2007 Dr650se (42,000 miles +)

Frame Reinforcement
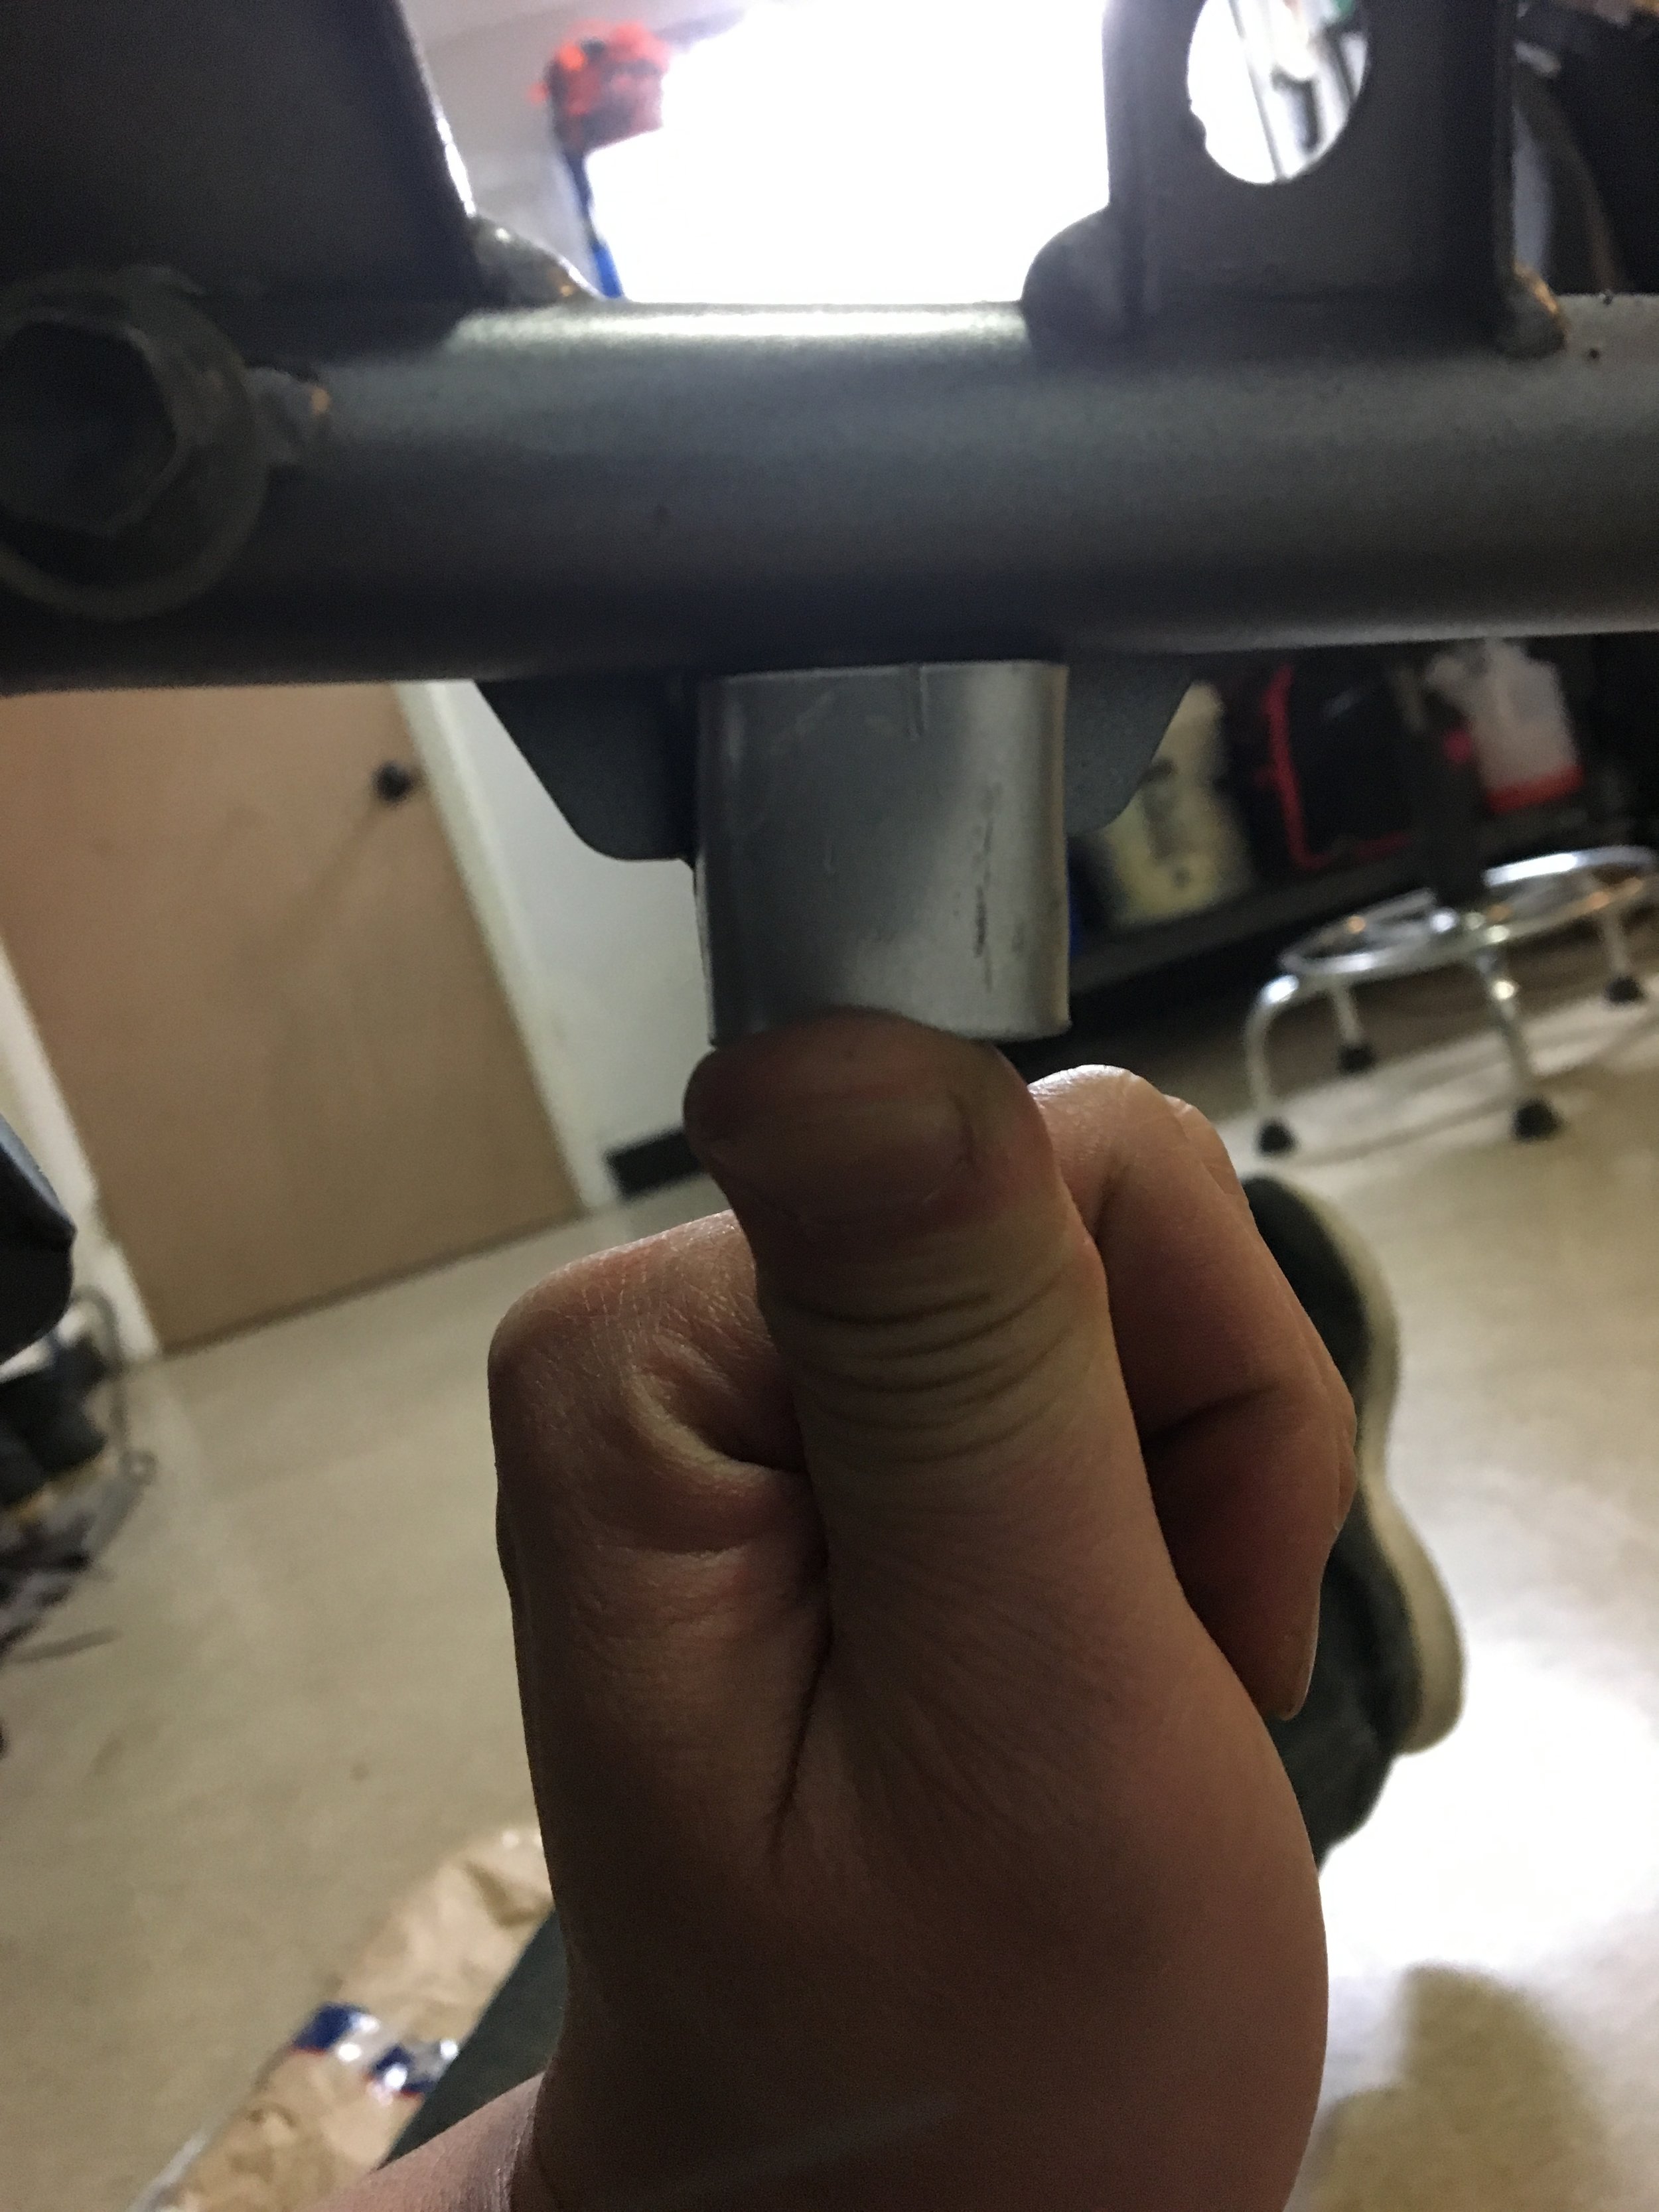
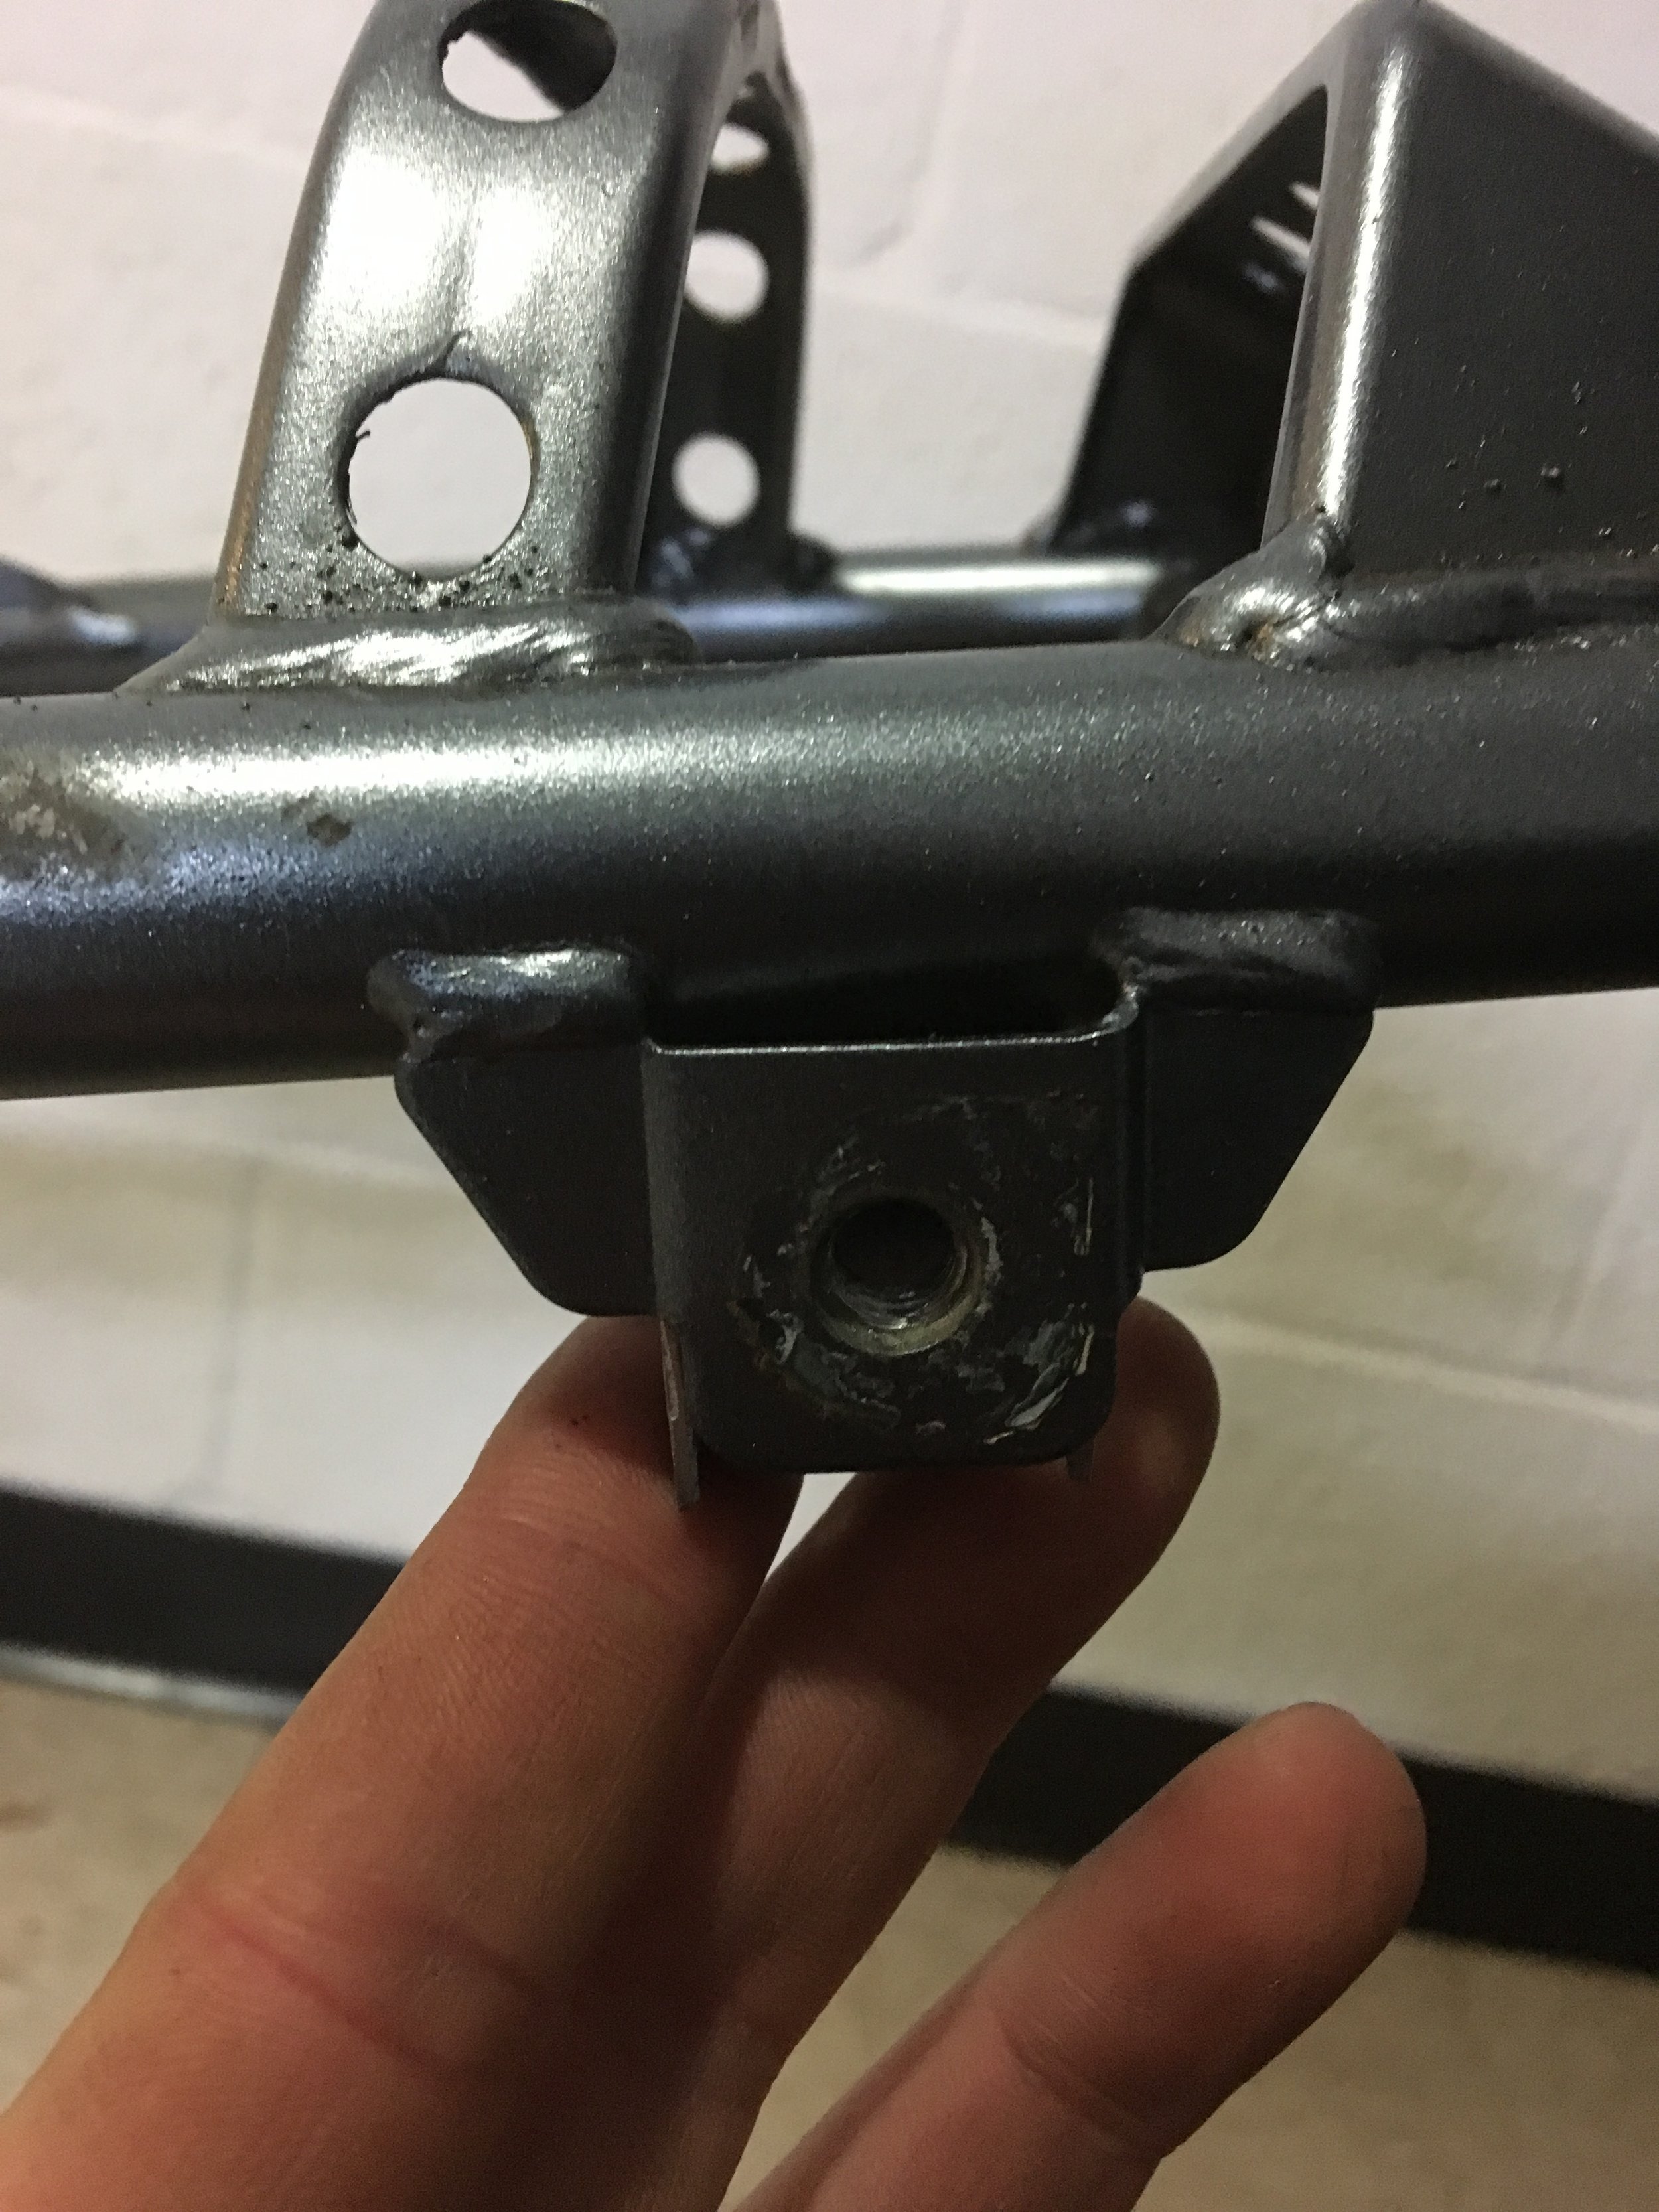
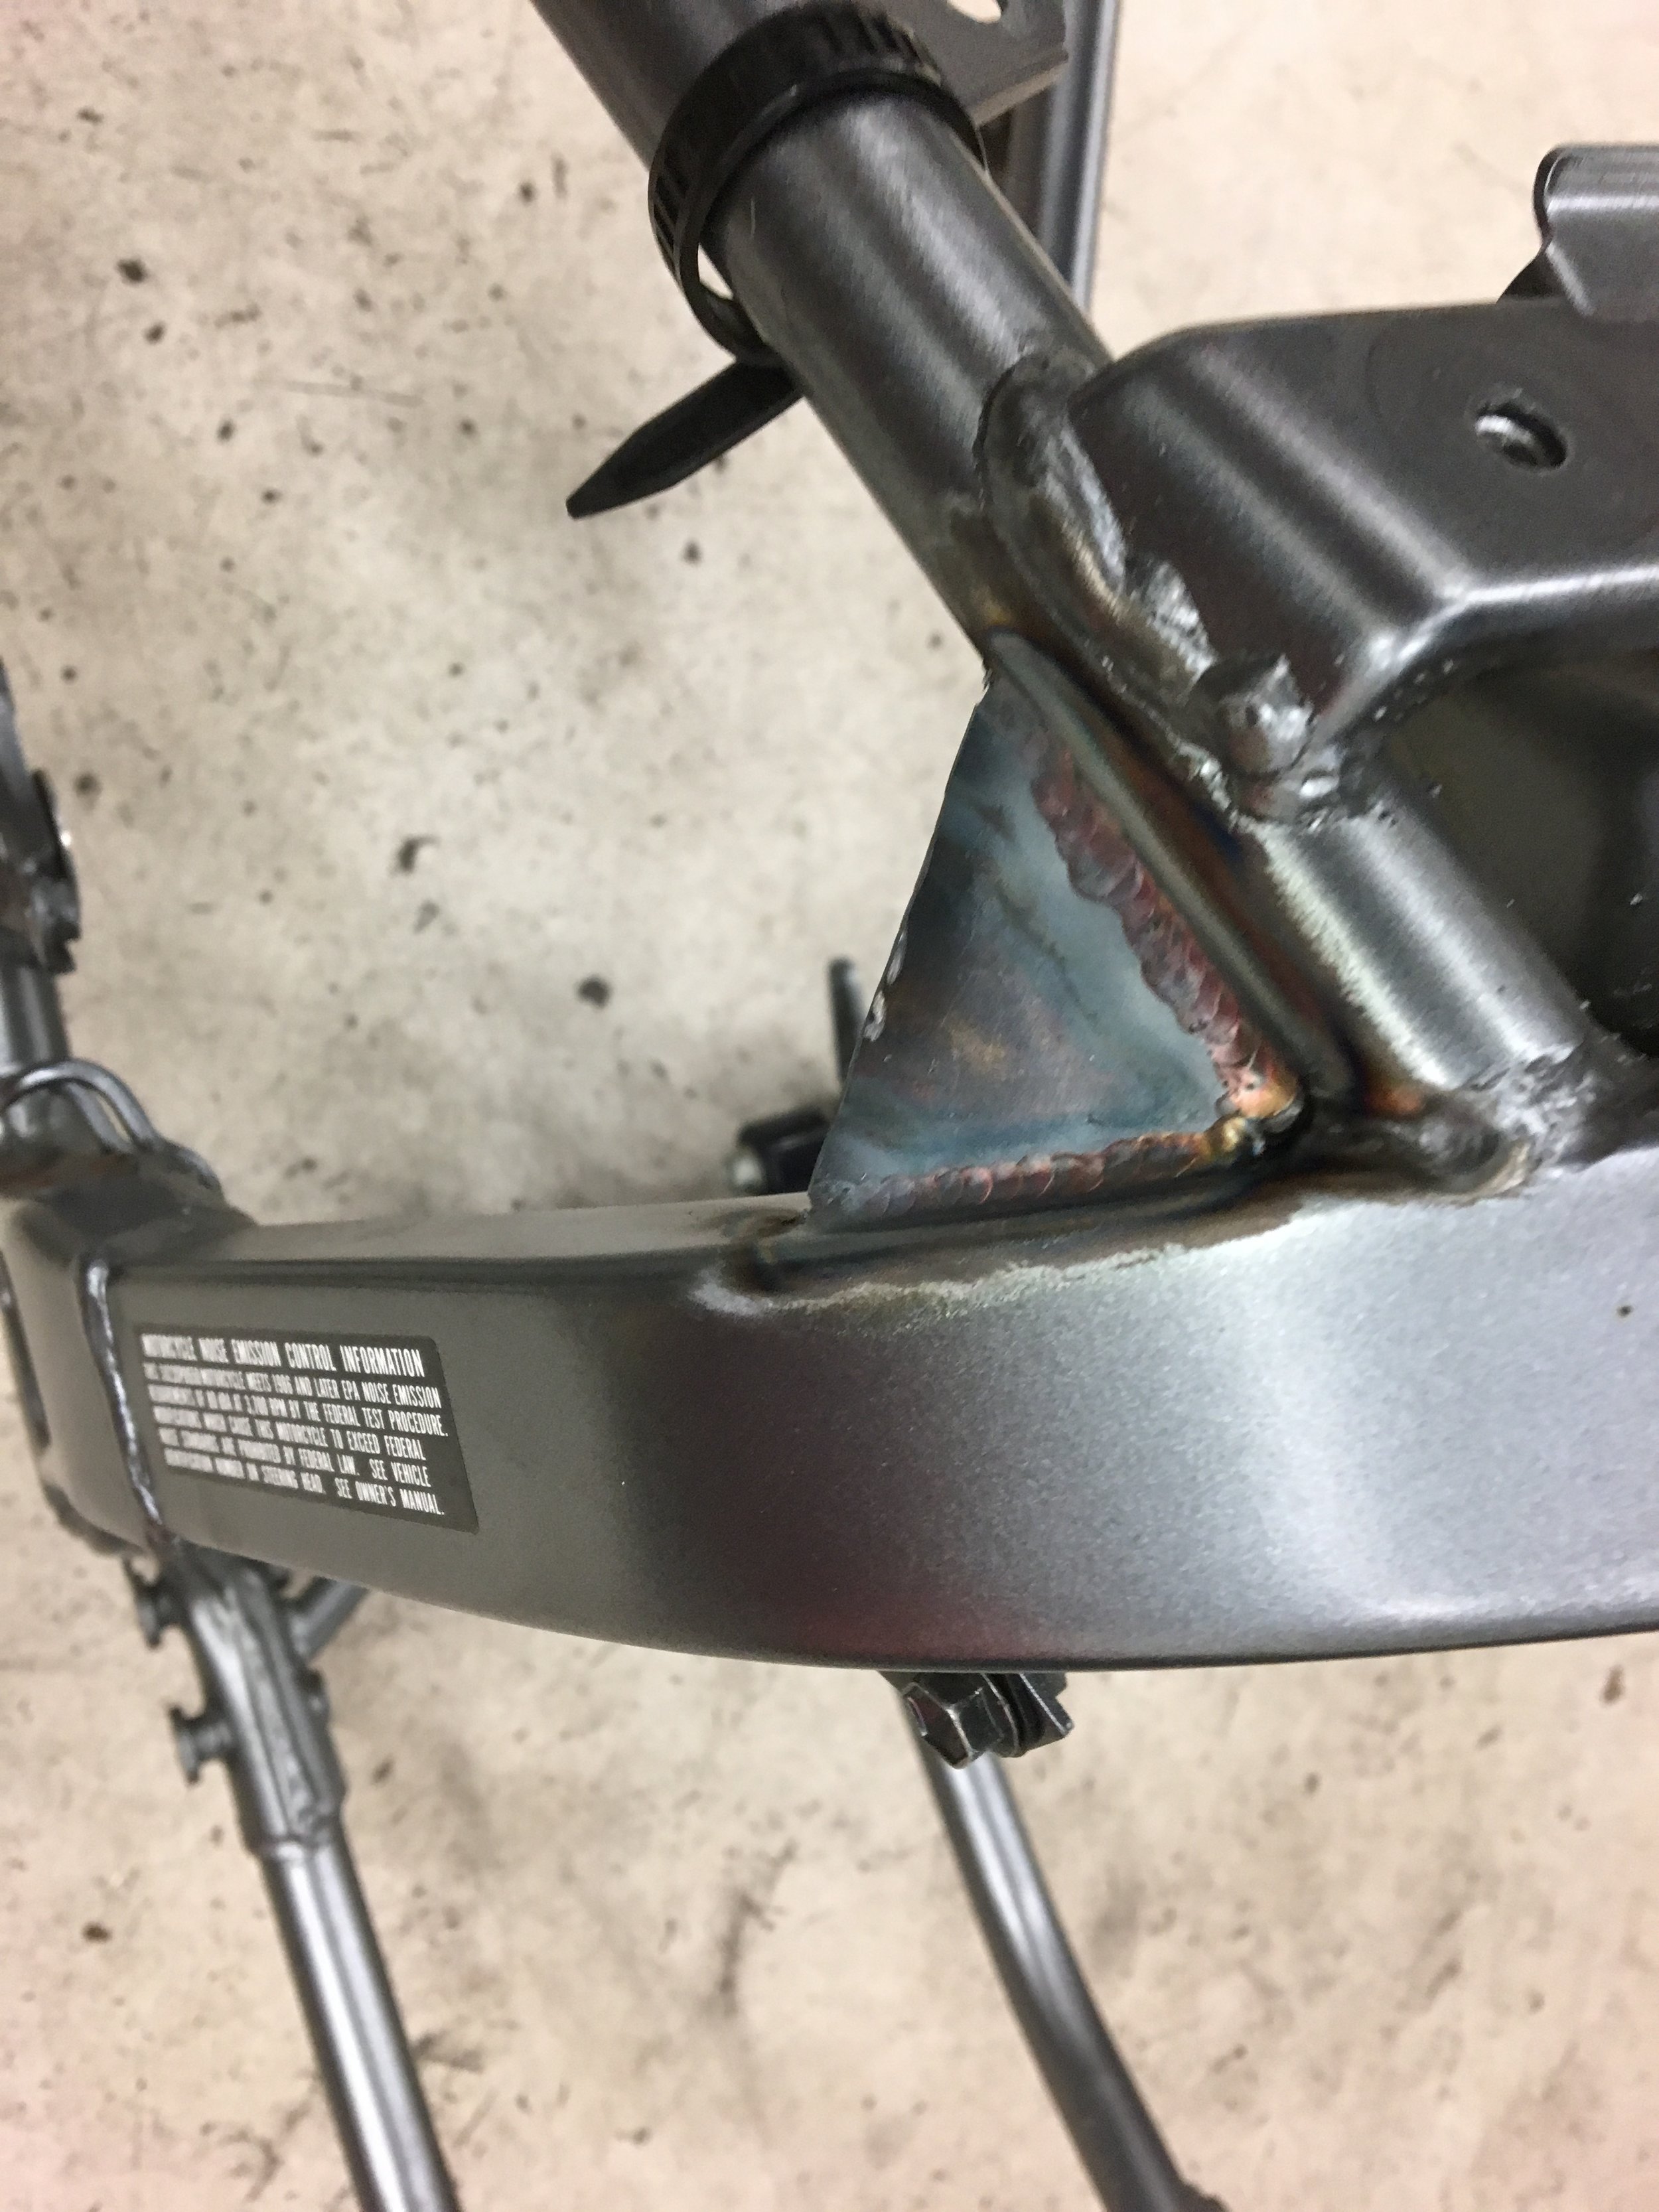
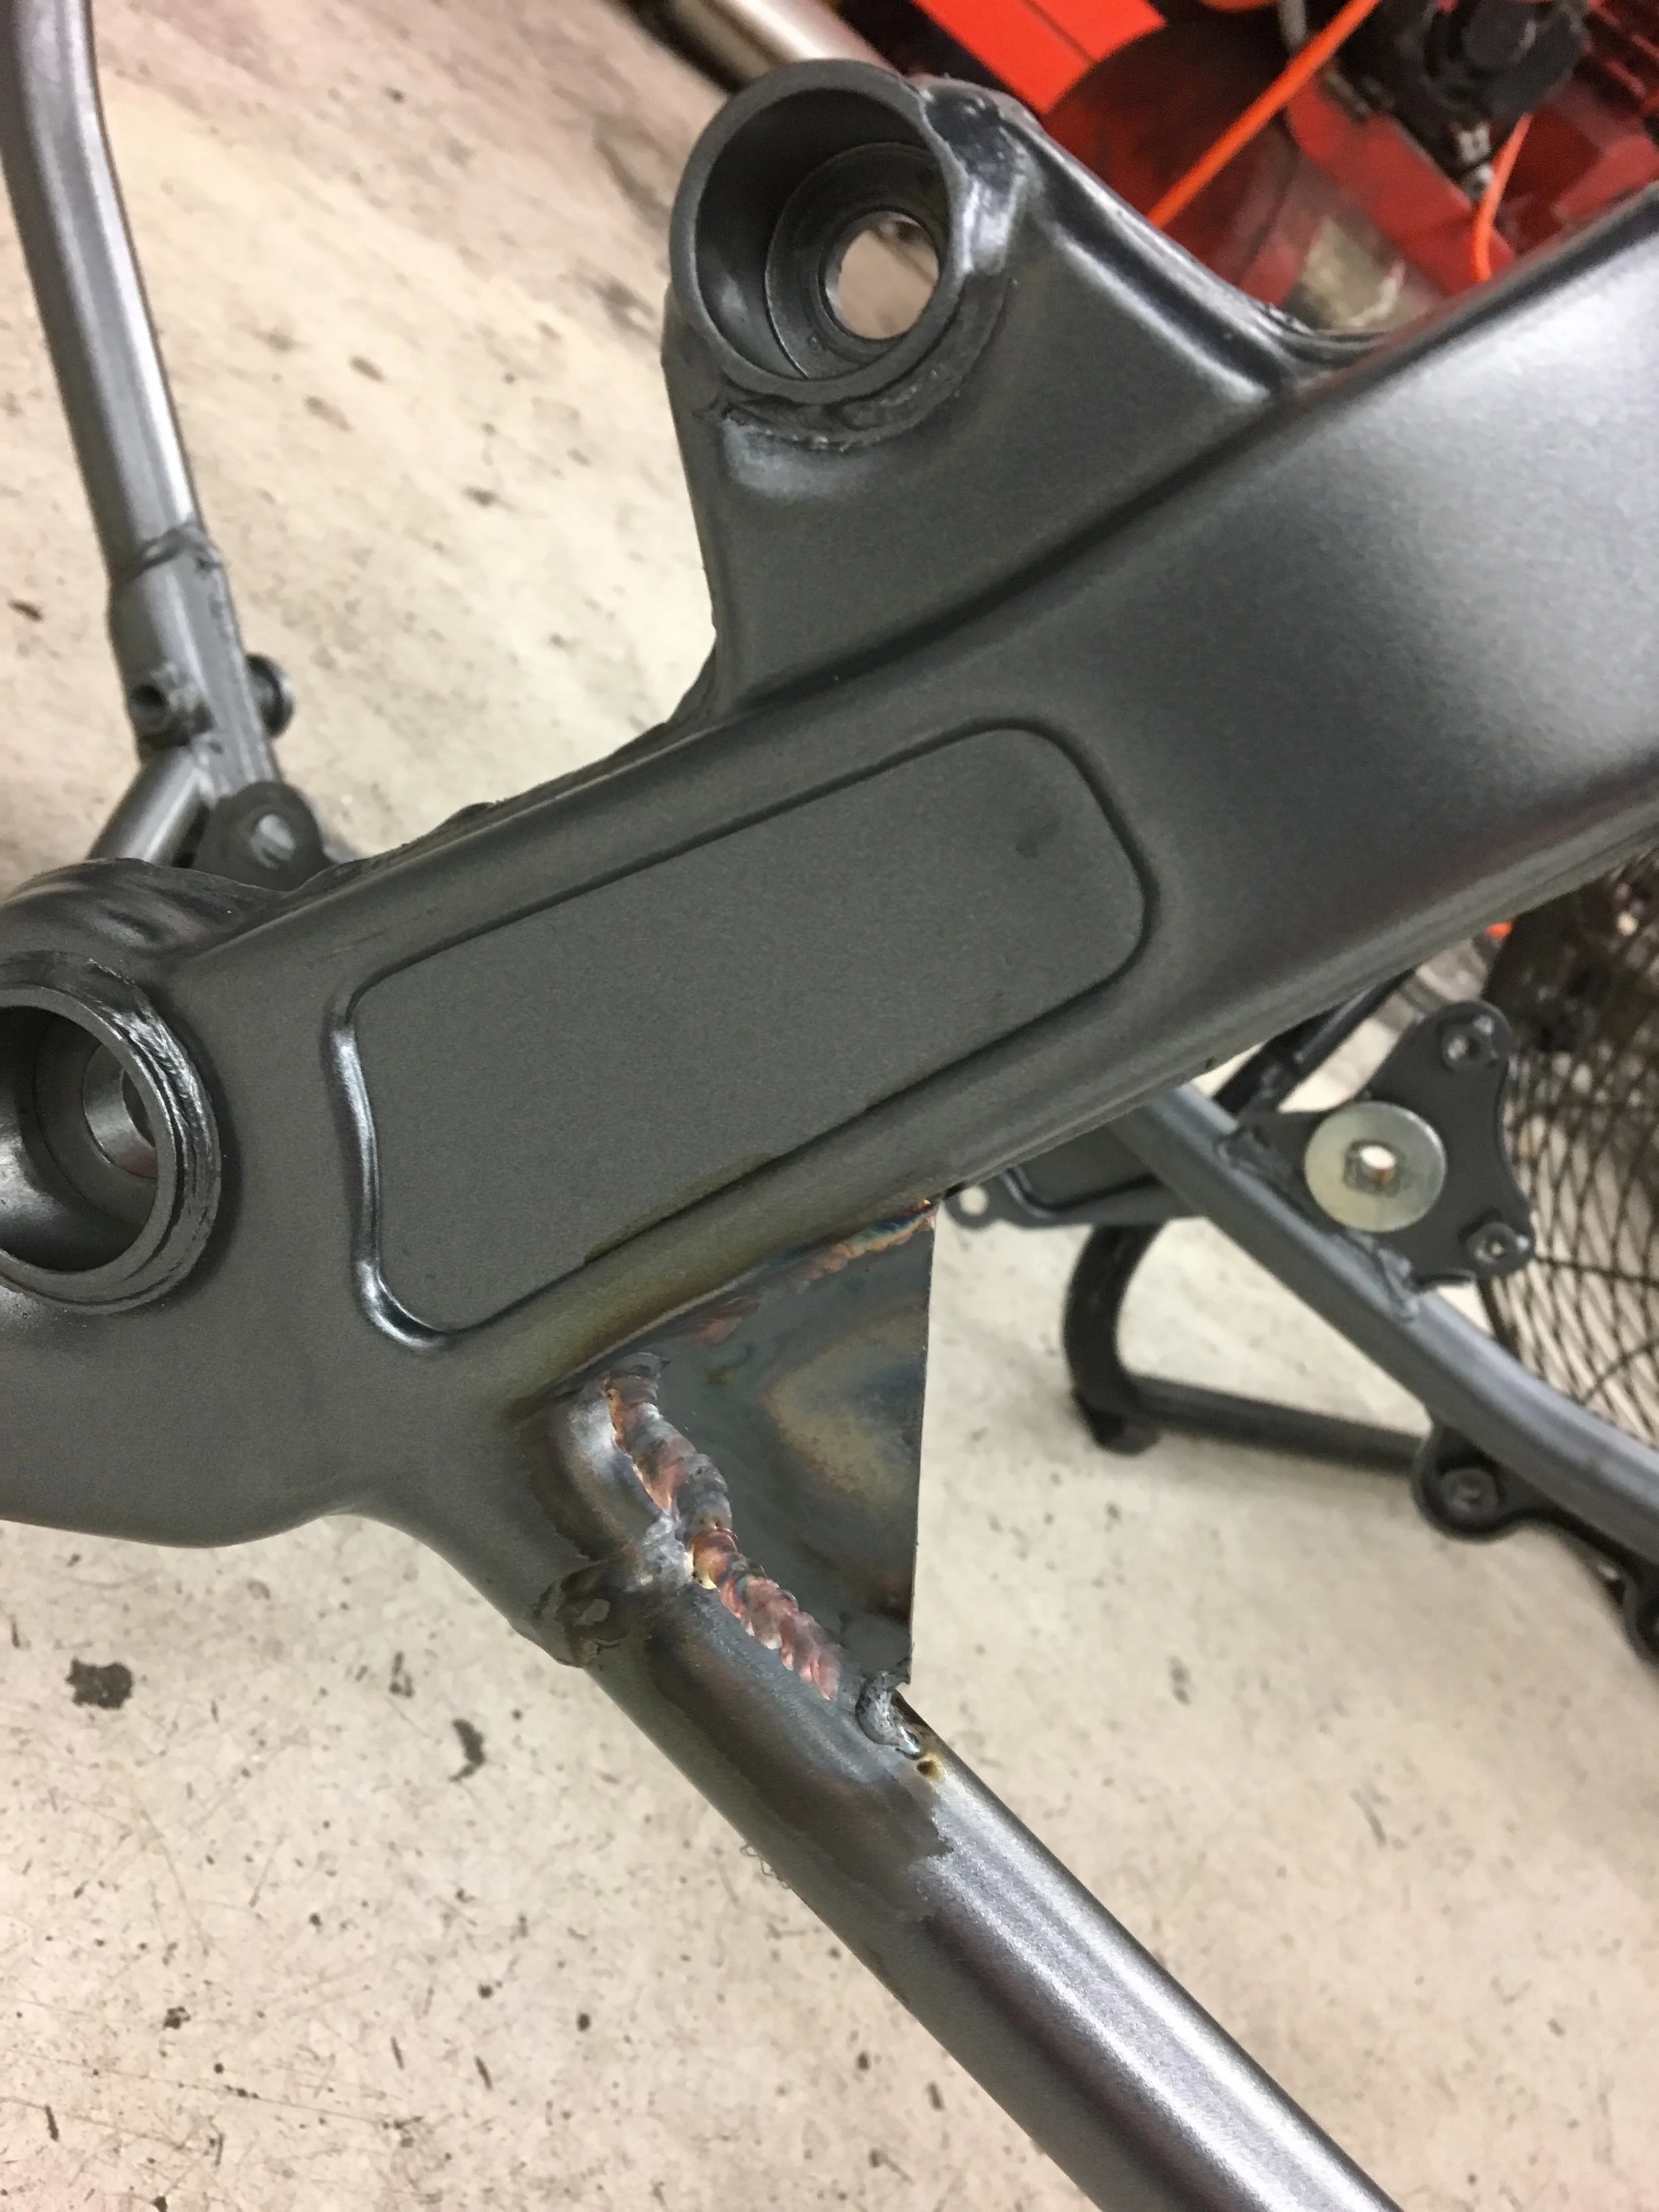
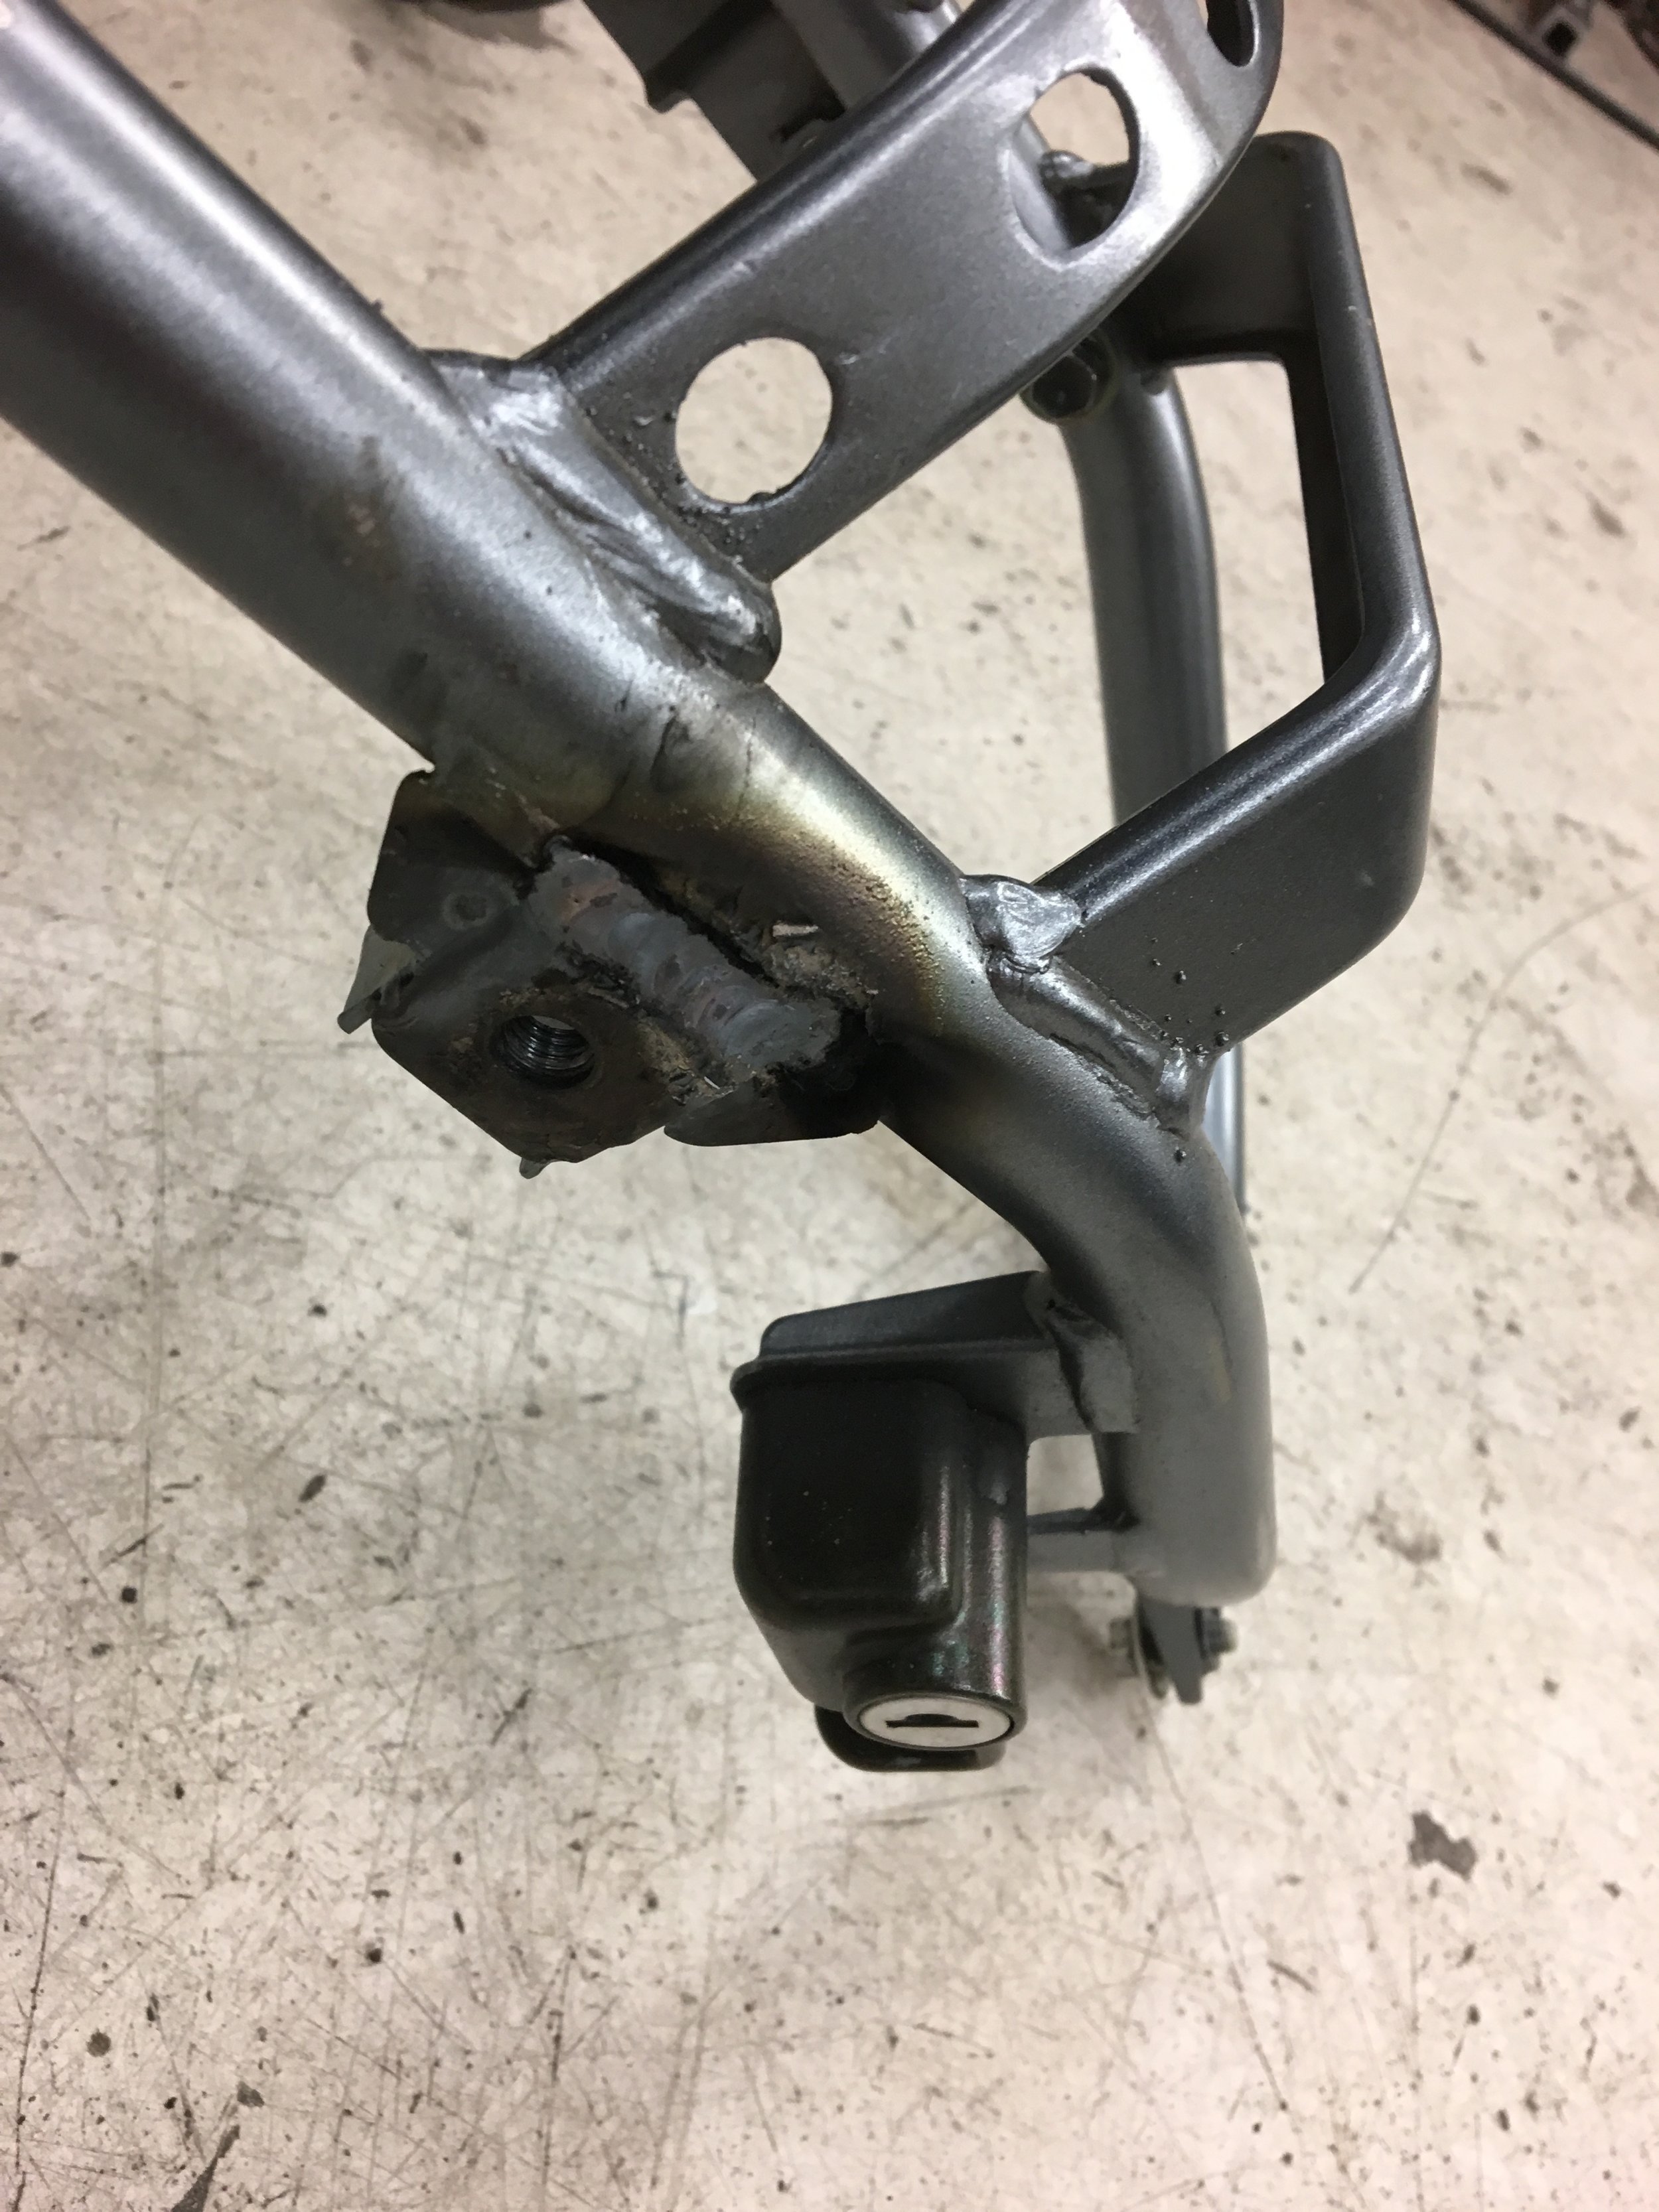
First off was frame reinforcement. I stripped the bike of everything. It wasn't that big of an undertaking, as I have already done this on the black bike. I had the bike in pieces within 2 - 3 hours. After research online and some personal opinion, I have decided to do three frame reinforcement and one luggage rack reinforcement. The rear mounting point is a no brainer, as its two tiny weld holding the whole weight of what ever is bolted to it. I made cardboard mock up first. But I didnt know how I wanted to reinforce it yet.
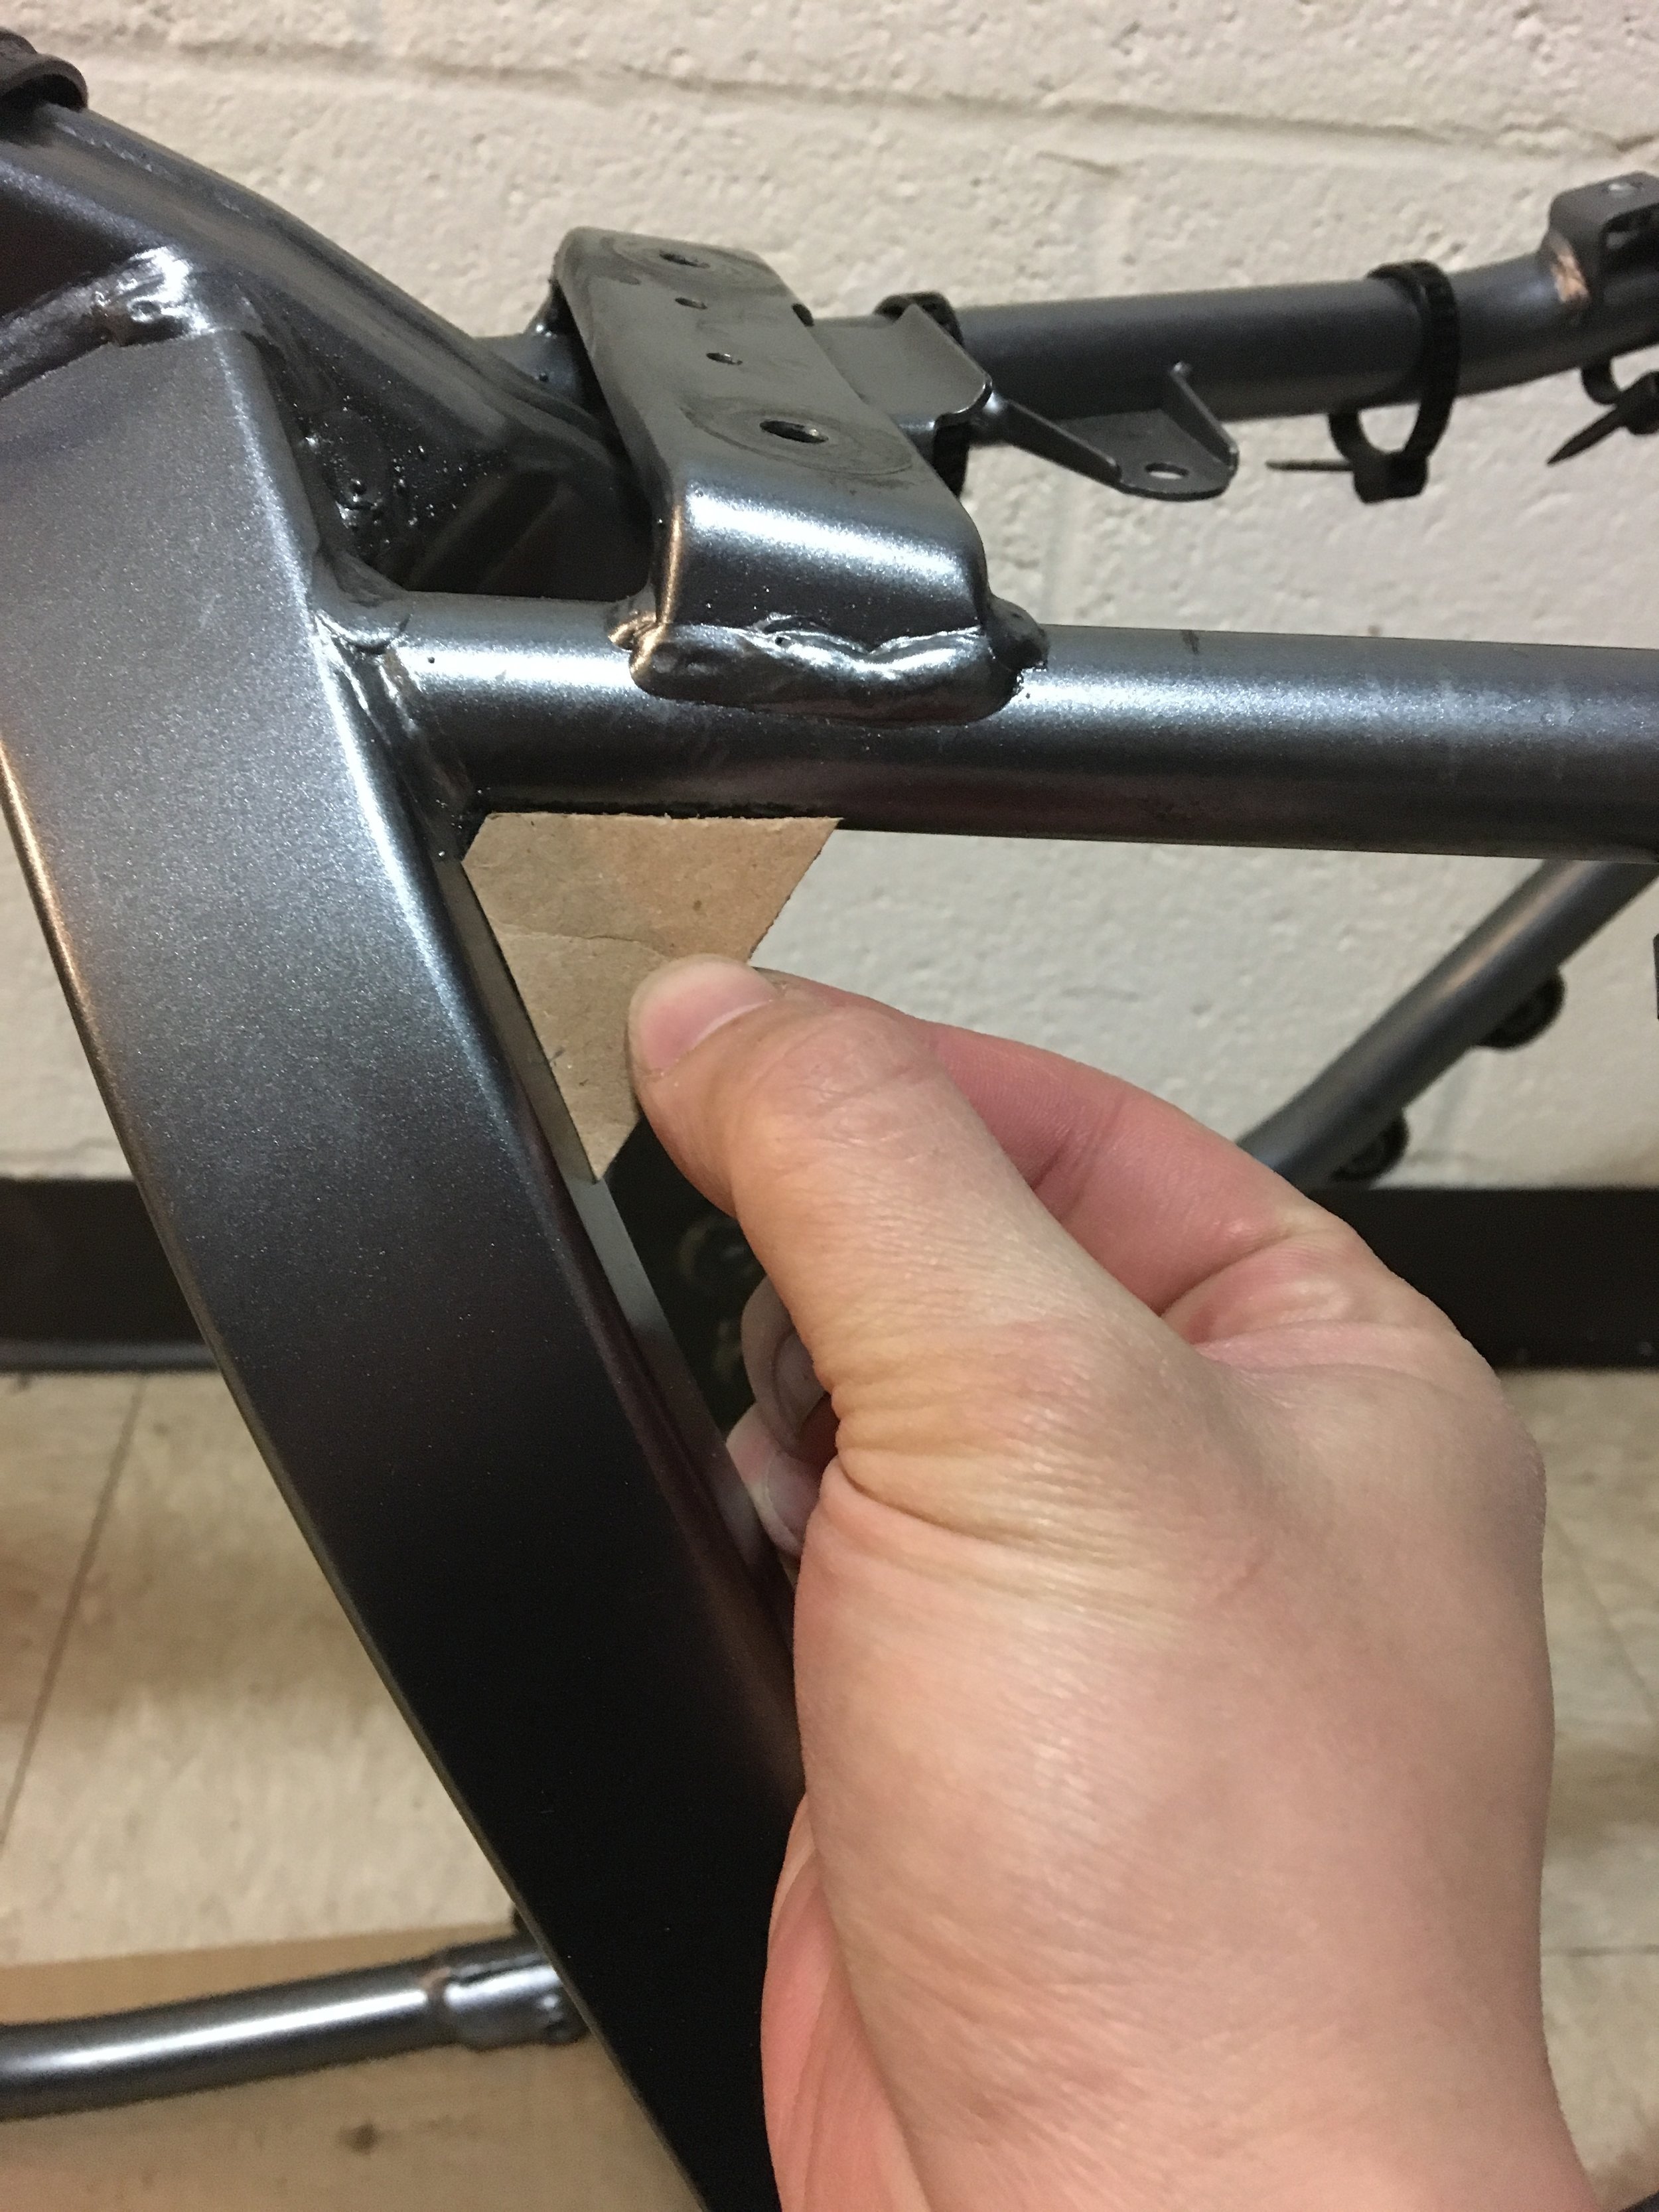
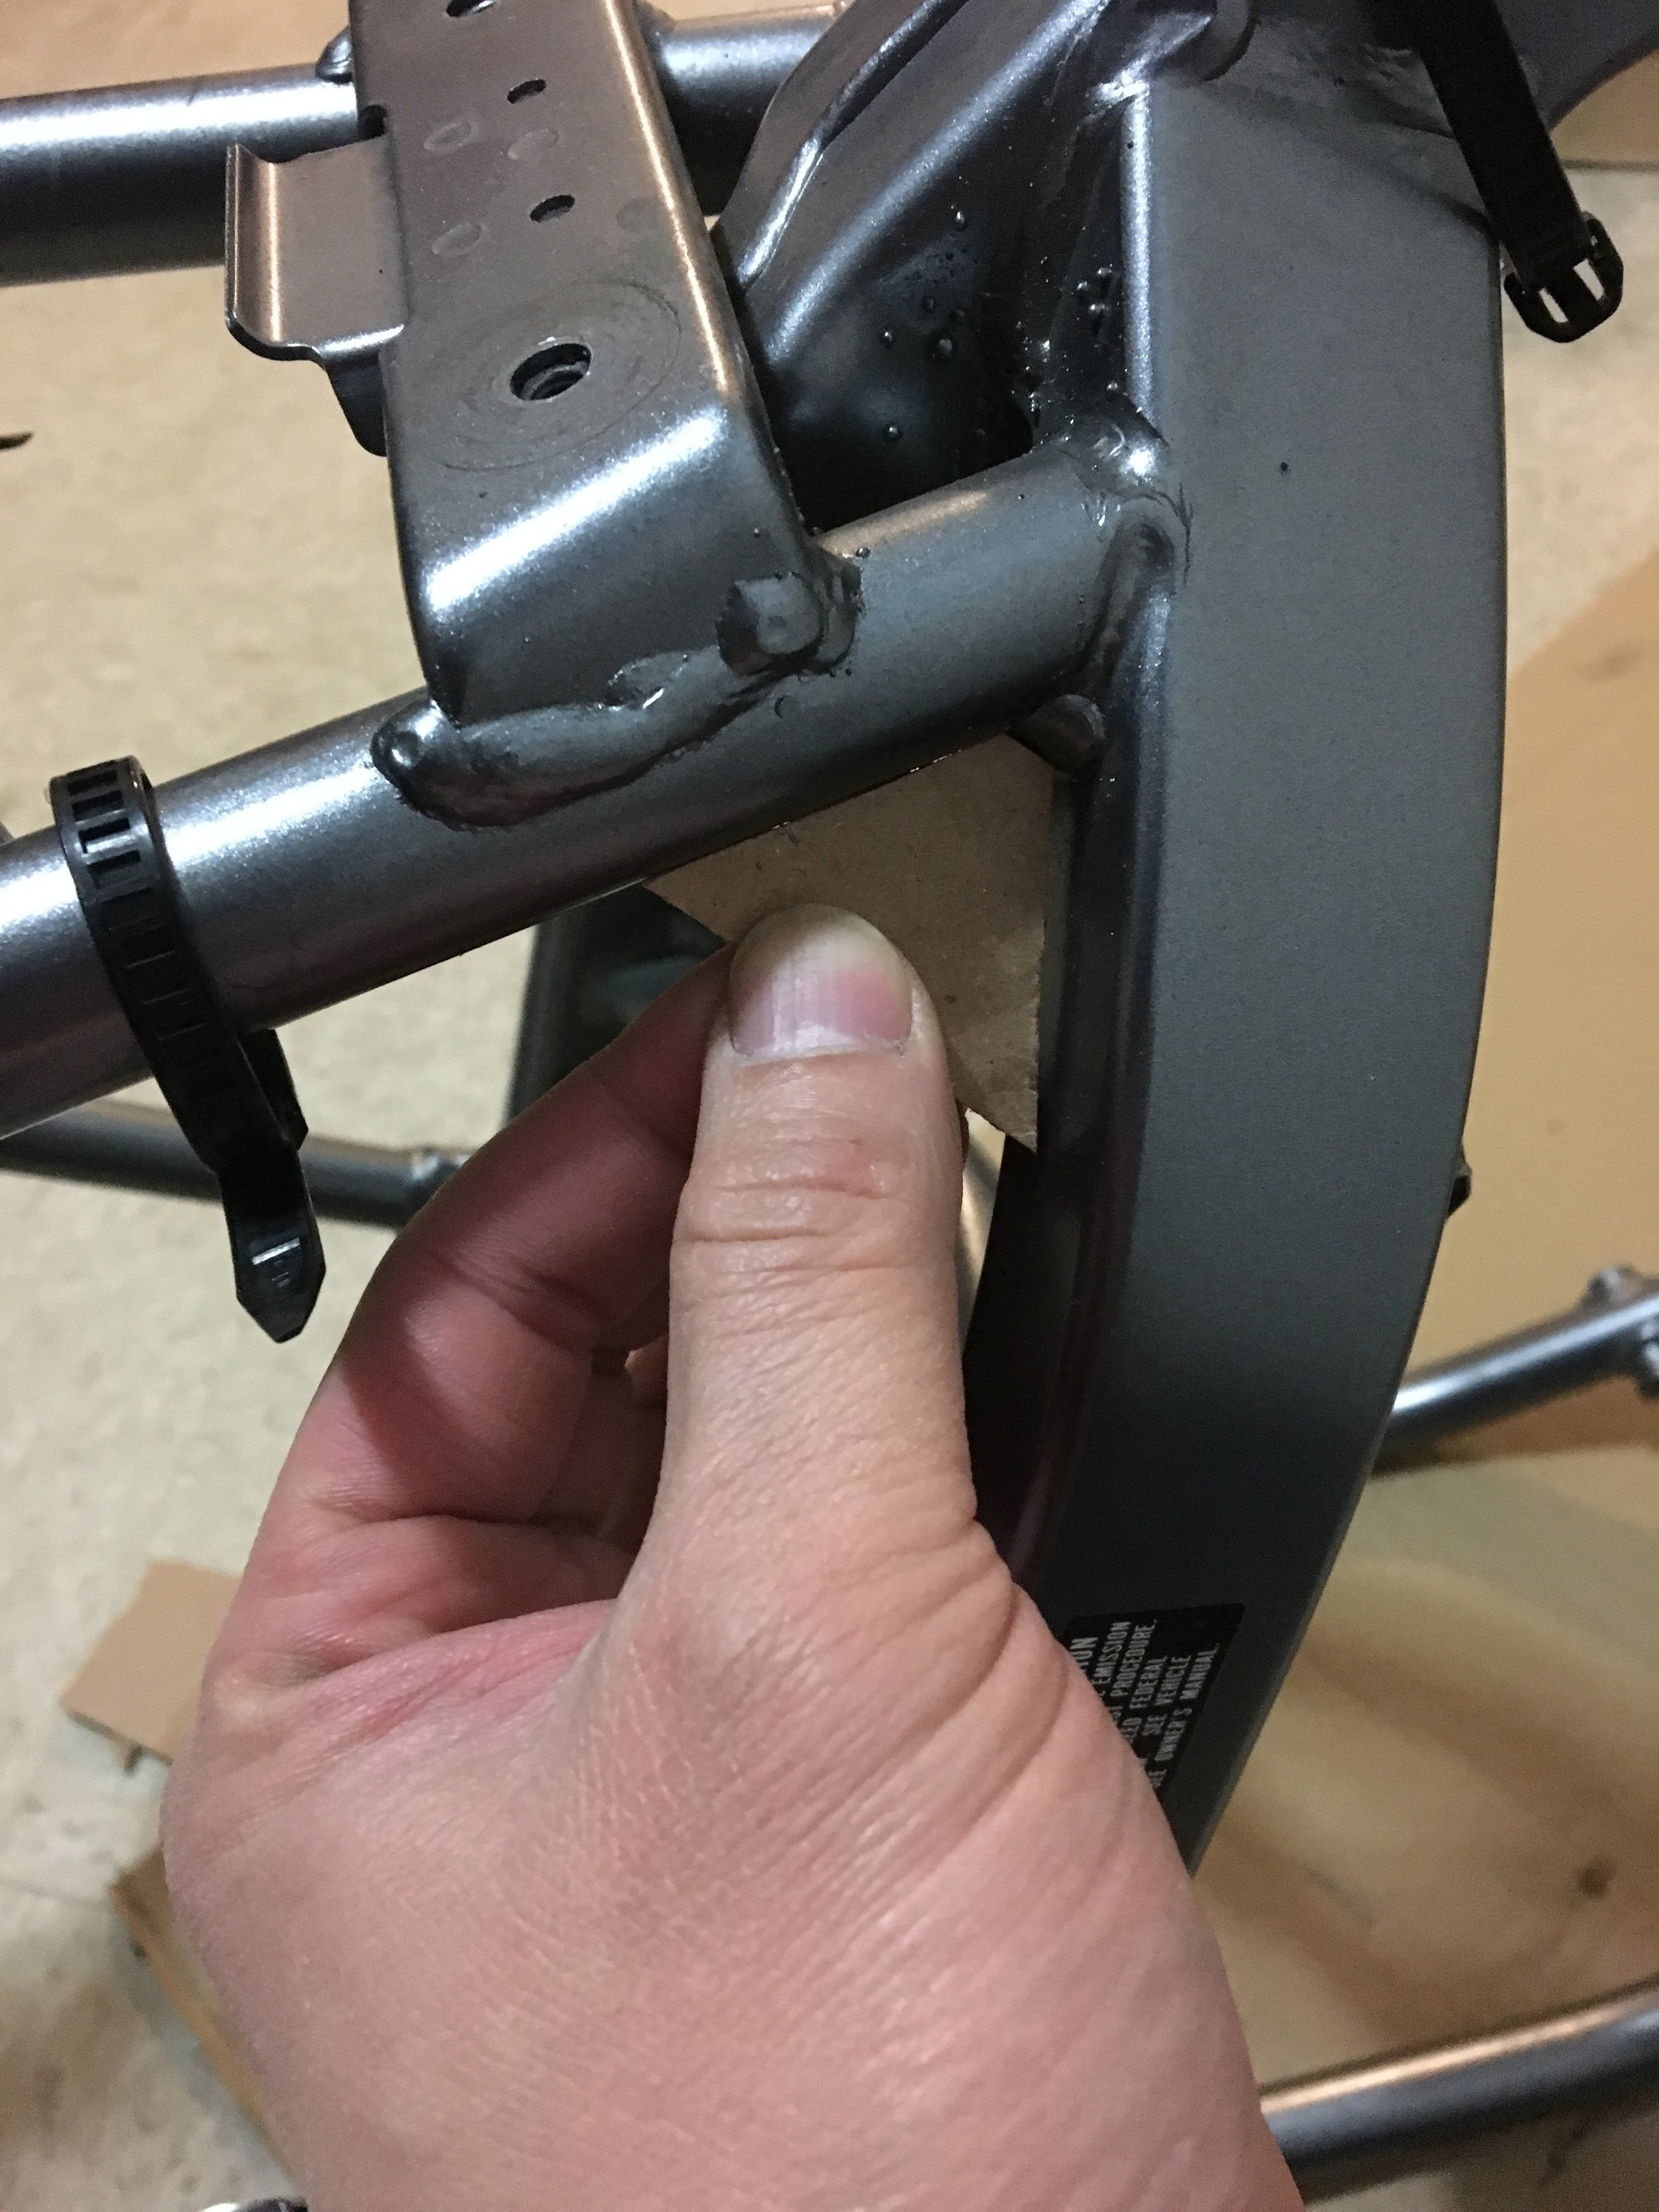
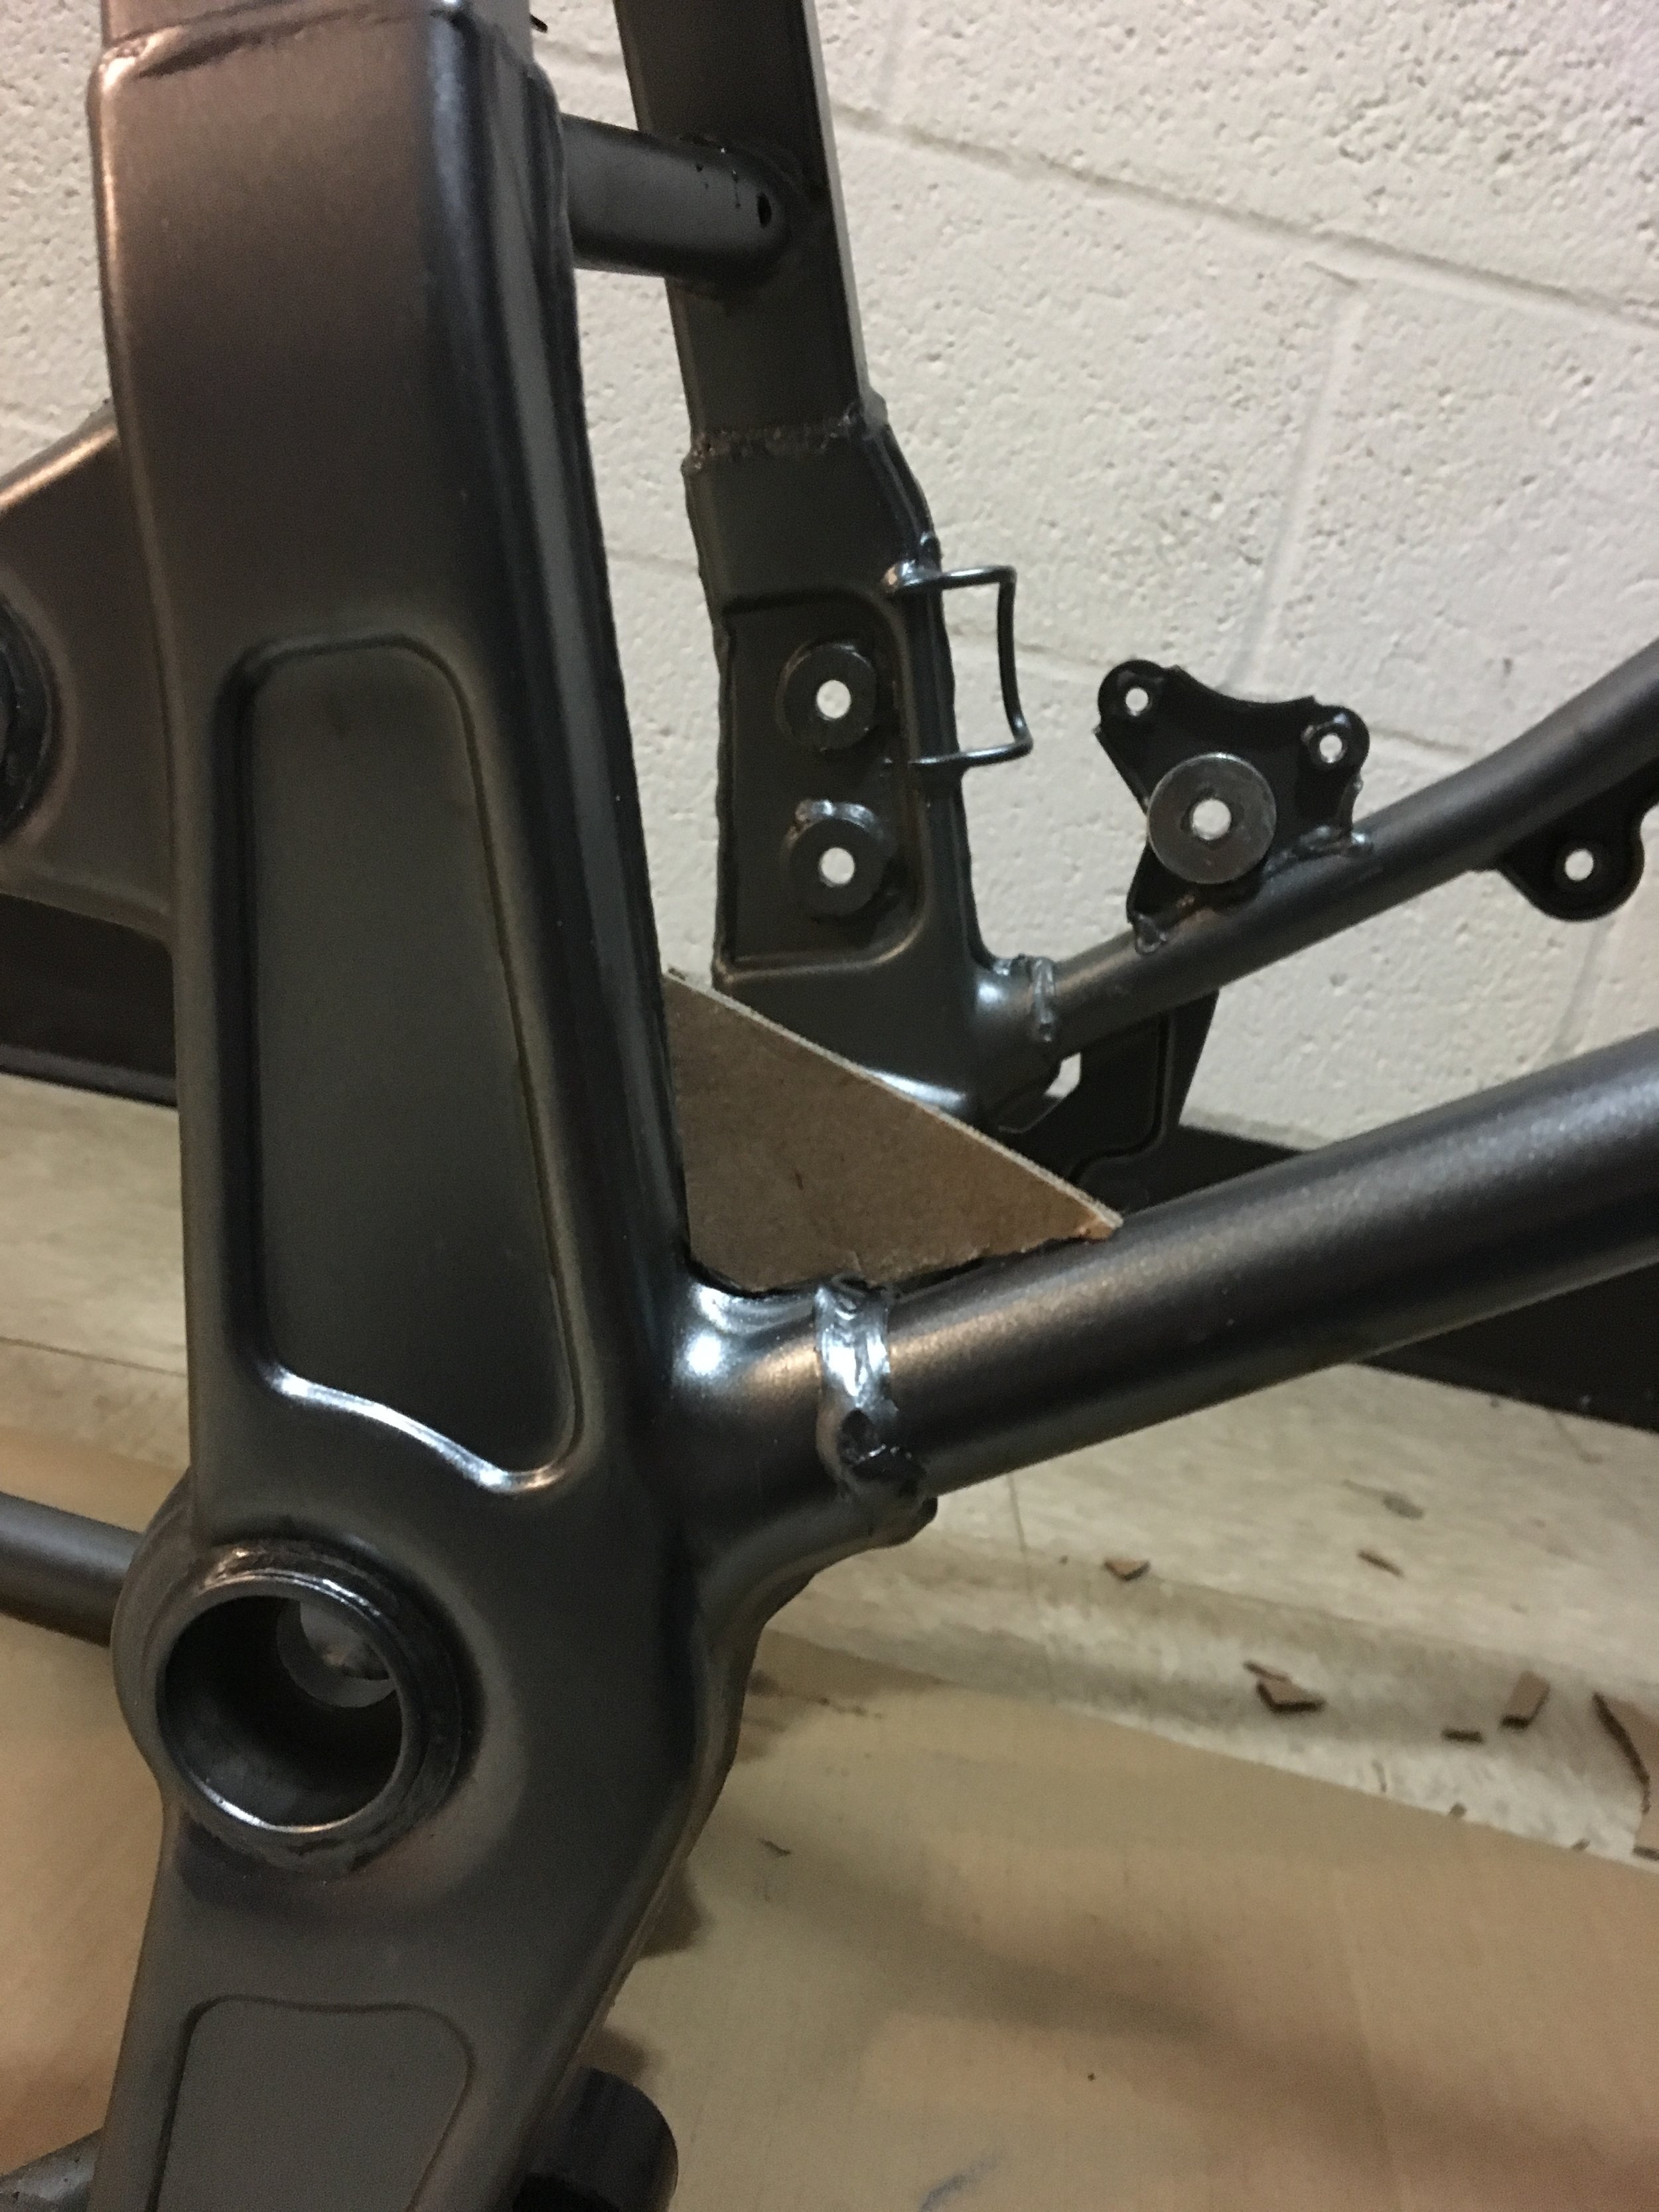
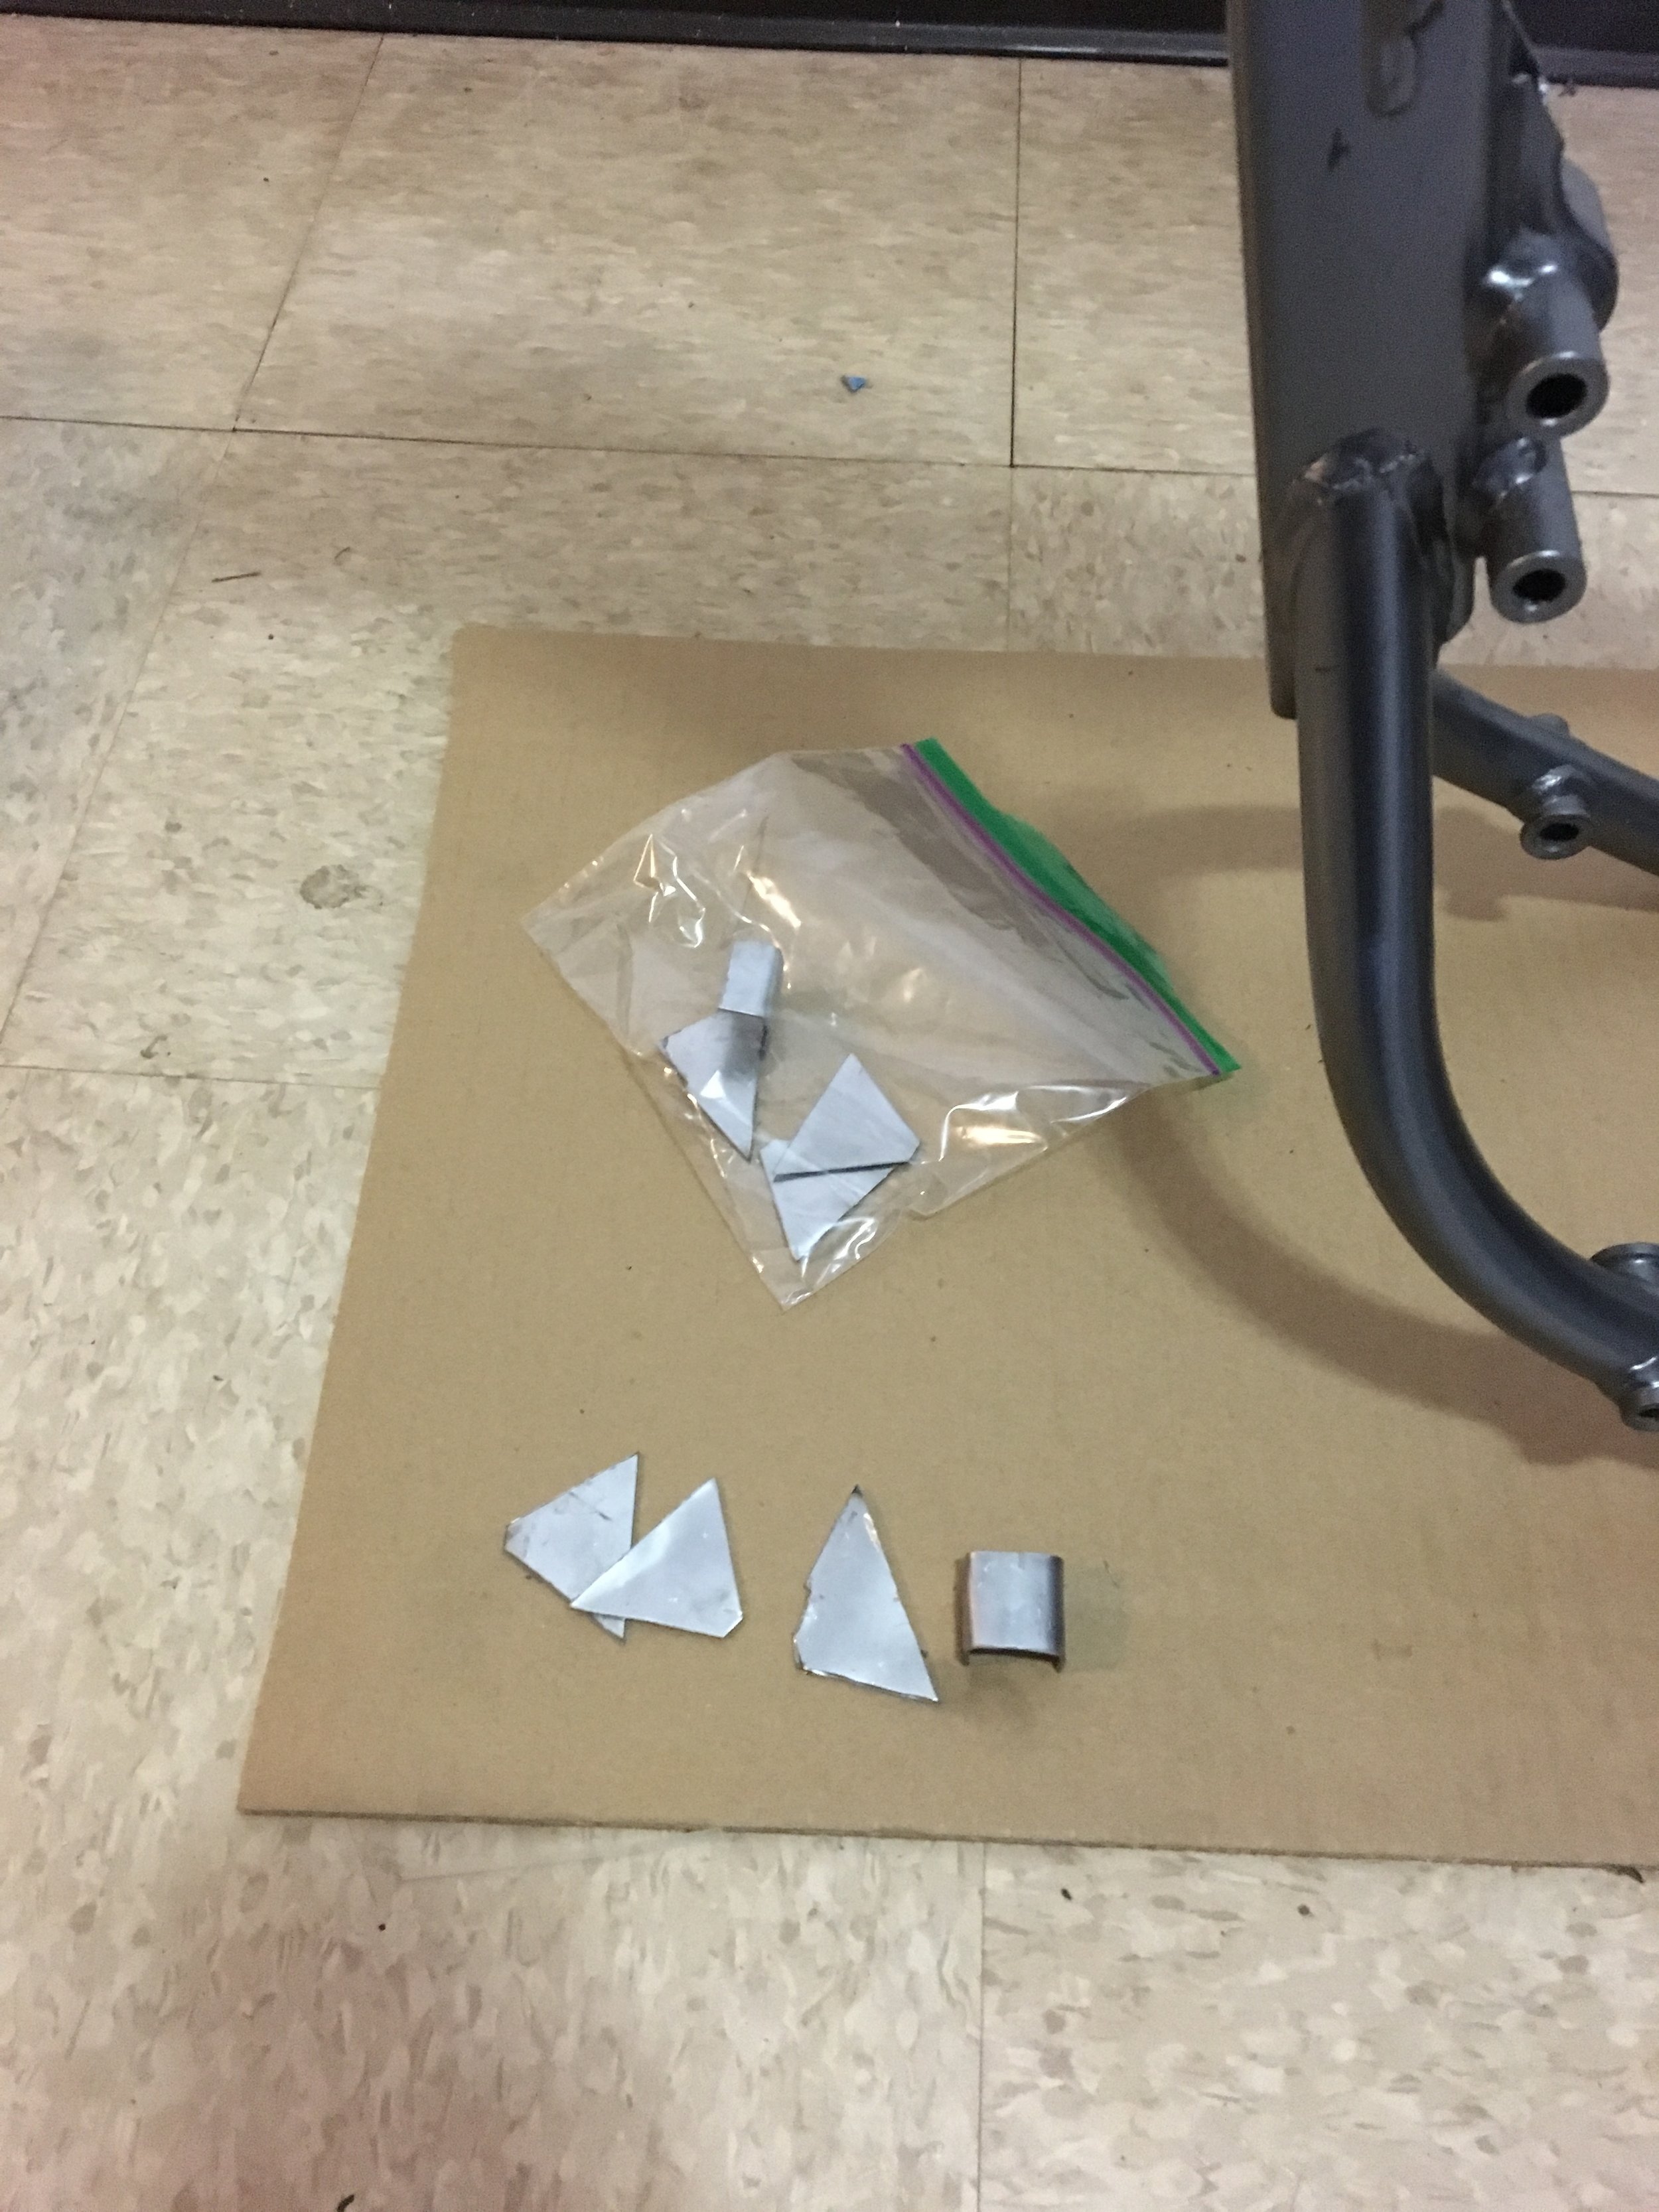
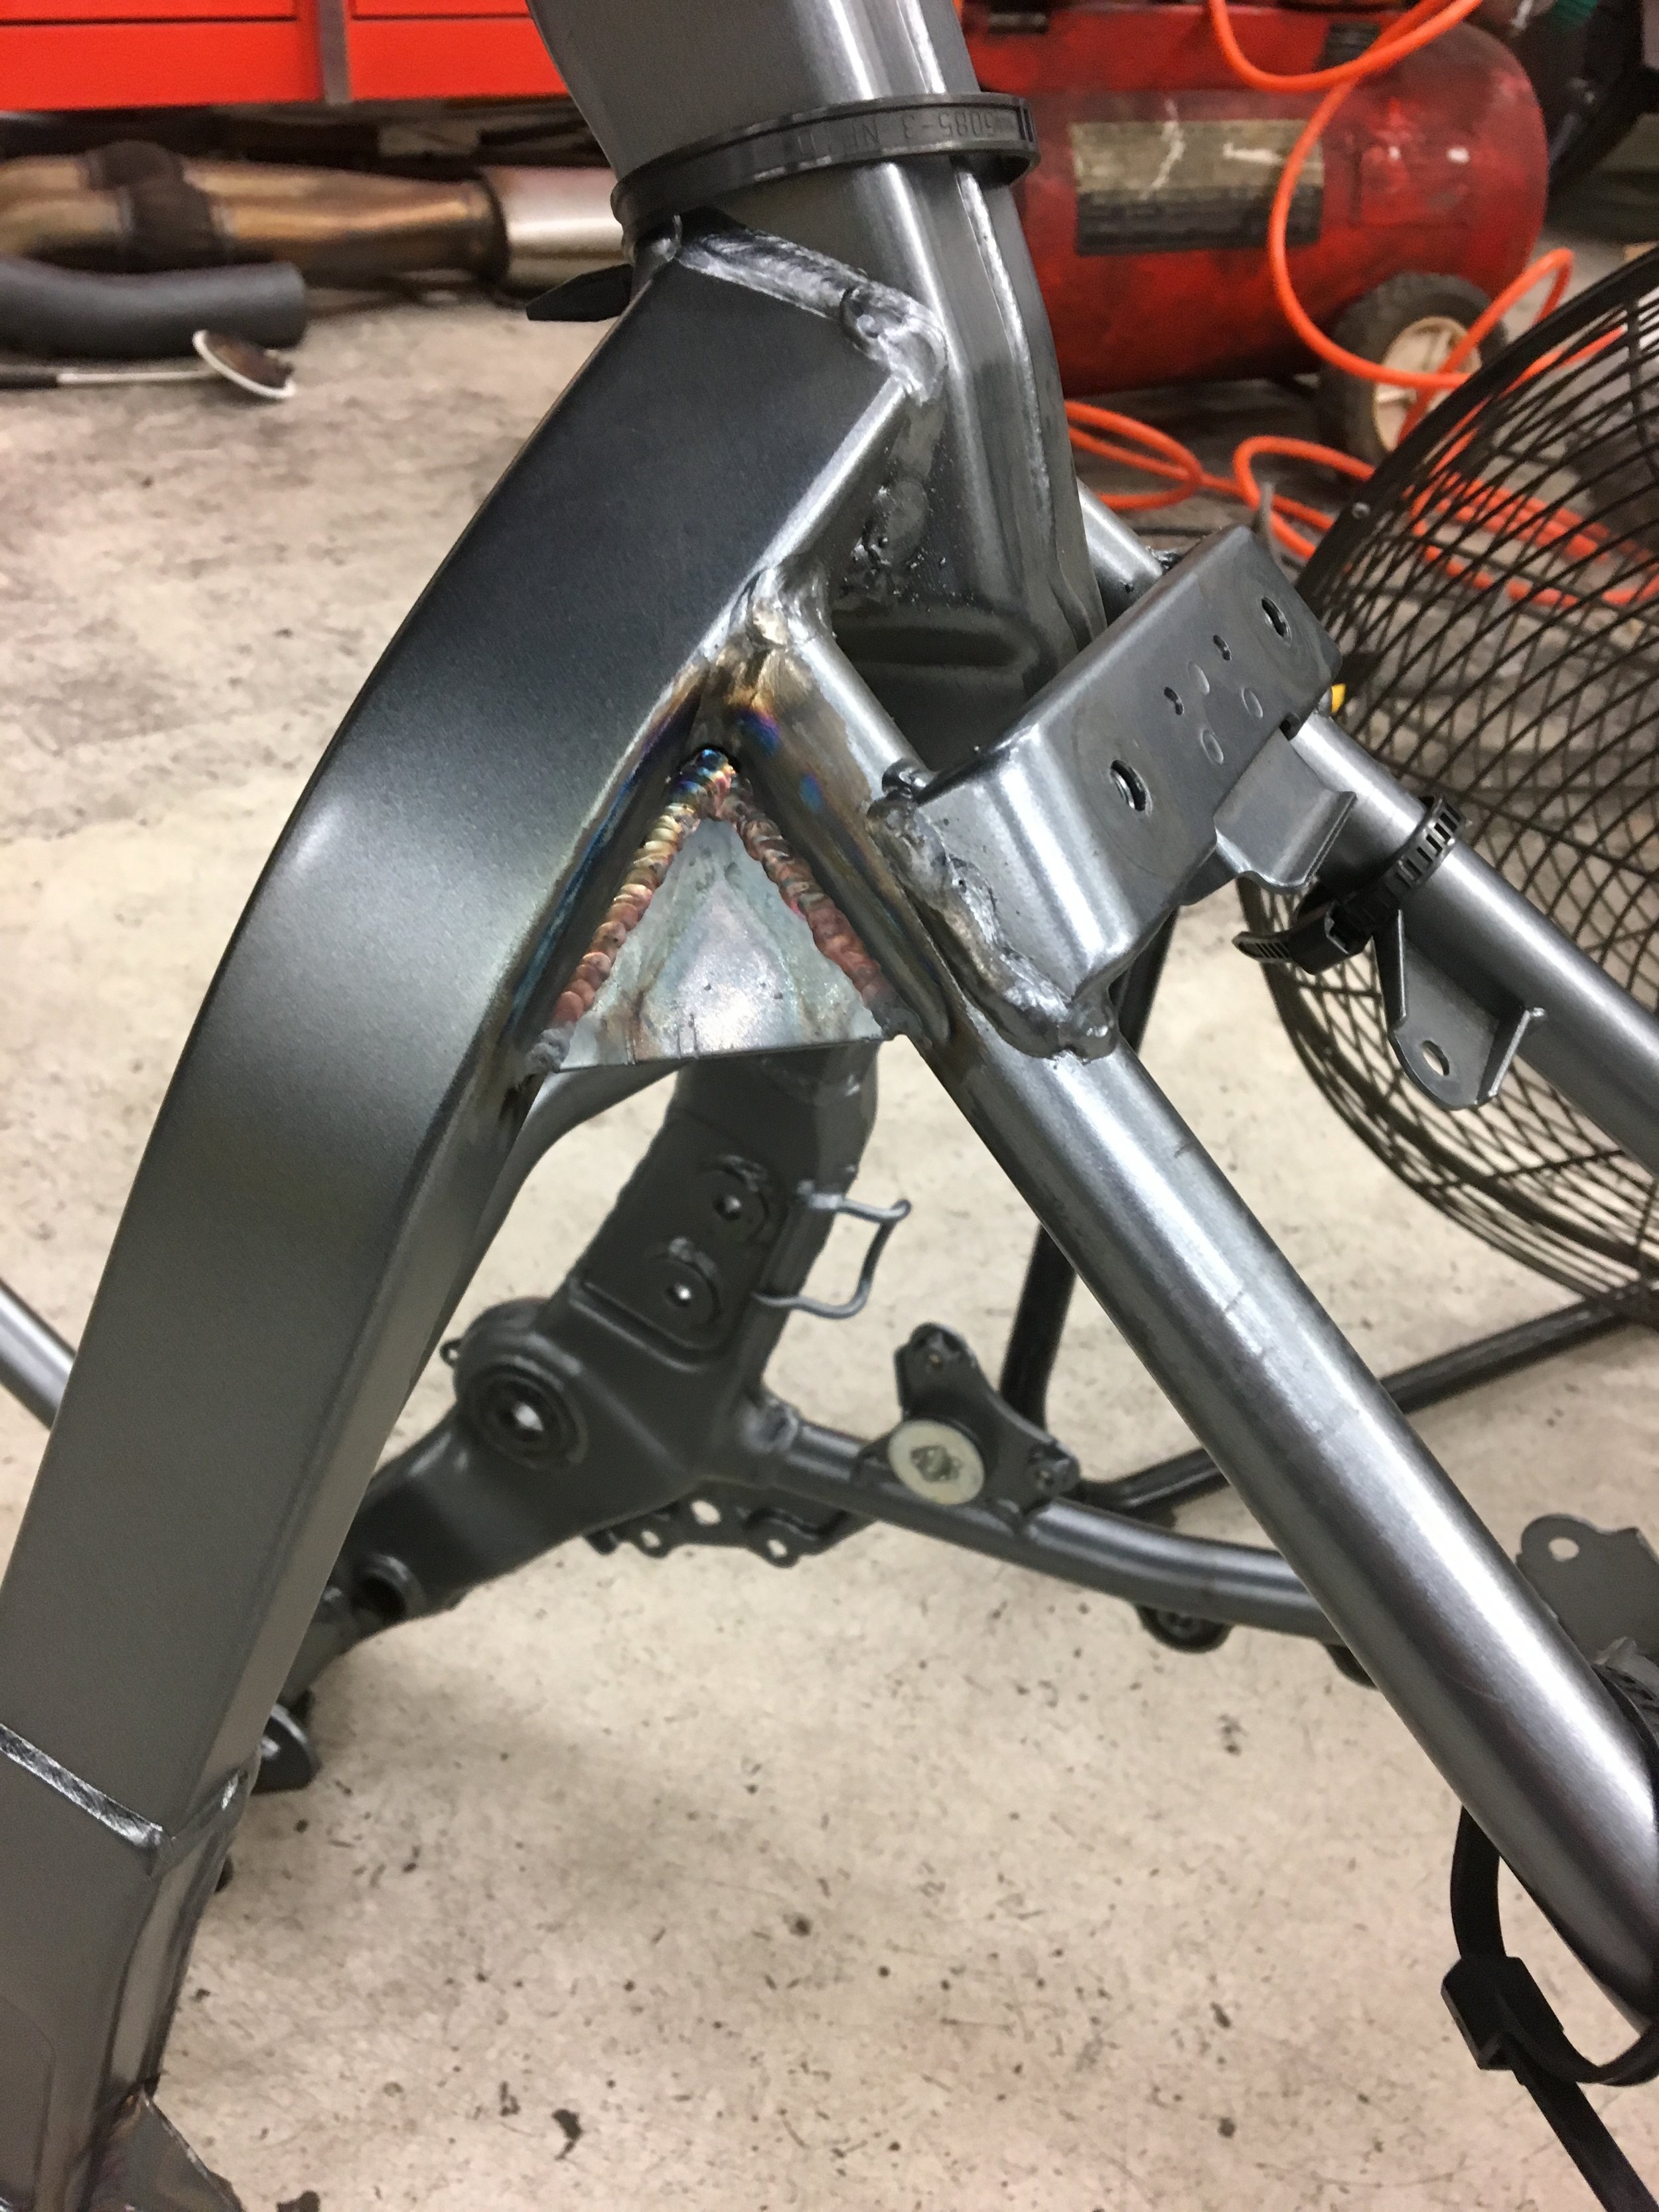
Then I use the cardboard template, and traced it onto a piece of steel. After that, I cut the shapes out with my dremel. I made two sets and gave one set to Jeff. Unfortunately, during the second set, I wasn't paying attention and I over heated and broke my dremel. I figure out the rear piece, by making a simple bend and once welded, I'll drill a hole in the rear for the bolt pass through. The whole unit will be boxed in with the front tab weld completely connected.

Finally, I took it to Zury Fabrication to have him weld it in for me. I then painted the frame with Rustoleum Hammertone paint. It turned out to be very tough paint. It was easy to apply as it was brush on, I didn't make as big of a mess as I did when I did the black bike.
Clutch Upgrade and NSU
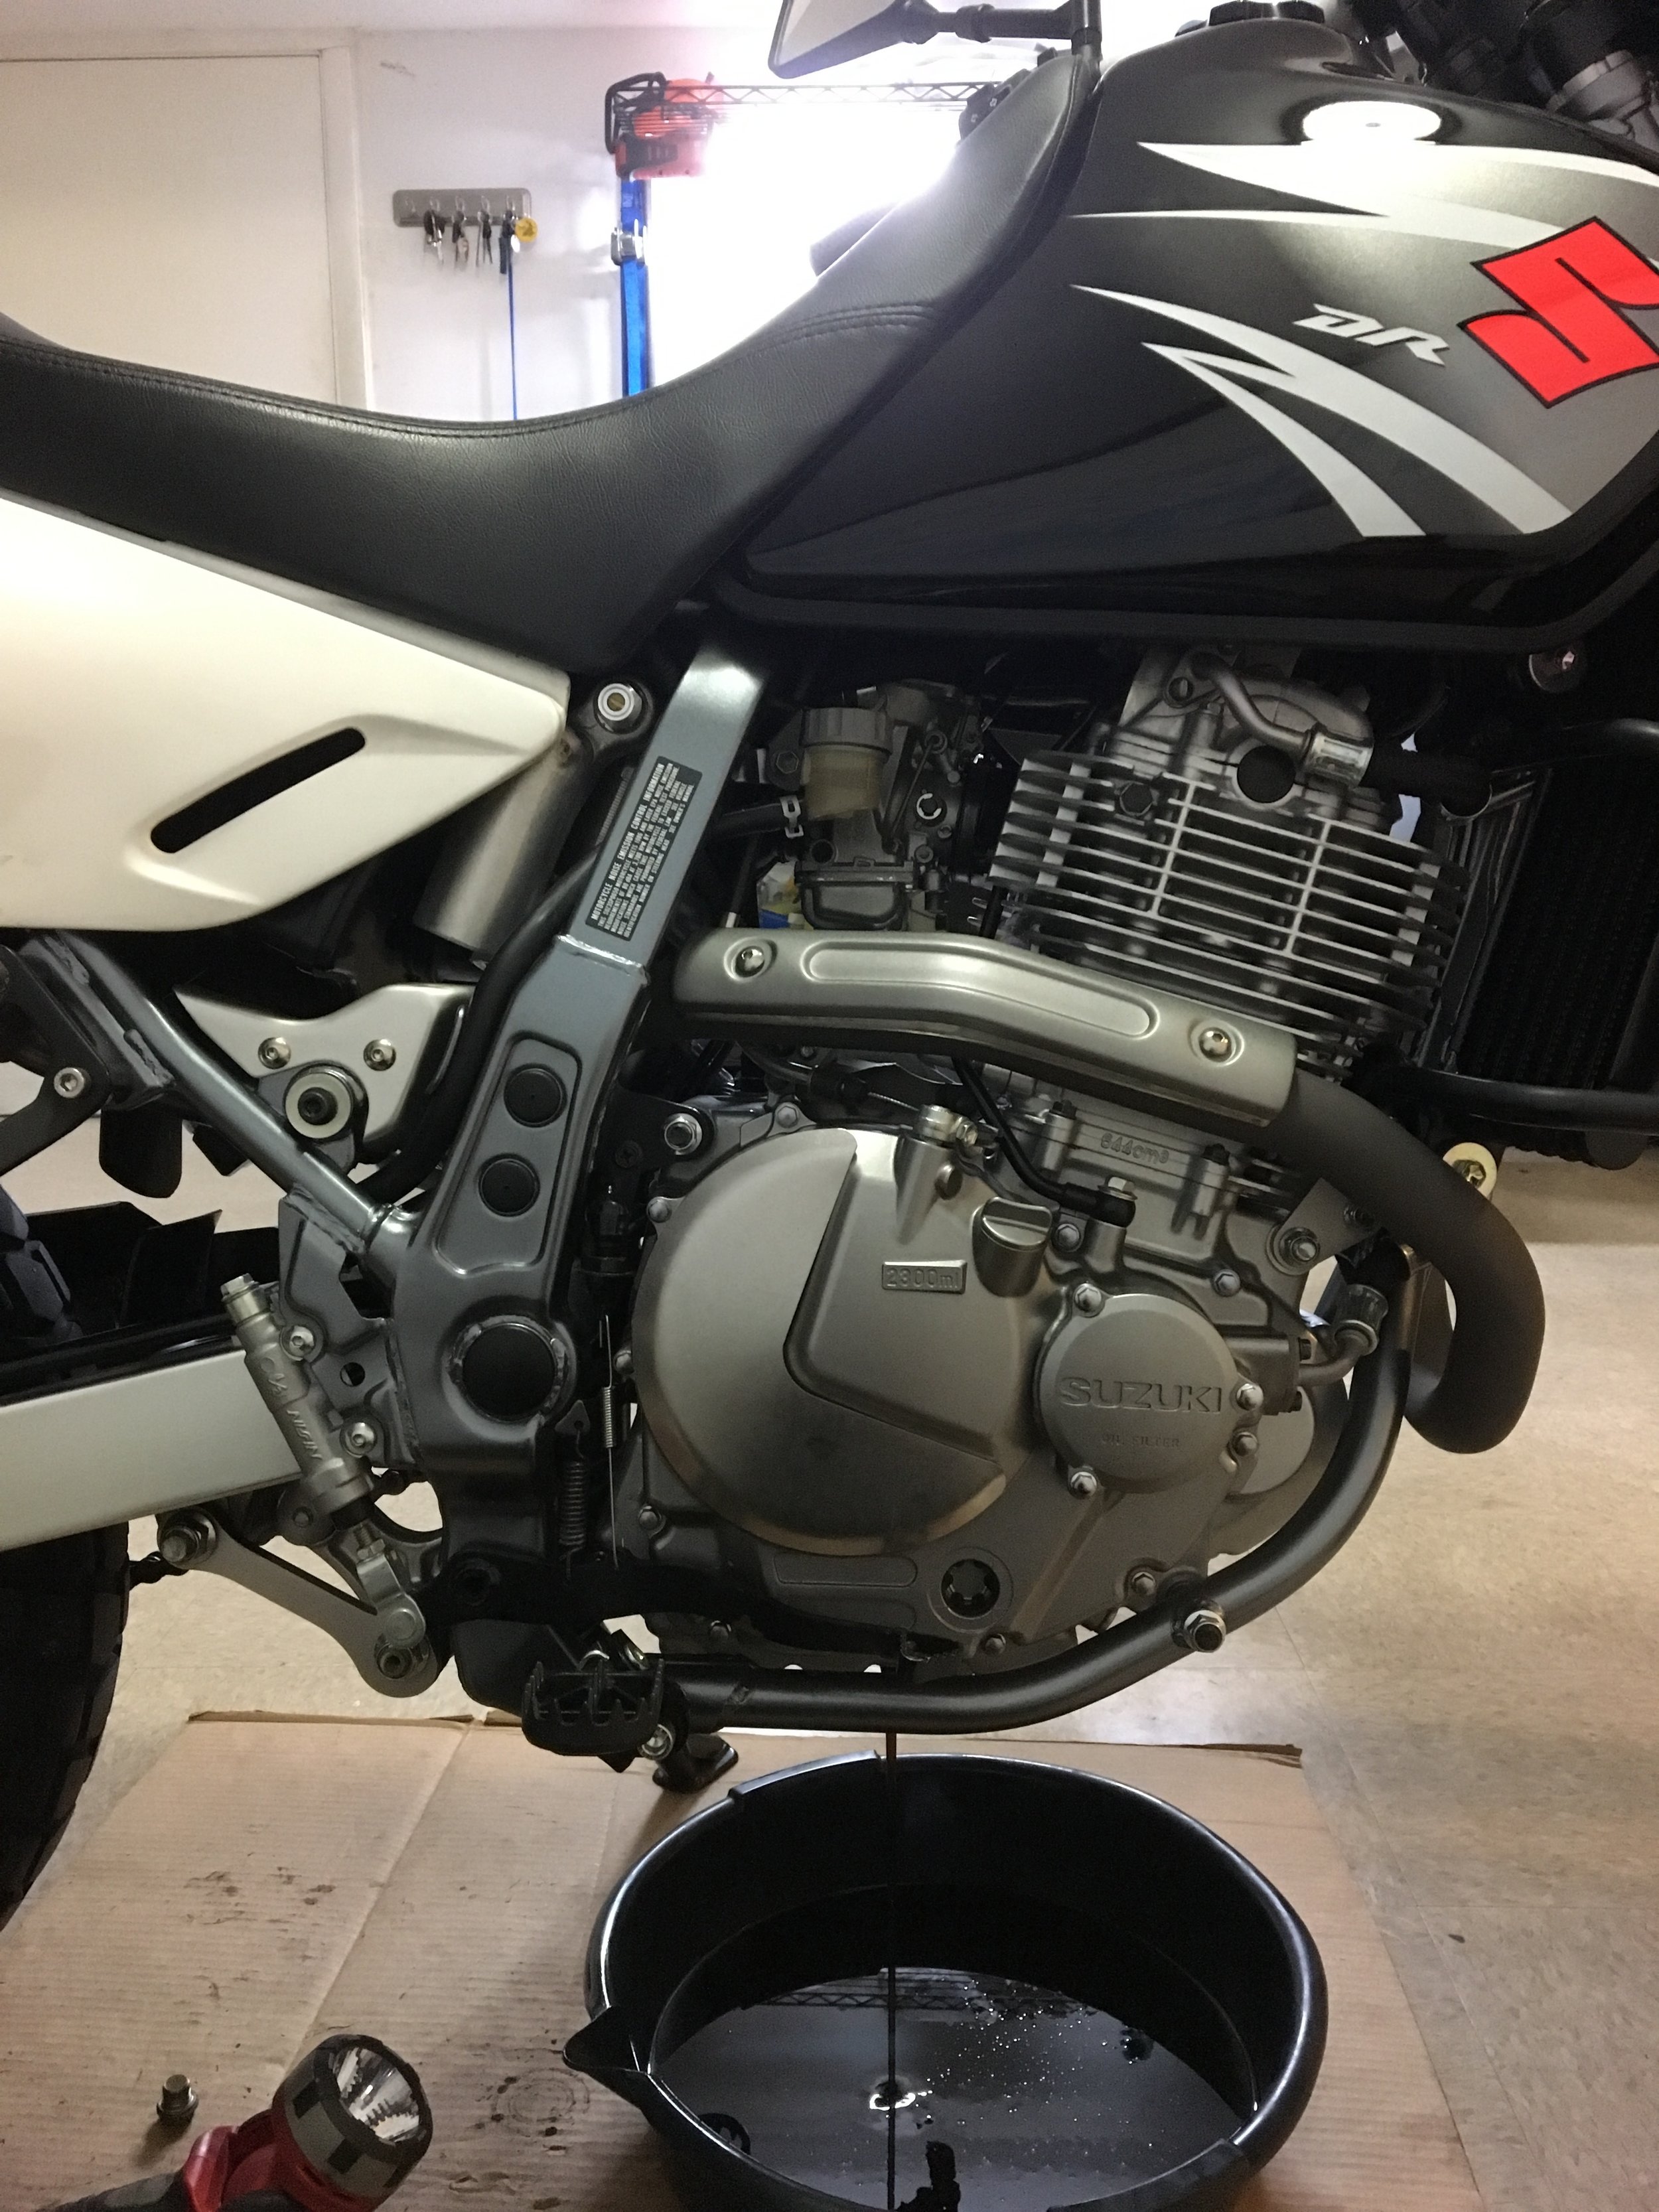
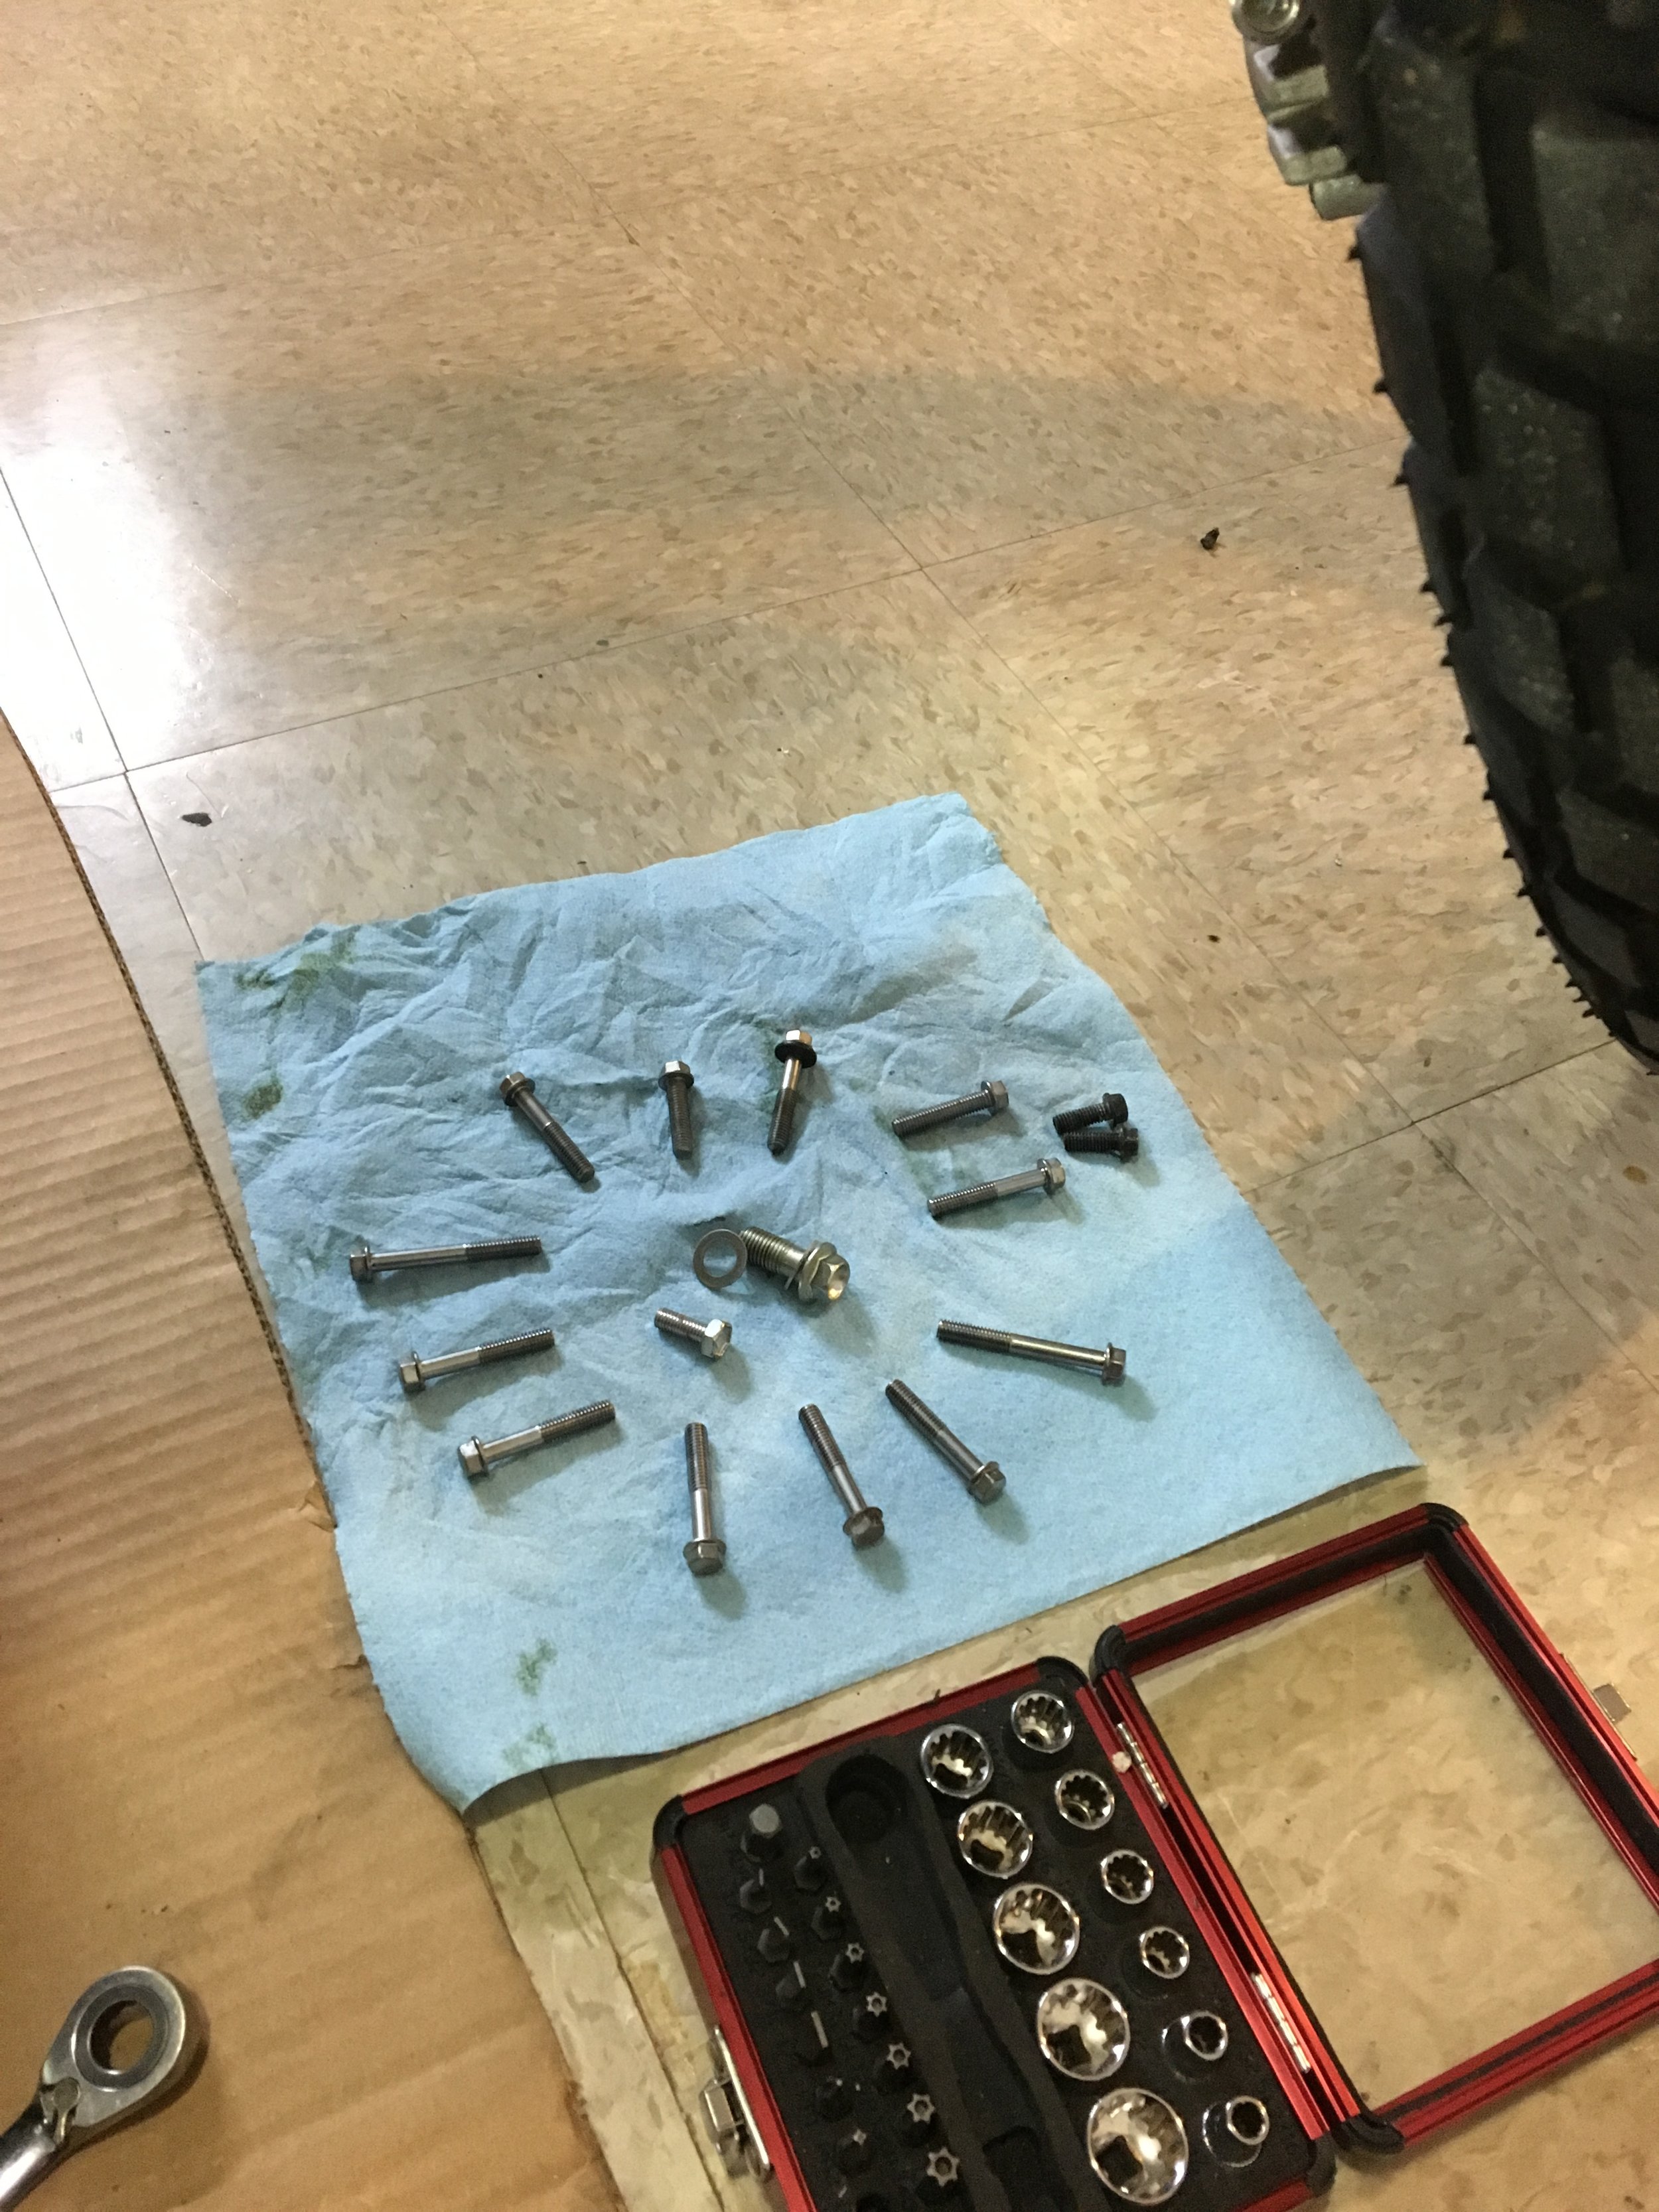
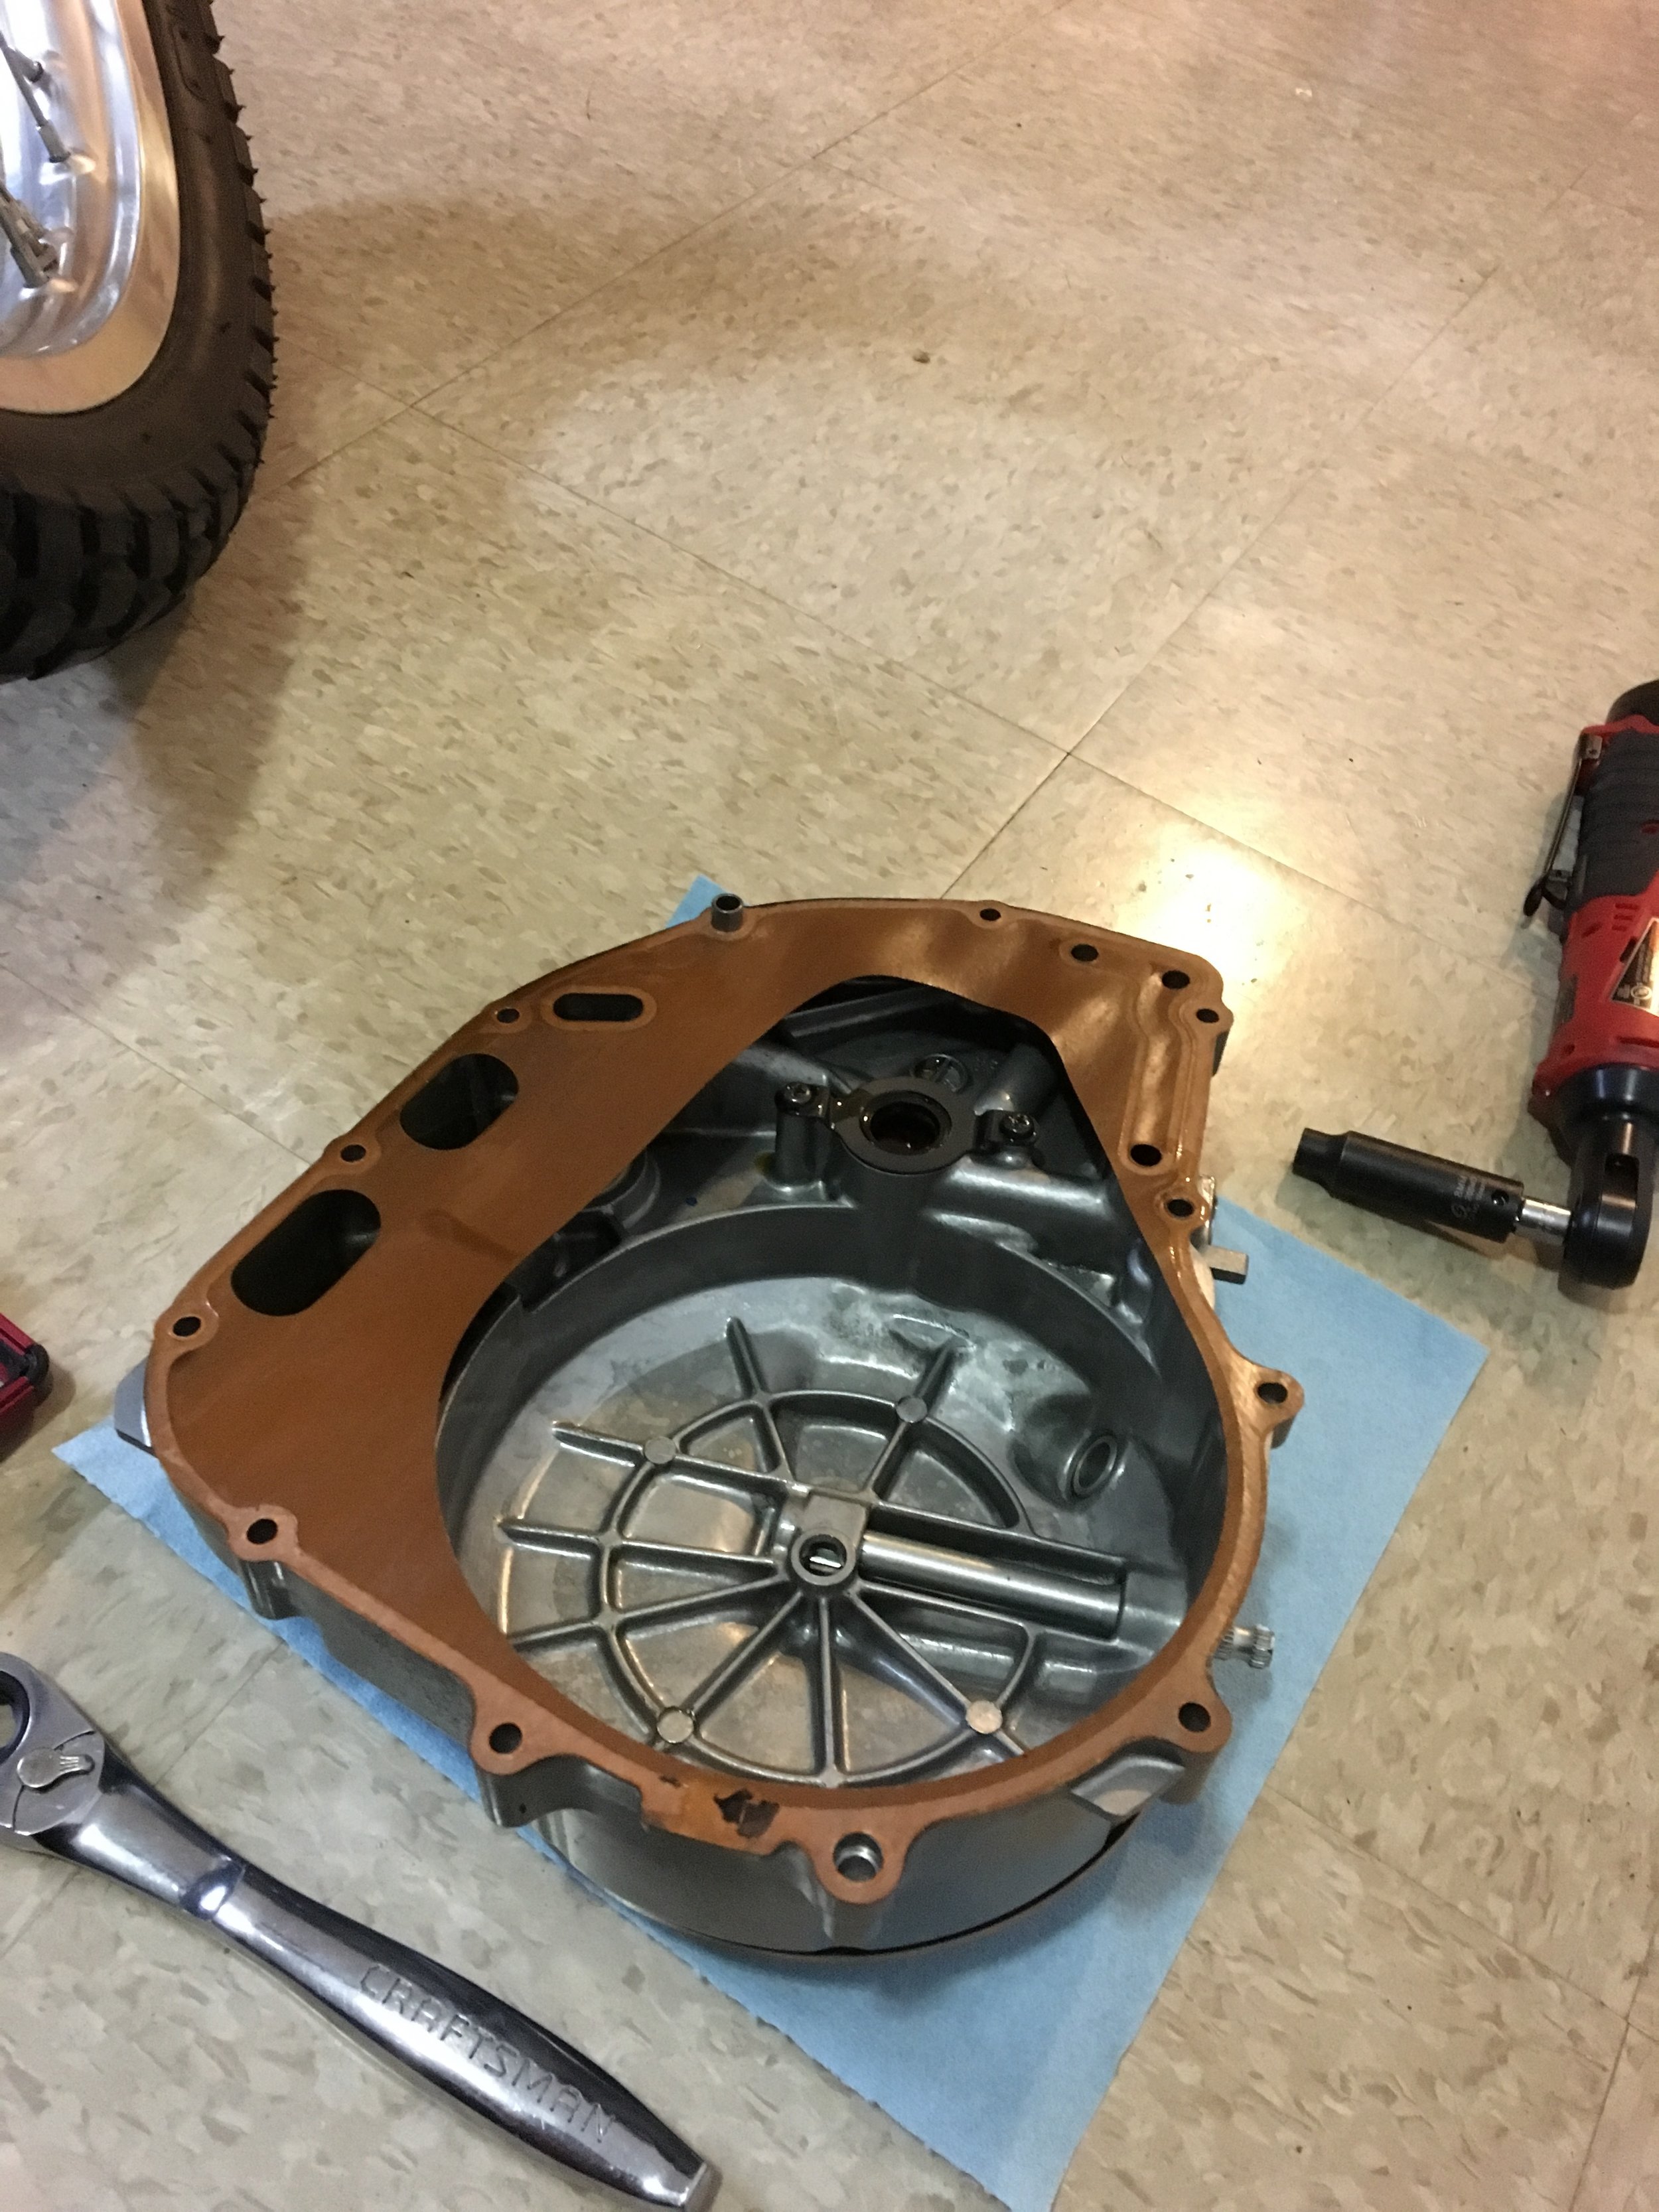
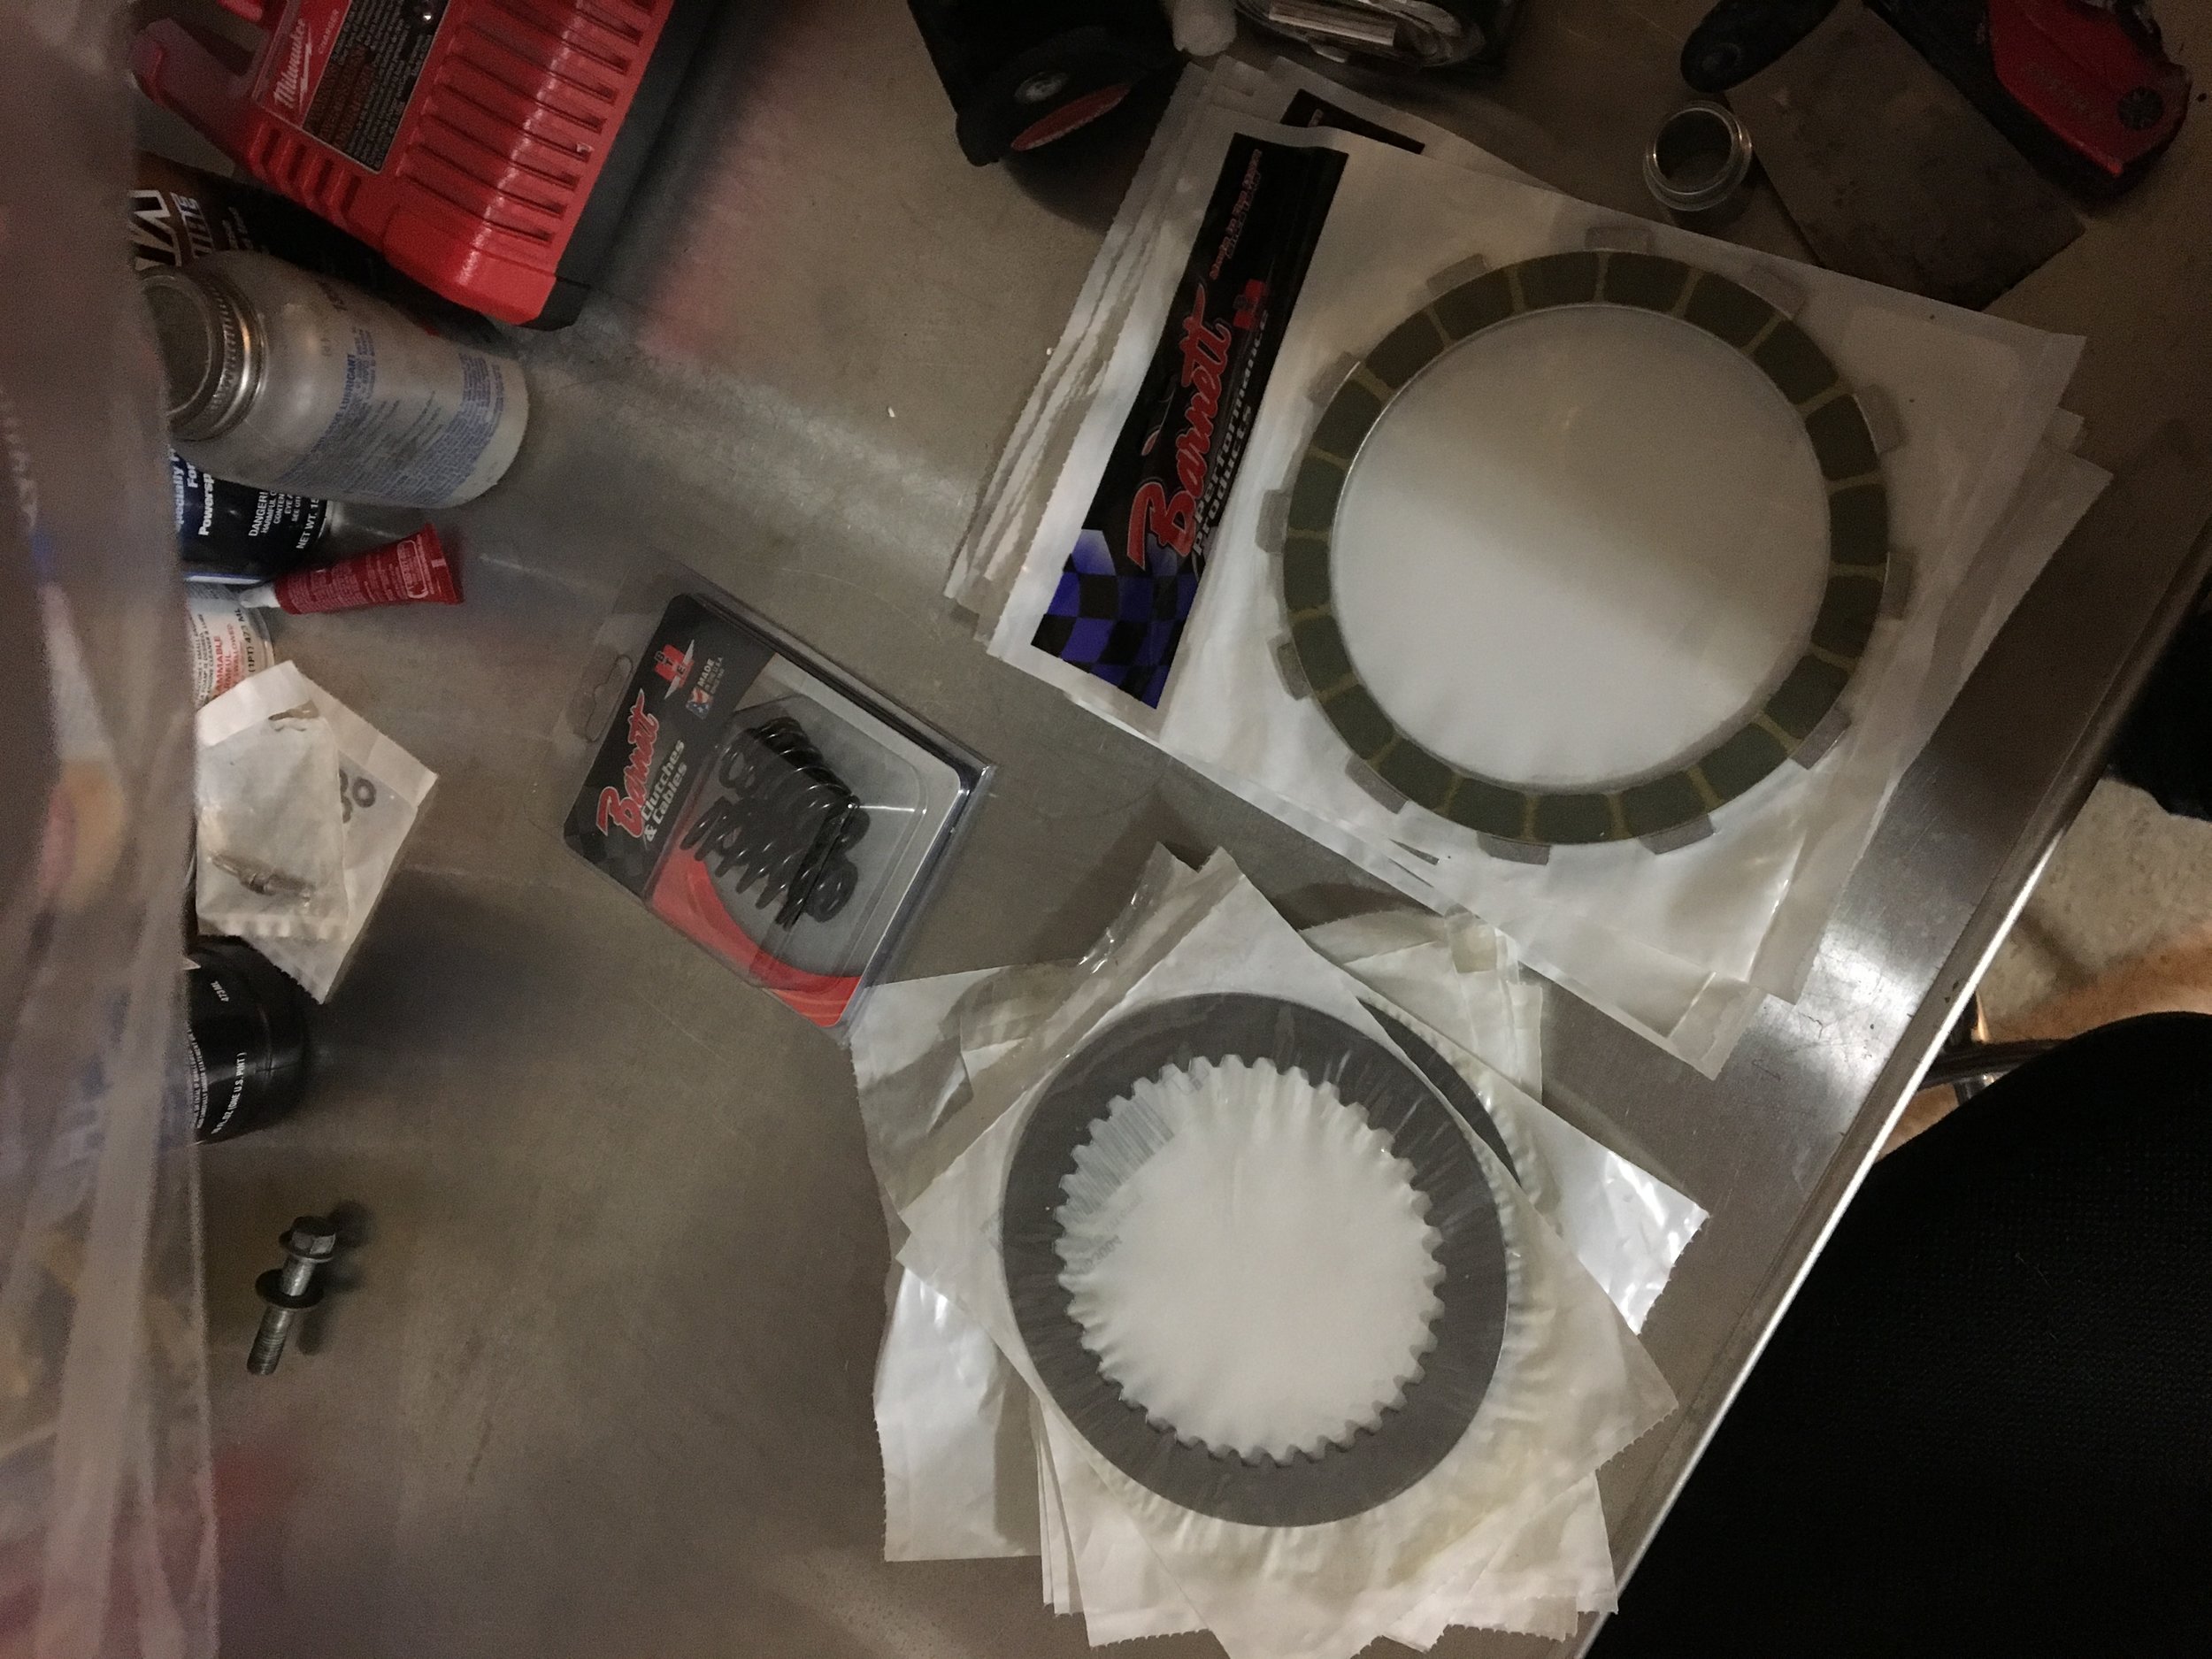
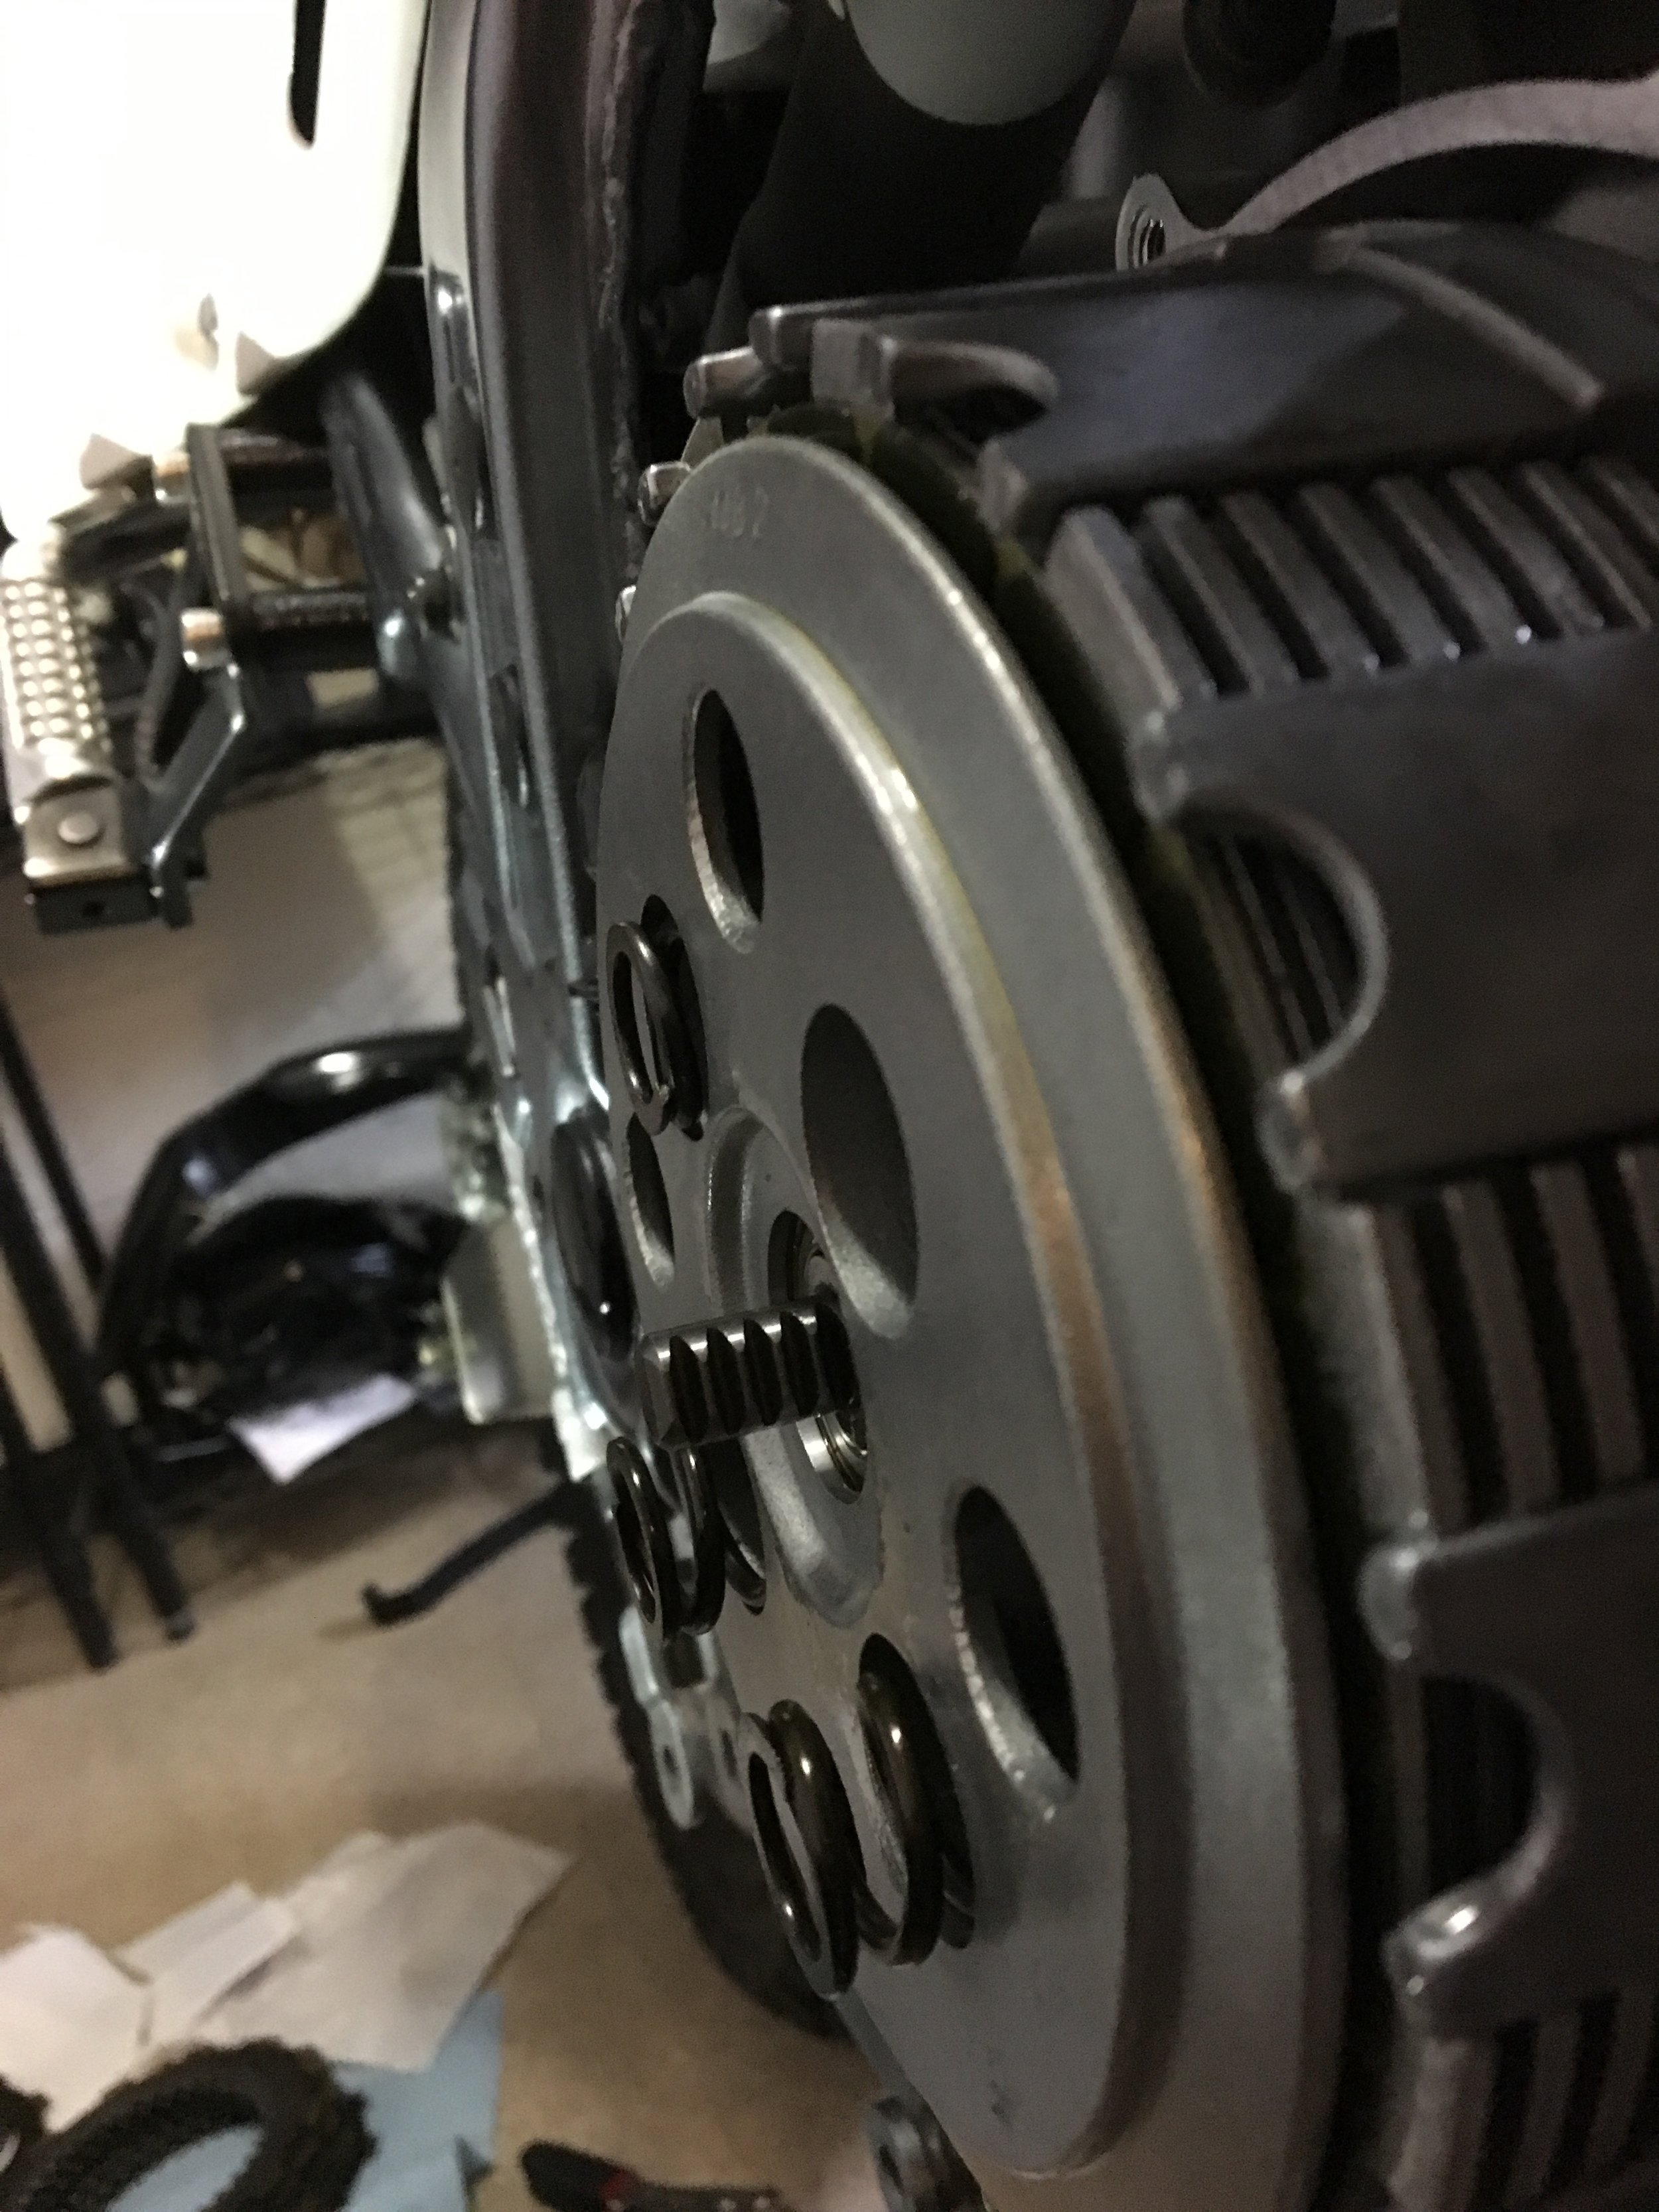
The black bike had the clutch slipping in the first month of ownership. I wasn't looking to have this problem while on the trail, so I upgraded the clutch with a Barnett clutch kit. I have read a lot of people have issue with the lever pull, being too tough as the HD springs are rather stiff. I already made this mod on my black bike. So I wasn't worried. In my personal experience, this was only noticeable within the first 1000 miles, after that it broken in rather well. First the cover was removed. This is rather tedious as the bolts are all different sizes, so I laid them out as I took them off. If its a factory gasket and never removed, then it'll guarantee to rip. So you will need a gasket.
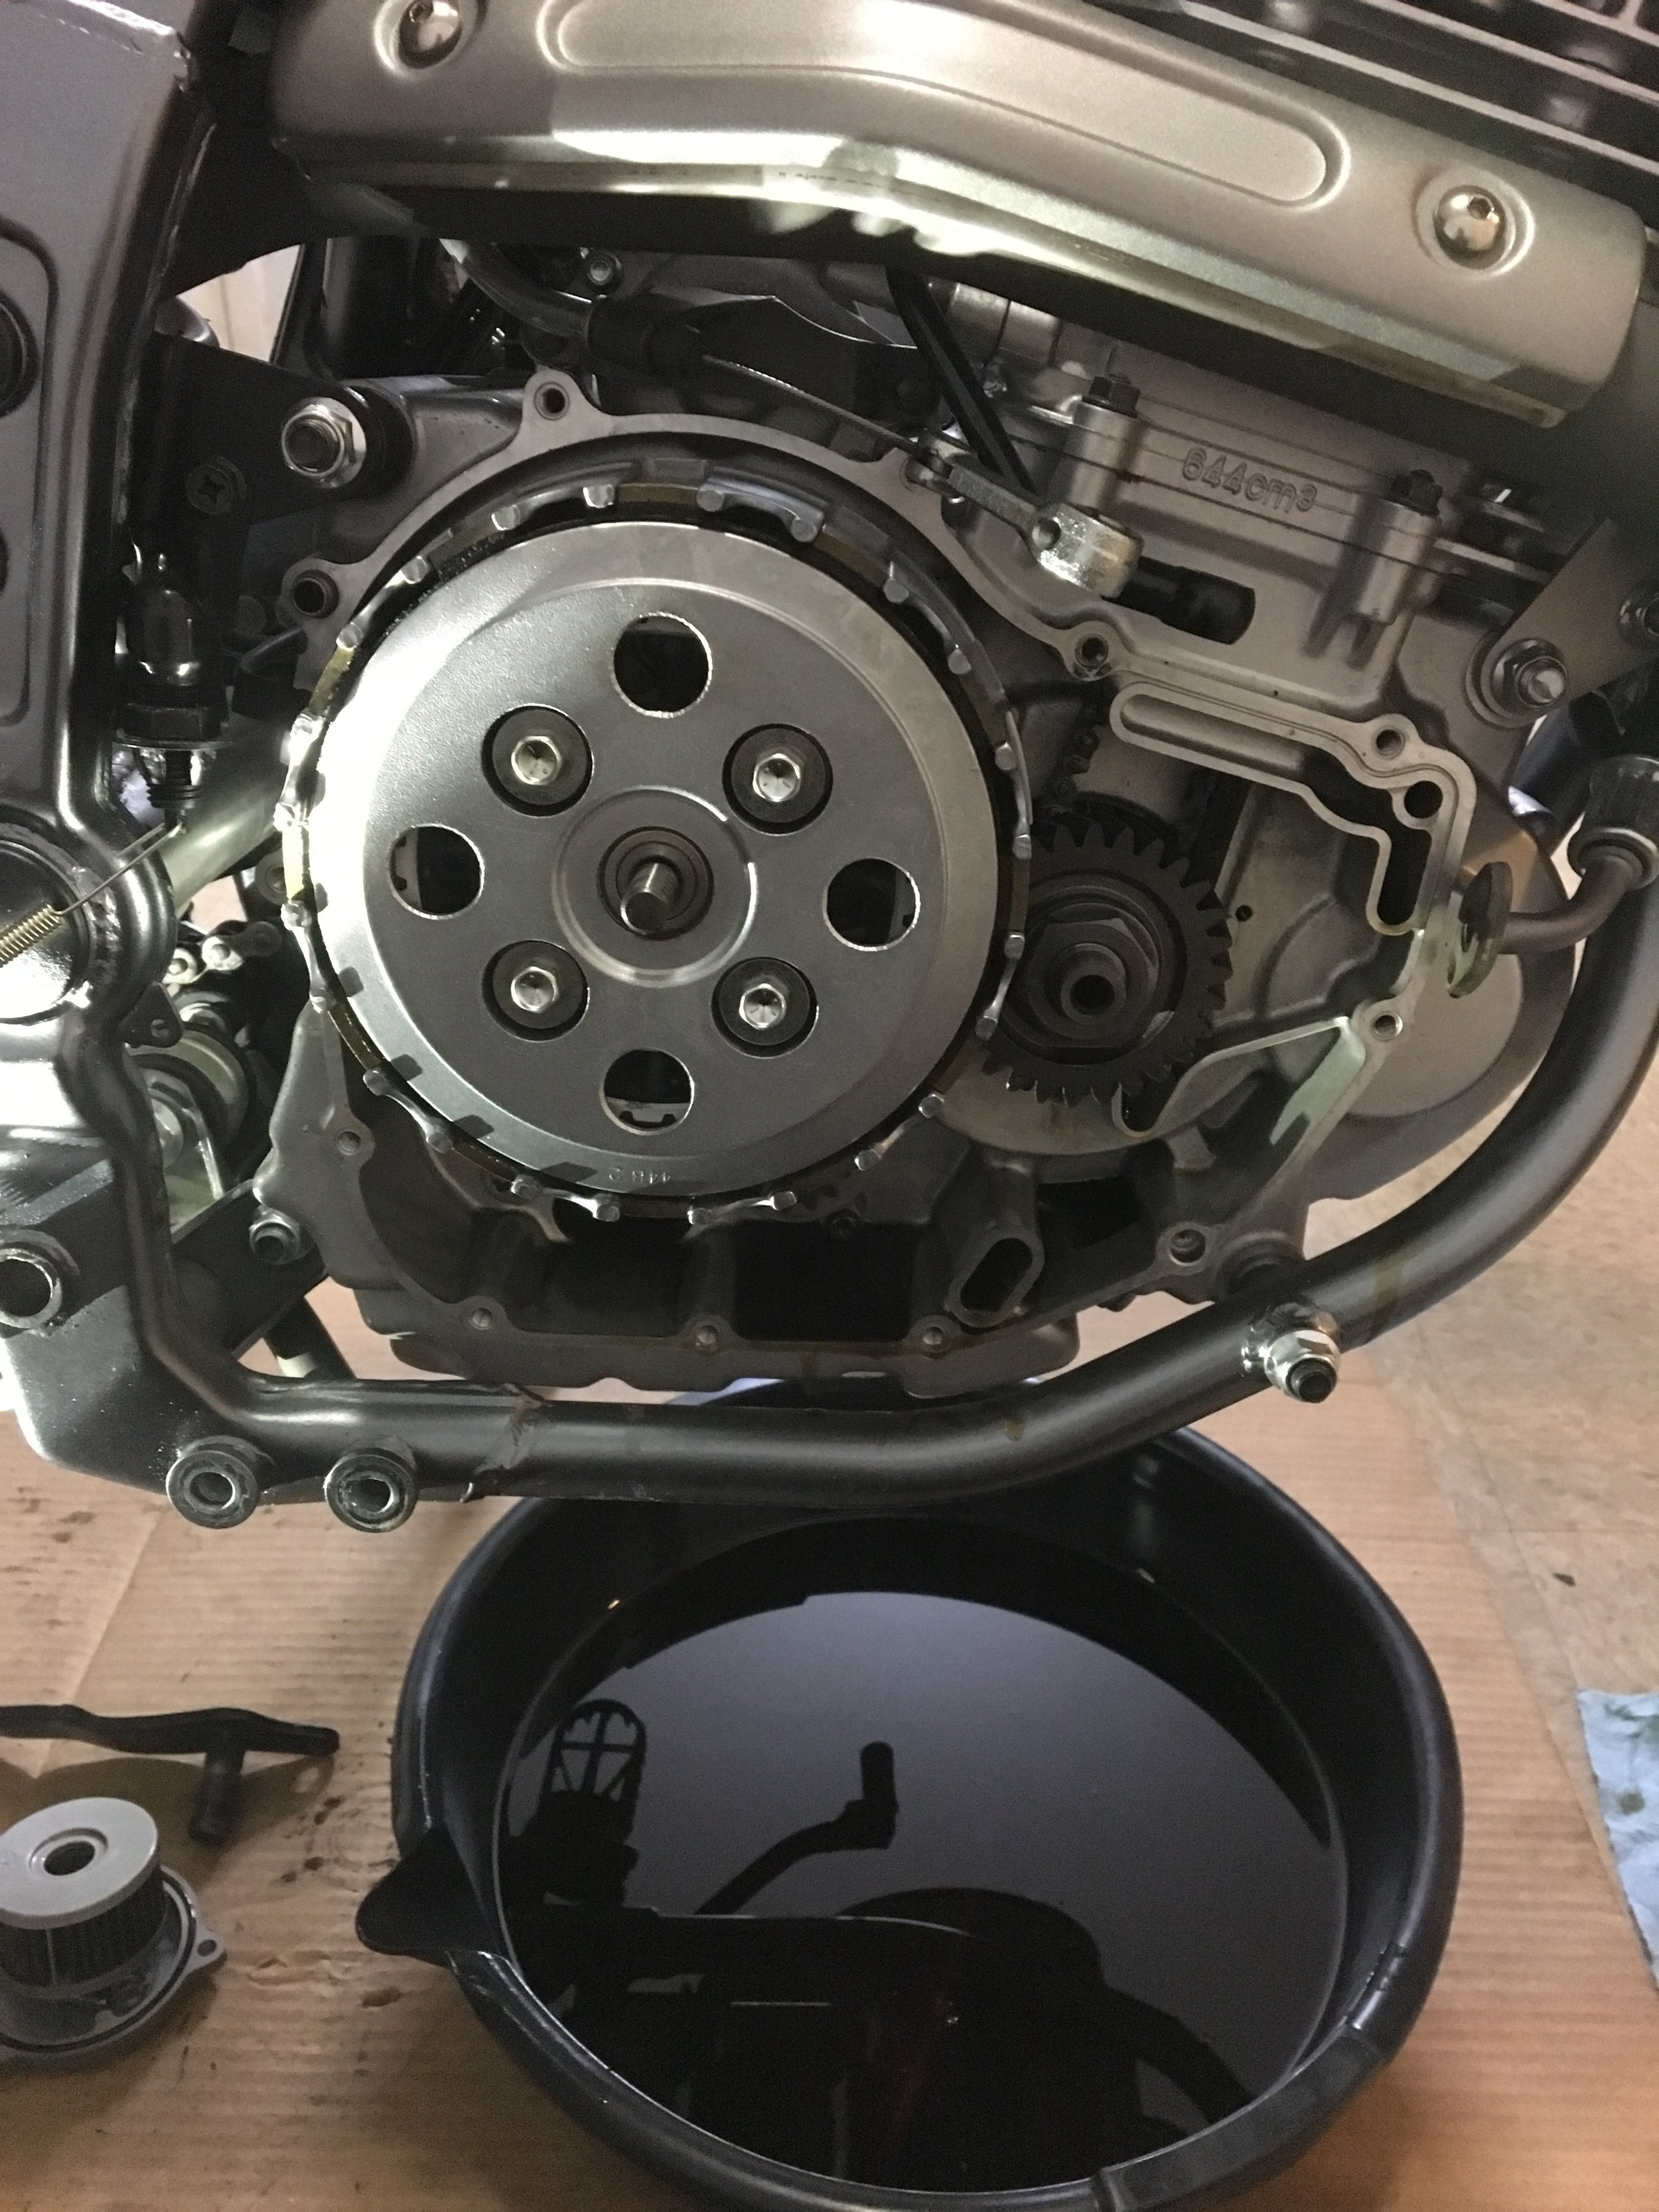
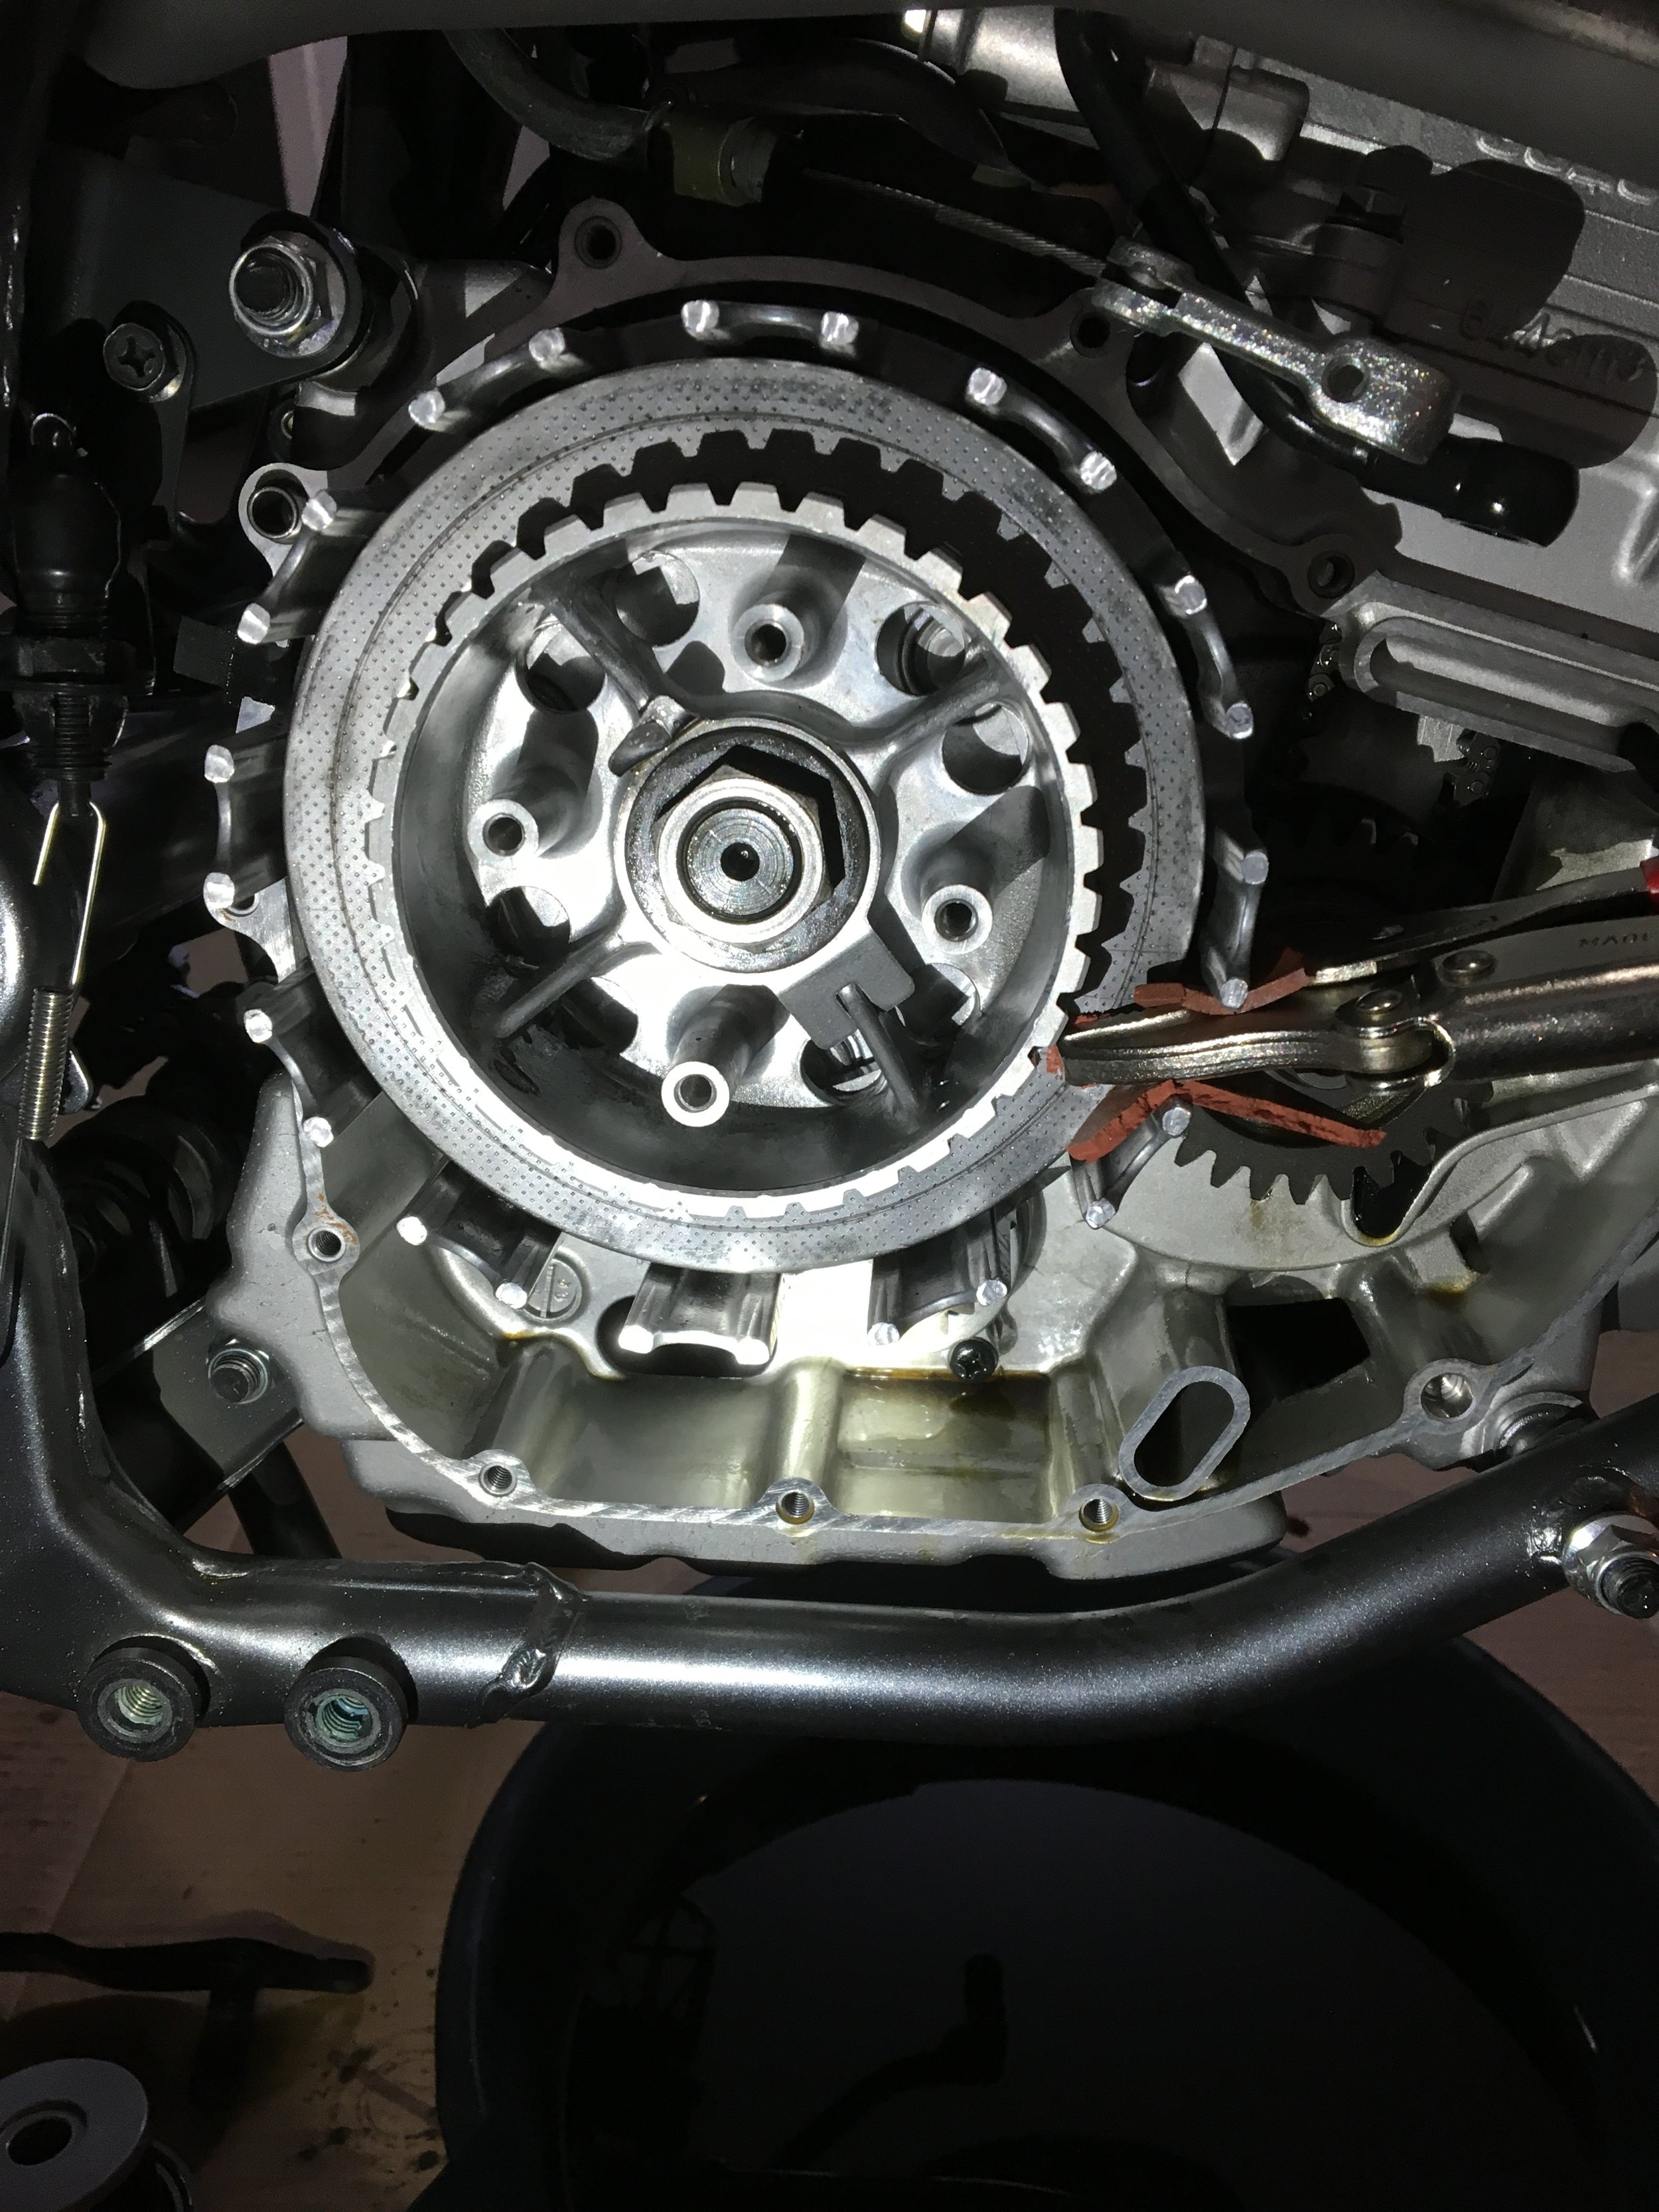
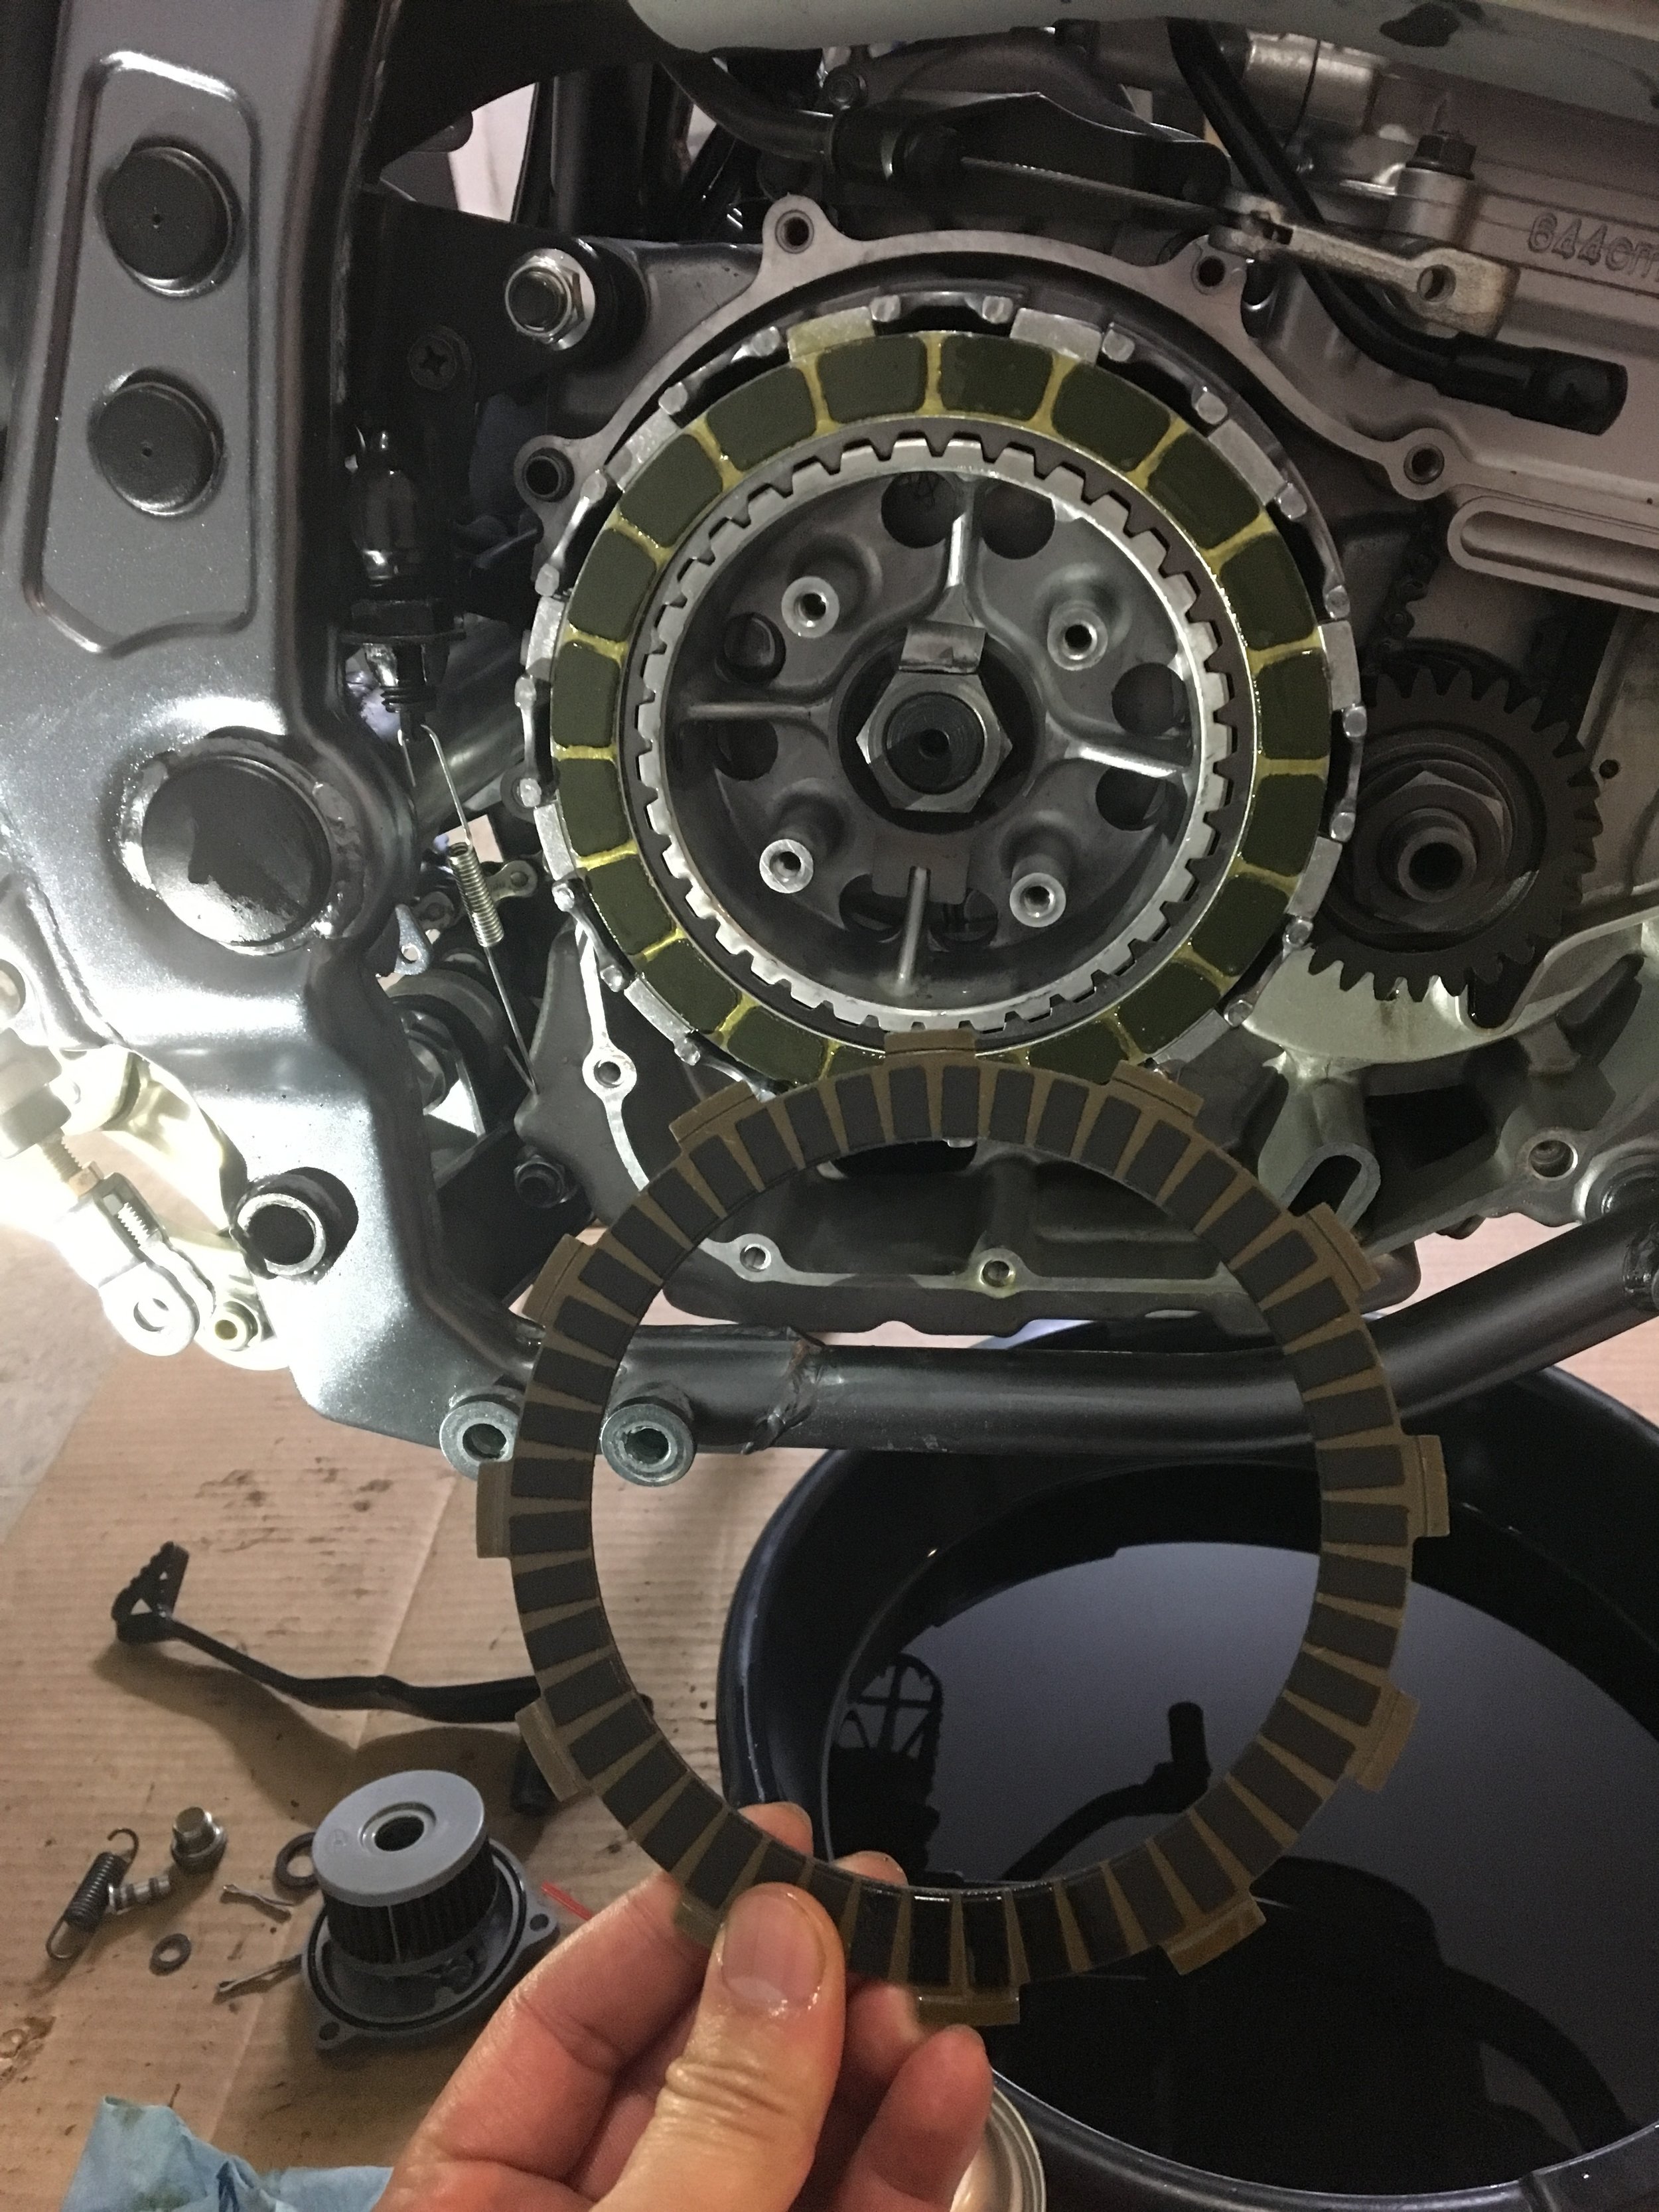
Then I took off the clutch, the clutch pack is held in by 4 springs and screws holding it in, then its a matter of removing the original clutch pack one disc at a time. I kept them together in order, but its not really that serious. The hub bolt is a bit tricky to remove, but I had an impact gun, so it took 2 second. If you have an impact use it. Or else you'll have to hold the hub with a contraption like I did in the first photo.
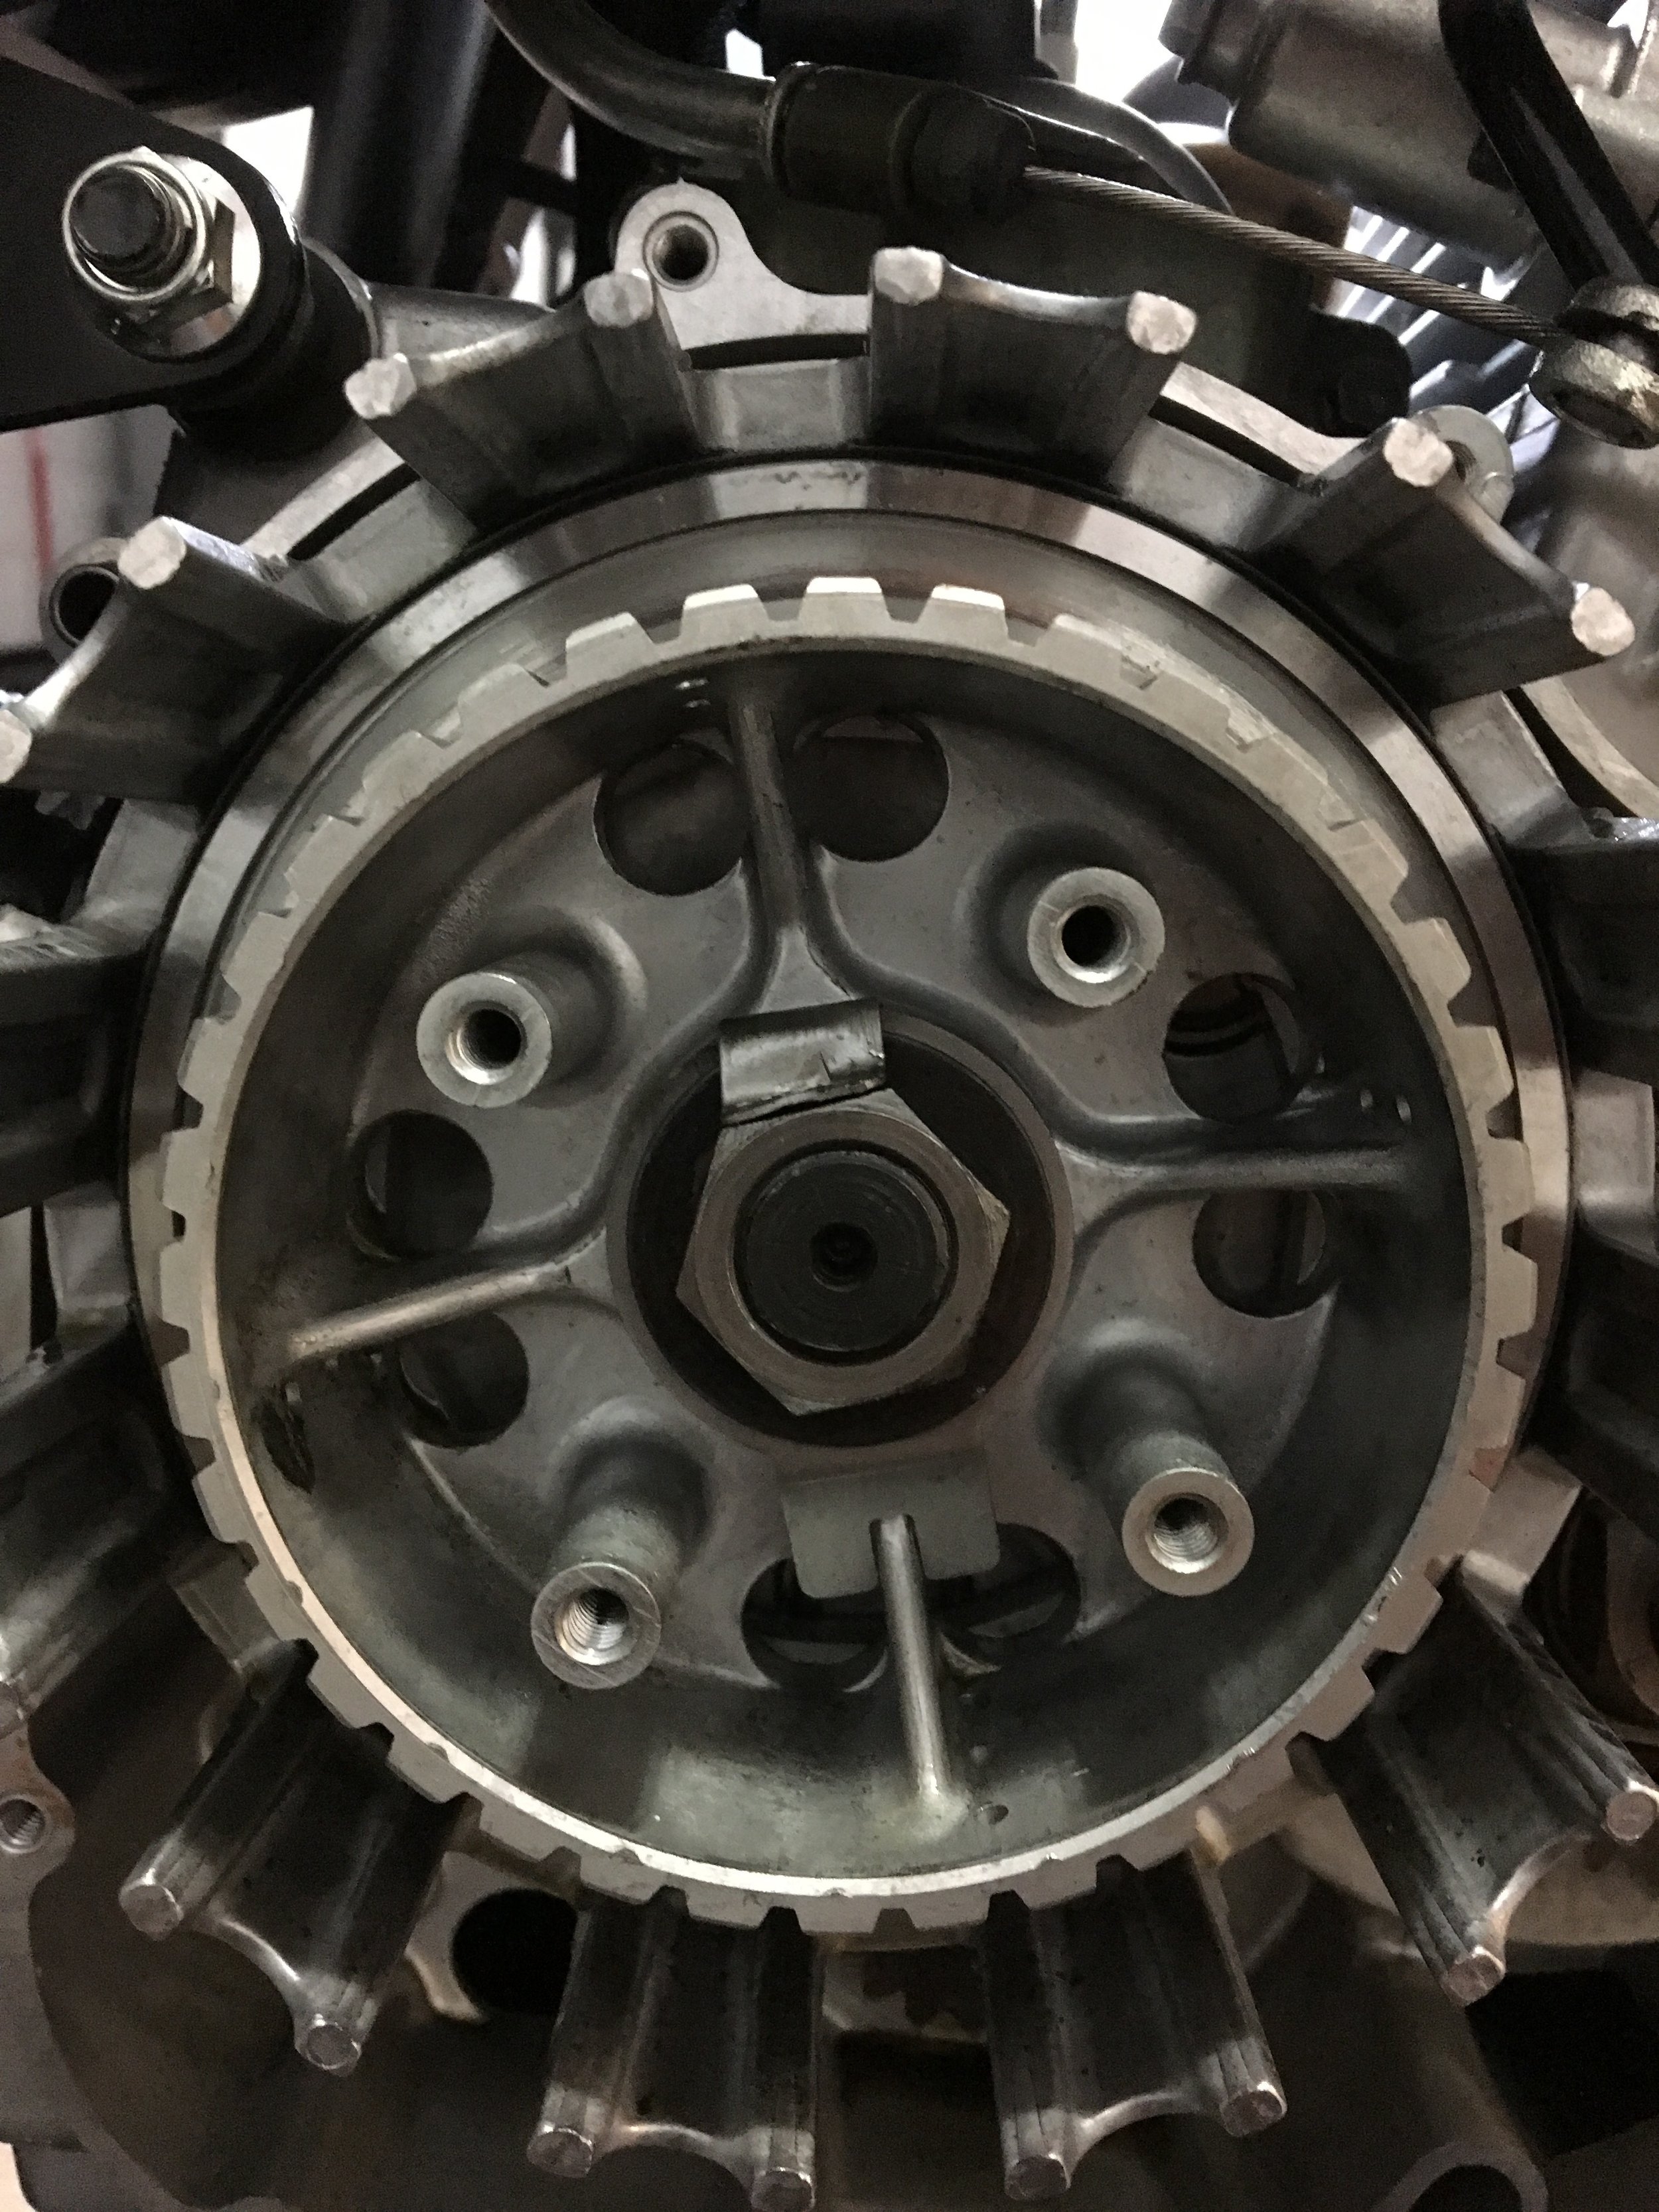
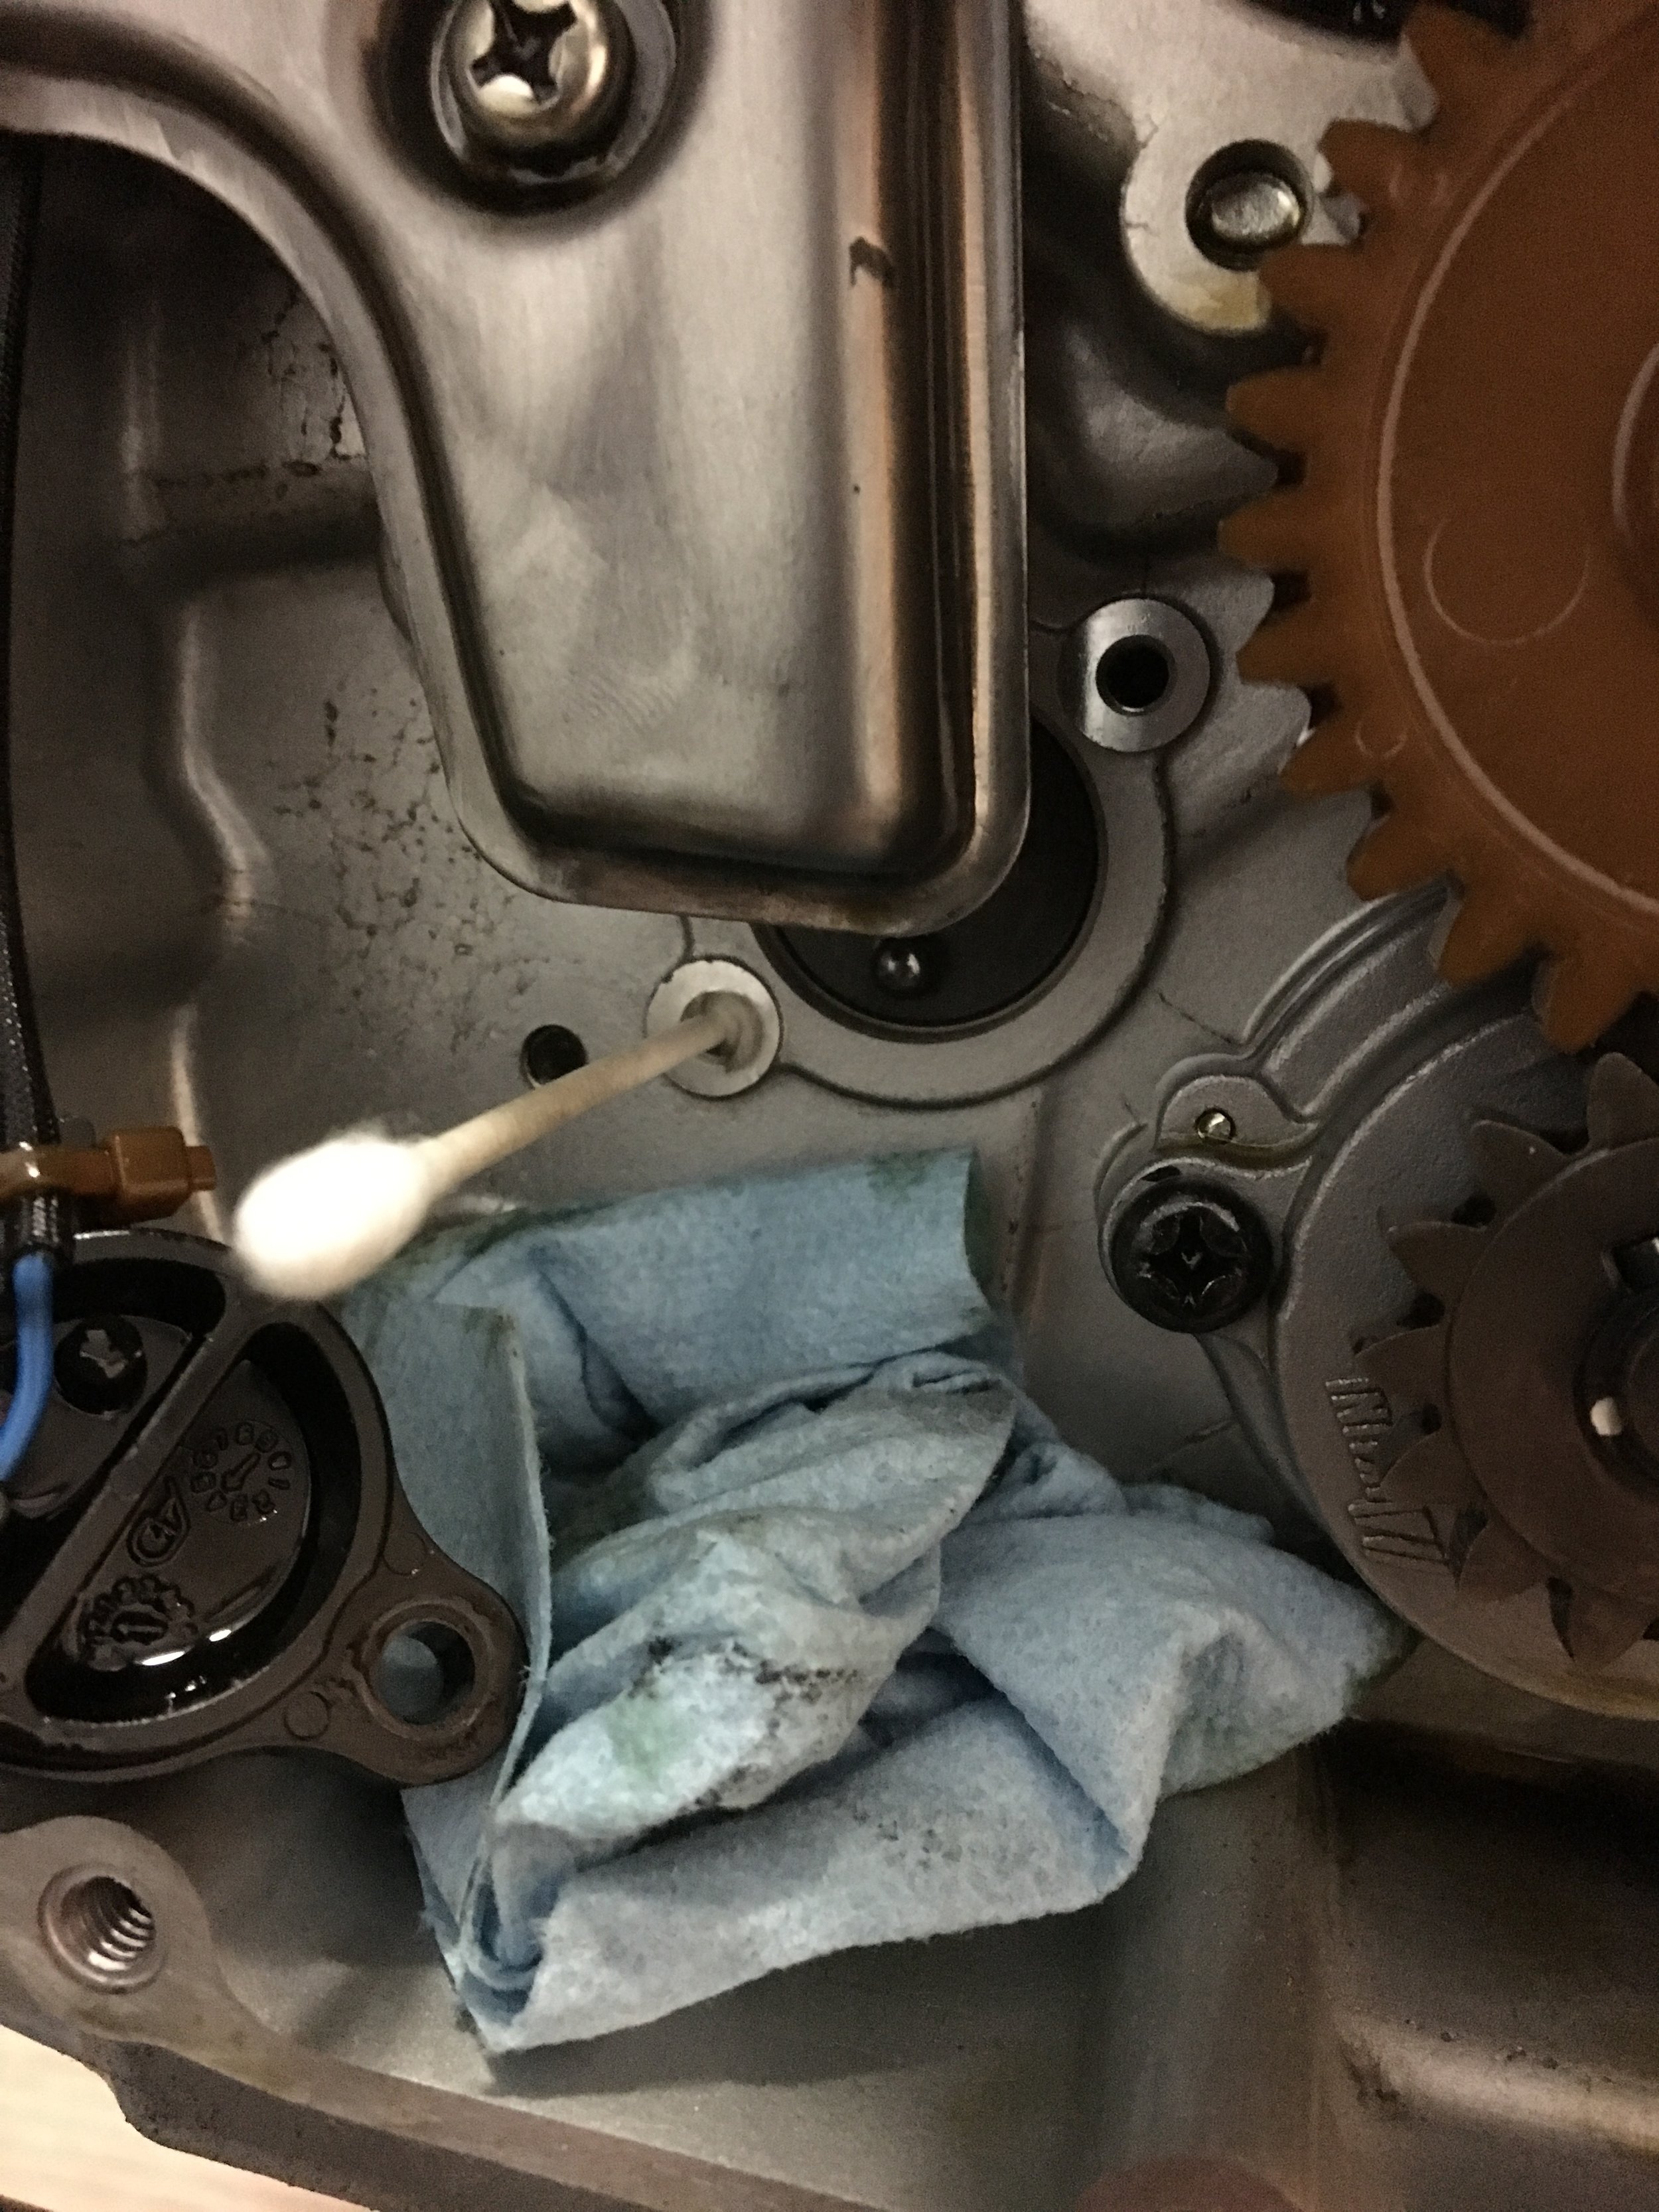
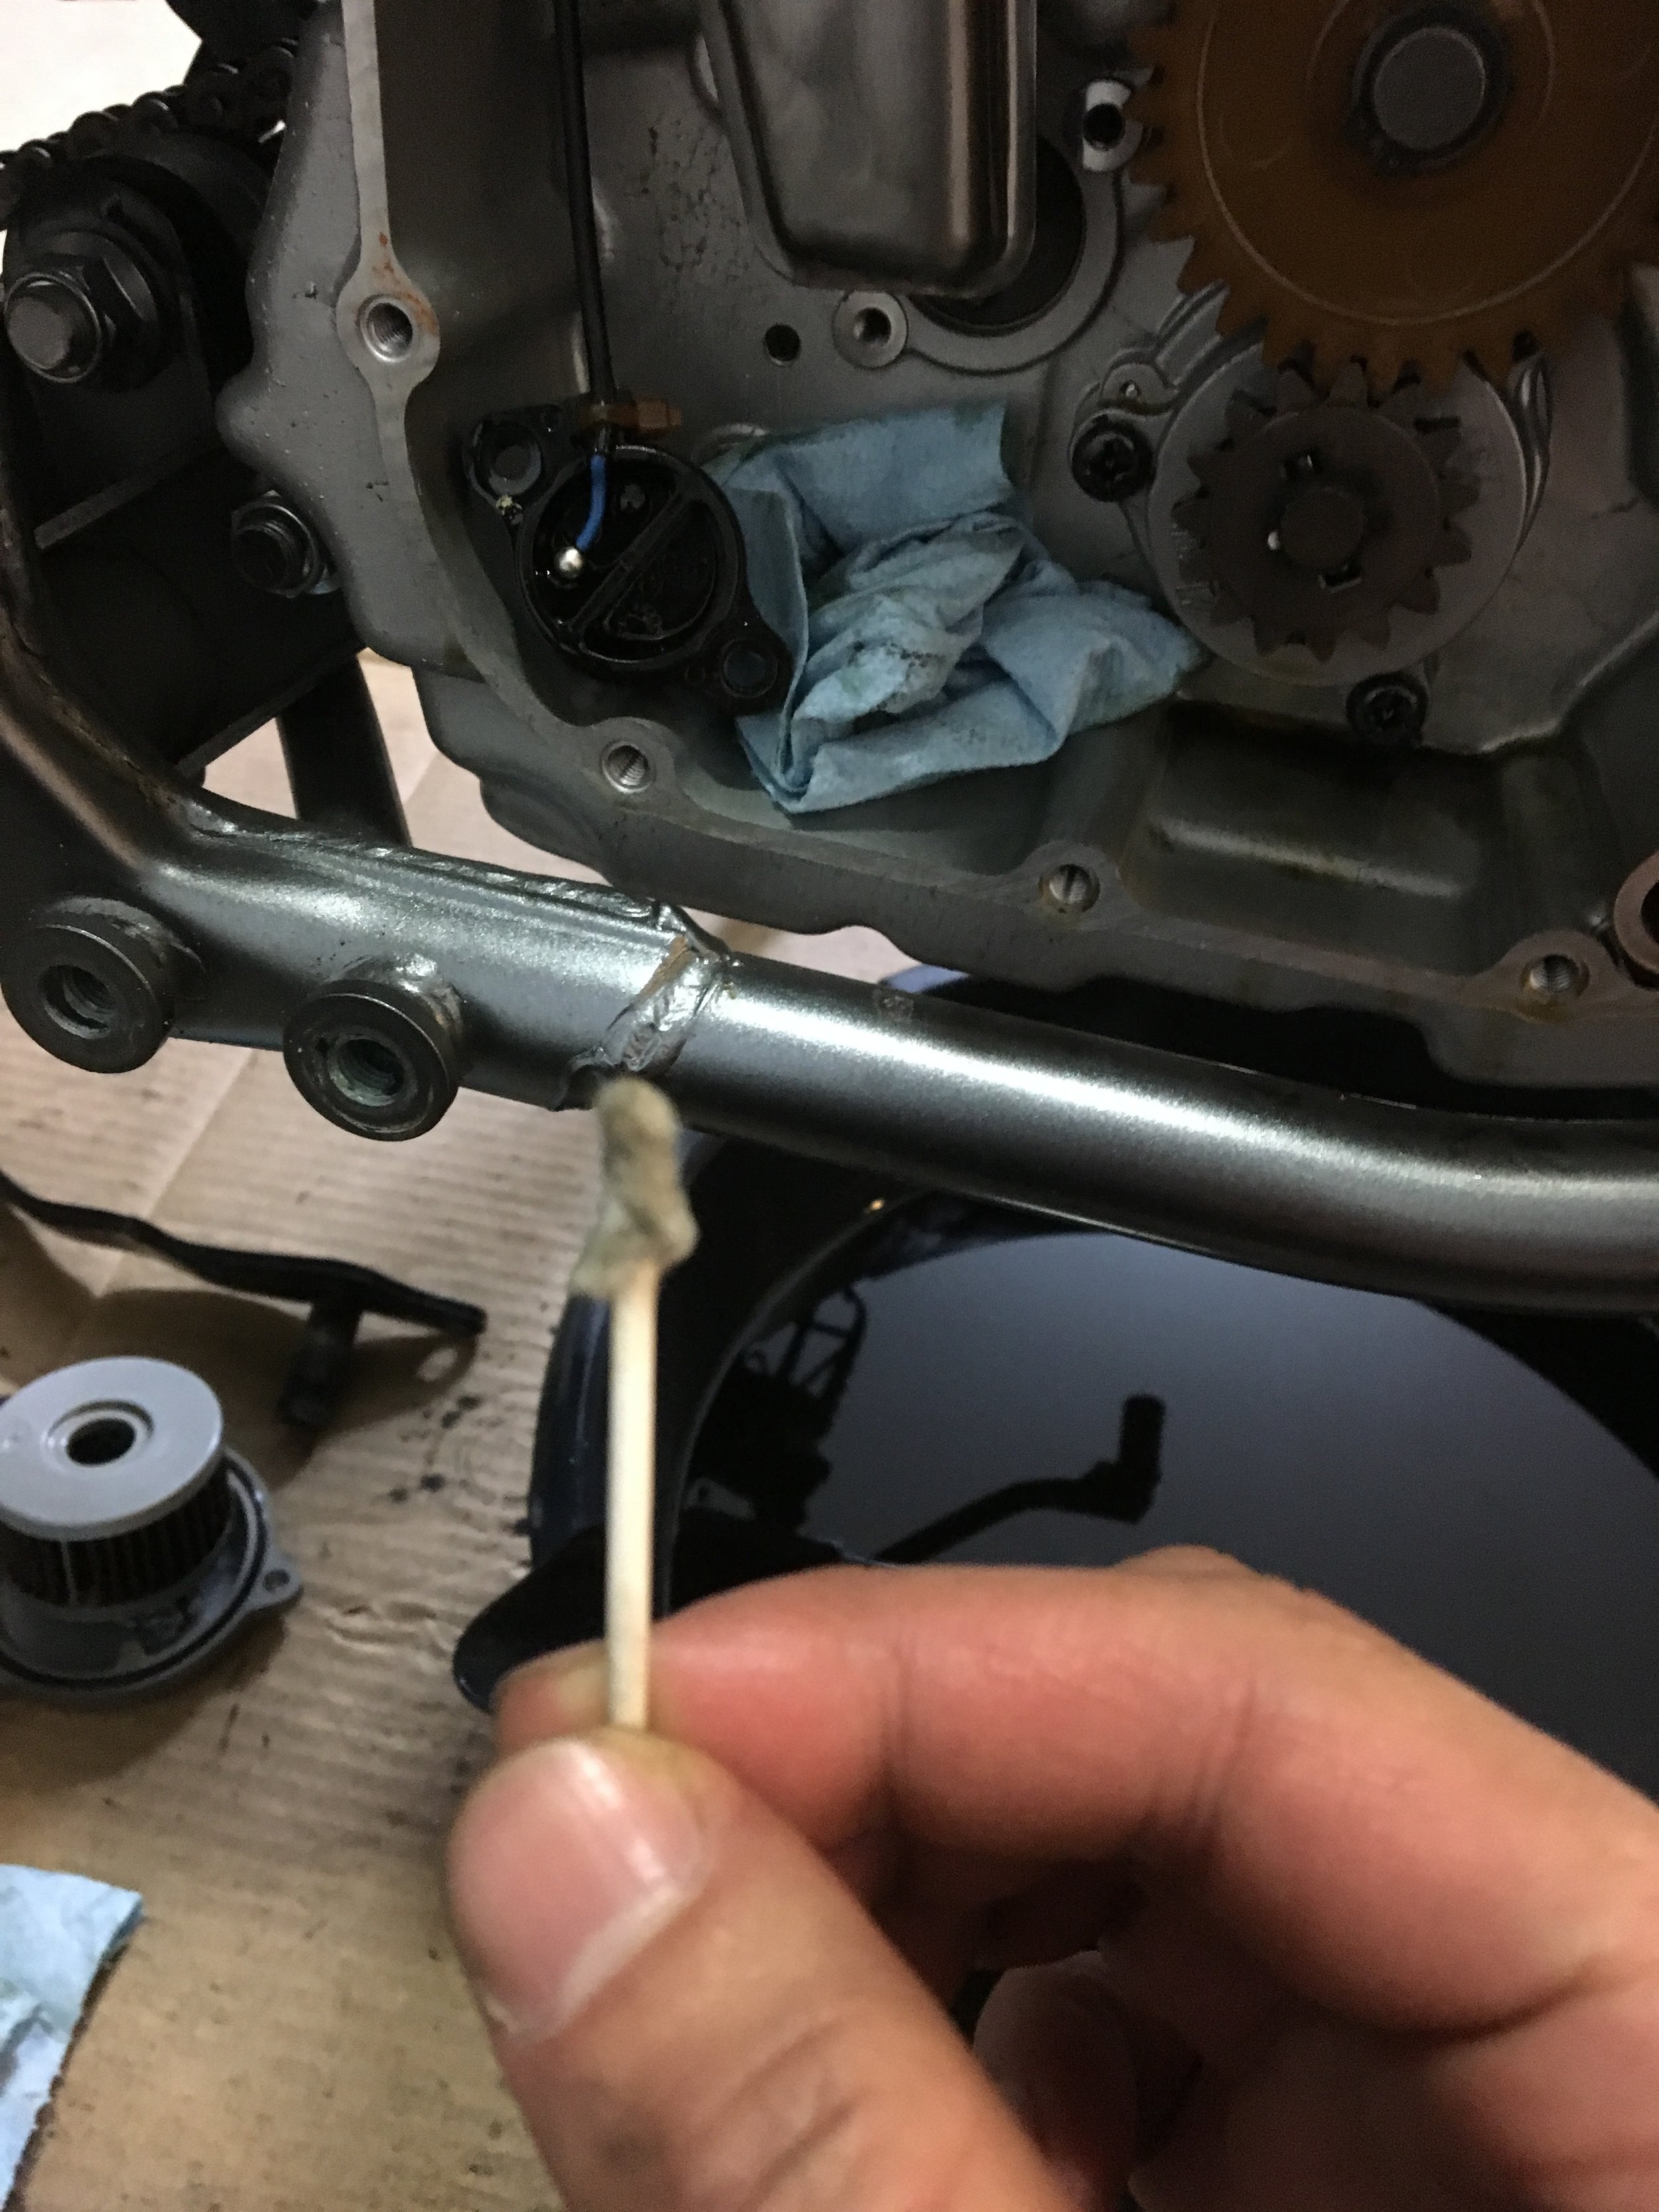
Before I threw the clutch back on I tackle the NSU. NSU (Neutral sending unit) on the Dr650 is held on to the motor right behind the clutch pack. It is a well known fact that before 2017, they have no loctite or anything in them. Overtime with the vibration and heat expansion of the plastic and the metal bolt, the bolt backs out. If you are lucky it gets sucked up by the magnetic drain plug, if you are unlucky, your engine is done. Since I was intent on doing the clutch I thought I take the liberty of doing the NSU while I was at it. I use cue-tips with some carb cleaner to make sure the thread is completely oil free before I loctite them in place. I also up graded the bolts to allen head and stainless steel. The later models already have the allen head bolt, but since mine is a 2007 it still had a JNS Phillips.
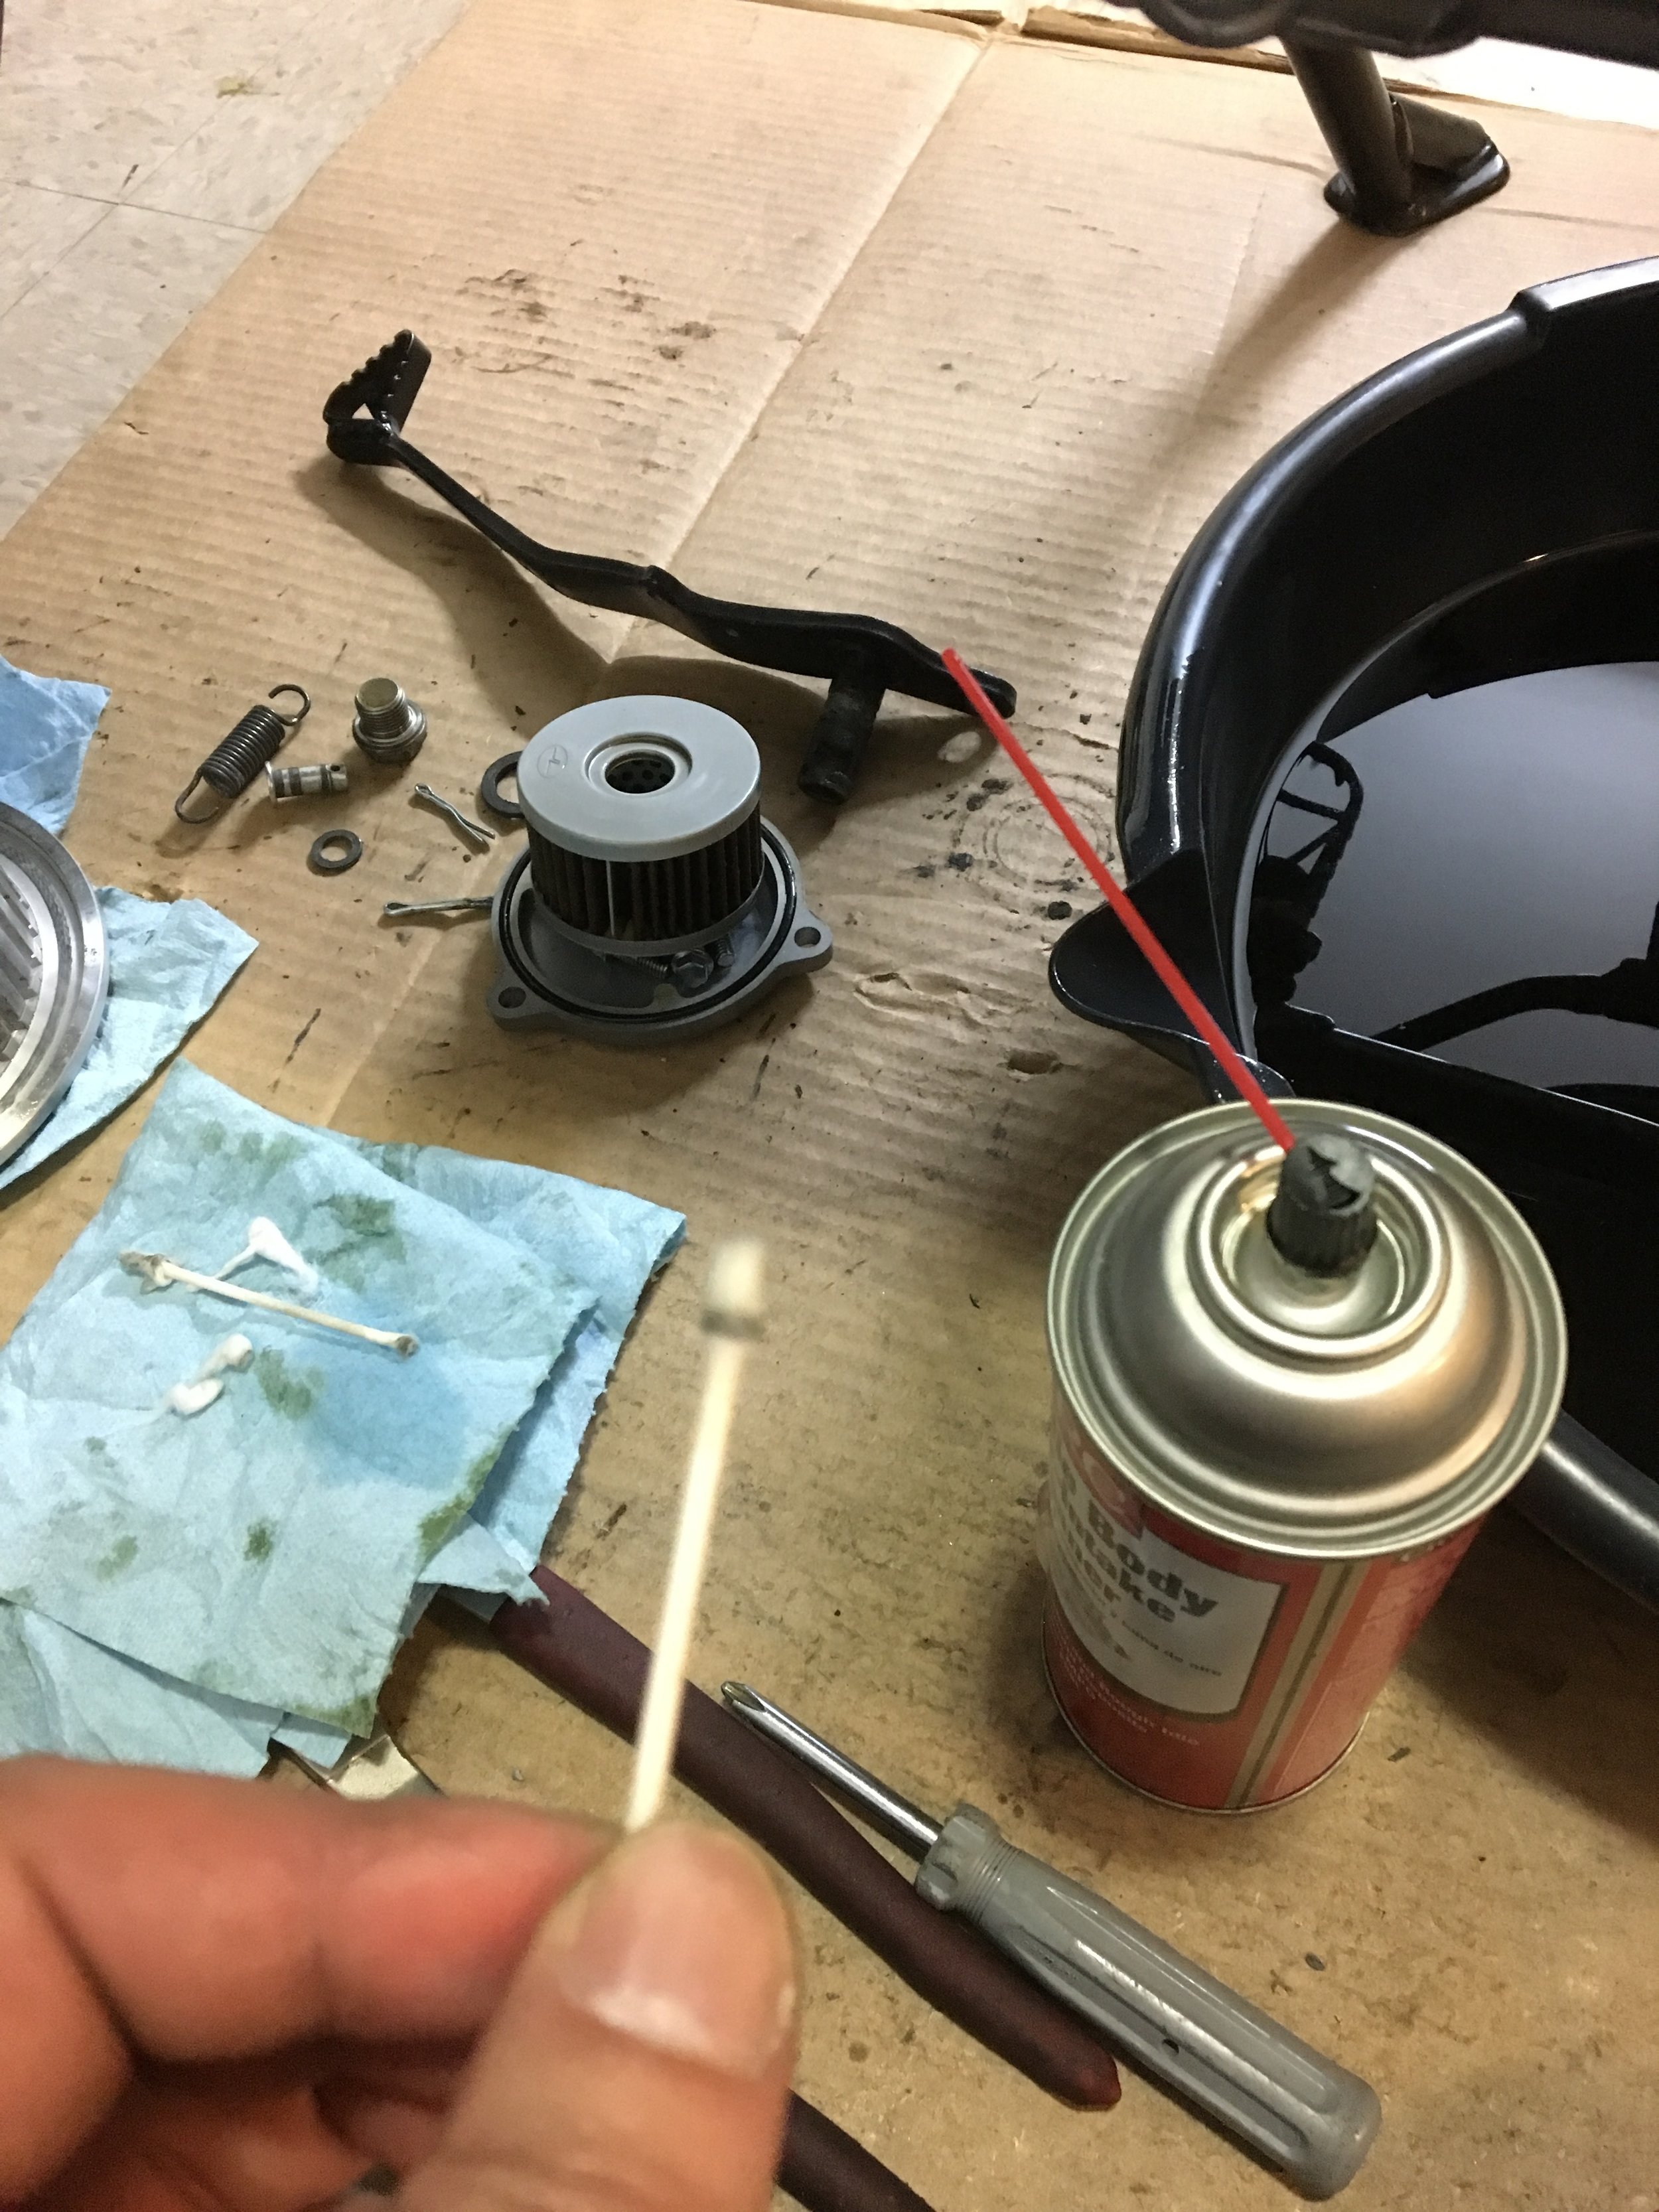
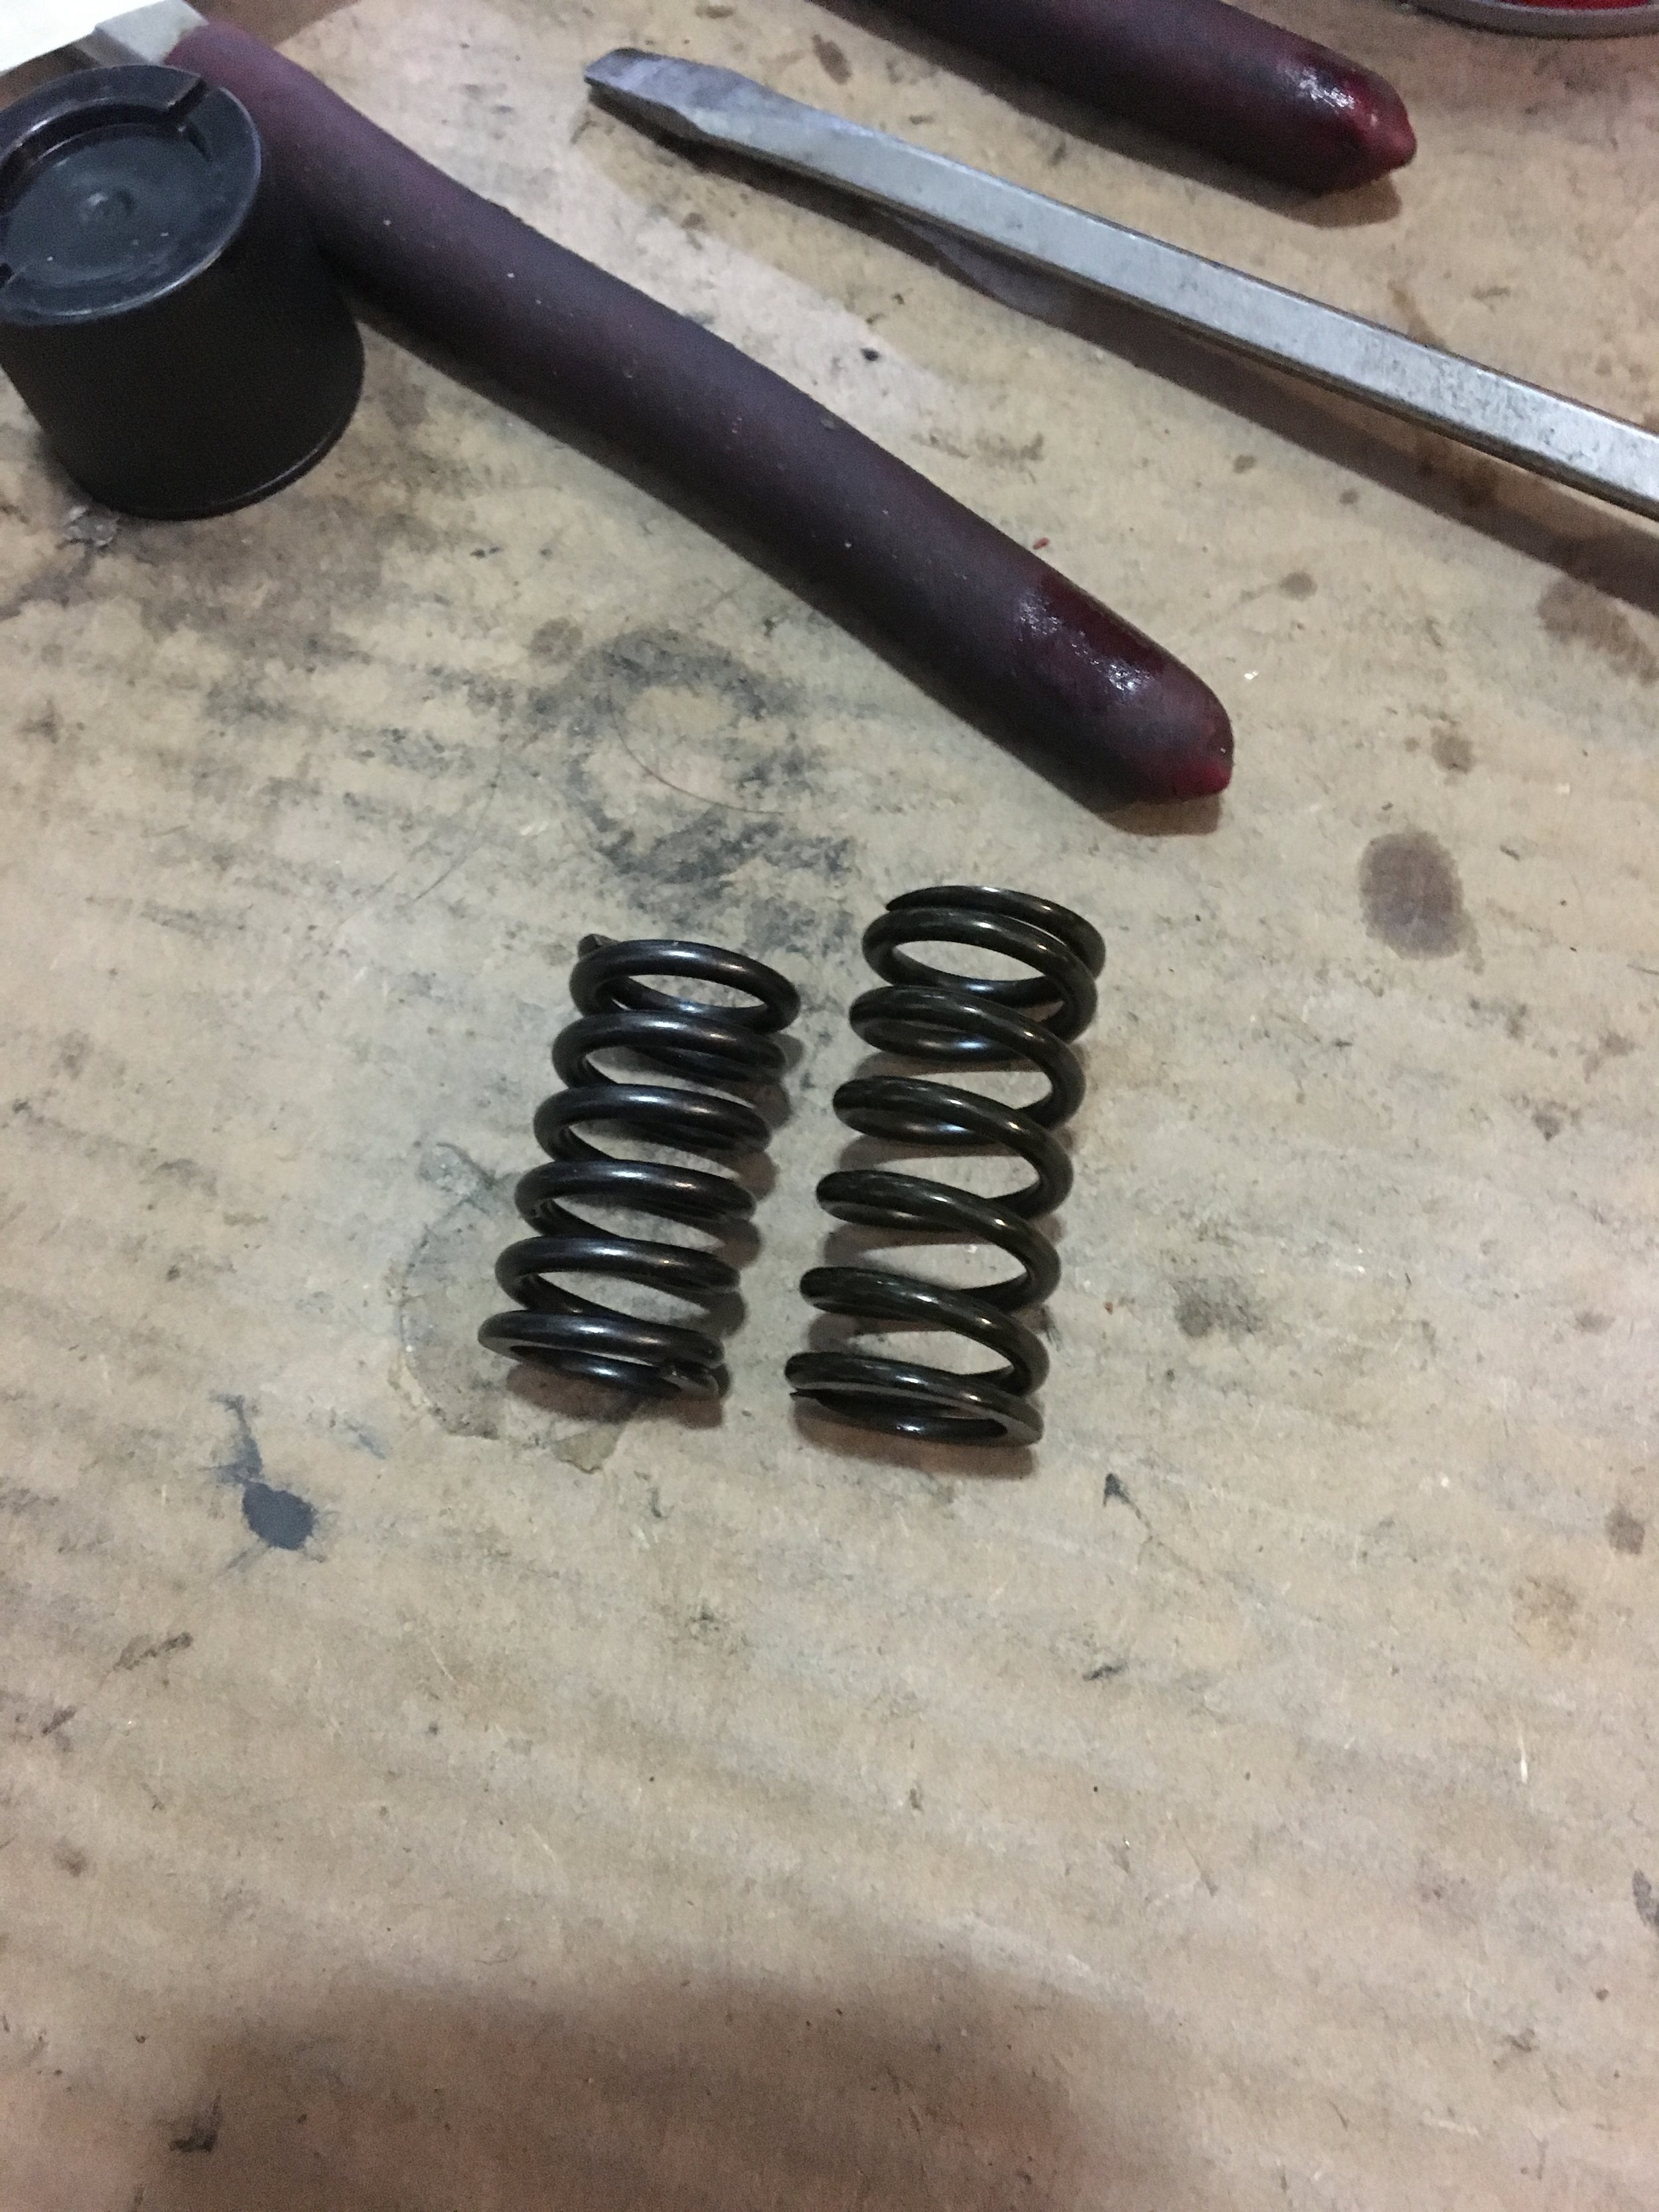
After that I install the Barnett clutch and tidy up the install. Adjusting the cable takes some experience, but since I already played around with my black bike a billion times, putting it in service was not an undertaking but rather just a process. The stock spring and Barnett spring difference can be seen in the picture.
Stator Upgrade and Electrics
After calculating the voltage draw I needed for all the accessories, it was definitely a necessity for a stator upgrade. I went with a 250 watt stator upgrade from Ricky Stator.
The stock stator is at 200 watts.
(55w low beam + 60w high beam + 21w brake light + 6w of instrument light + 35w ignition + 5w turn signal = we are at around 182w roughly)
Add
(15w aux light + 40w heated grip + 15w gps + 24w phone charger + 40w heated vest = 134w)
Minus LED upgrade
20w headlight + 30w high beam + 15w brake light + 3w turn signal = 68w
182w + 134w - 68w = 248w
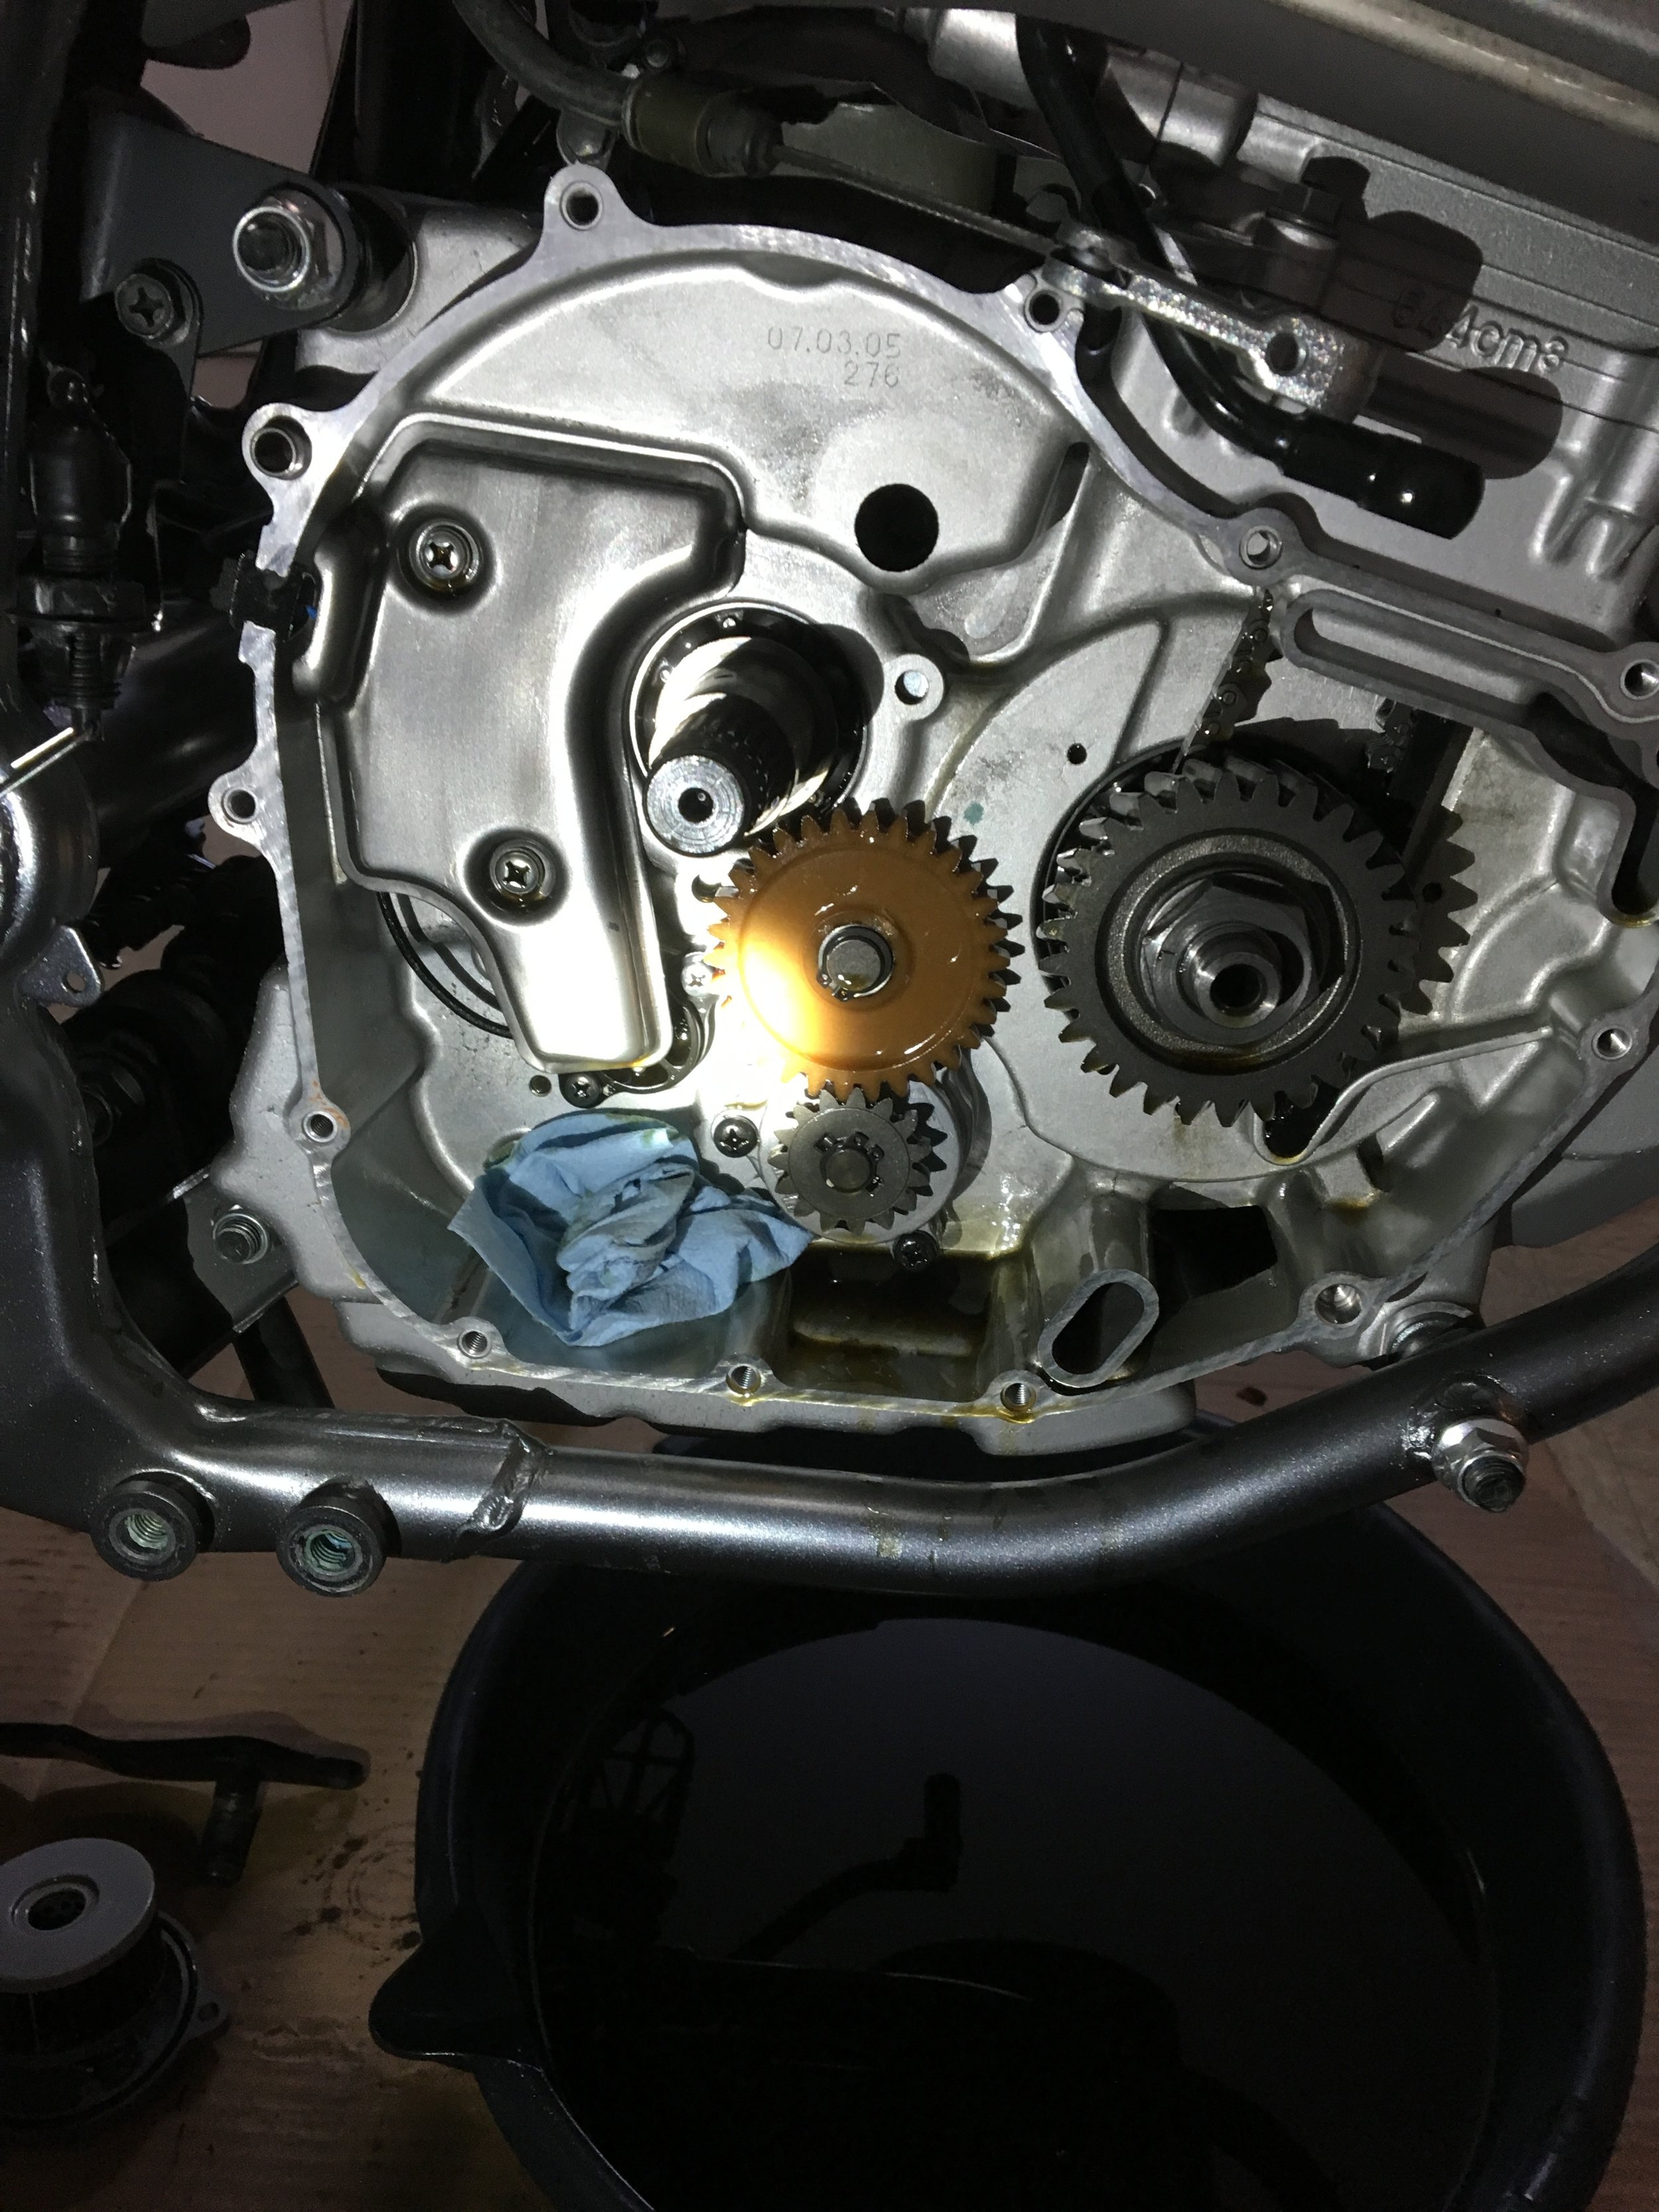
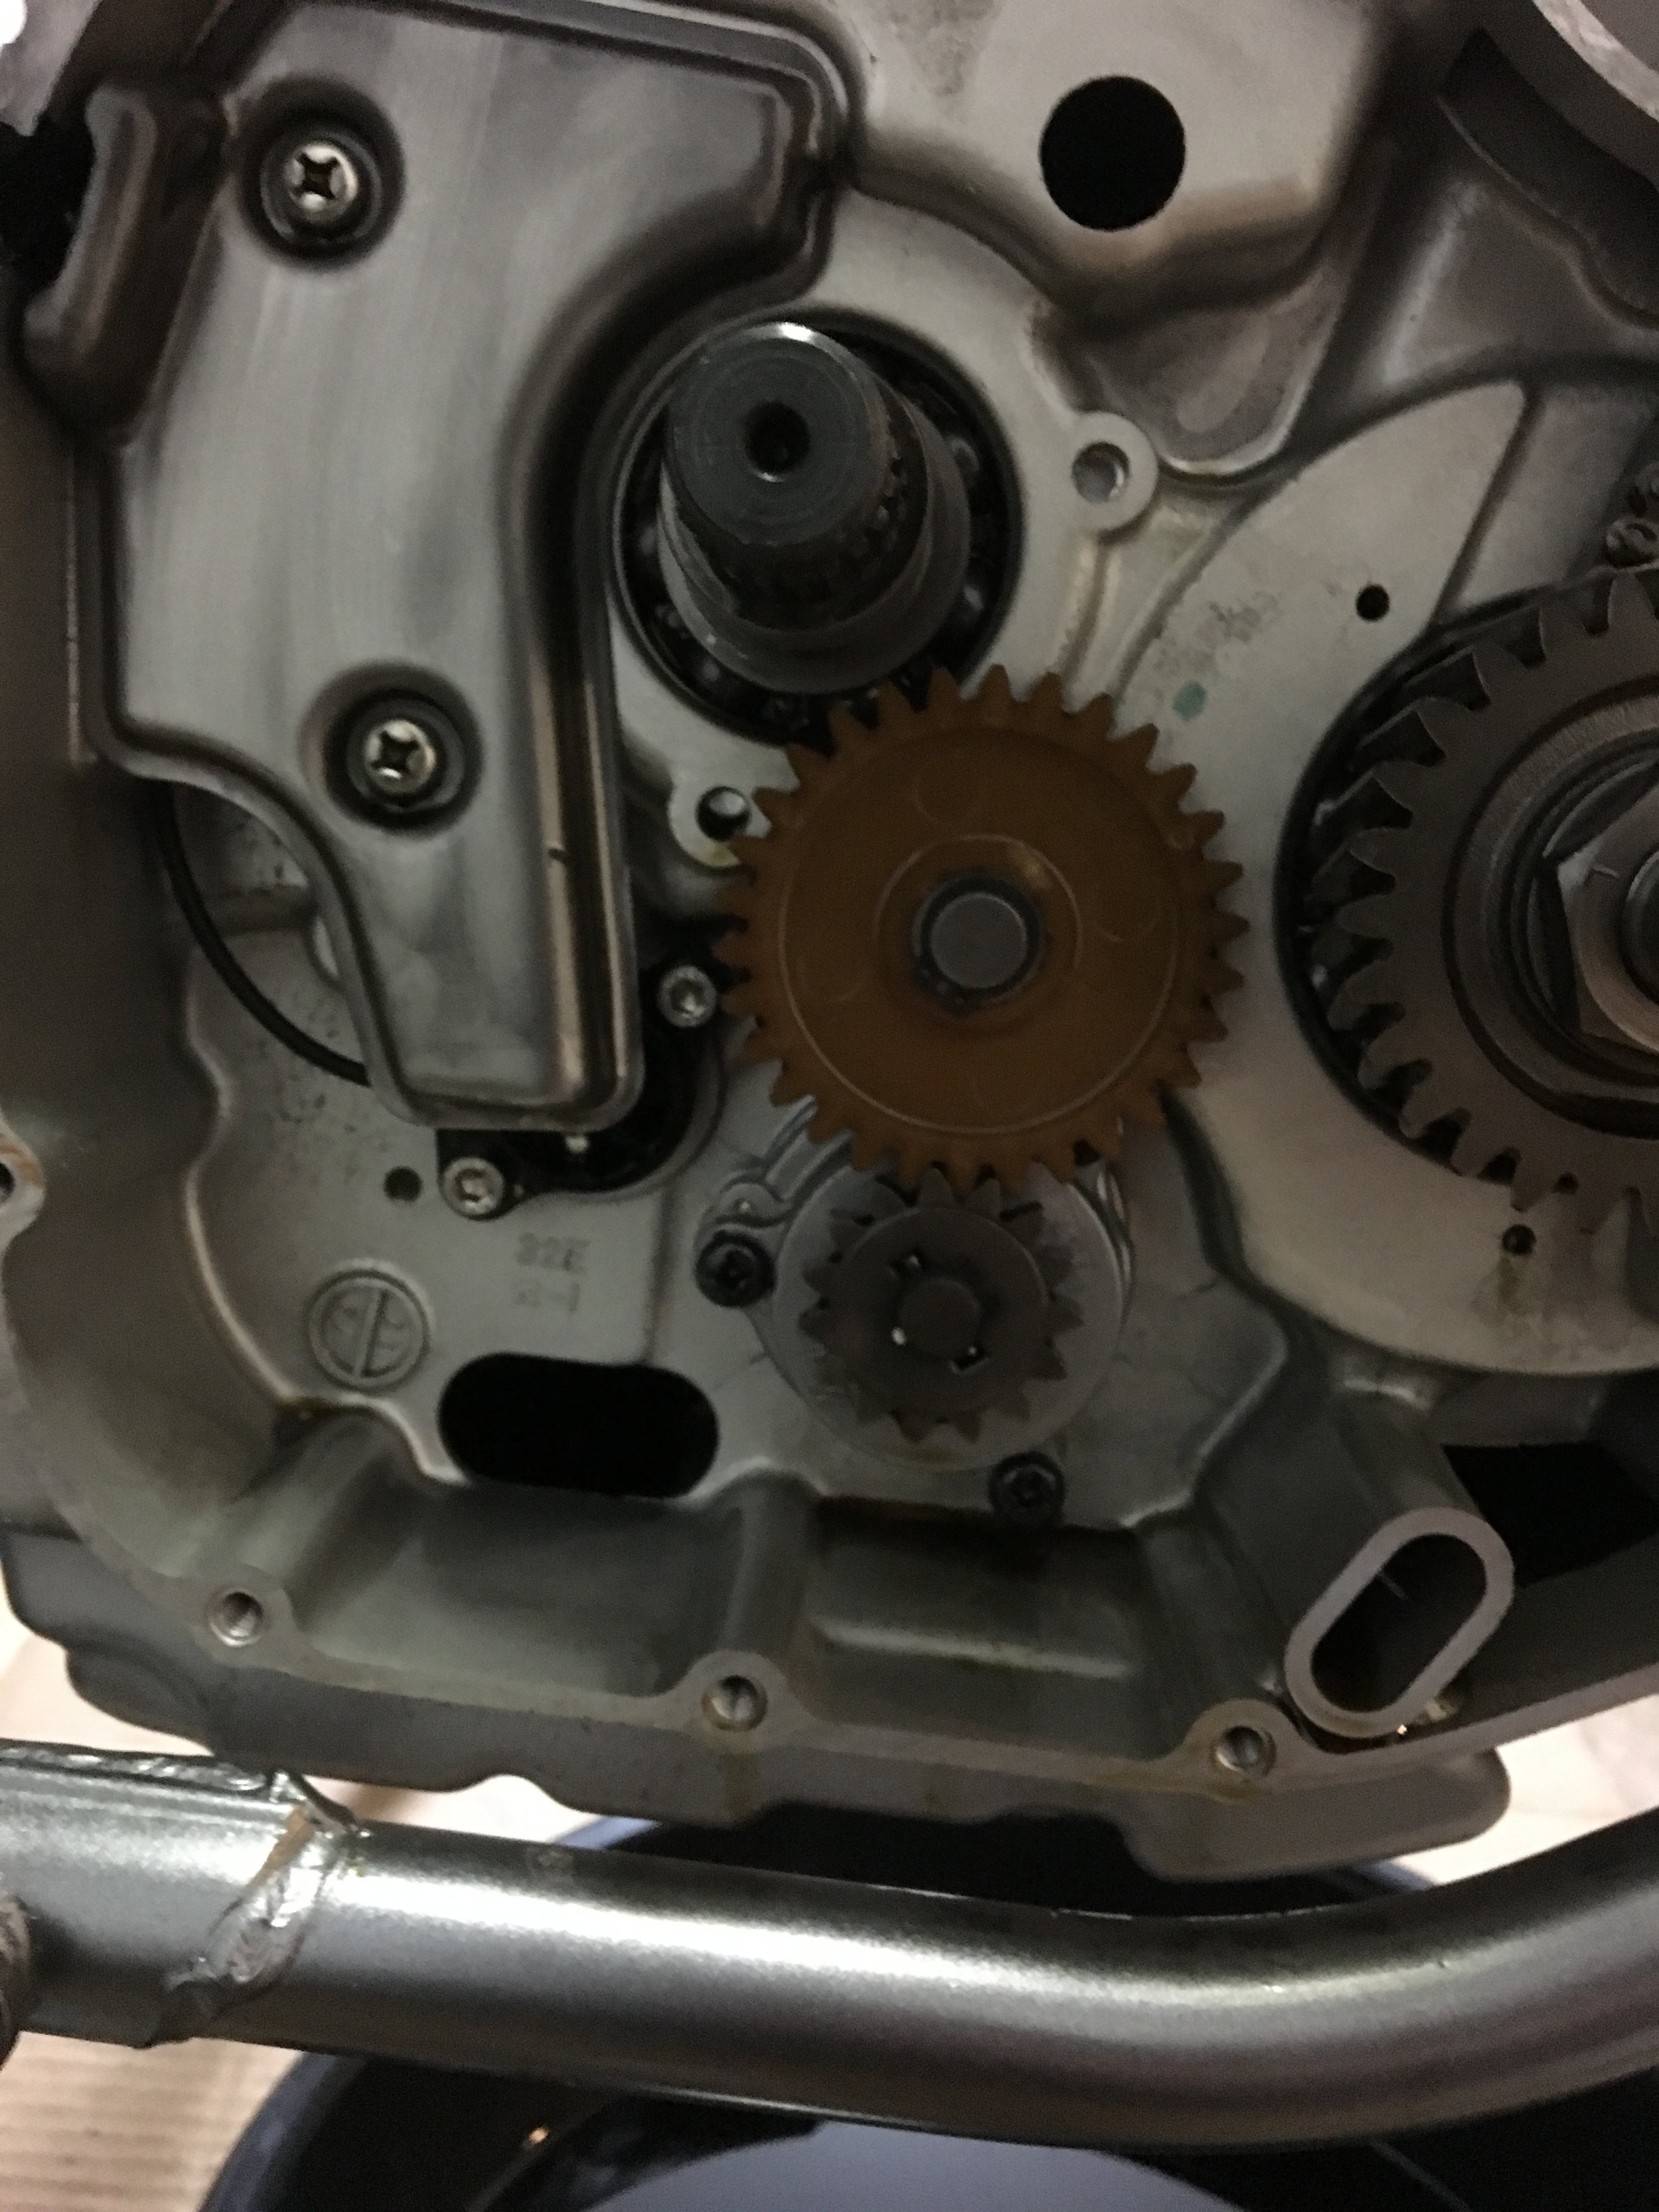
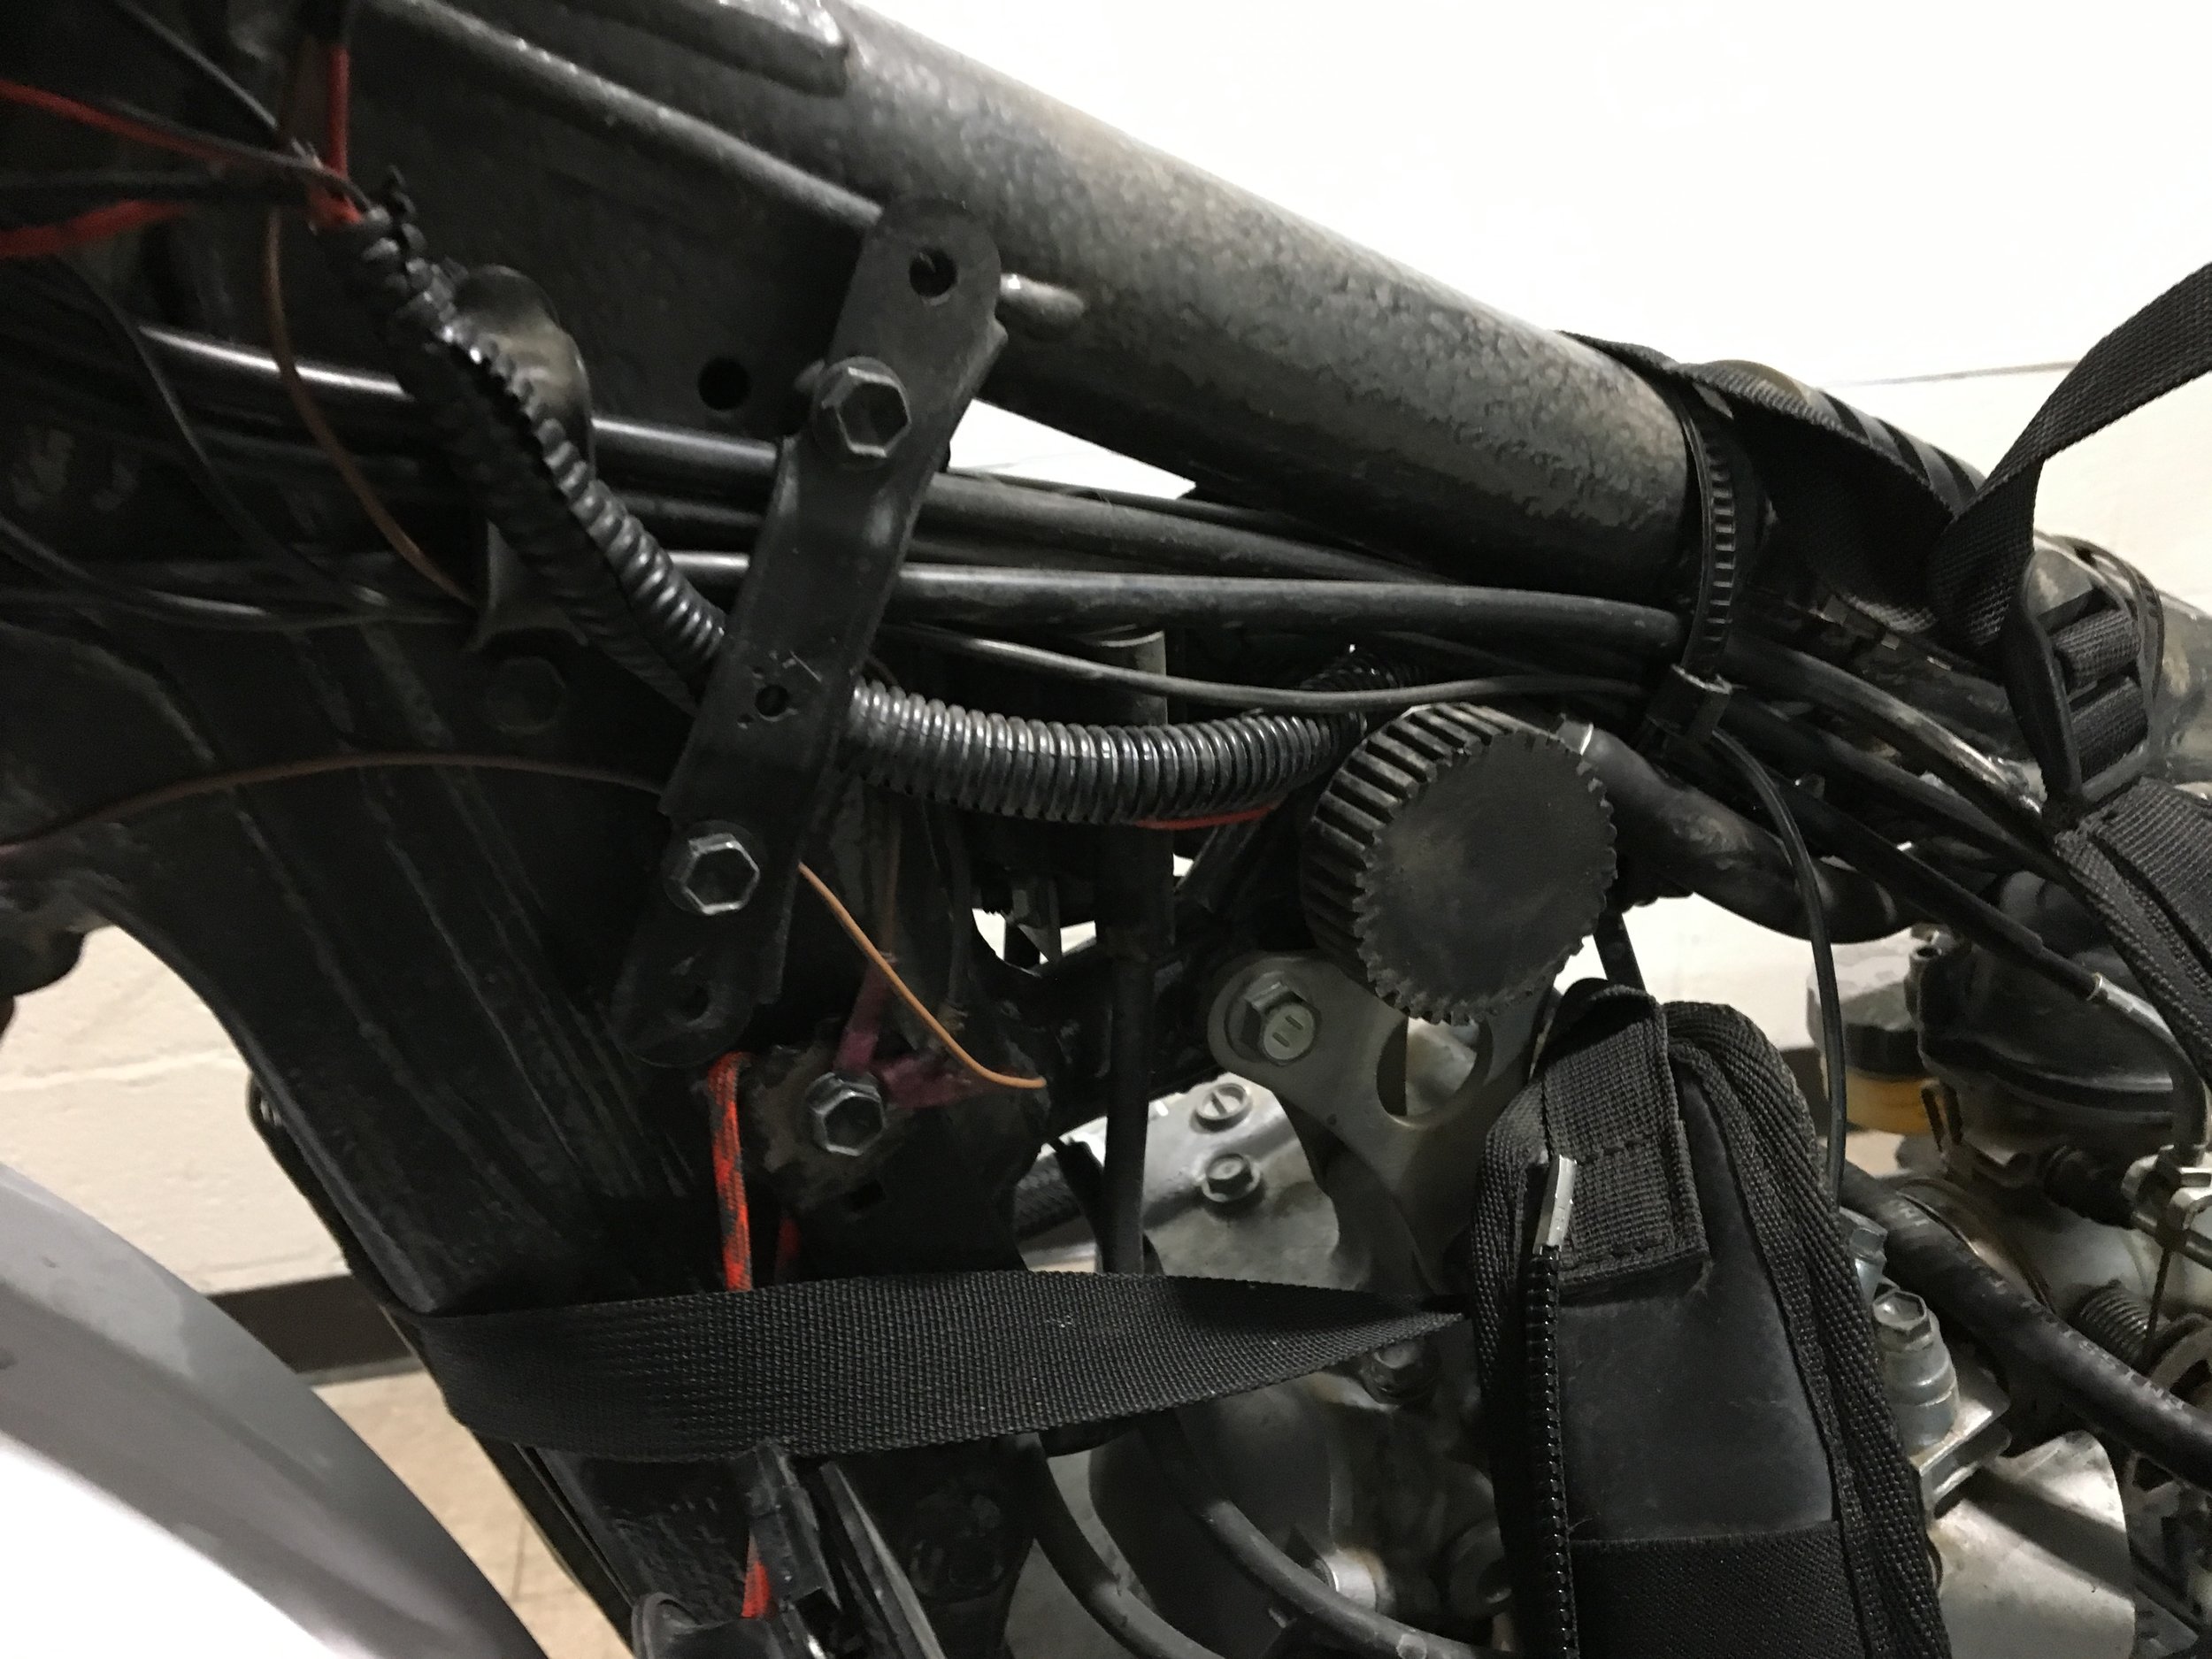
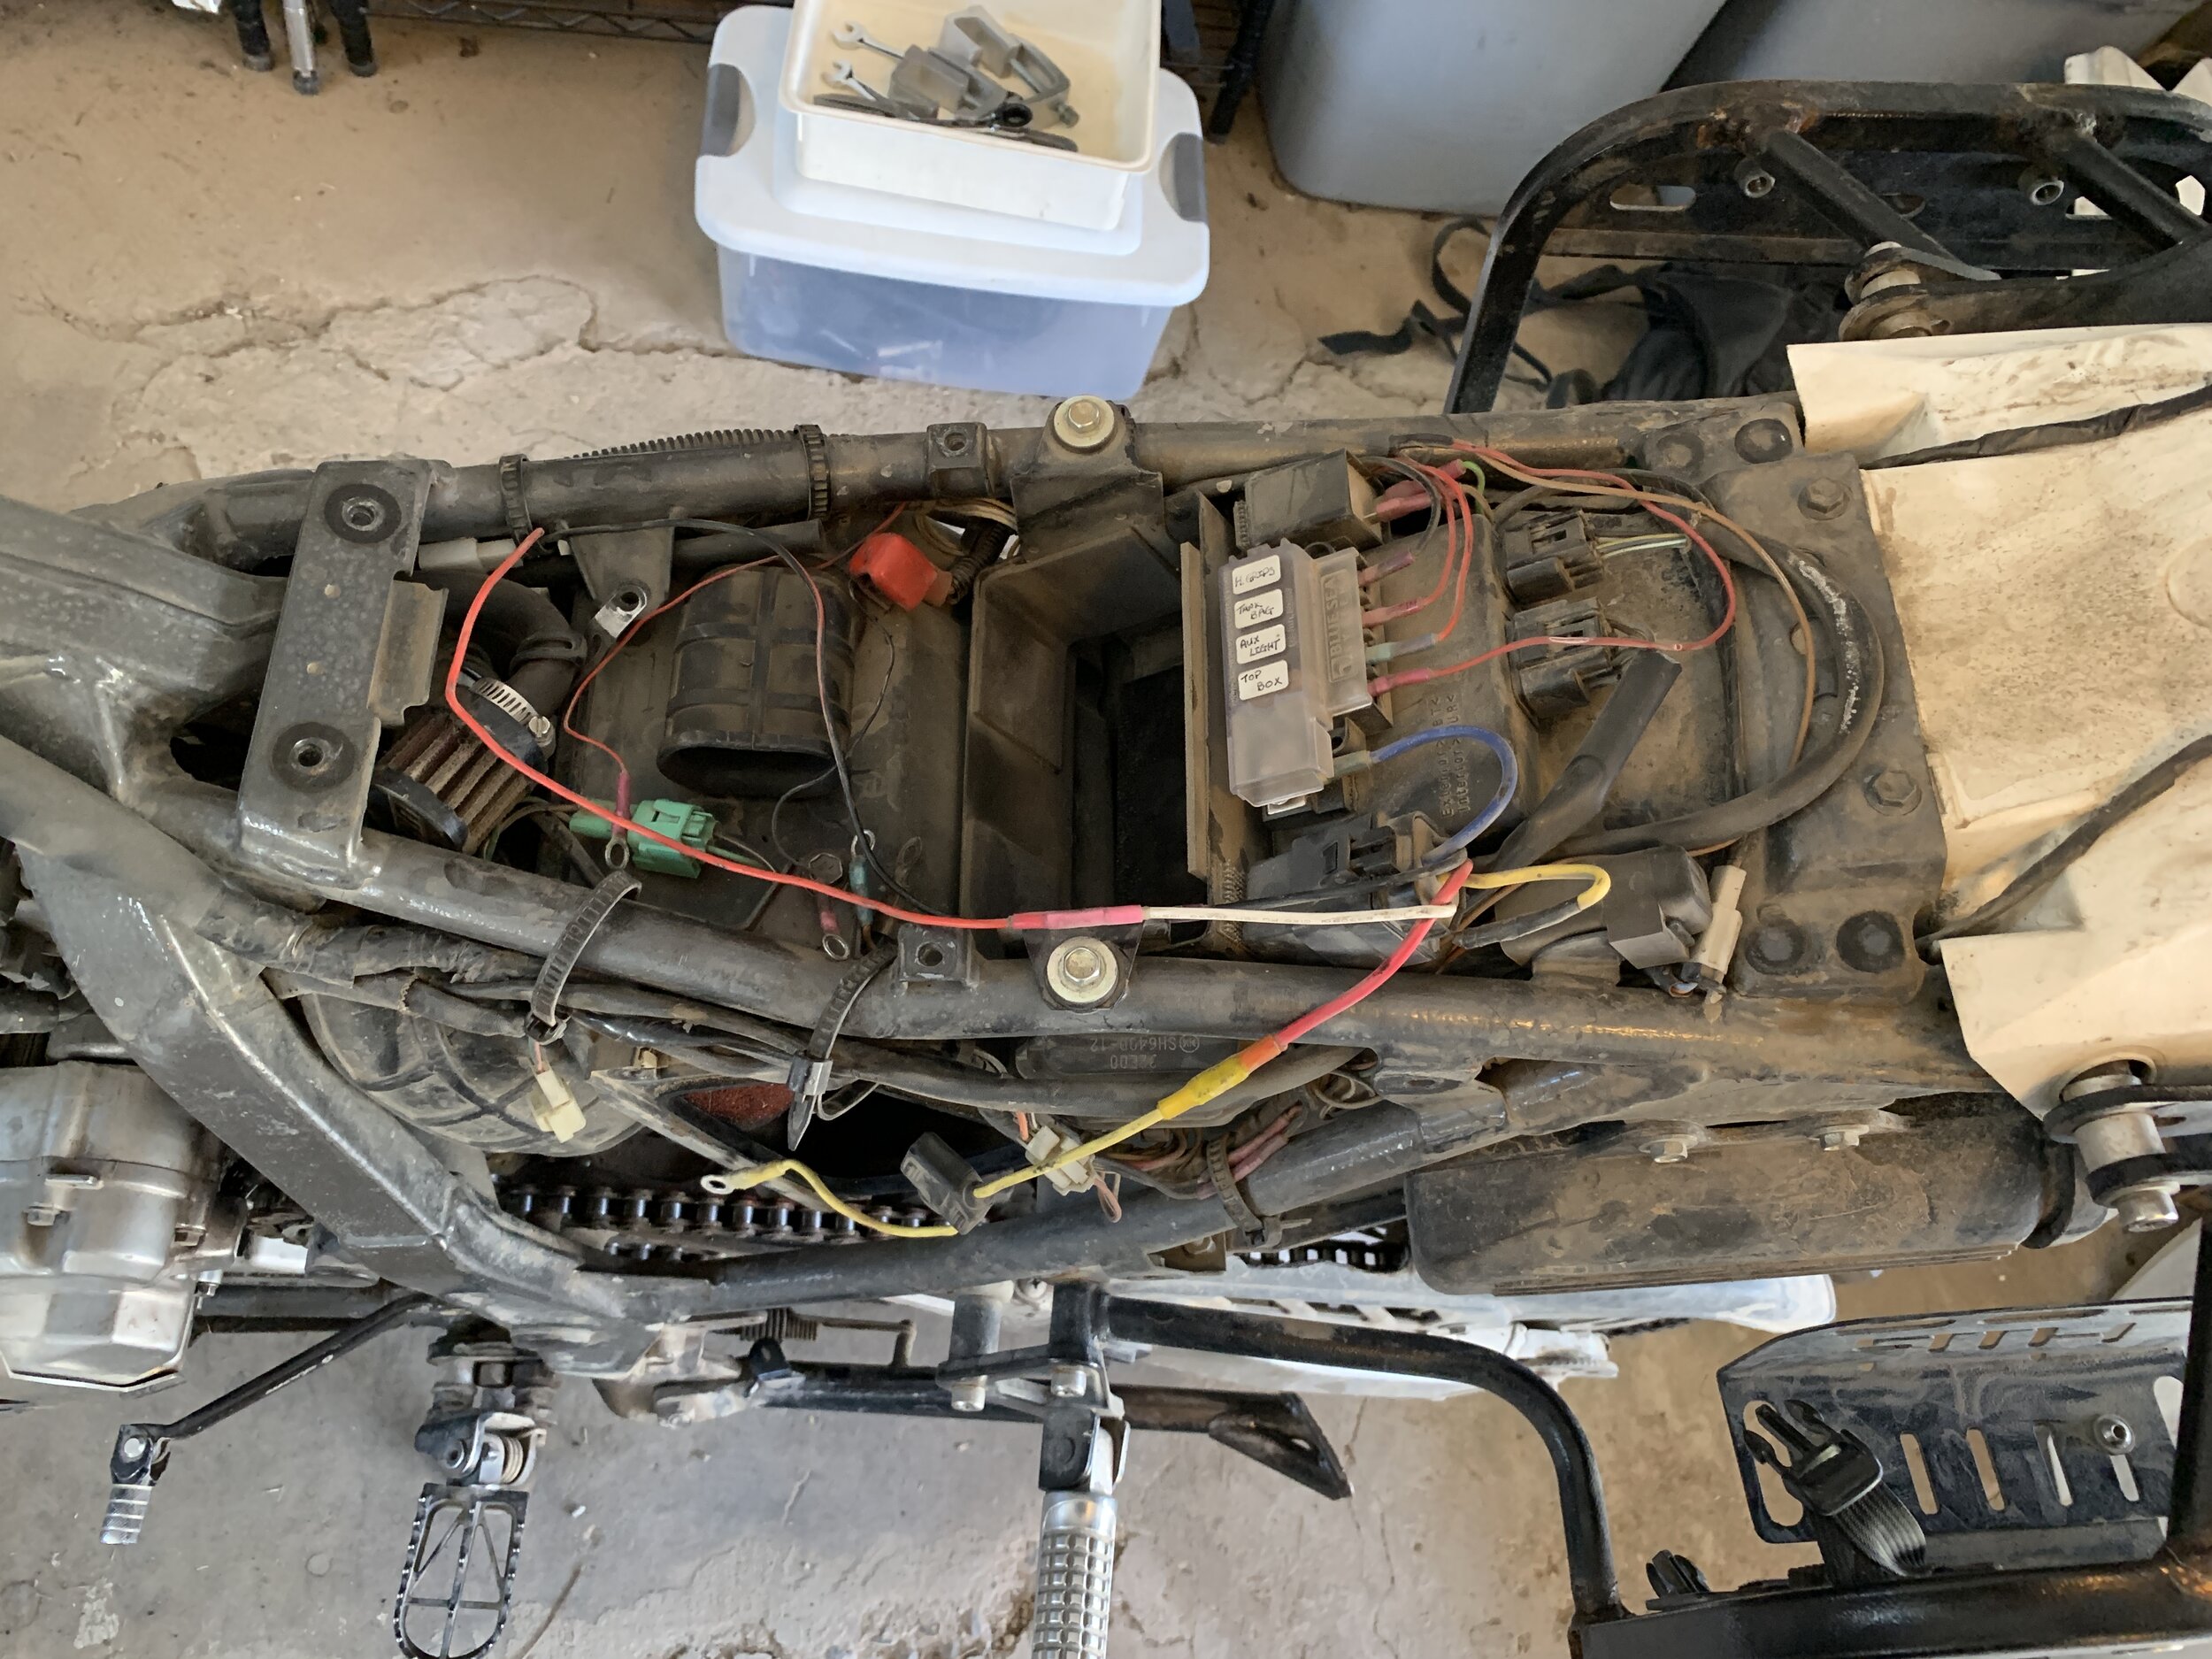
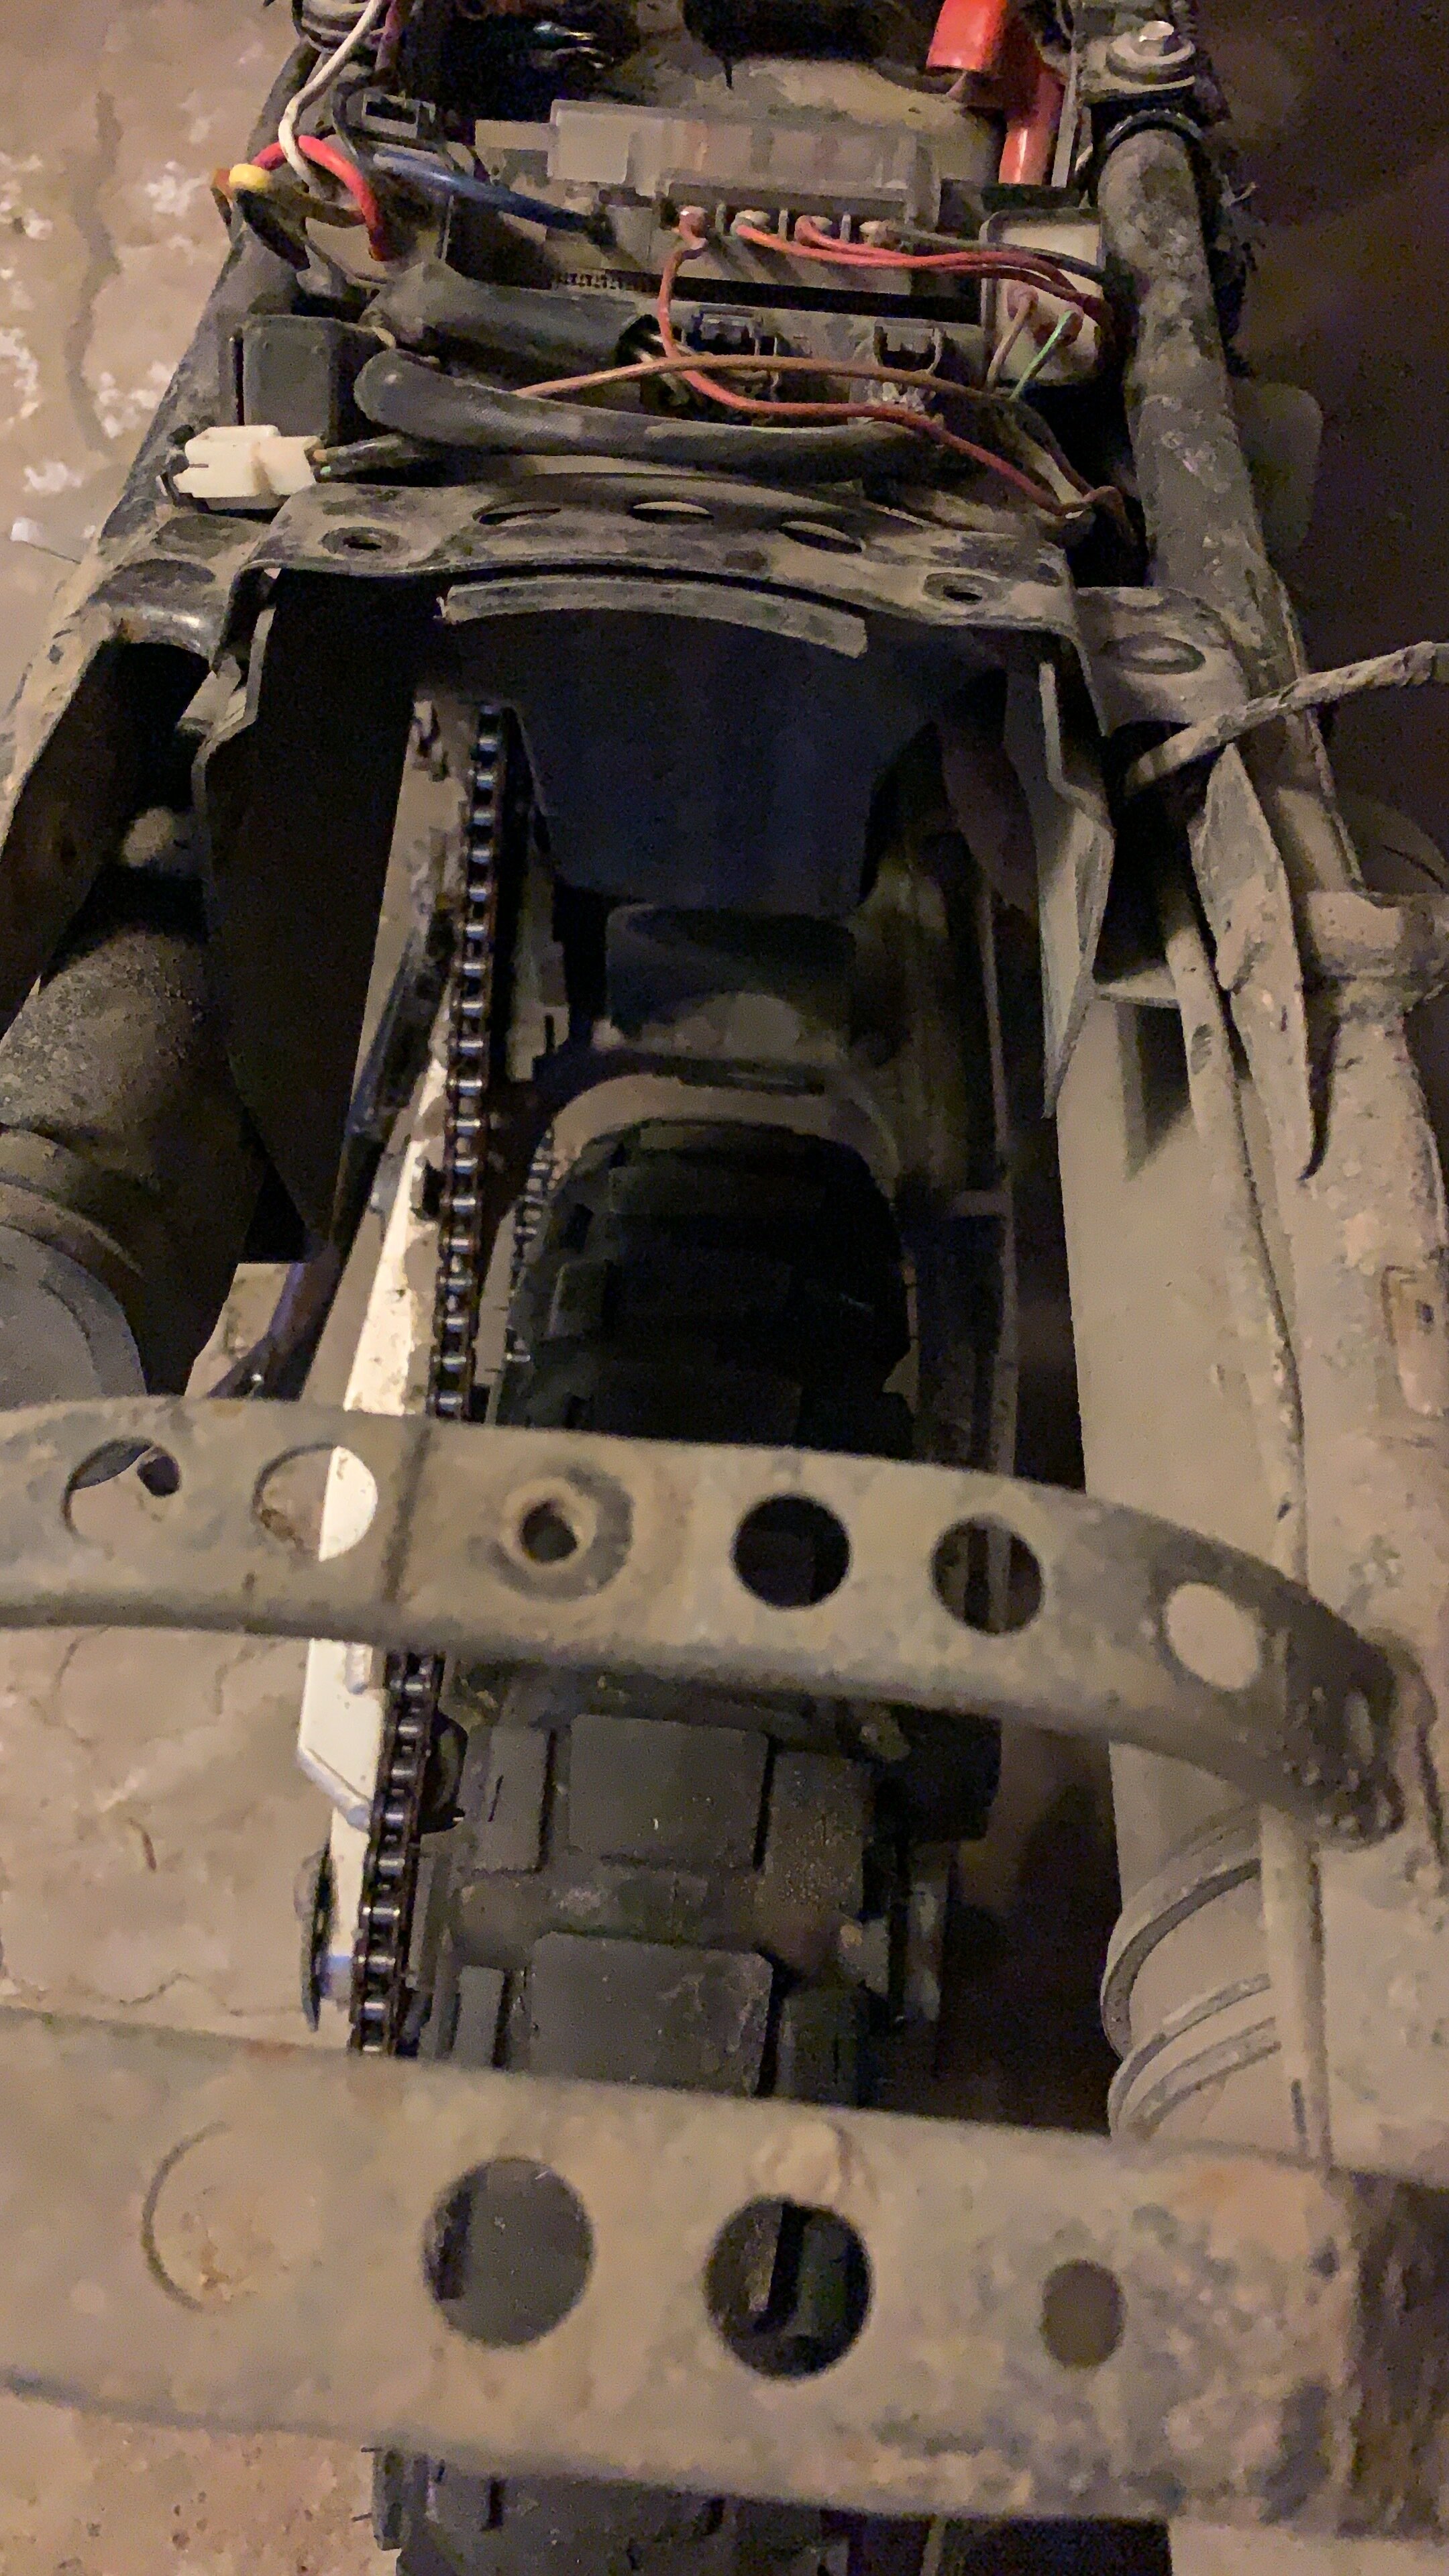
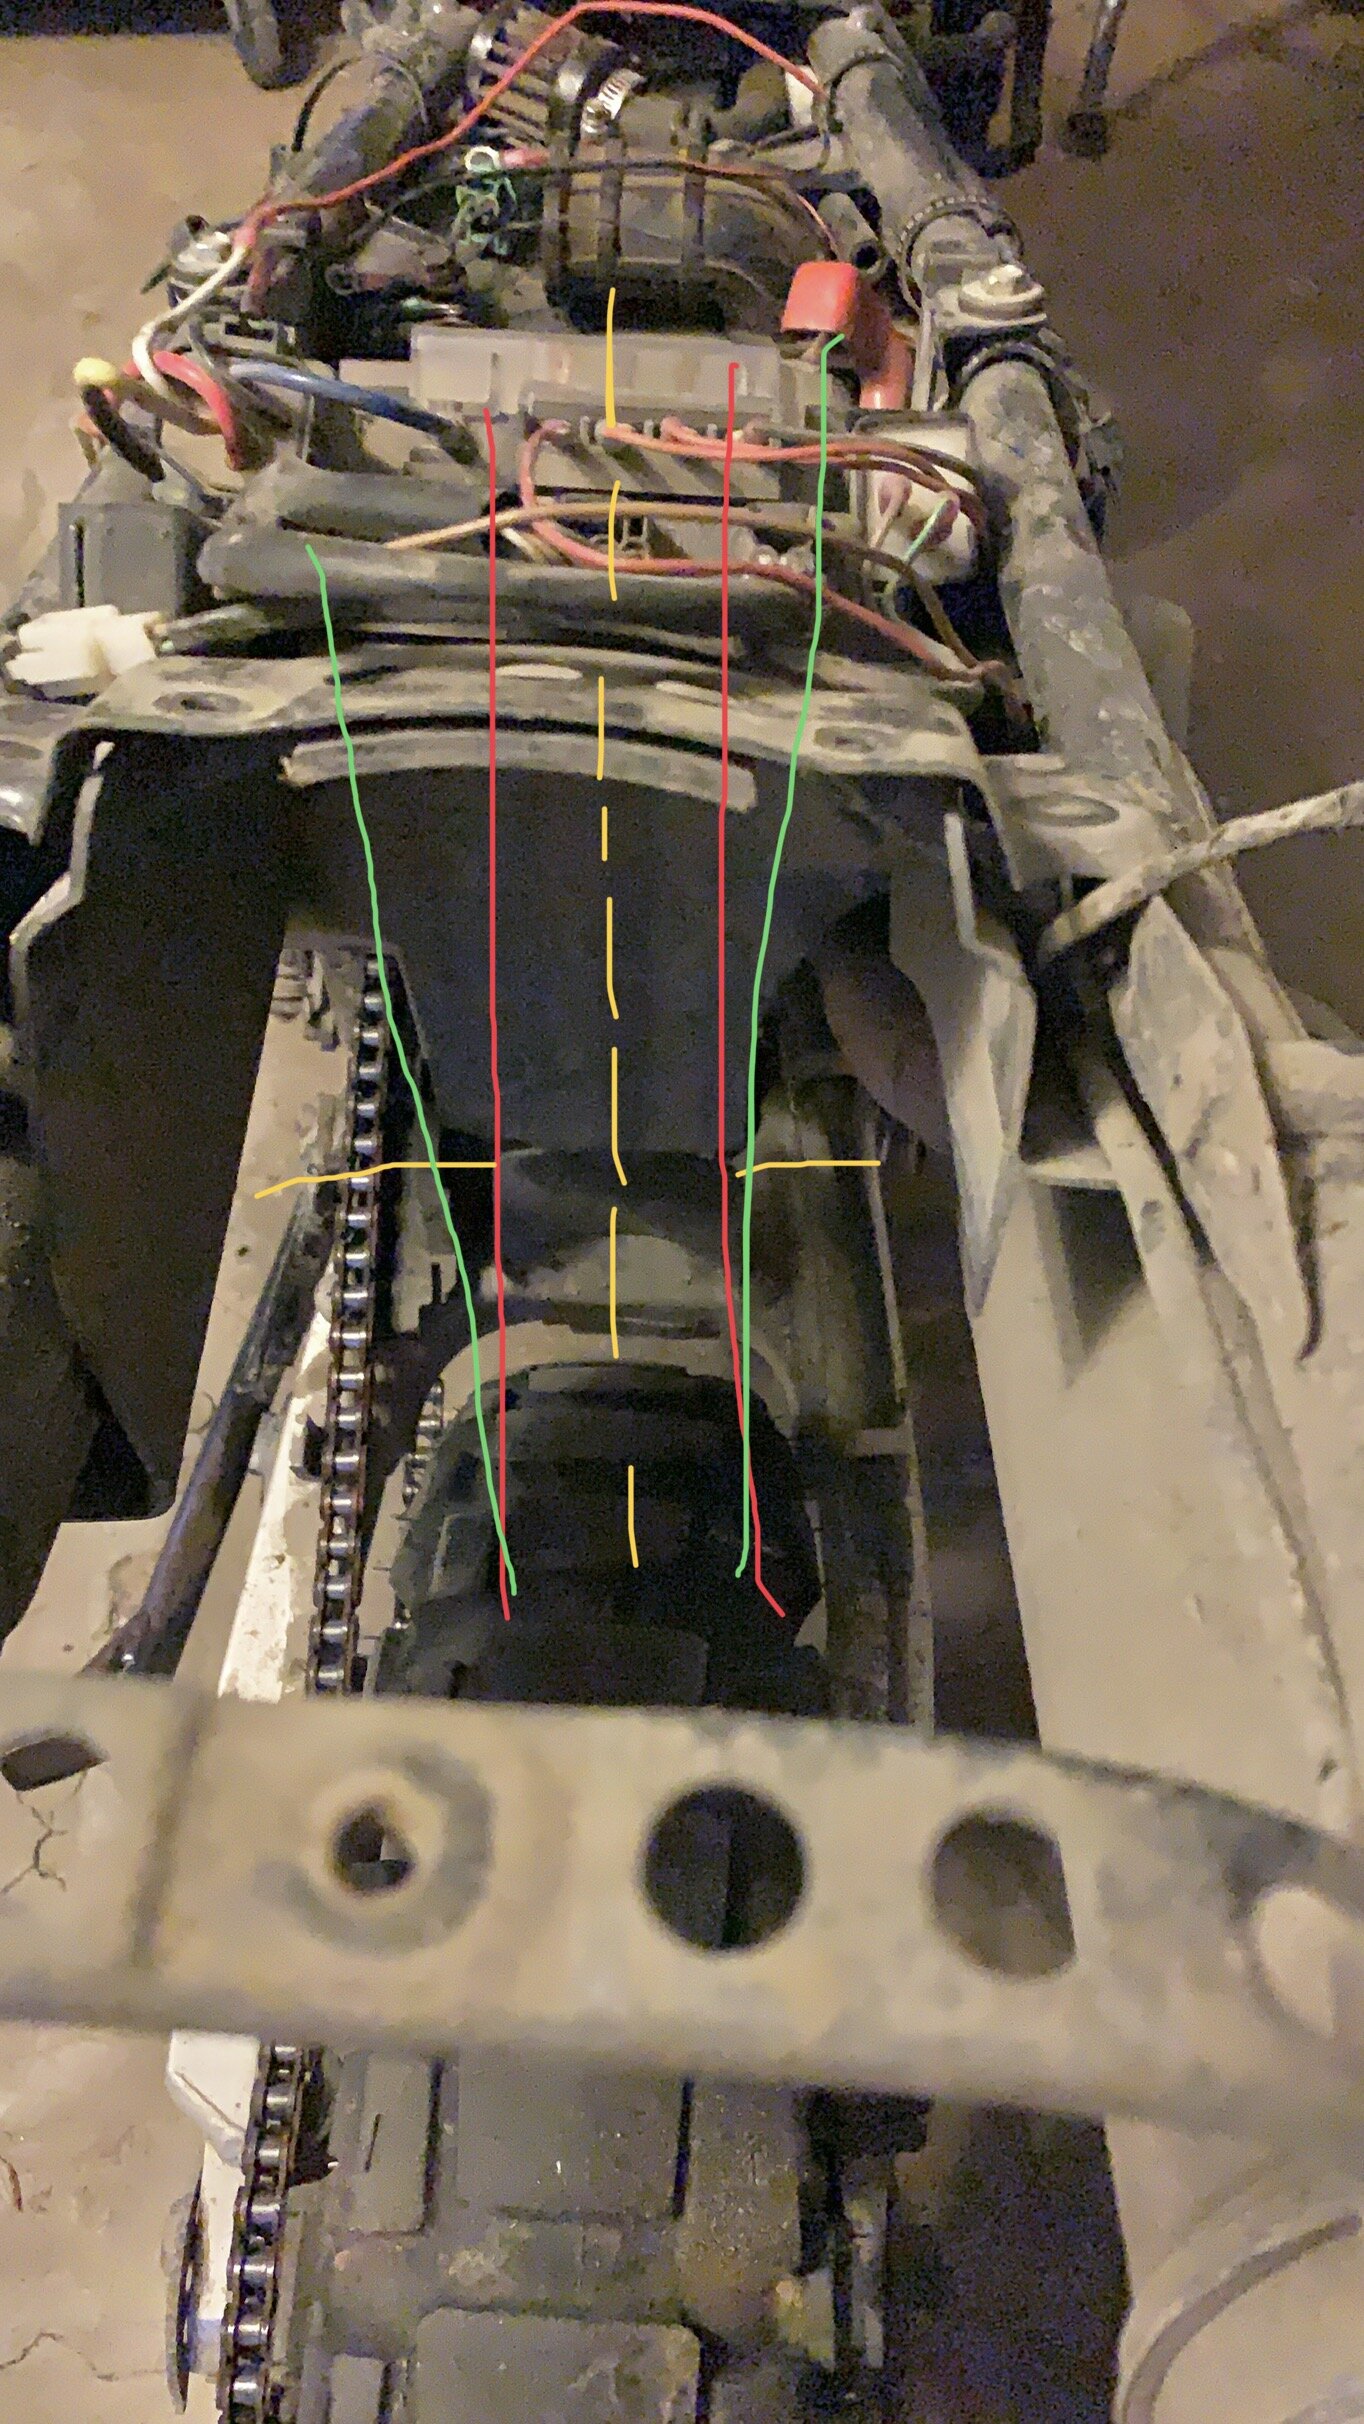
I have, that can be charged on the go, if I don't get to lodging. So the stator upgrade is a bare minimum. I got mine from Ricky Stator. Install is pretty easy. All the bolts are the same length on this side of the engine casing. Gasket is almost guarantee to break when removed. The ebay gasket that is 10 dollars is just as good as the 20 dollar OEM. Just make sure you have one when you need to remove the cover. After installing the stator I sourced a distribution block from a marine store, just because I like how robust the unit is and wired in a waterproof relay to manage the power. I used the ignition power under under the gas tank by the rear shock as the trigger for the relay power. Two independent relay one for battery tender, and the other for the source lead for the ignition to the relay. The later is probably overkill, but I did it anyways.
![IMG_9057[542].JPG](https://images.squarespace-cdn.com/content/v1/5a1360dfd74cff54b853dd92/1512484780794-UXRUW4CNH51GG5U50M8L/IMG_9057%5B542%5D.JPG)
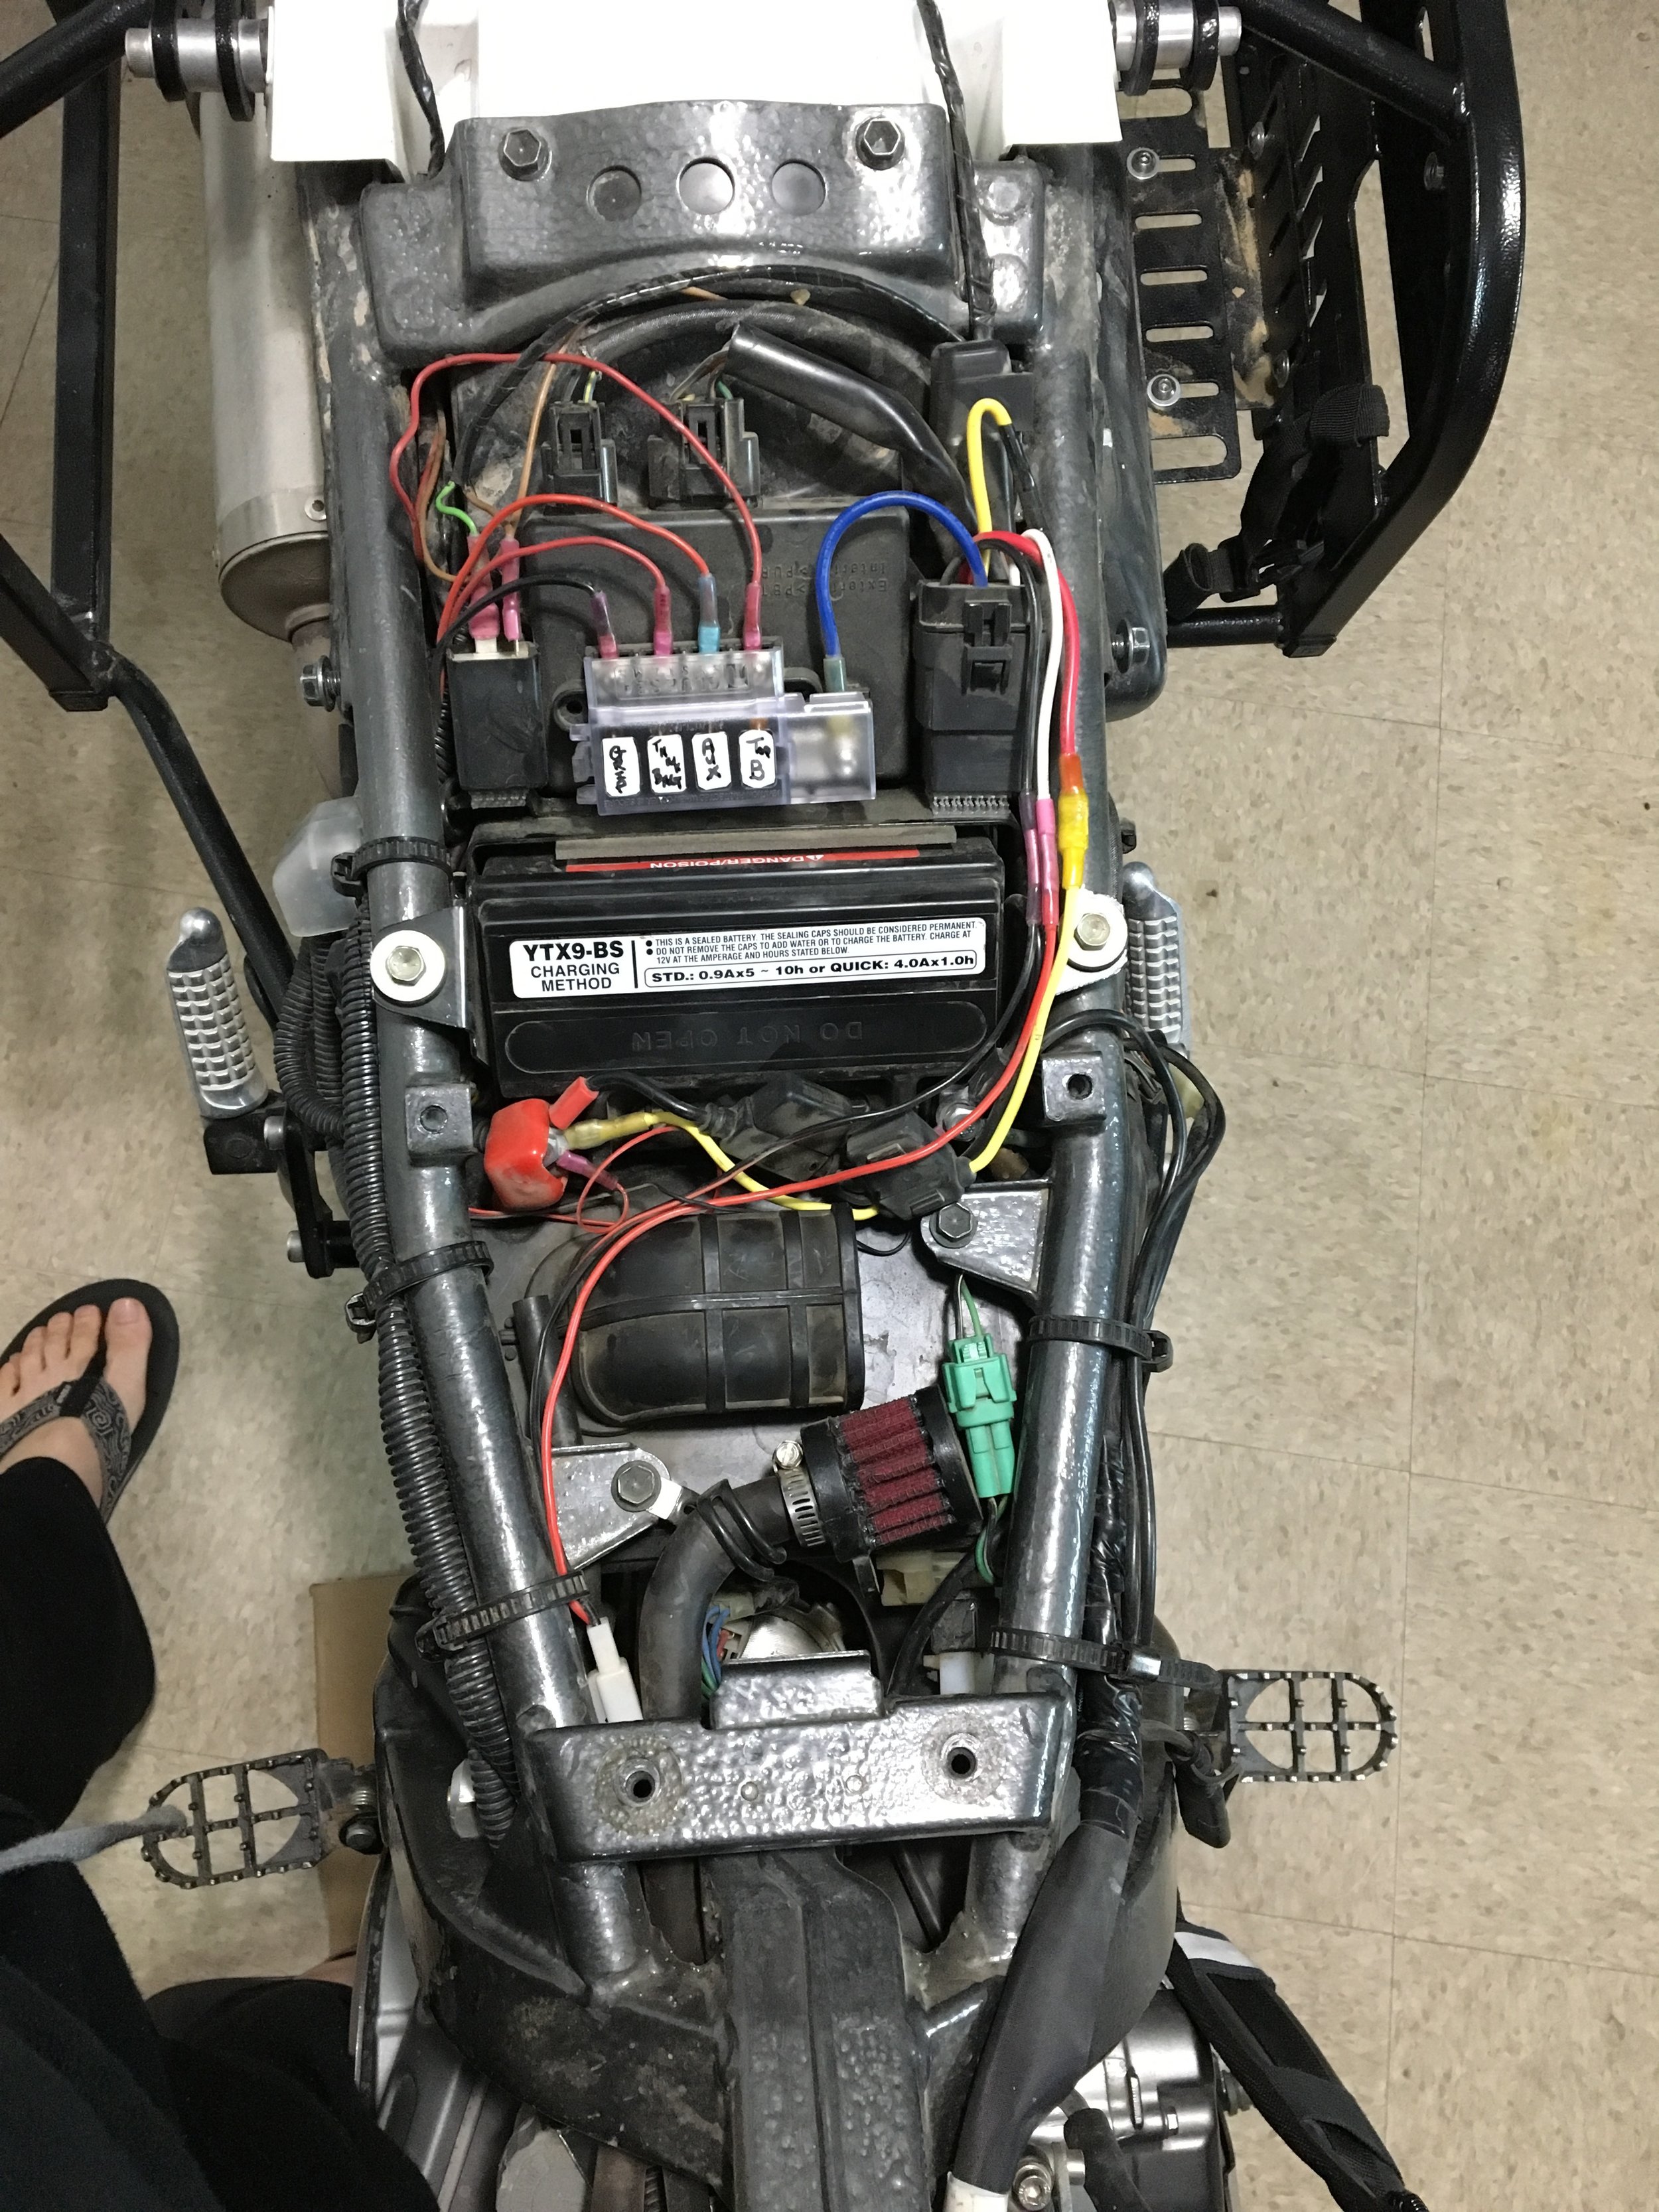
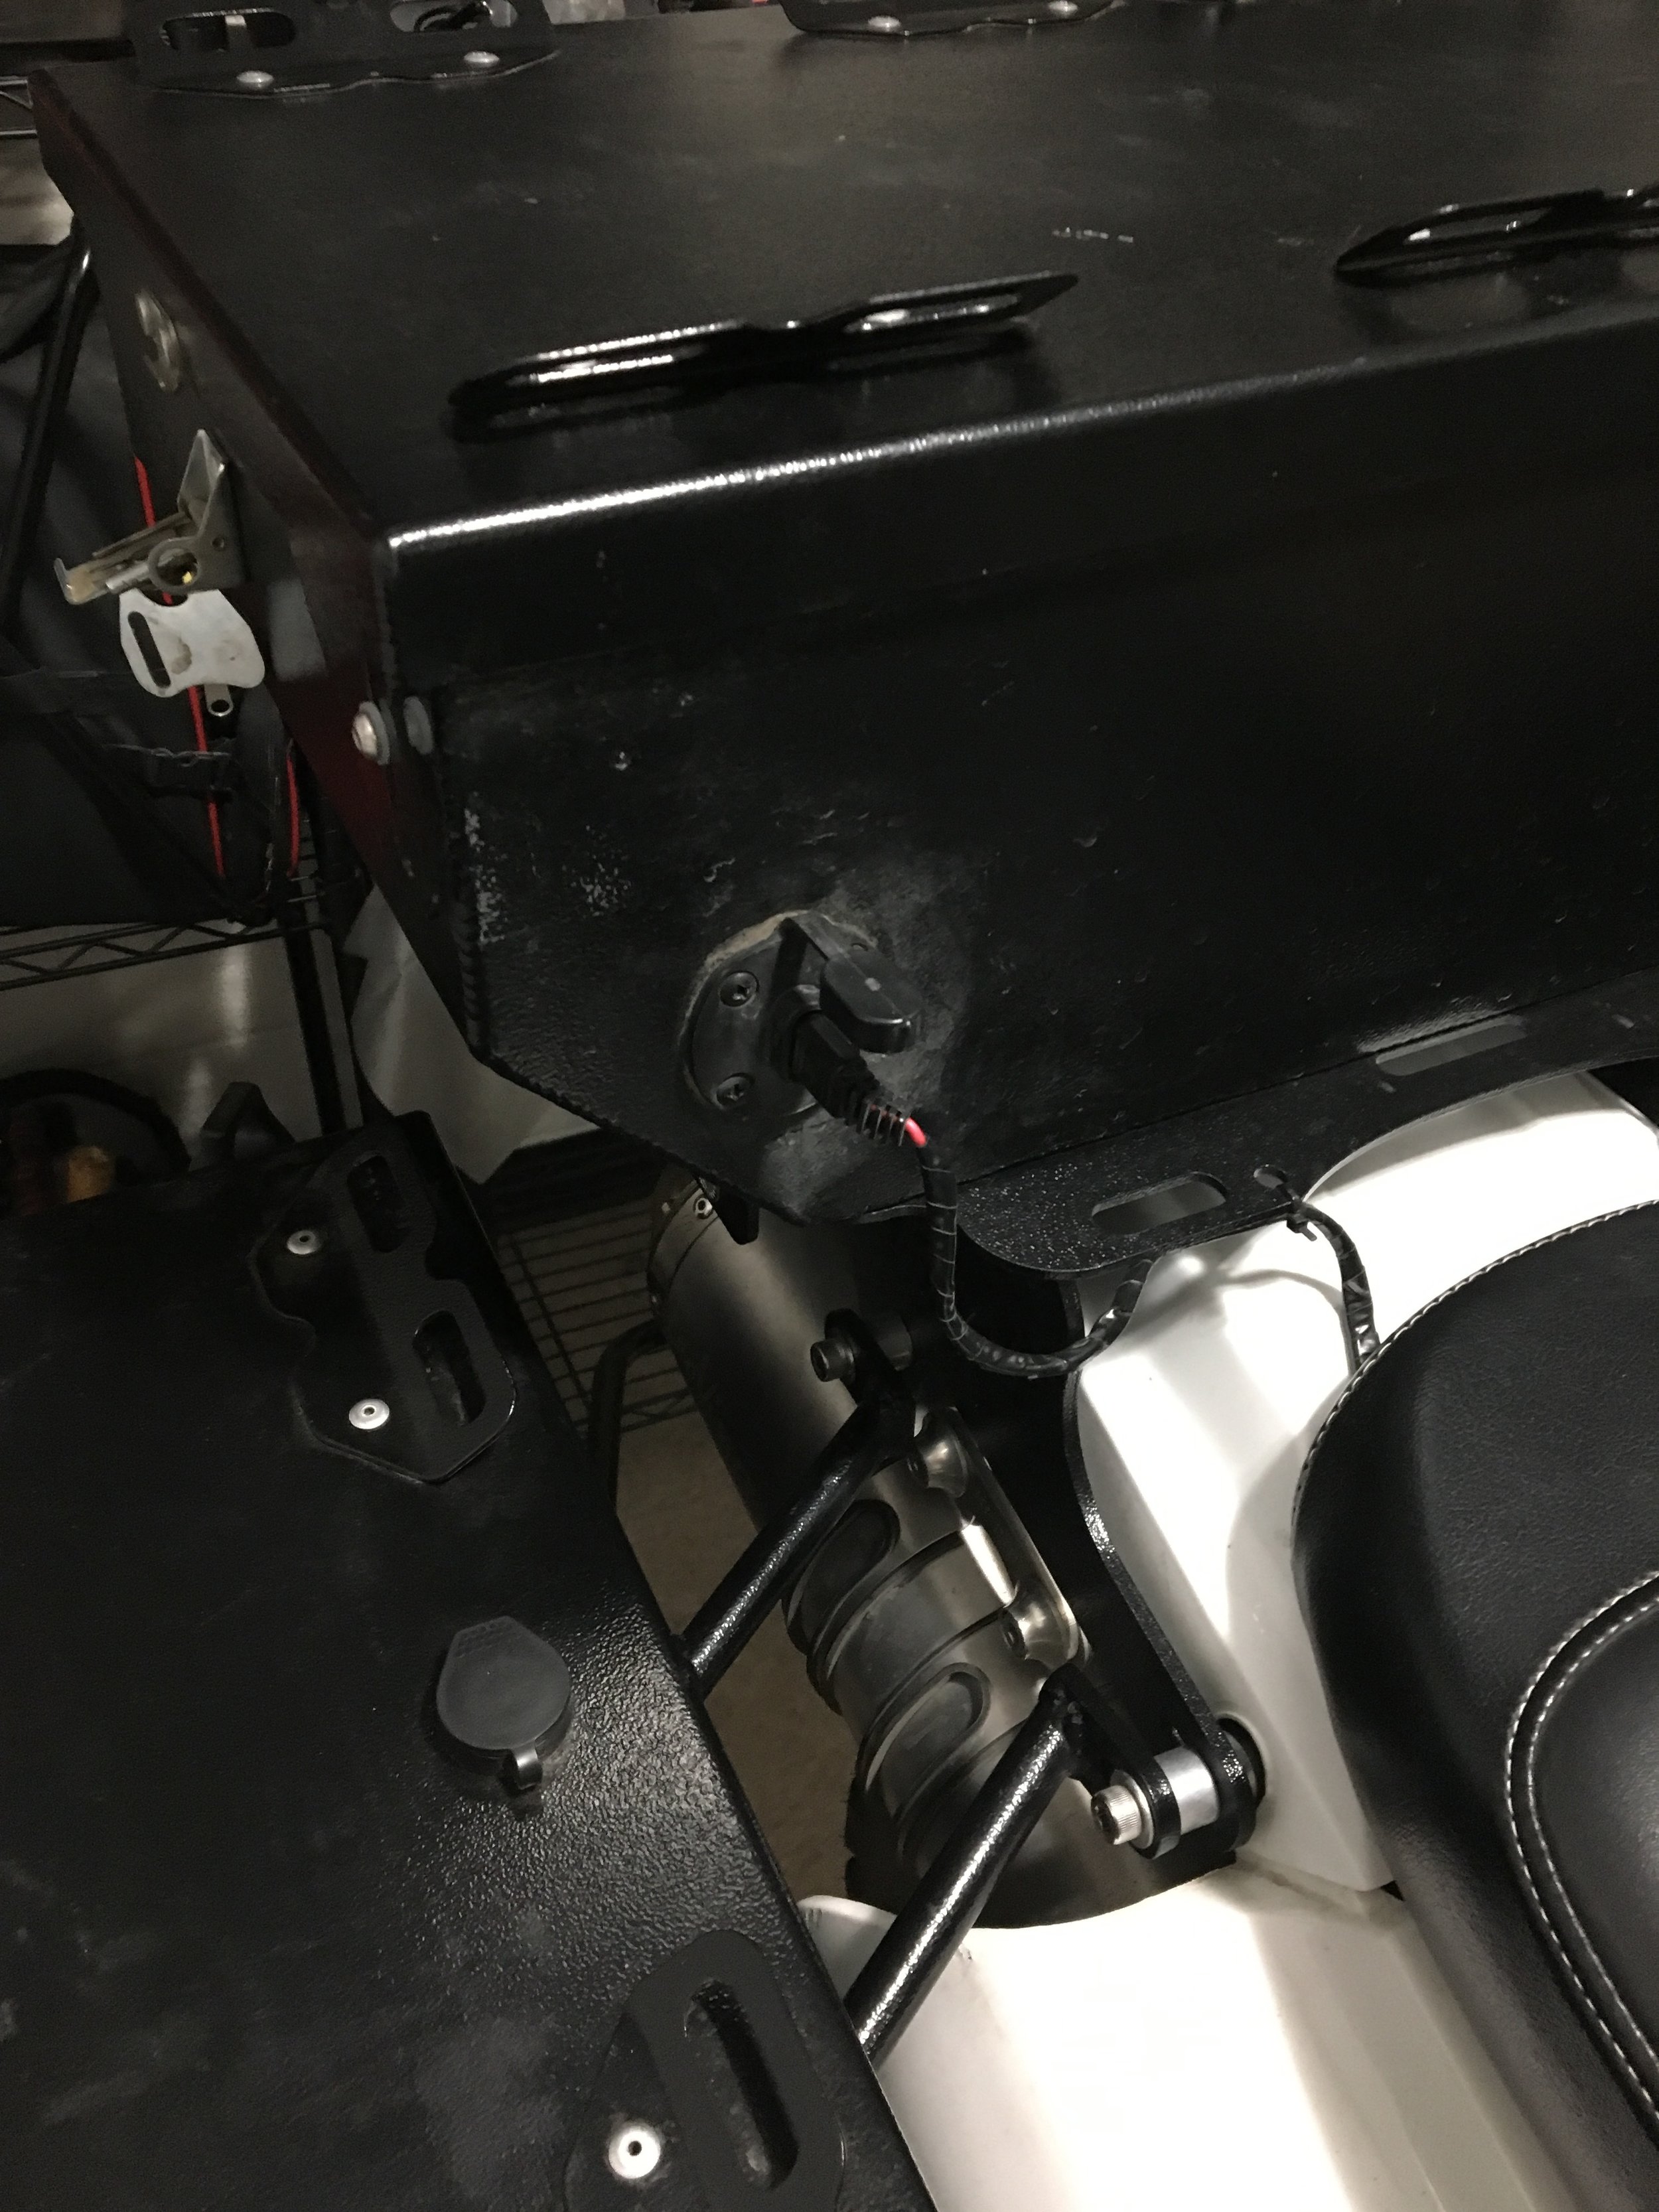
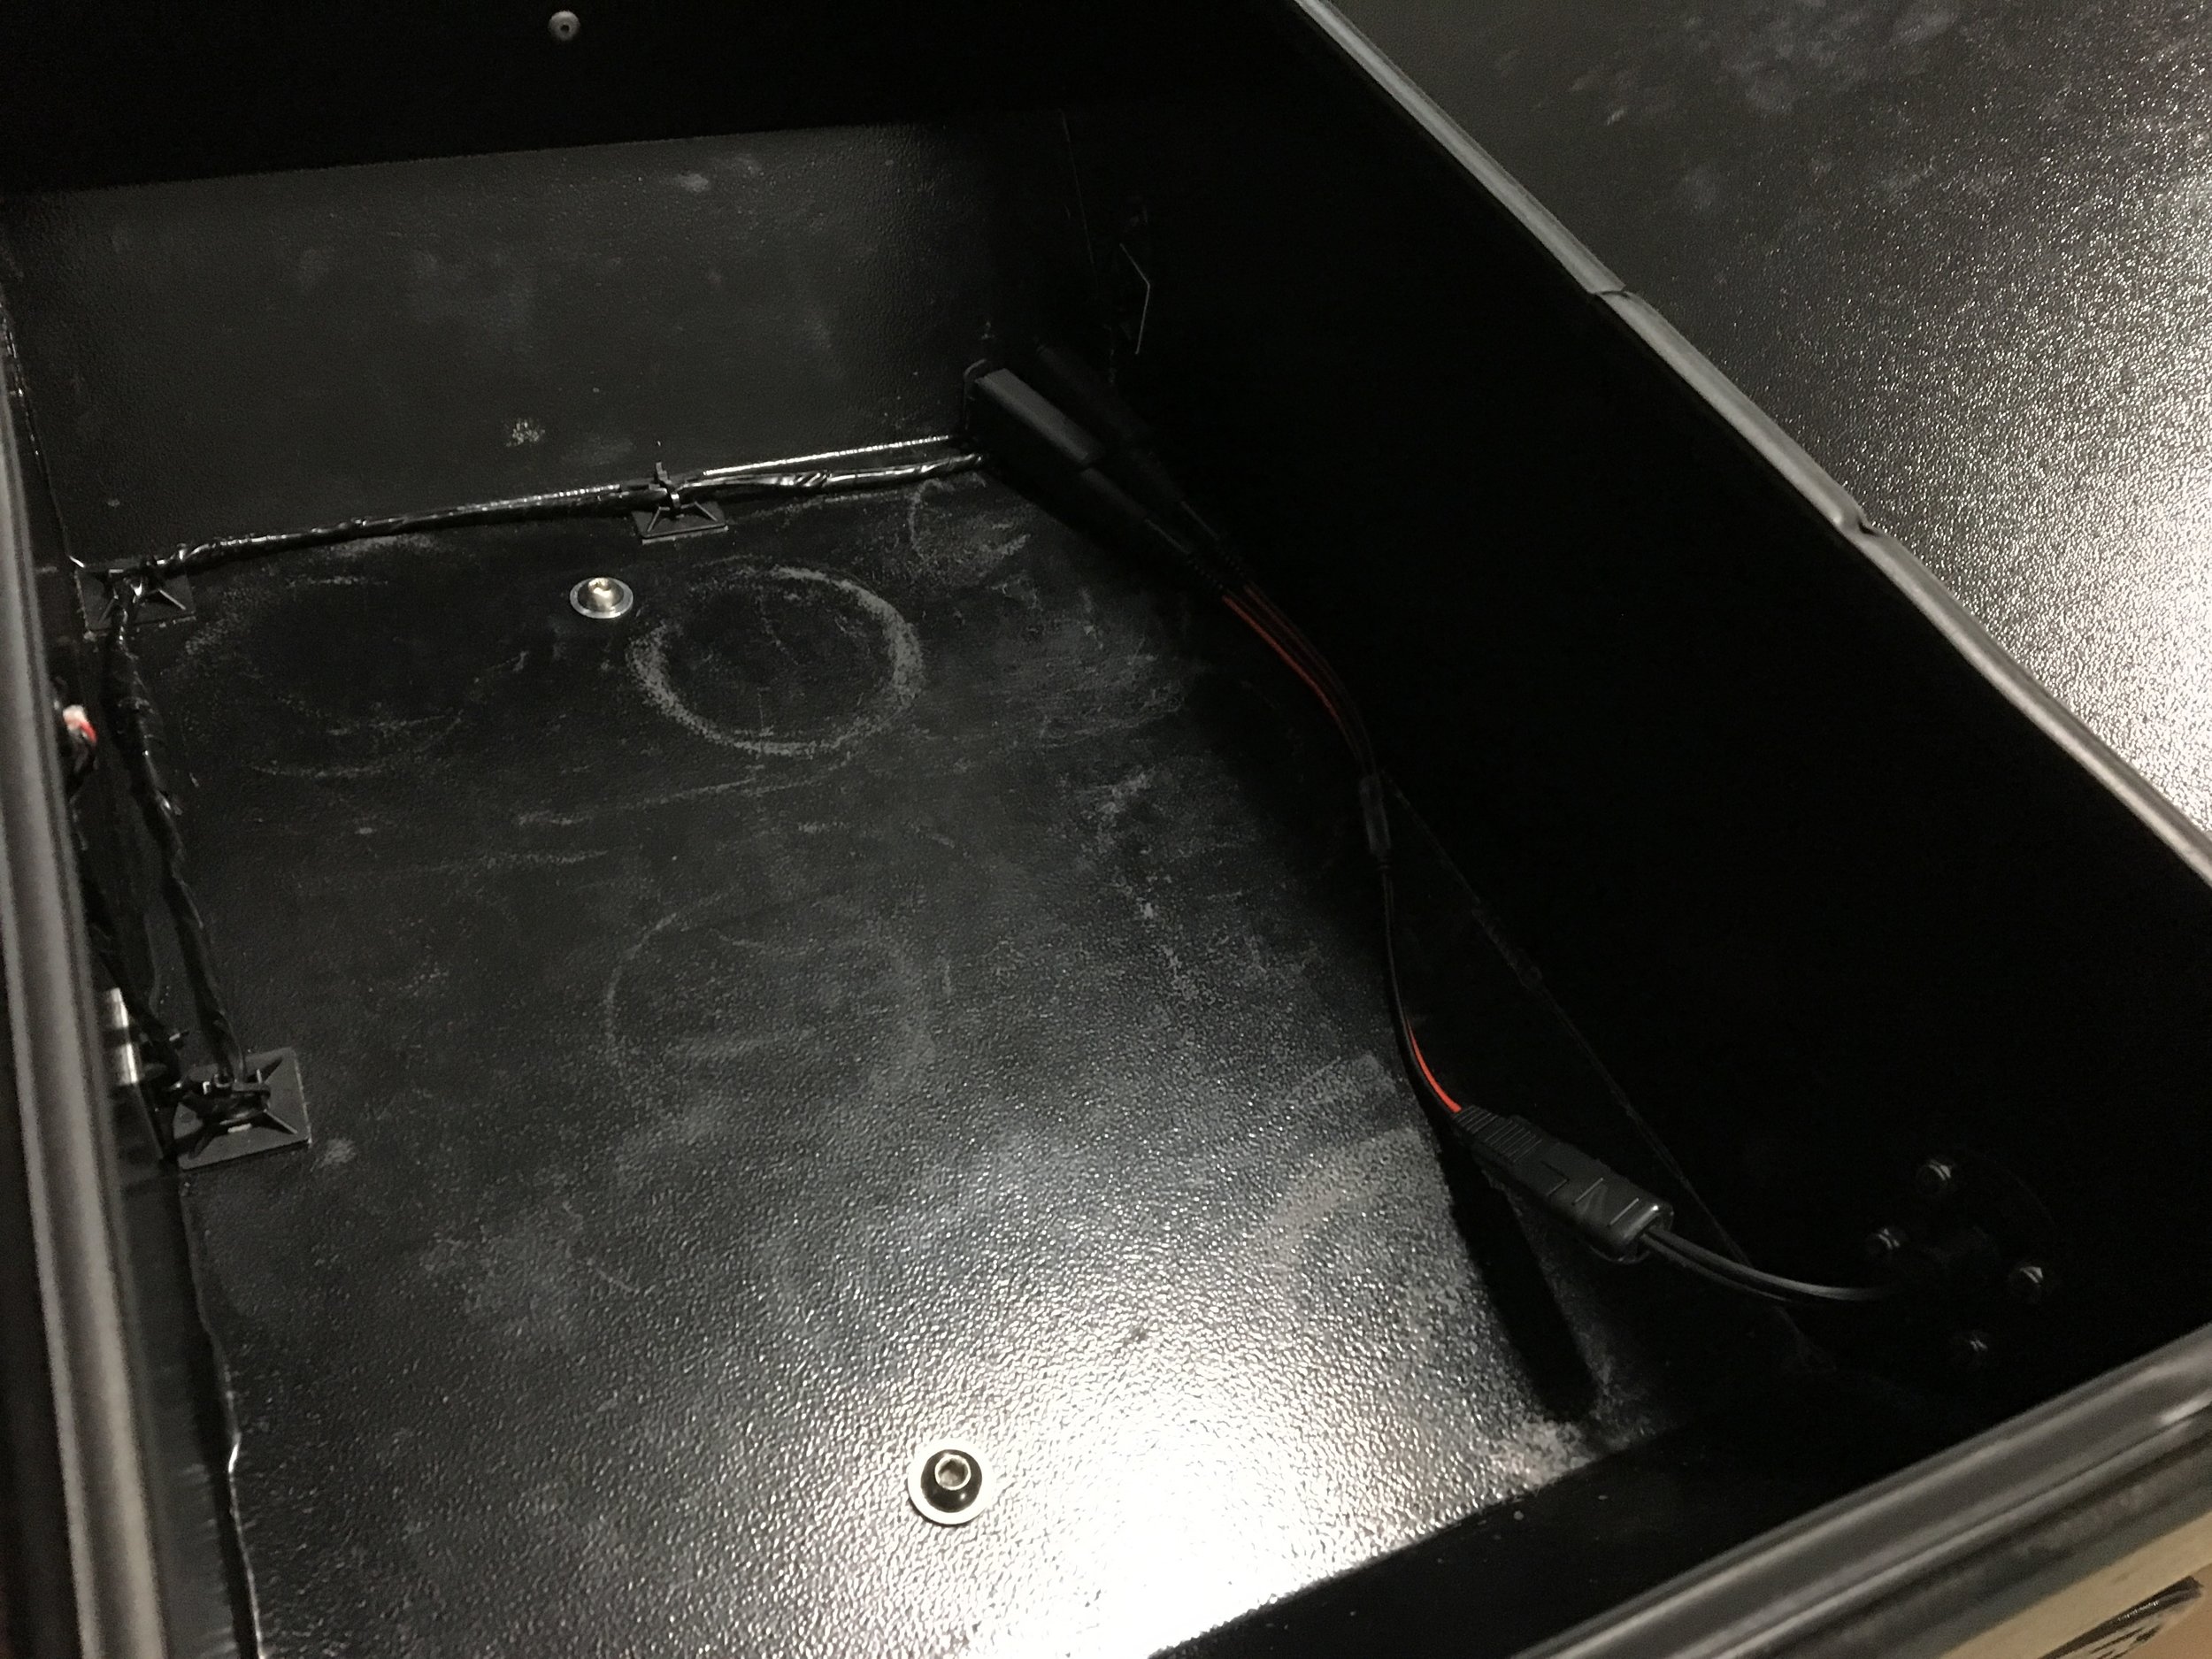
There are three grounds on the top of the frame. These are USB for tank bag, GPS and auxiliary light. In addition, I added power to the rear top box, this was grounded on the battery as it is very close to the rear of the bike. I drilled a power outlet to plug and unplug the power to the top box. I did this mainly because if I needed to use the universal plug for a passenger I can plug and unplug it at will. I can also use this as a voltage tester.
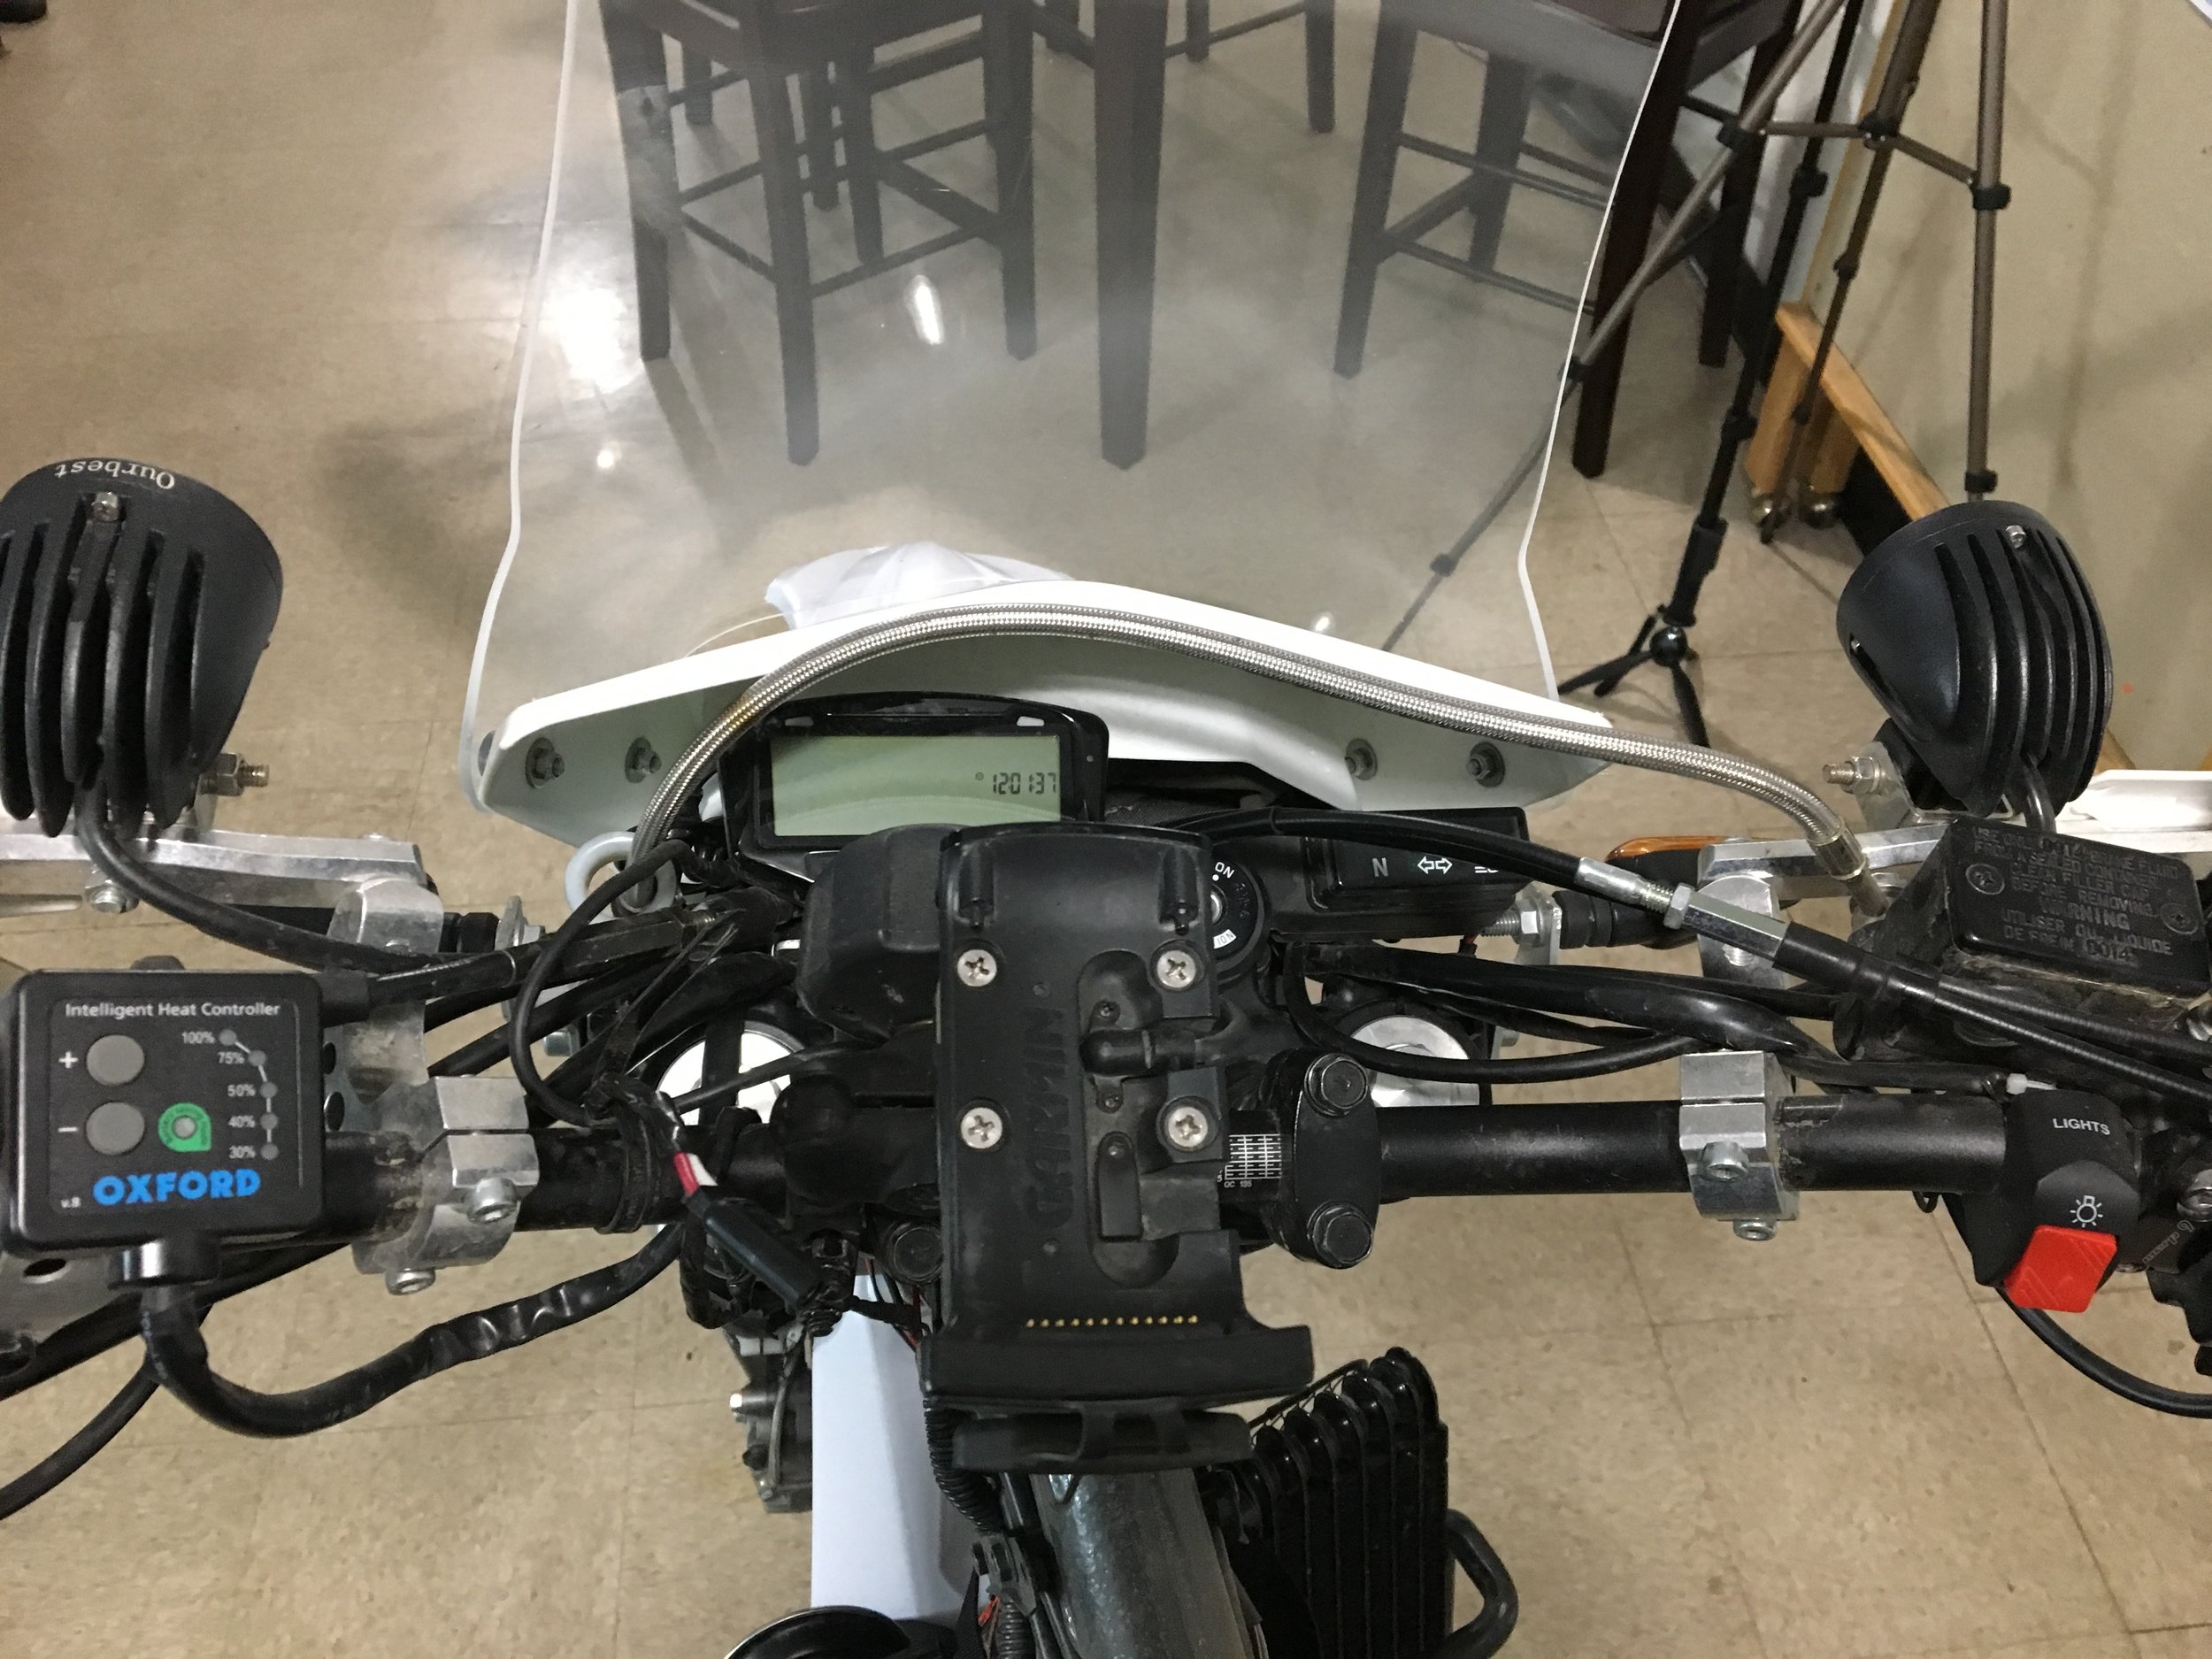
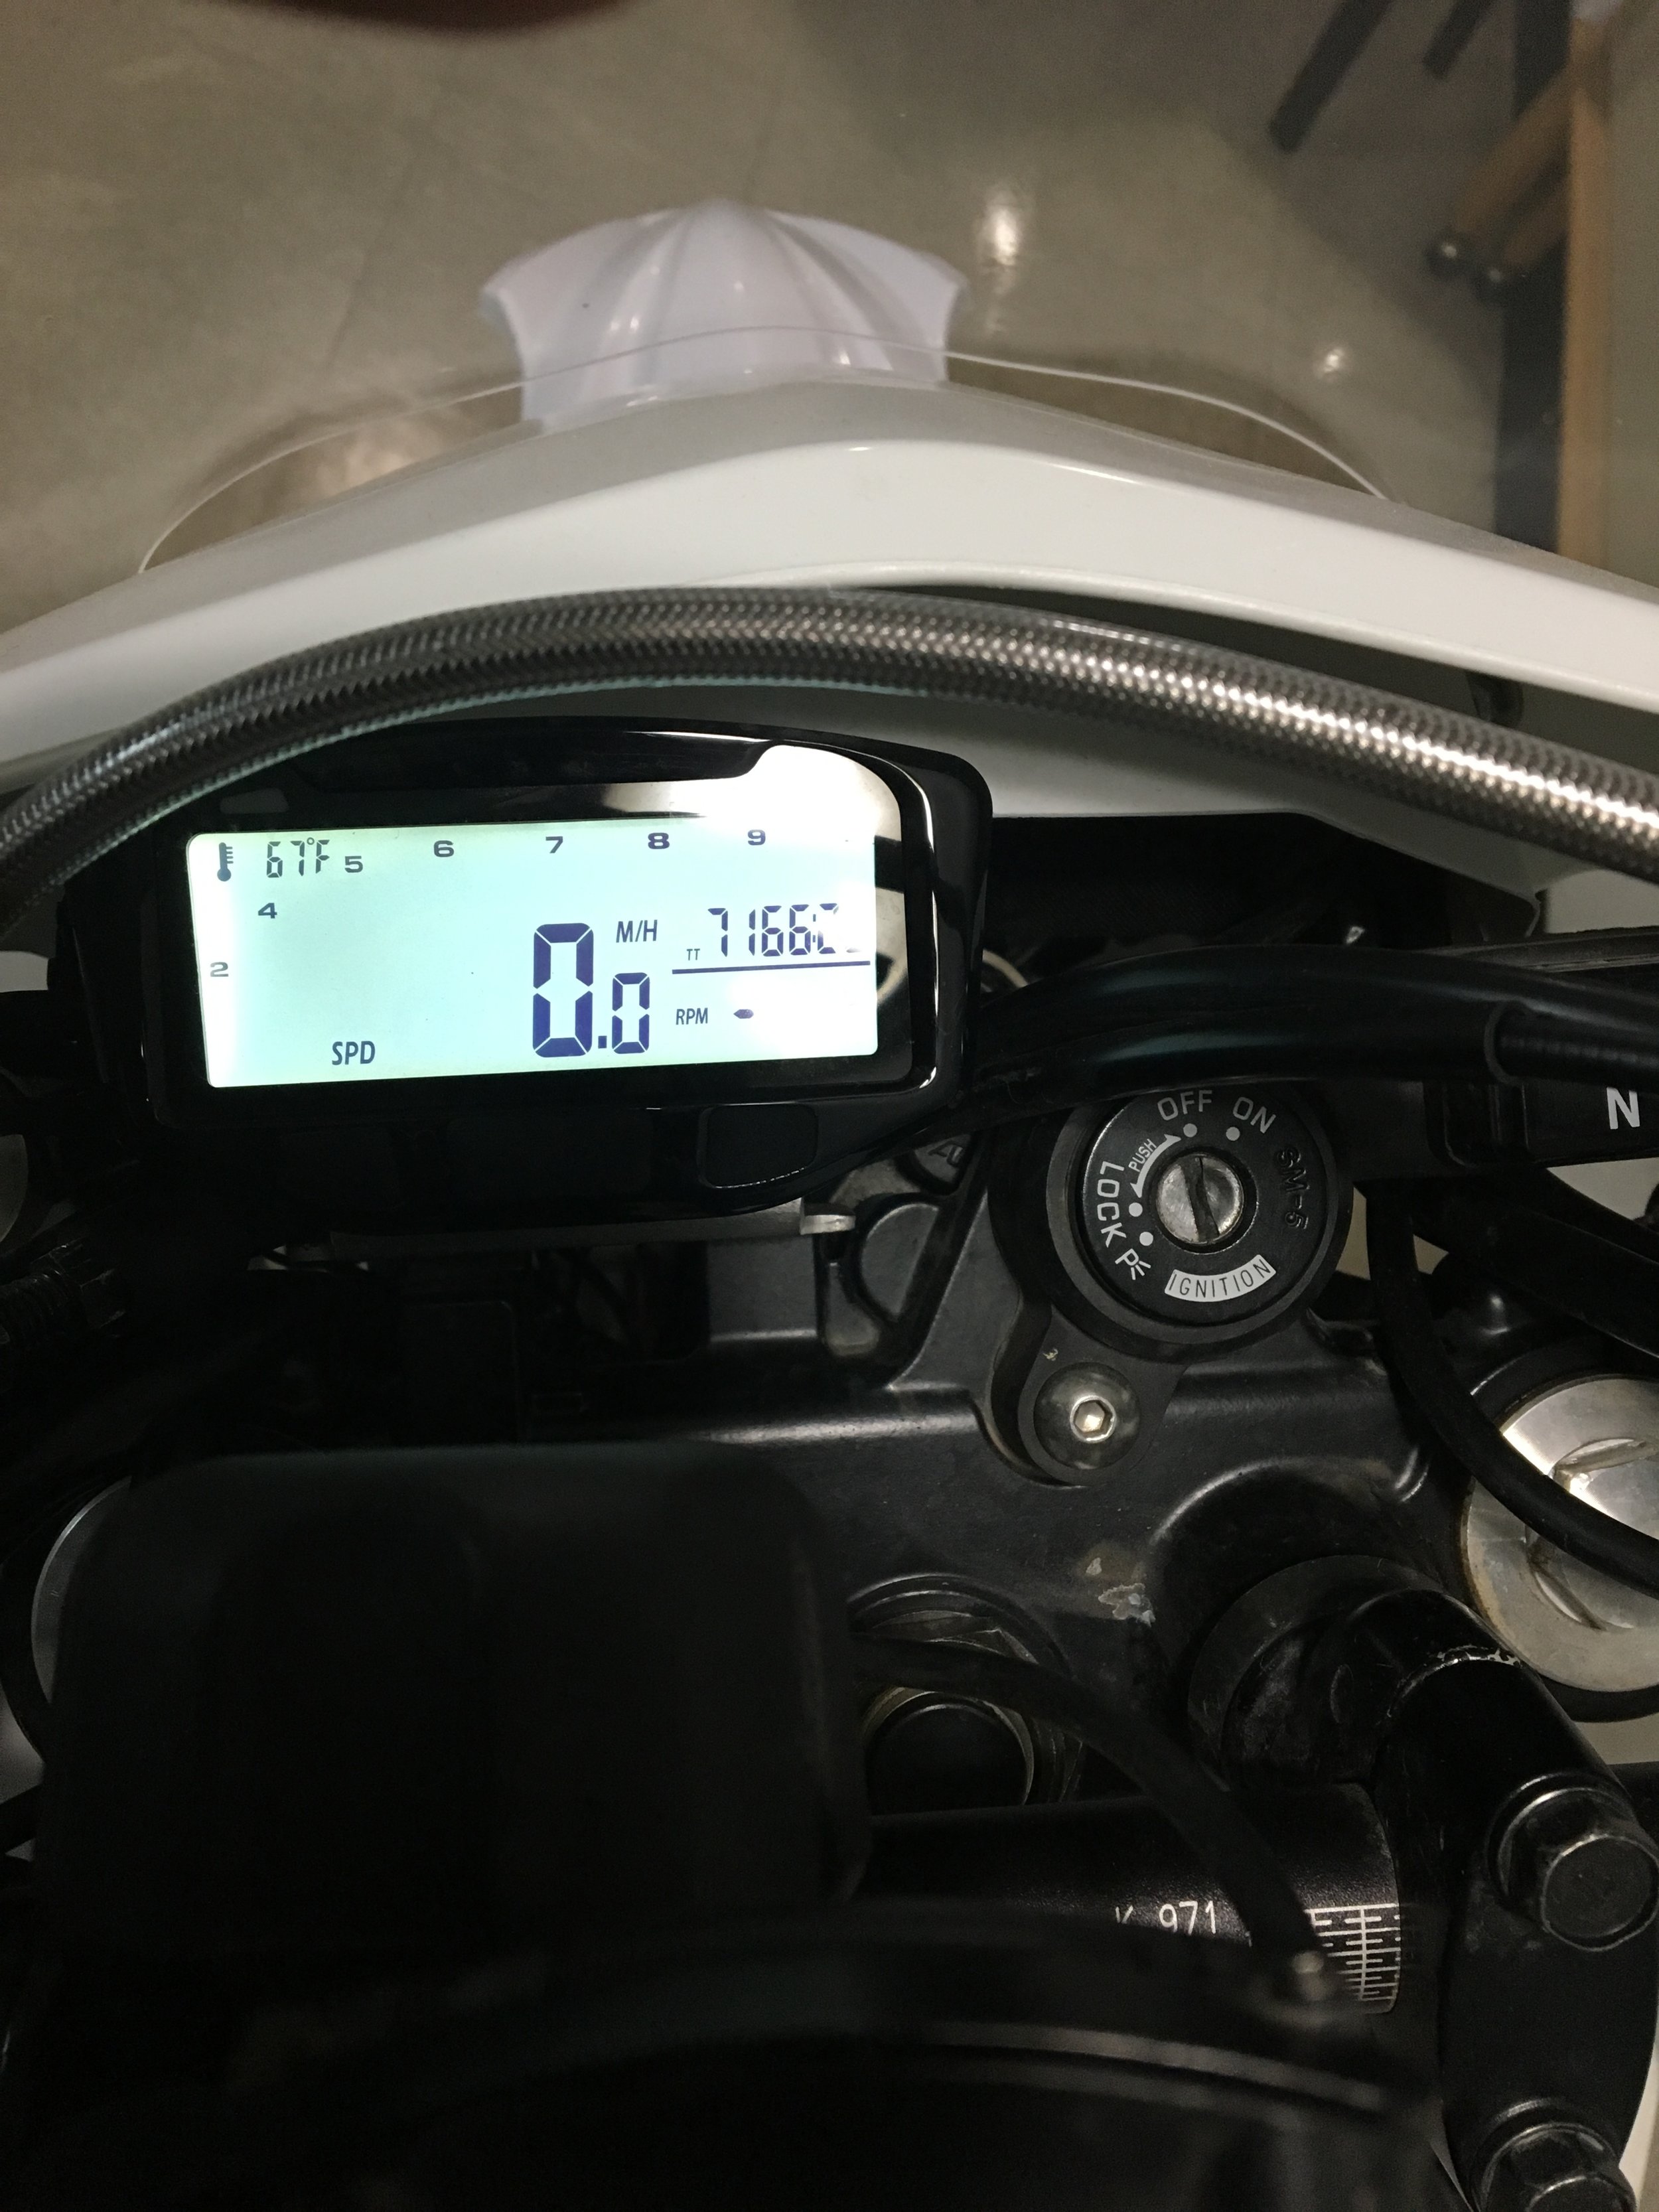
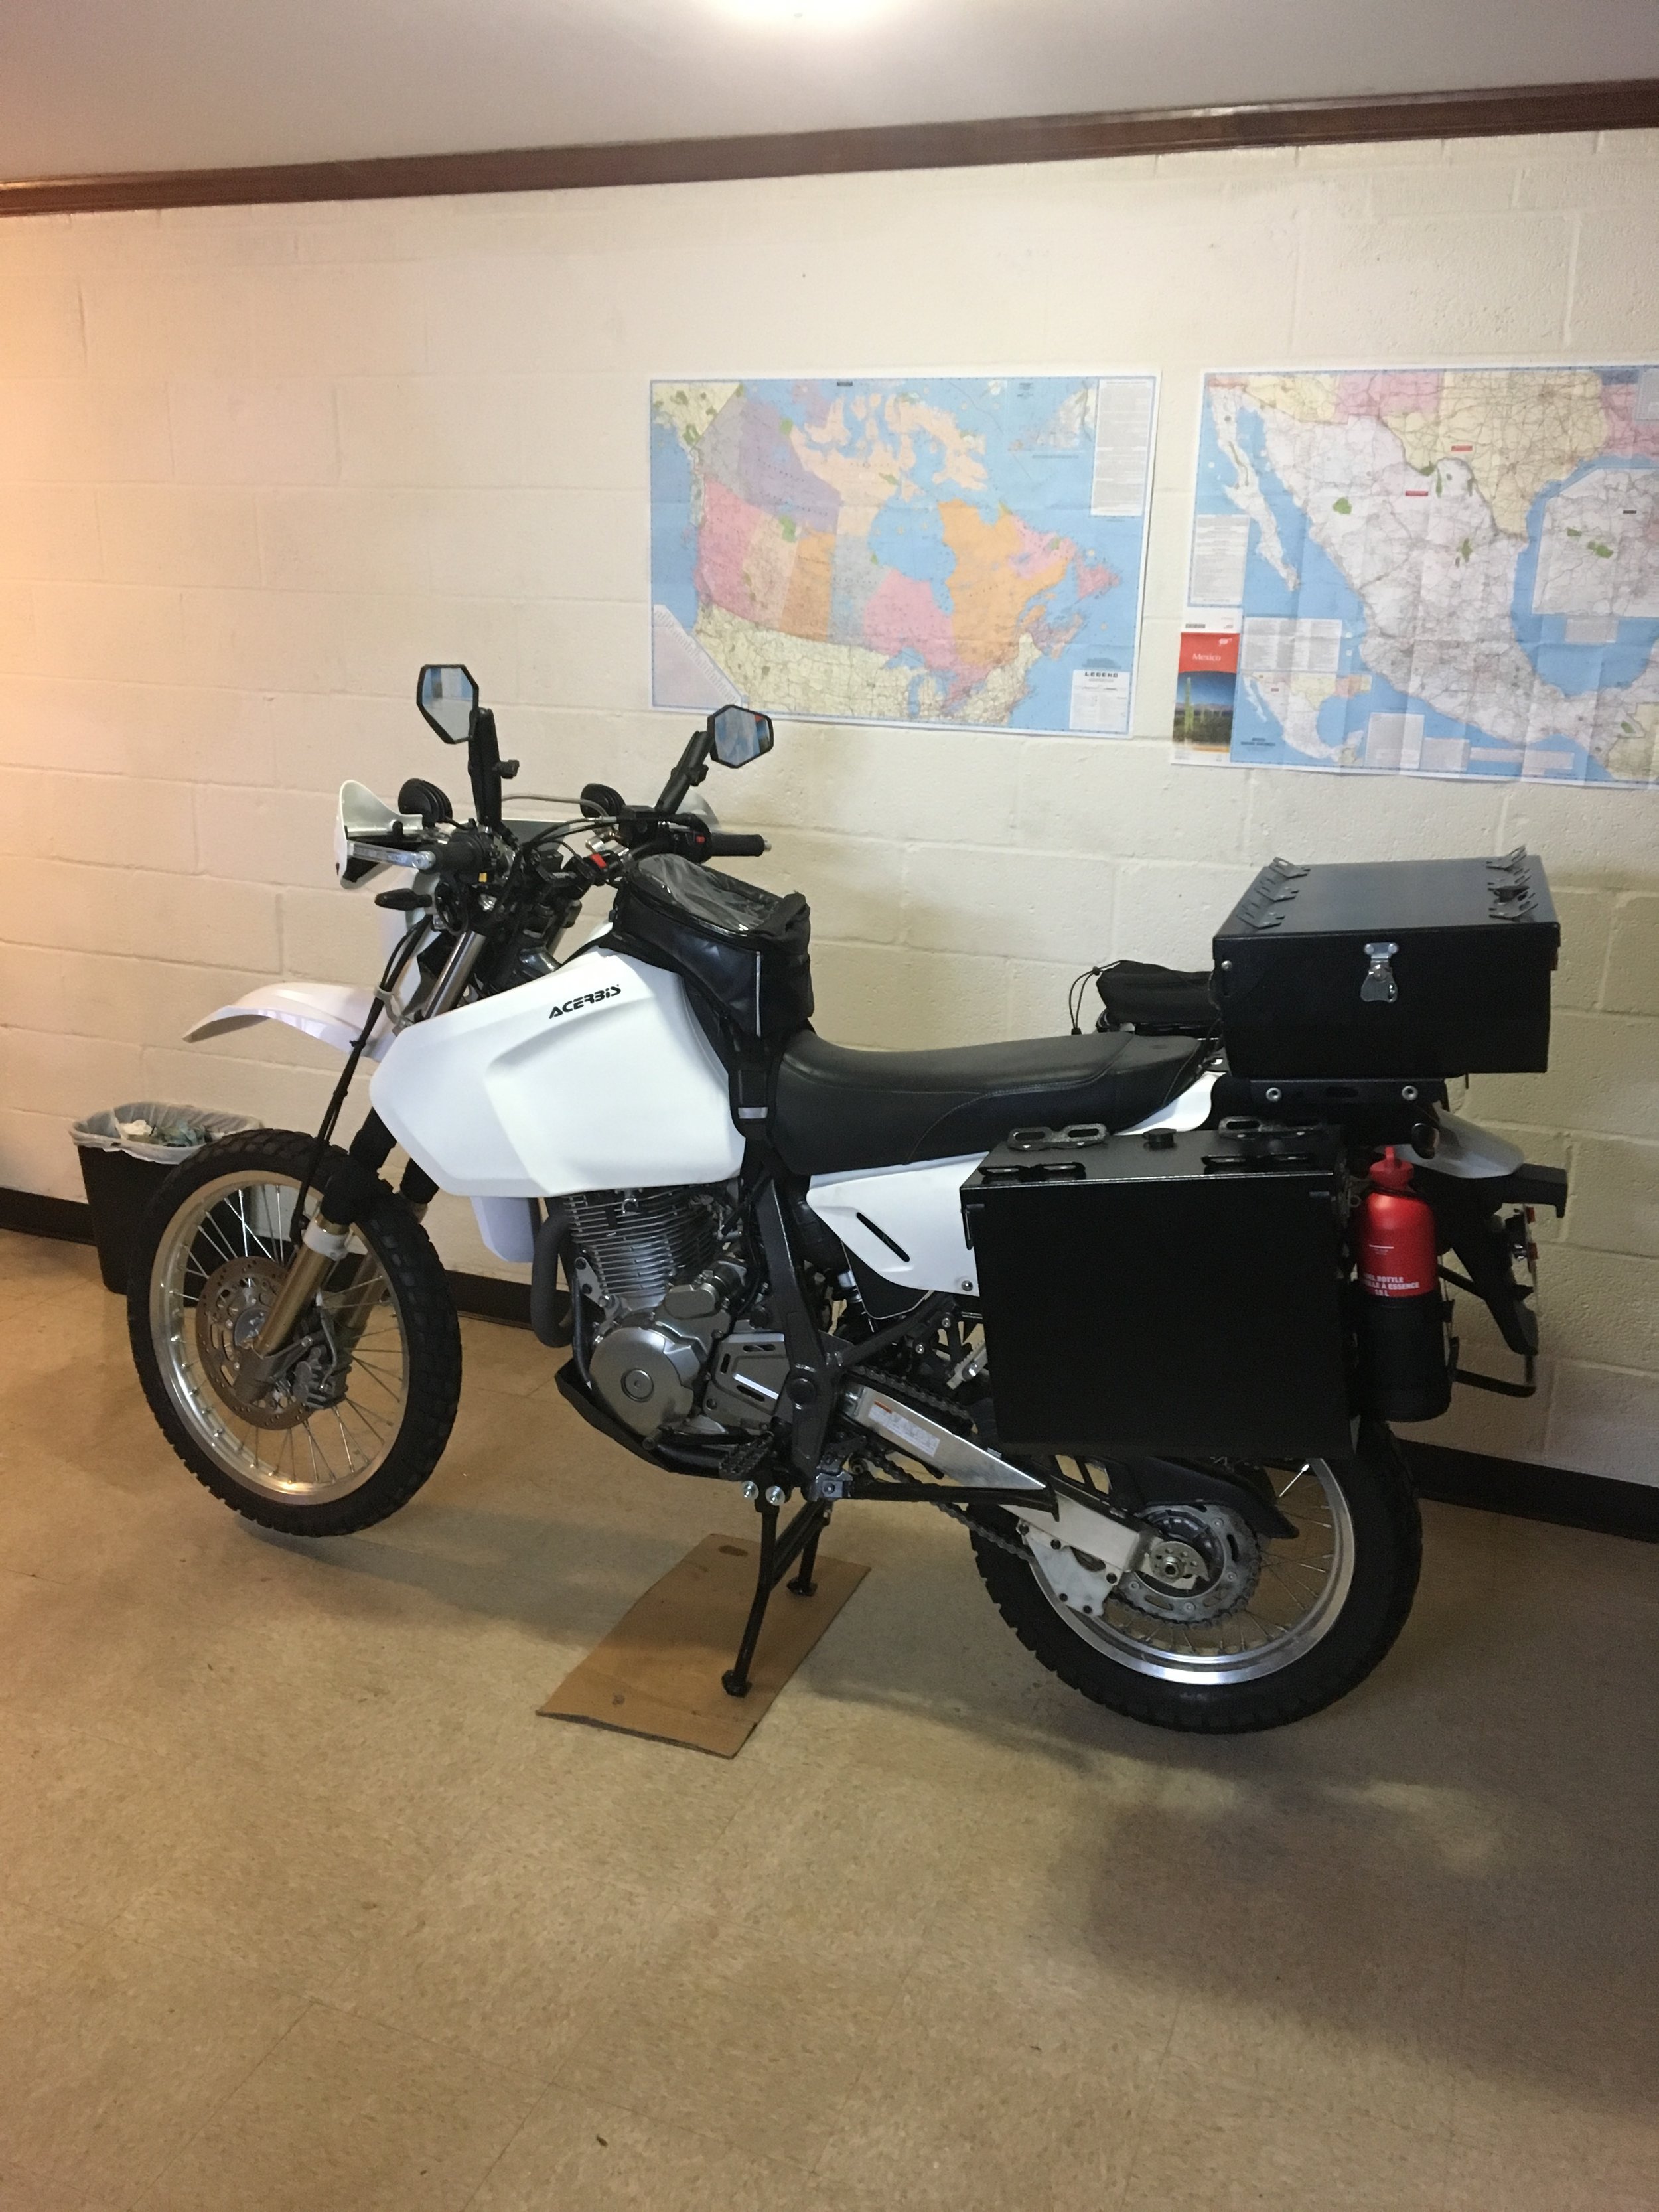
Vapor Speedo and Lighting
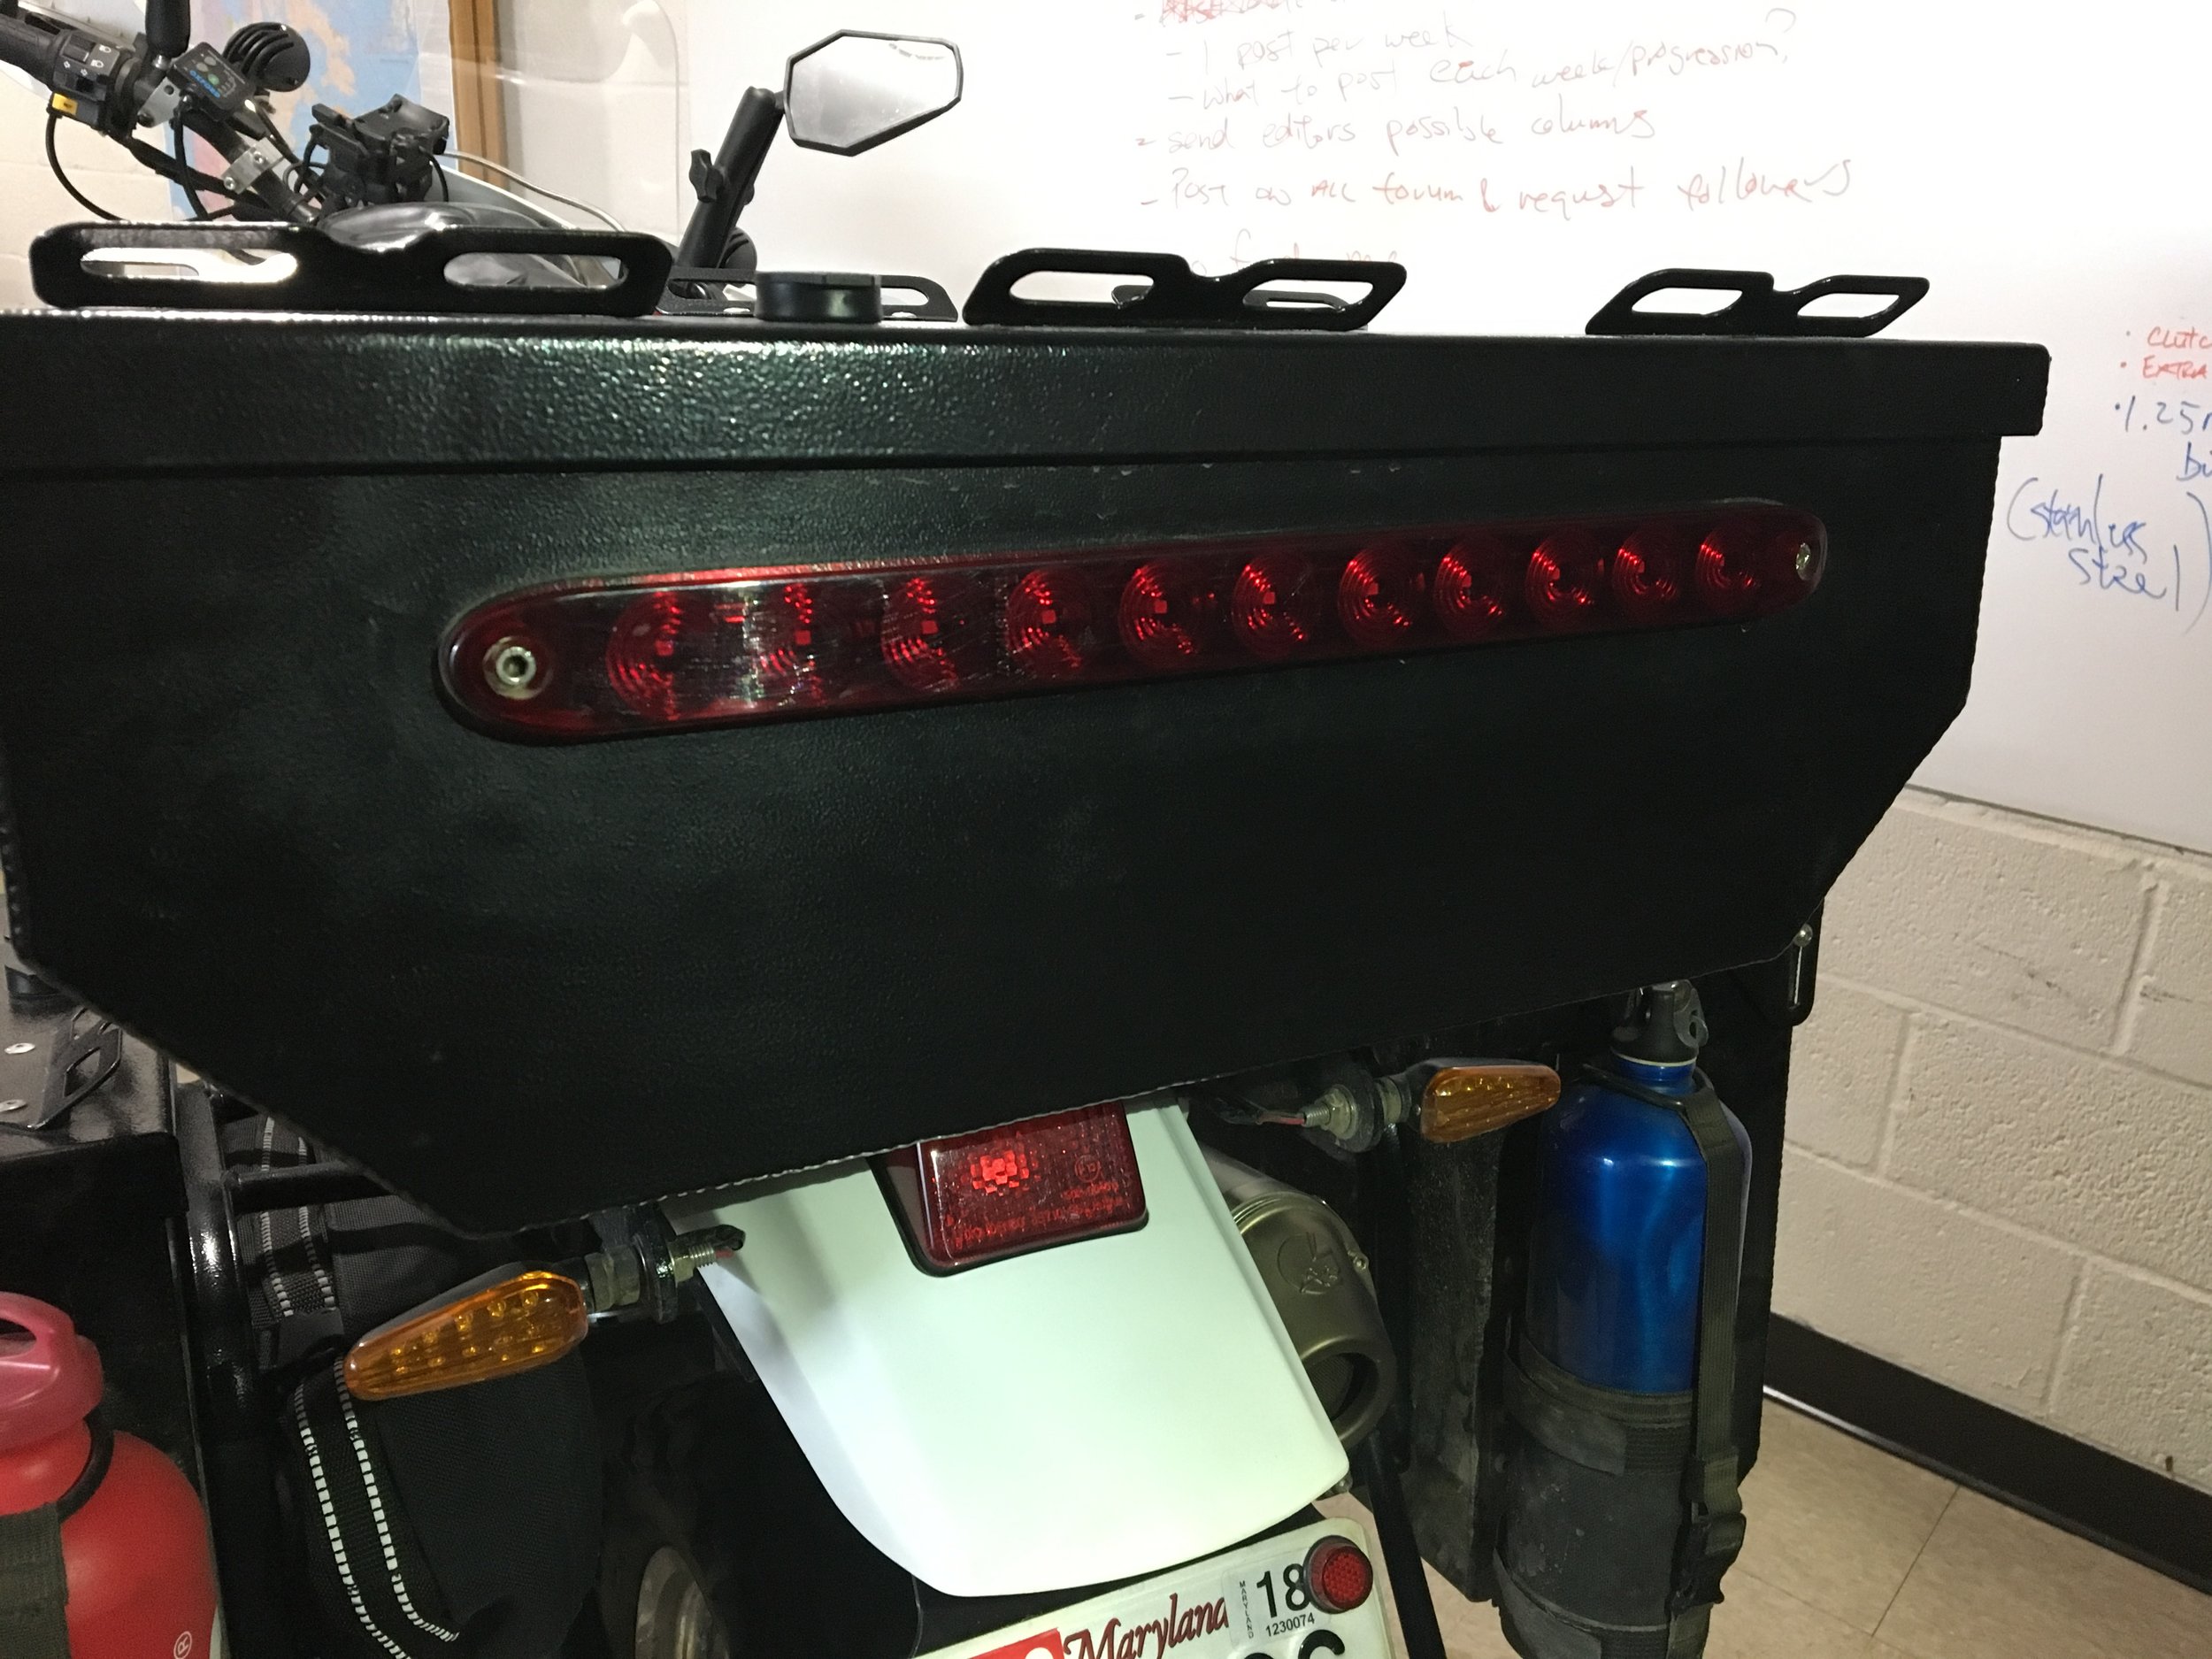
Having used the vapor unit on the black bike already and having no issues with it, the addition to the white bike is natural. It provided tachometer which the Dr didn't come with, but it also kept a temperature range that is helpful in knowing the operating temperature under extreme conditions. While the Dr is bulletproof it still bears the need to have some oversight when things aren't operating properly. DRC LED turn signals, are pretty expensive, but the difference of light output and the quality of turn signal is pretty significant versus my ebay lights. The rear light also got the dr250 treatment. The rear top box I installed a truck light LED strip for visibility. I think this will save me one day, from a rear end crash.
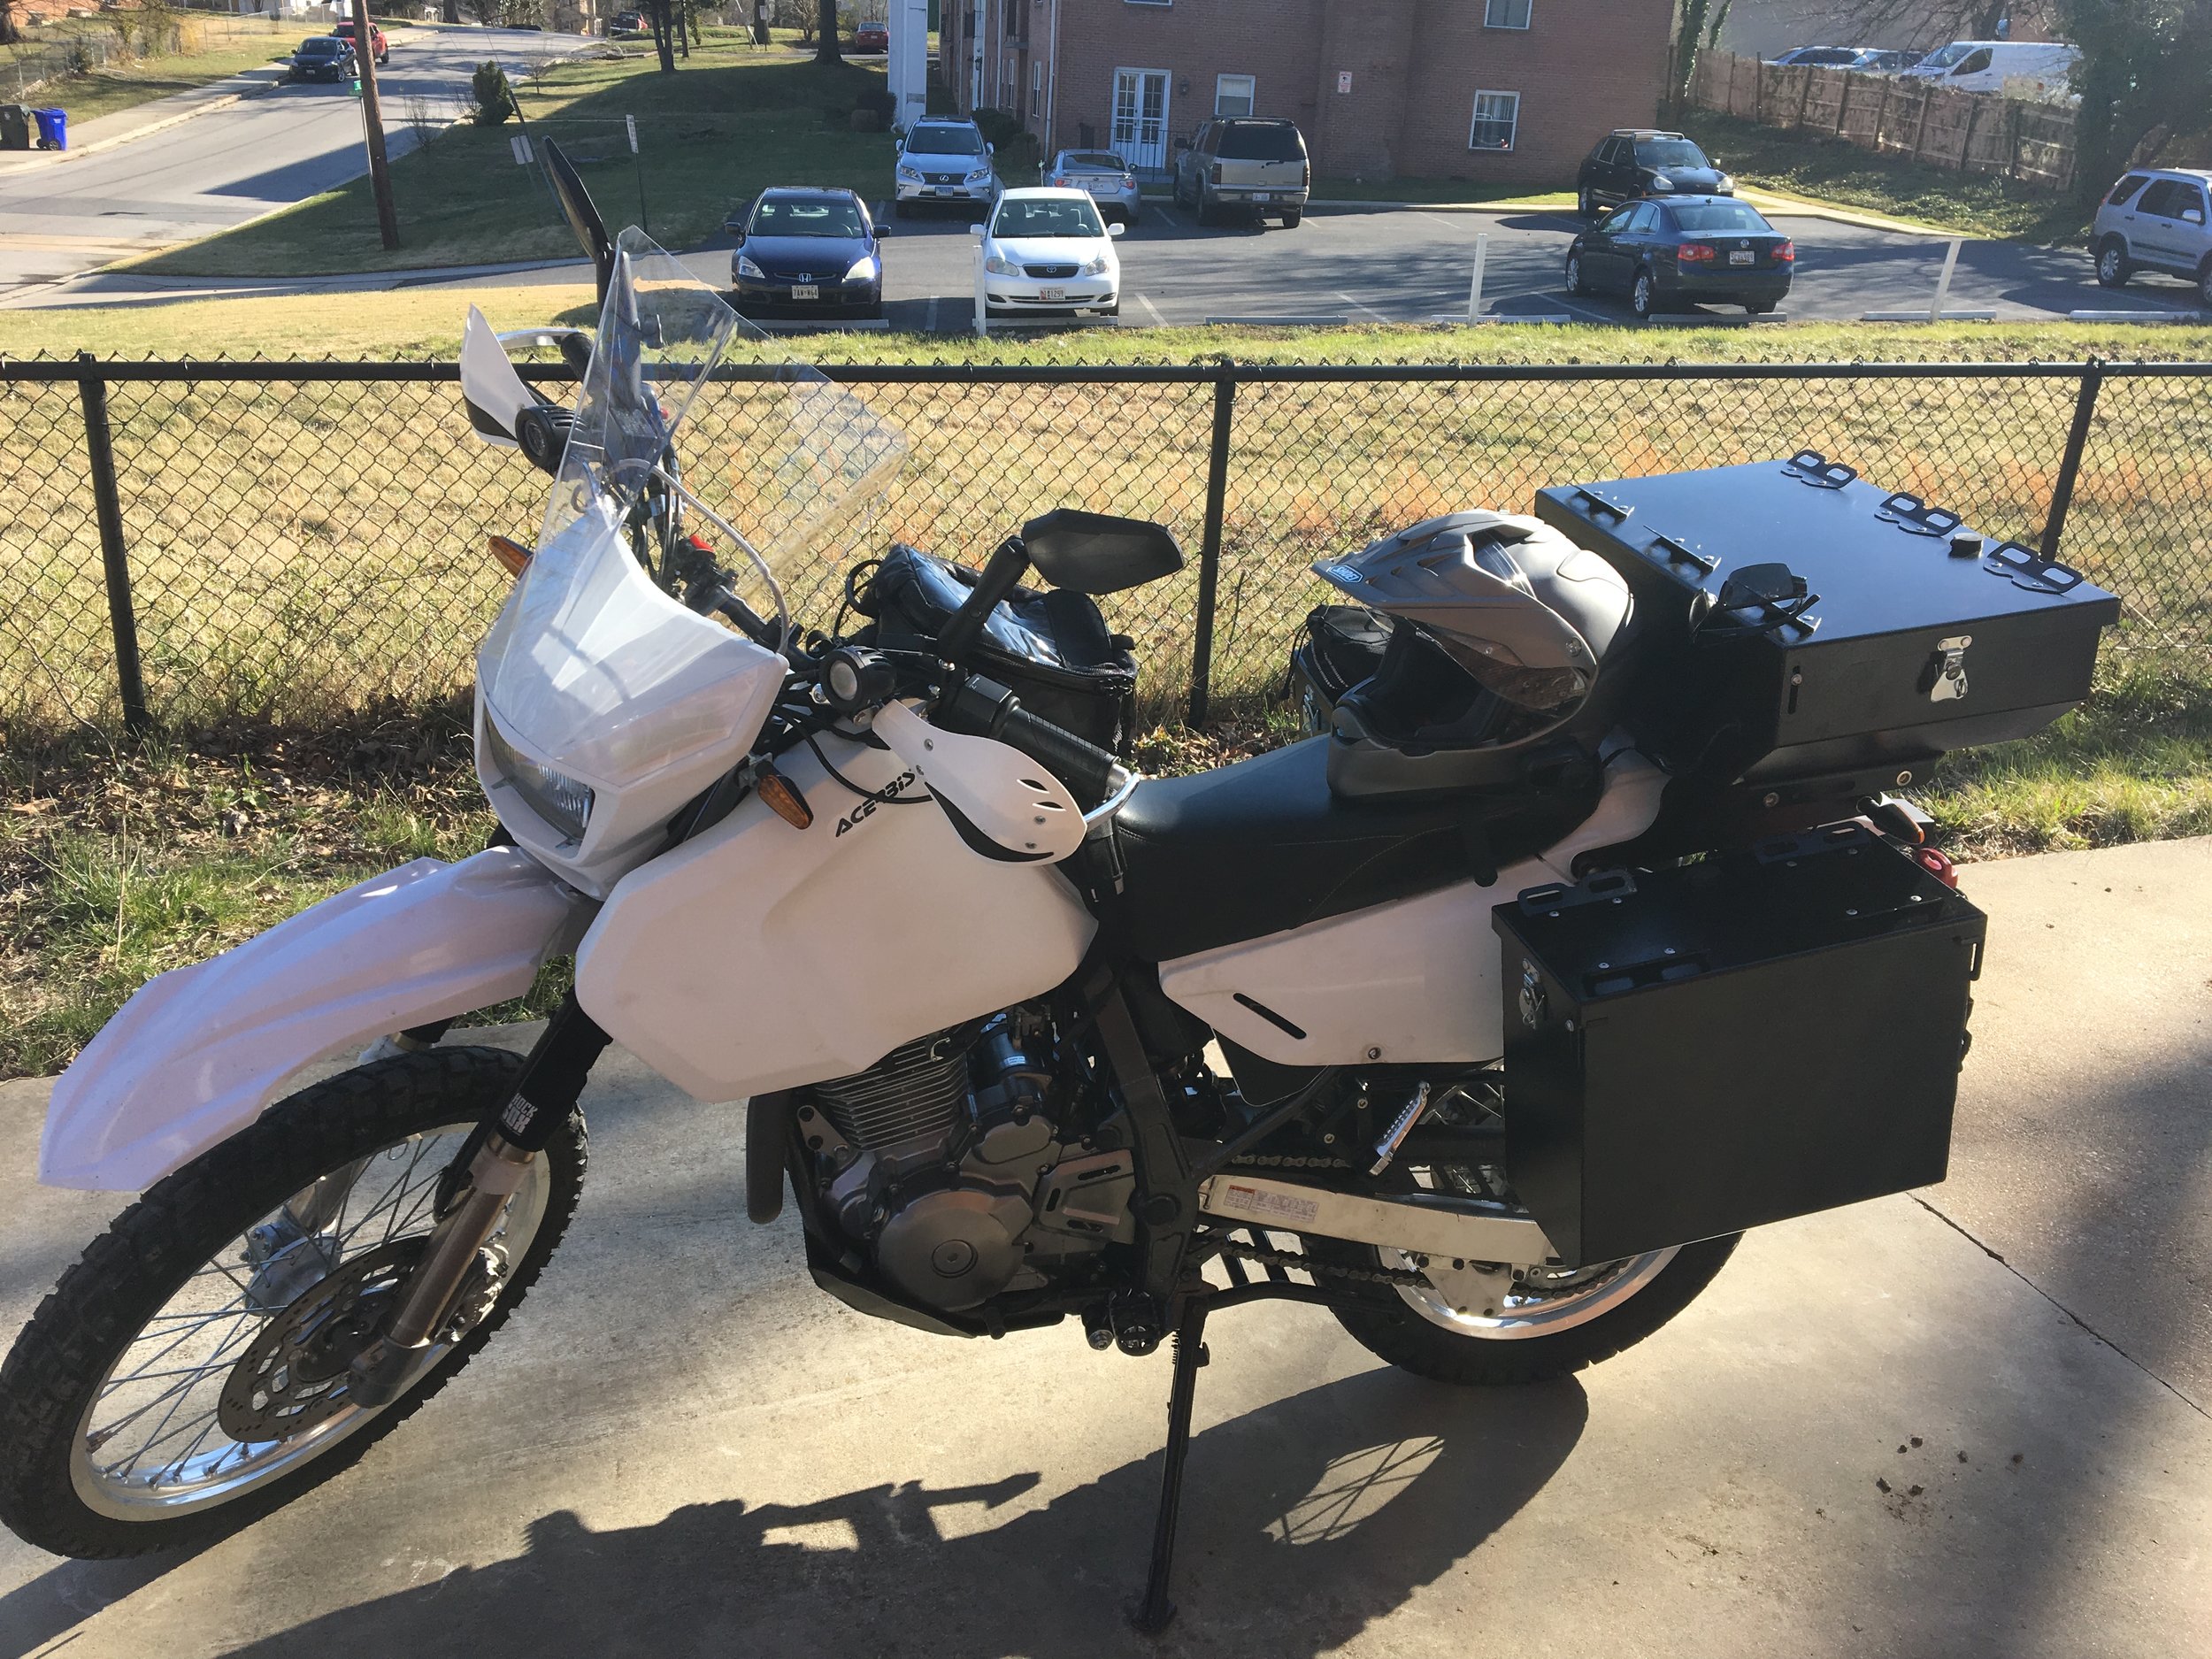
Aesthetics and Fuel
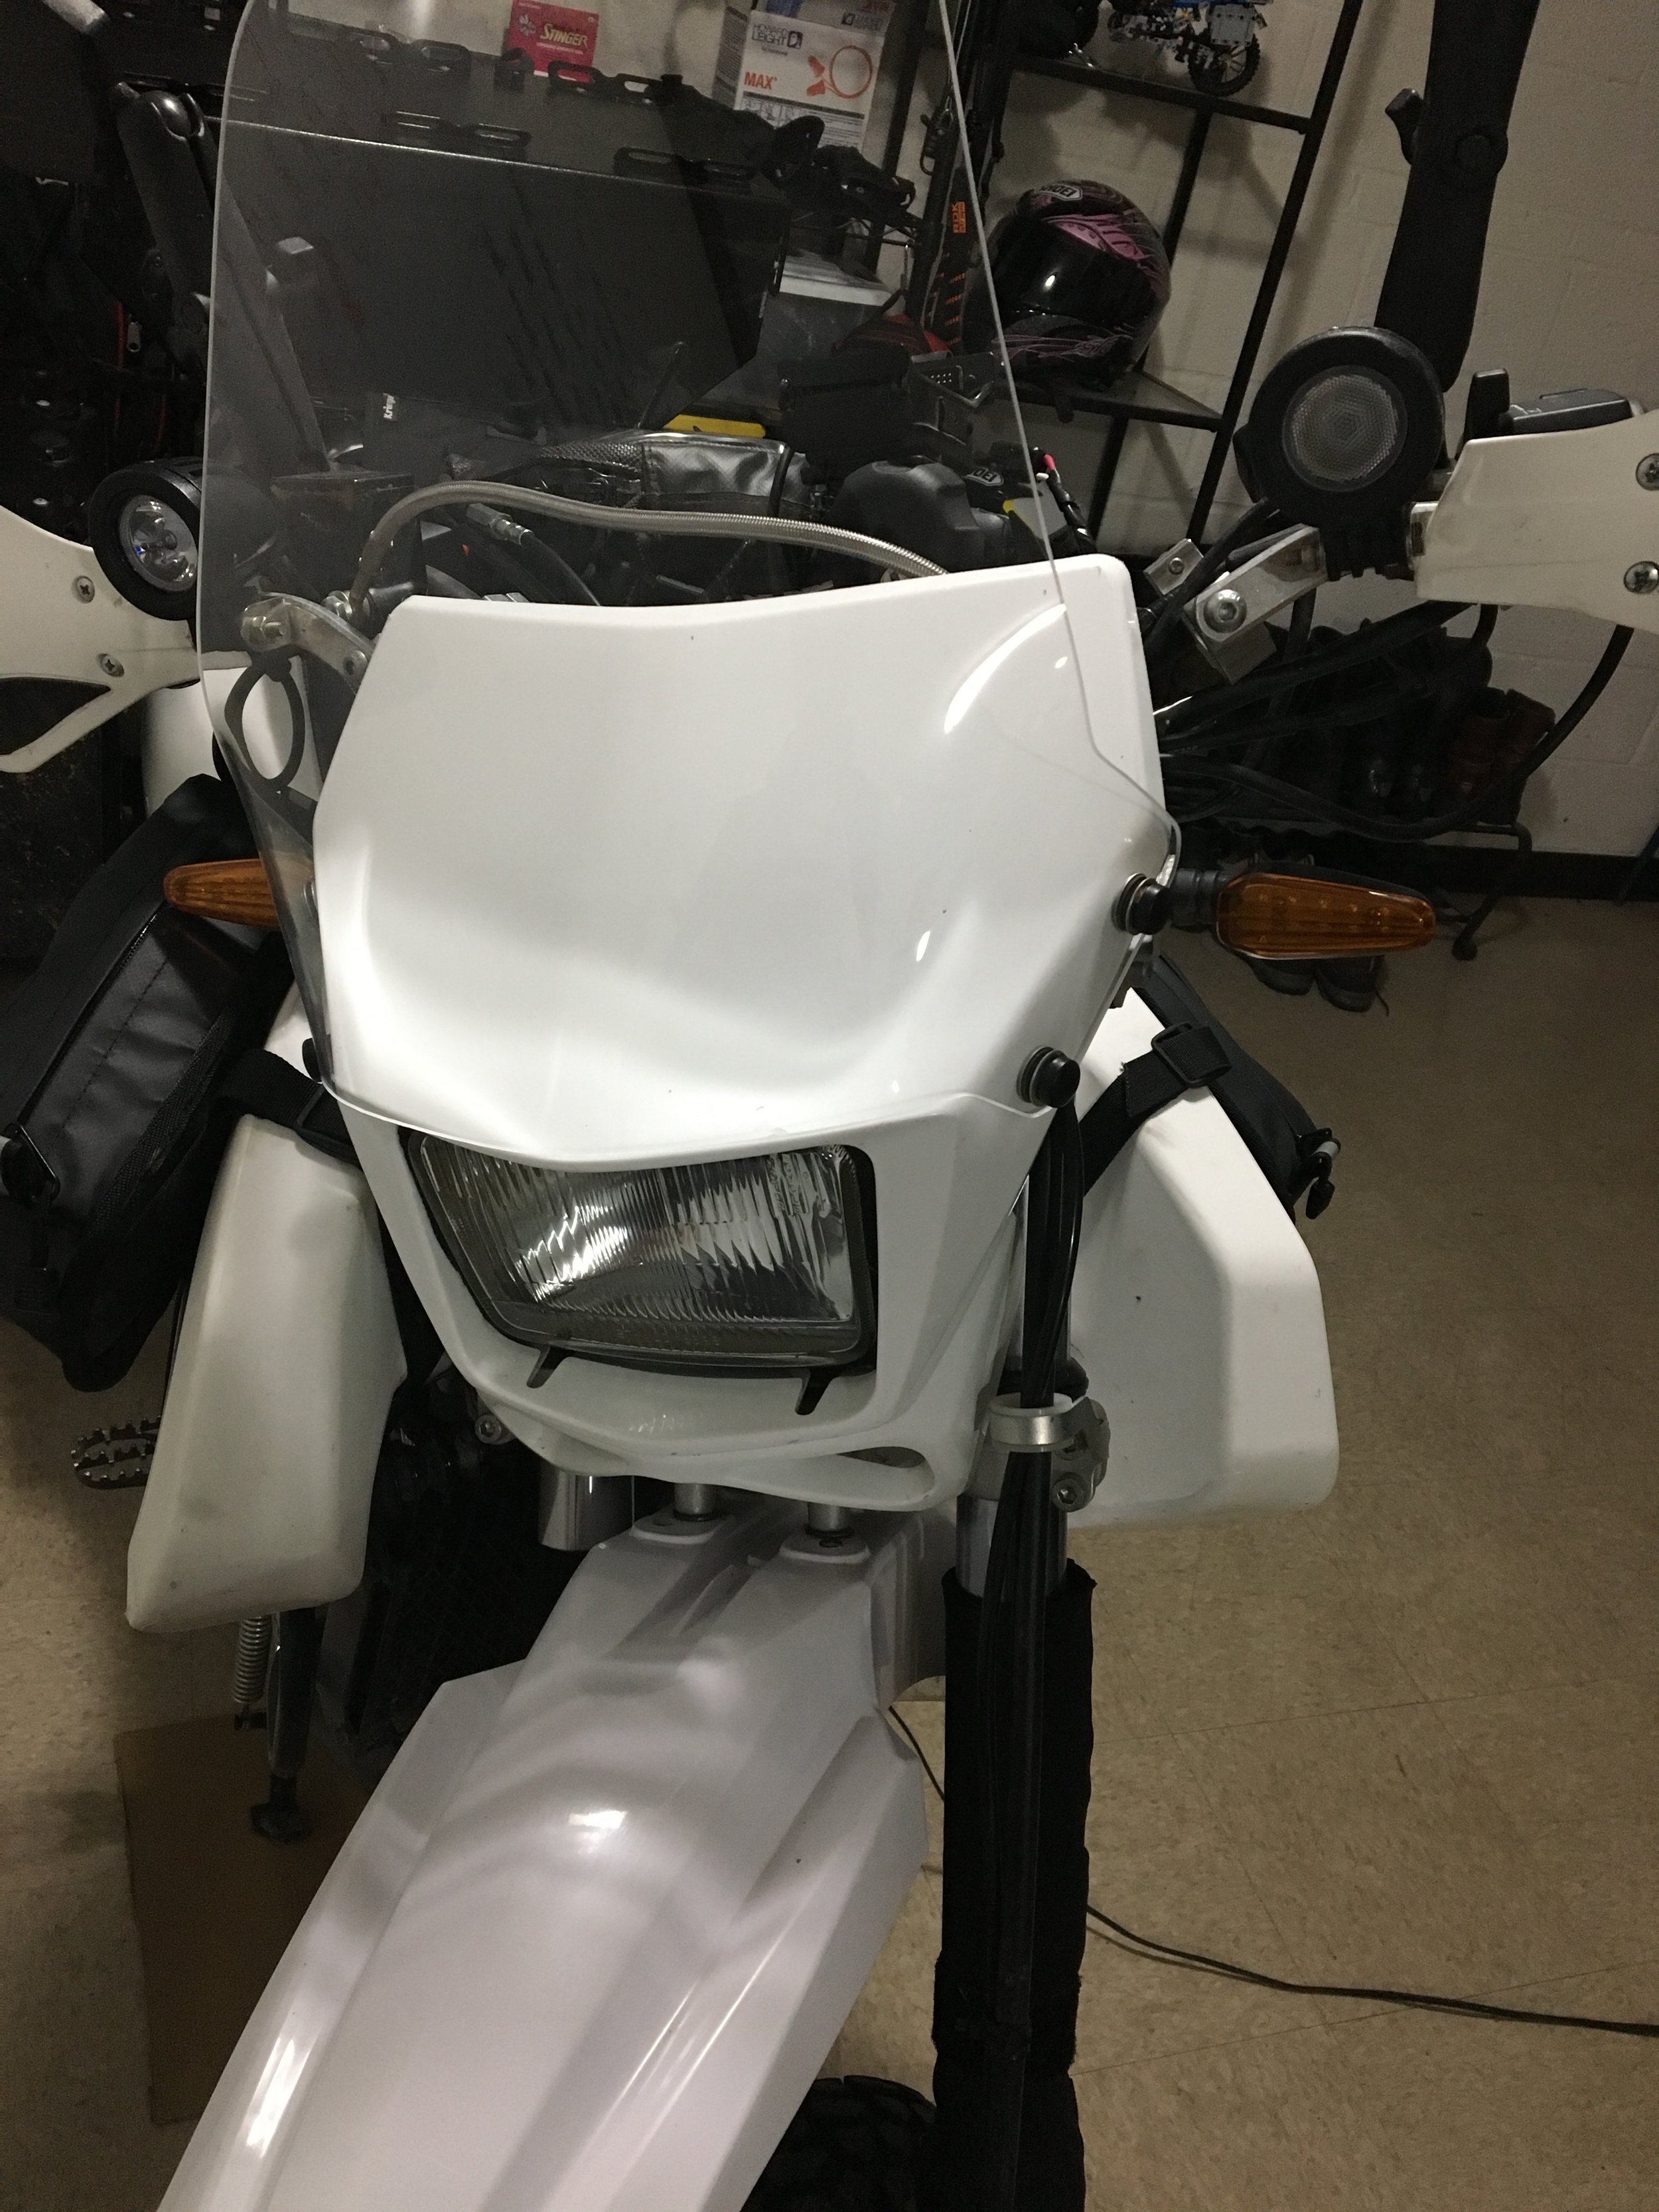
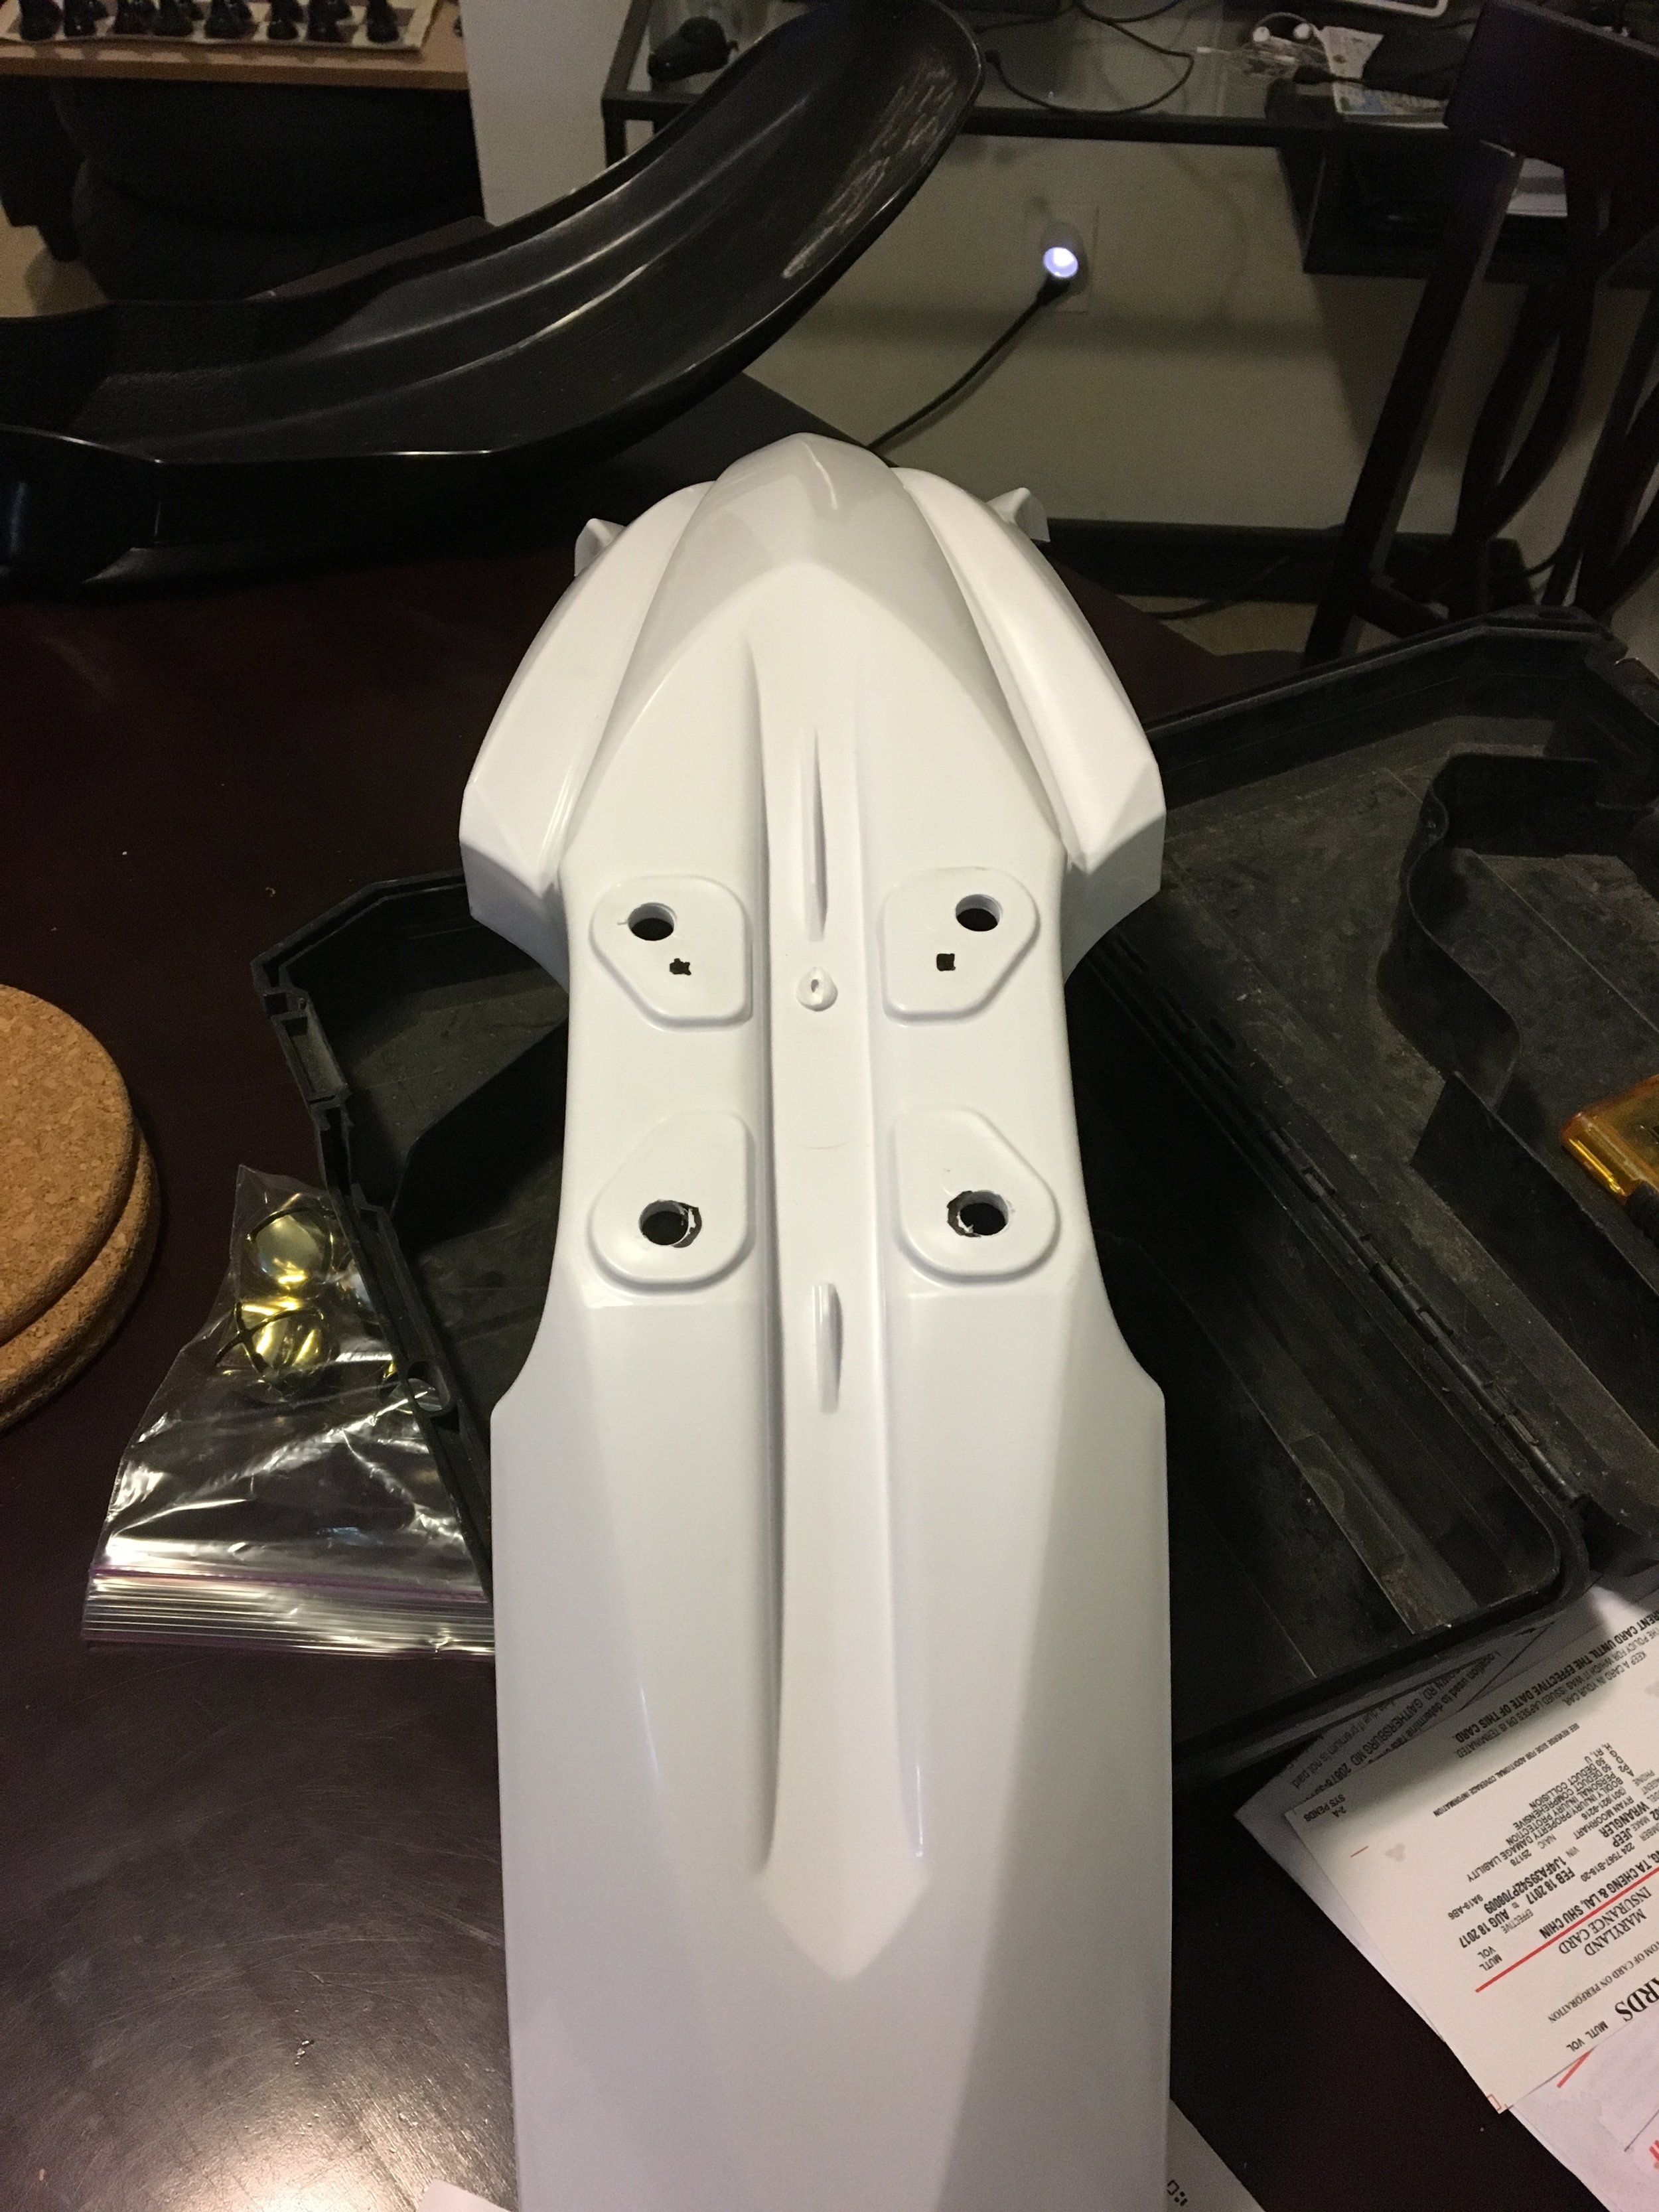
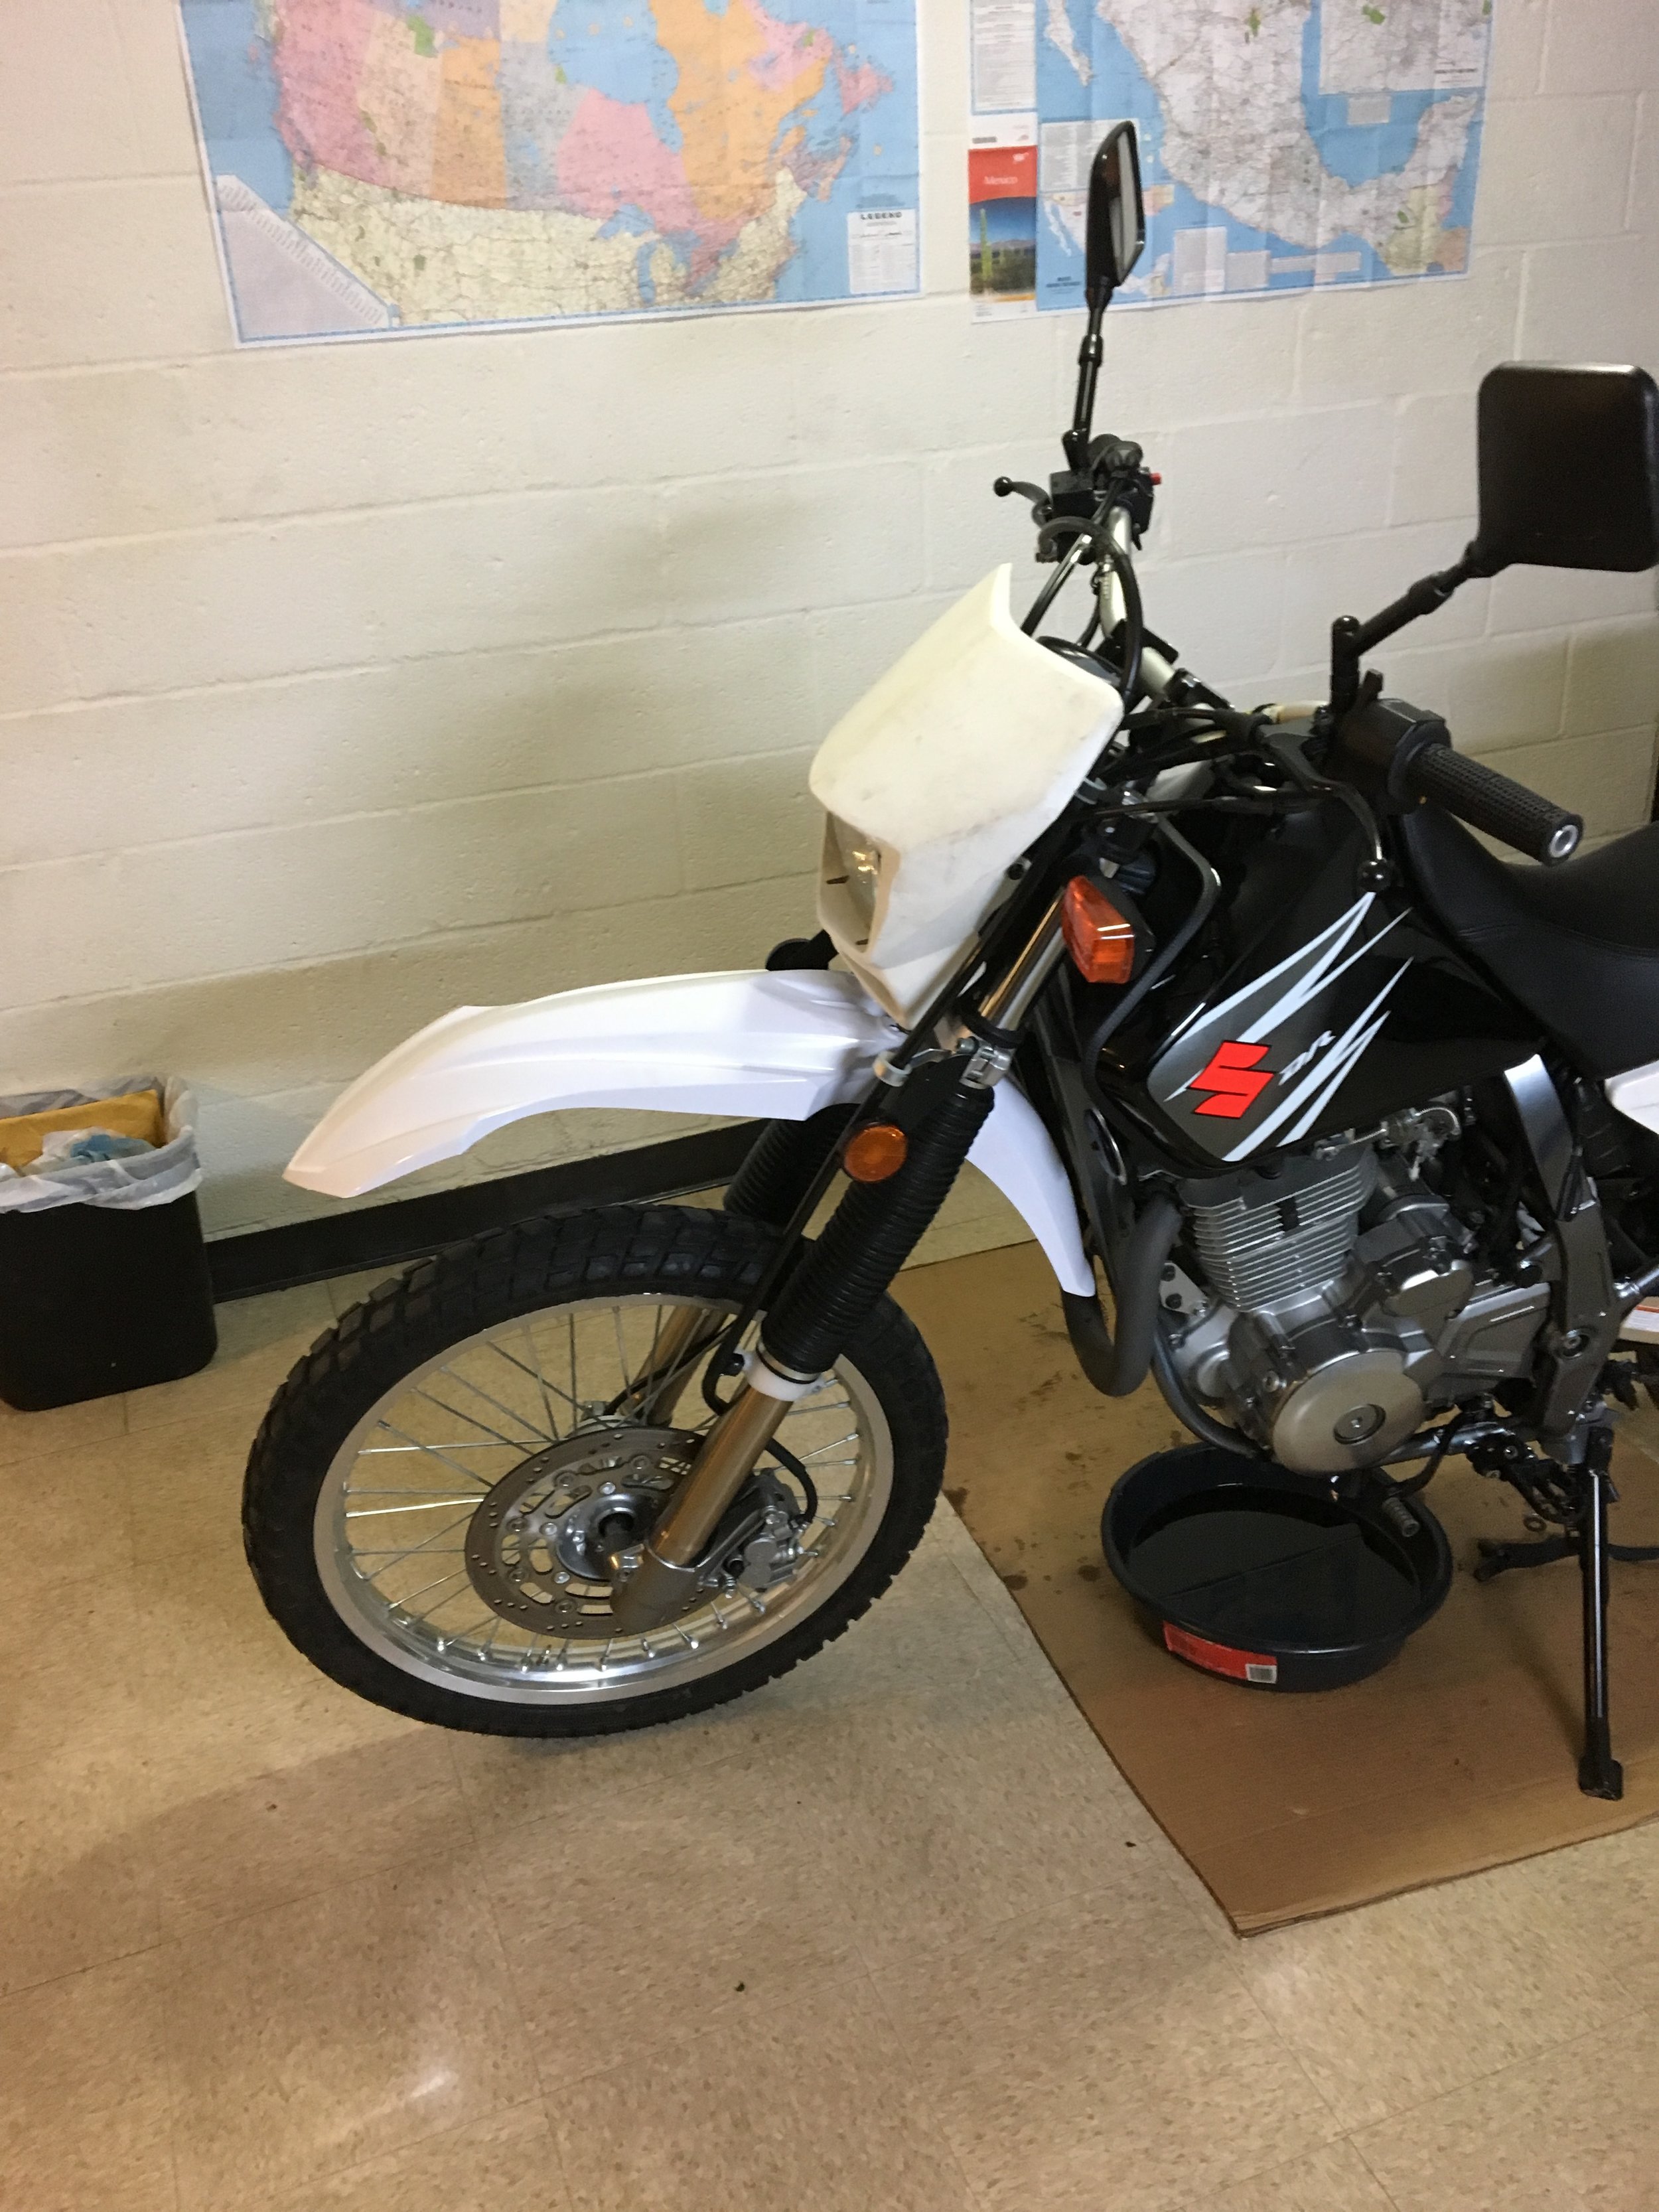
The 2007 came with black headlight cowl and black tail, black front fender and white side panels. I wanted to have white bike, so I sold the rear fender and front fender to someone. The black headlight I put on the black Dr and reverted back to the oem headlight from the polisport headlight, that looks cool but have zero light output. In addition, I order the same front fender as my black Dr. a Cycra YZ front fender in white. I also ordered a rear fender, headlight cowl and a tail light from a Dr250 to make the look more refined. An Acerbis tank was also added. I went with the biggest tank this time around, the 6.6 gallon tank. Like the black bike, I went with dual petcock.
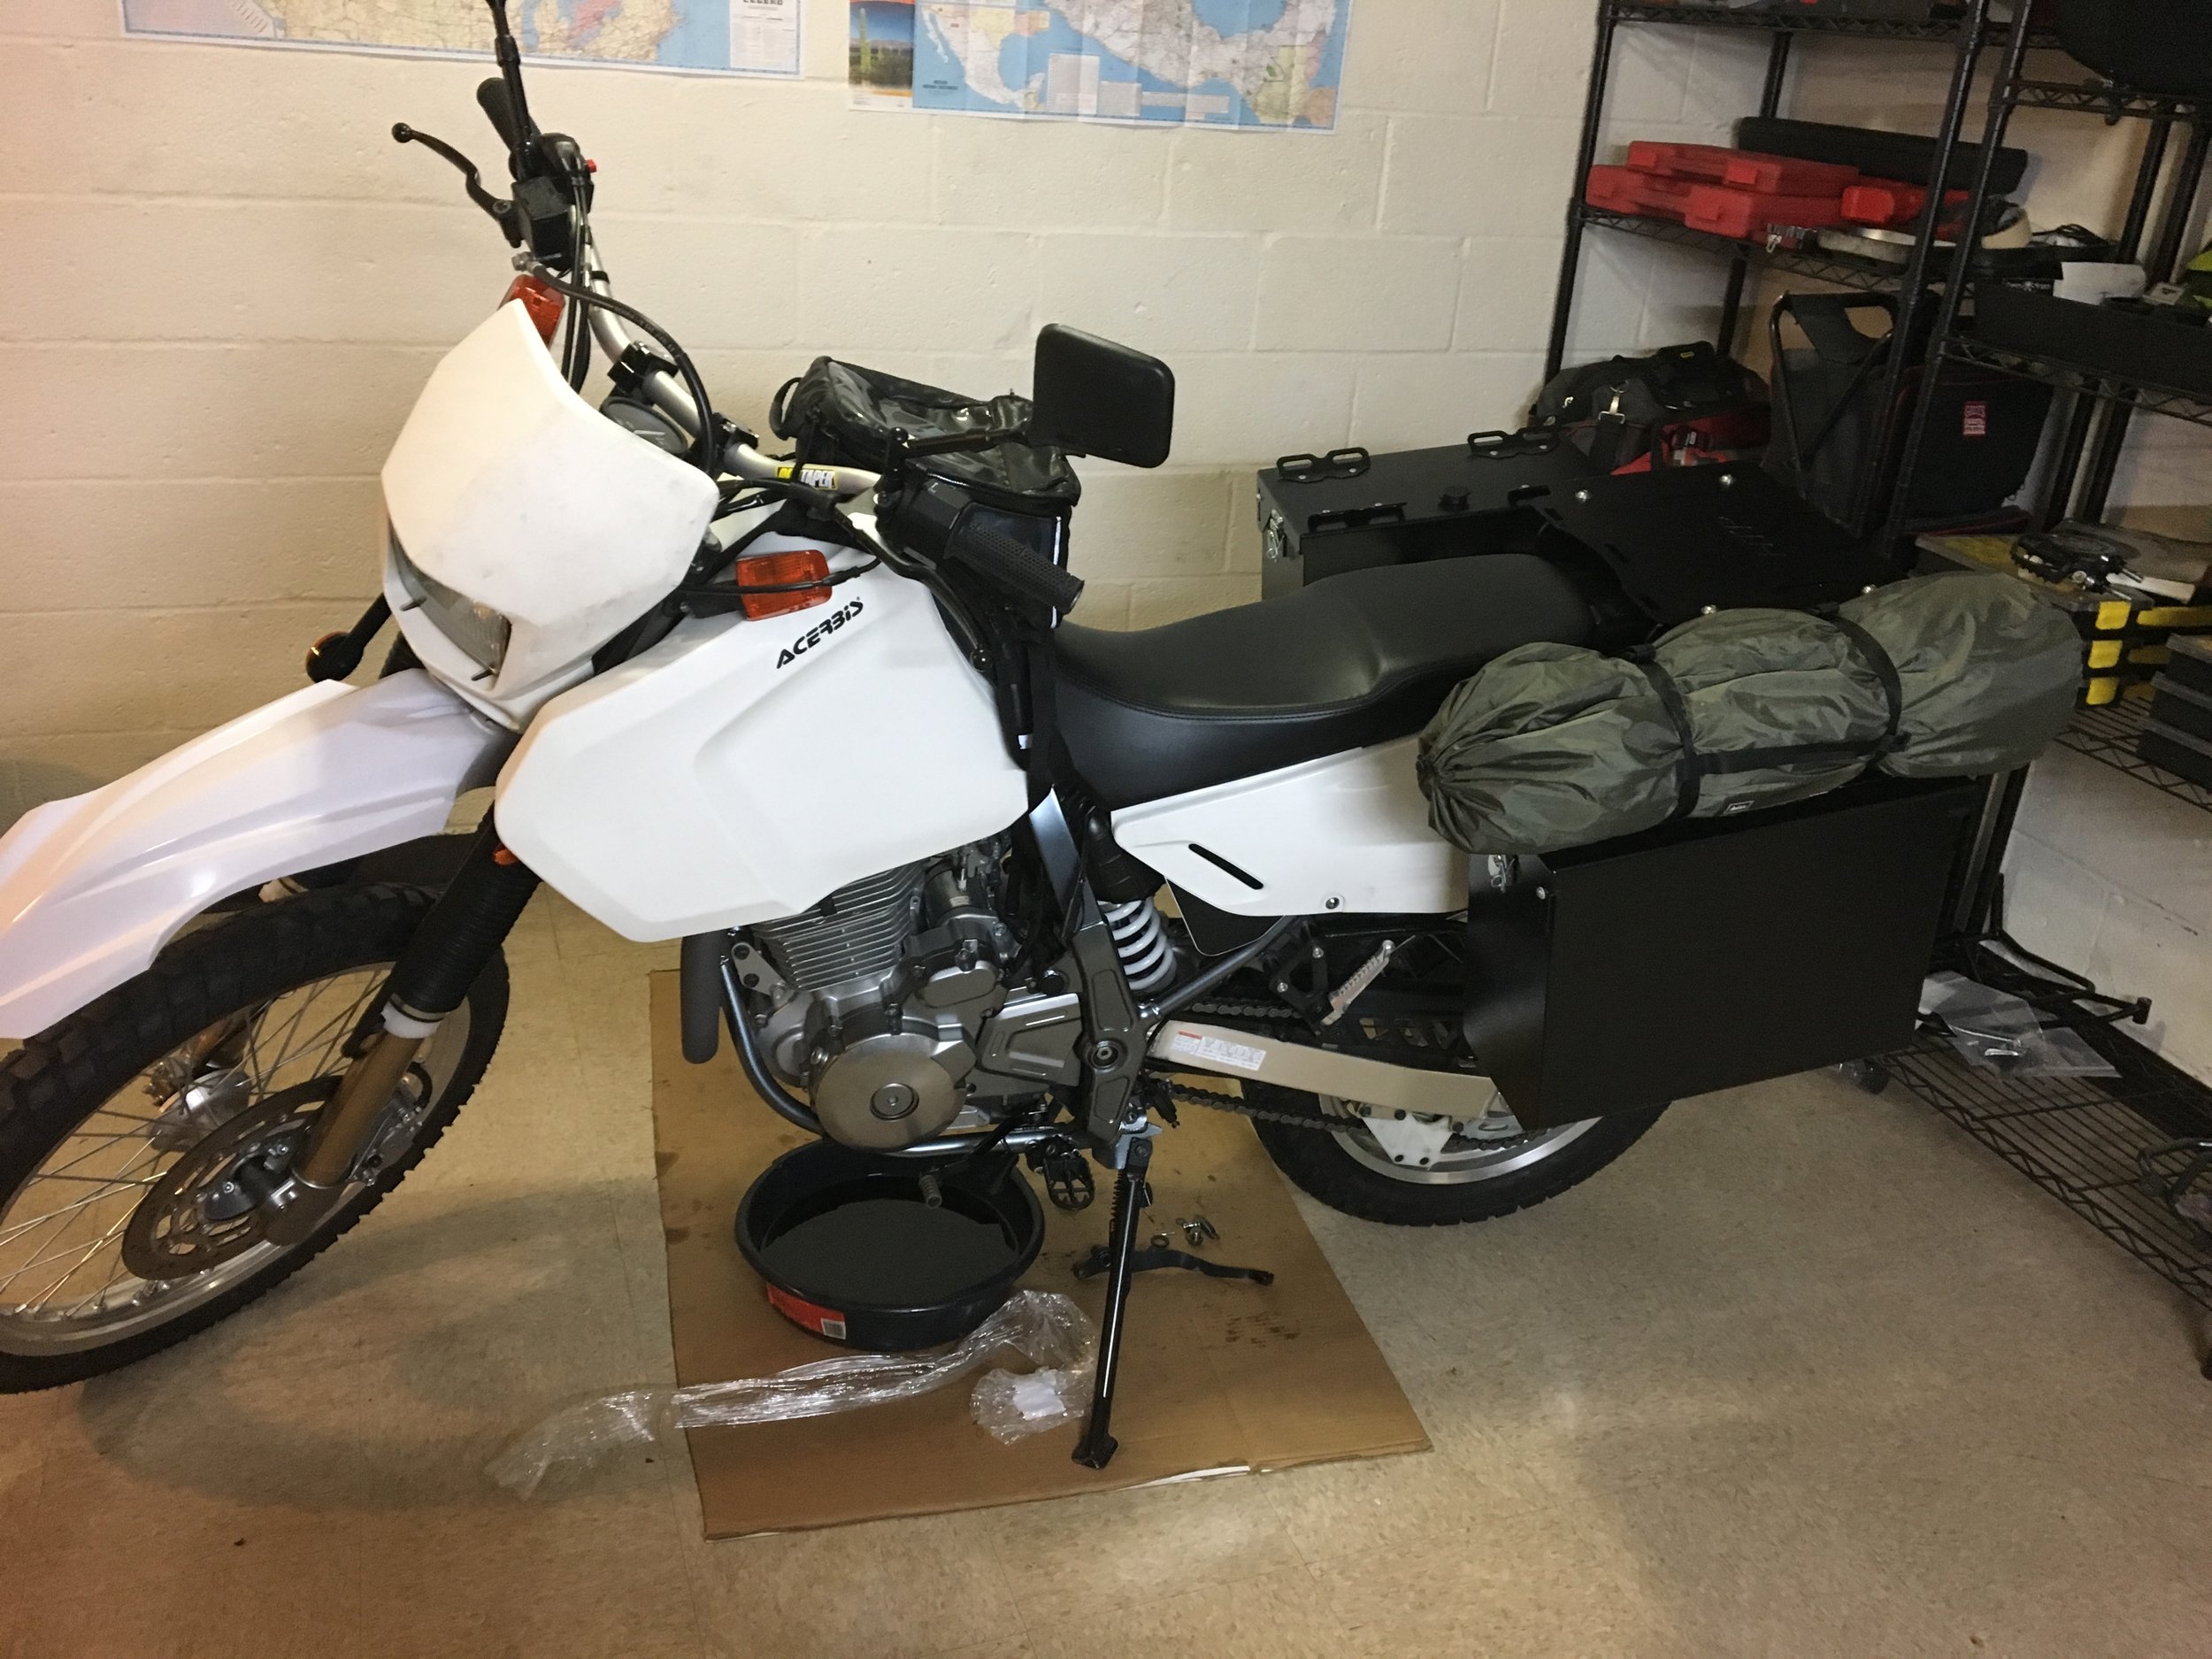

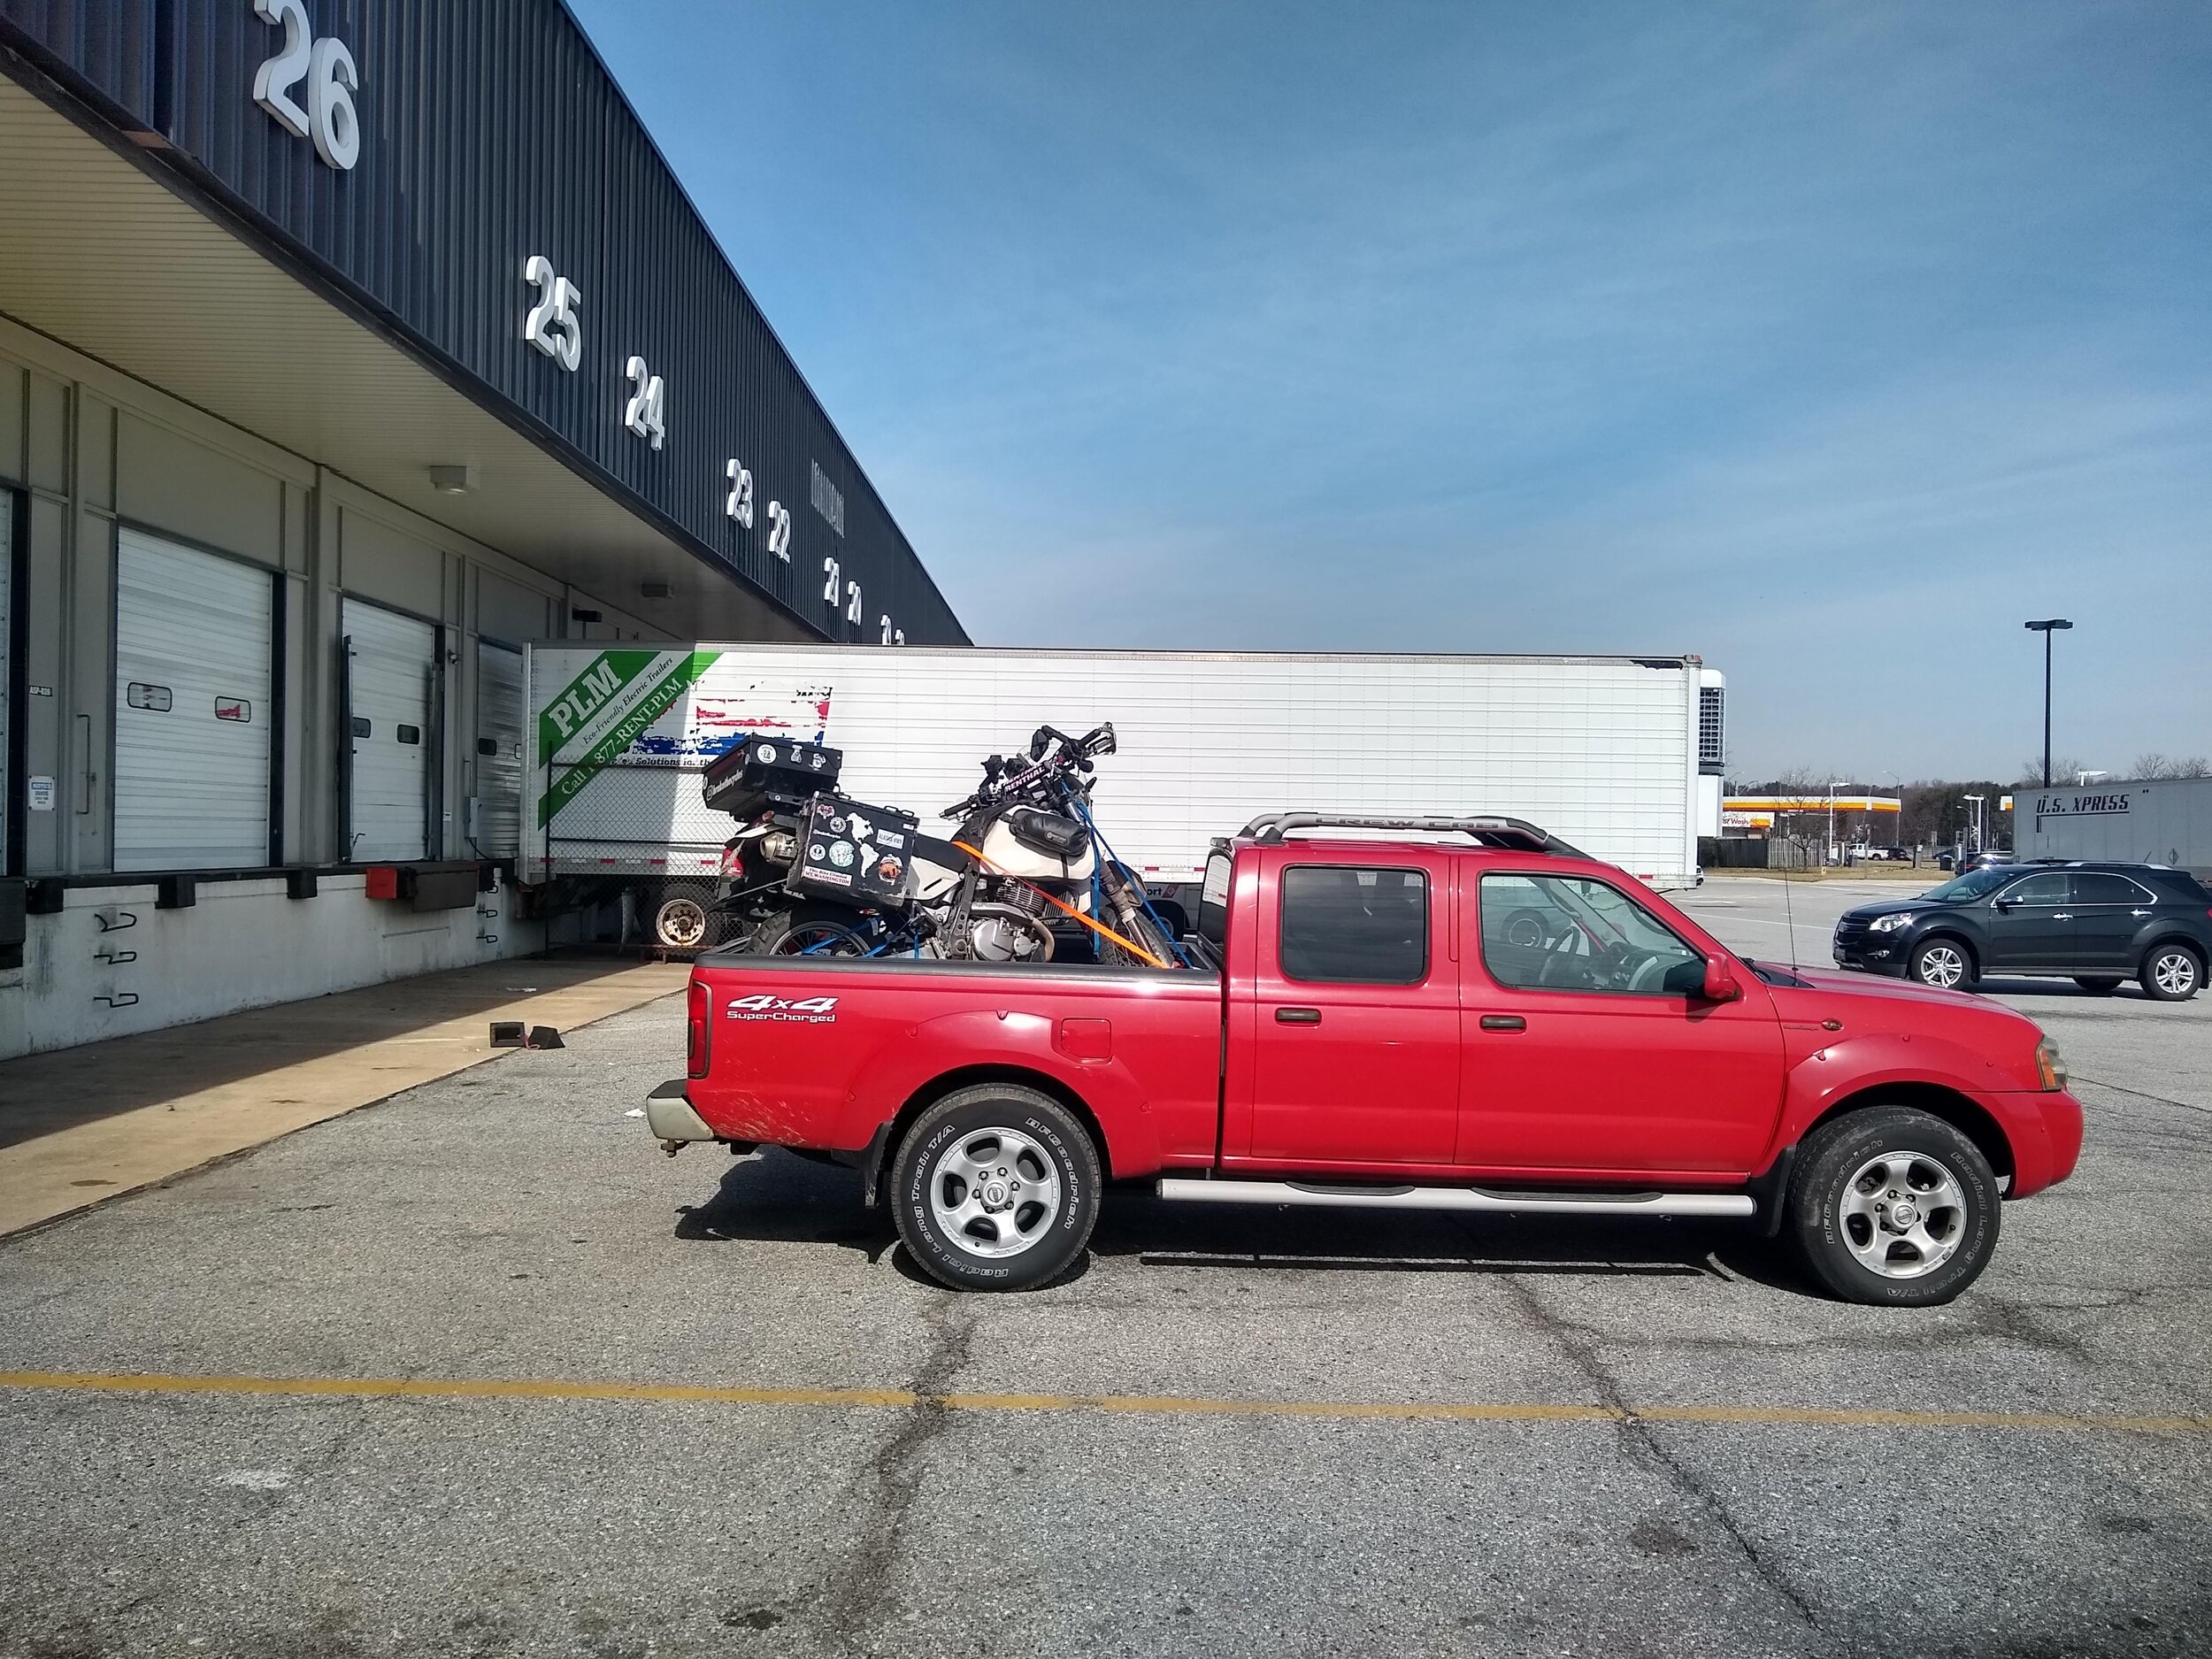
Luggage
For luggage, I went with Happy Trails 7.5 Owhyee panniers and a top box also from Happy Trails. I took the dimensions and mocked up the sizing for alot of different types online and settle with Happy Trails. There are a million debate over hard and soft luggage, but honestly, I am still torn between the two. But I am settle on this south america tourer to have hard luggage, and I think I will make the black Dr carry soft luggage for more off road focus. I think for something that I will be on the road for a year, I will enjoy the convenience and security (or perceived security) a lot more. versus just being on the road for a month doing the TAT or something like that. I also purchased a giant loop diablo from a forum member. I think I will be adding the Pannier Pockets for some quick access items.
Suspension
I didn't take any photo of the suspension build, because this is the second time around for me to do it, and to me it was pretty straight forward. I went with the Cogent DDC front drop in emulator. A pair of springs, cant remember the spring rate now. The rear is up rated springs as well with cogent shock body from procycle. Biggest problem was the nitrogen filling. Only one place locally did it, and charged a murdering rate of 40 bucks. When I first did it, I was able to get it done for 10 dollars at RAM cycles in air park... which is now out of business. I'll edit the post with exact spring rate.

Post Alaska to ARgentina Trip Rebuild Part 1
After 30,000 miles of abuse to the bike, I picked it up in my dad’s truck and brought it home. I already knew the rear frame was twisted, I also know that the rear swing arm is damaged. oil leaks are starting to show in multiple locations. My wiring is still solid, seems like my electrical set up was well planned and executed and withstood the abuse. I see a lot of waterproof connectors in new motorcycles. I wonder if it is even necessary. I have dump this in a river, had it sit in the rain and rode in all the places I can imagine would cause electrical issues, but it has trucked on strong.
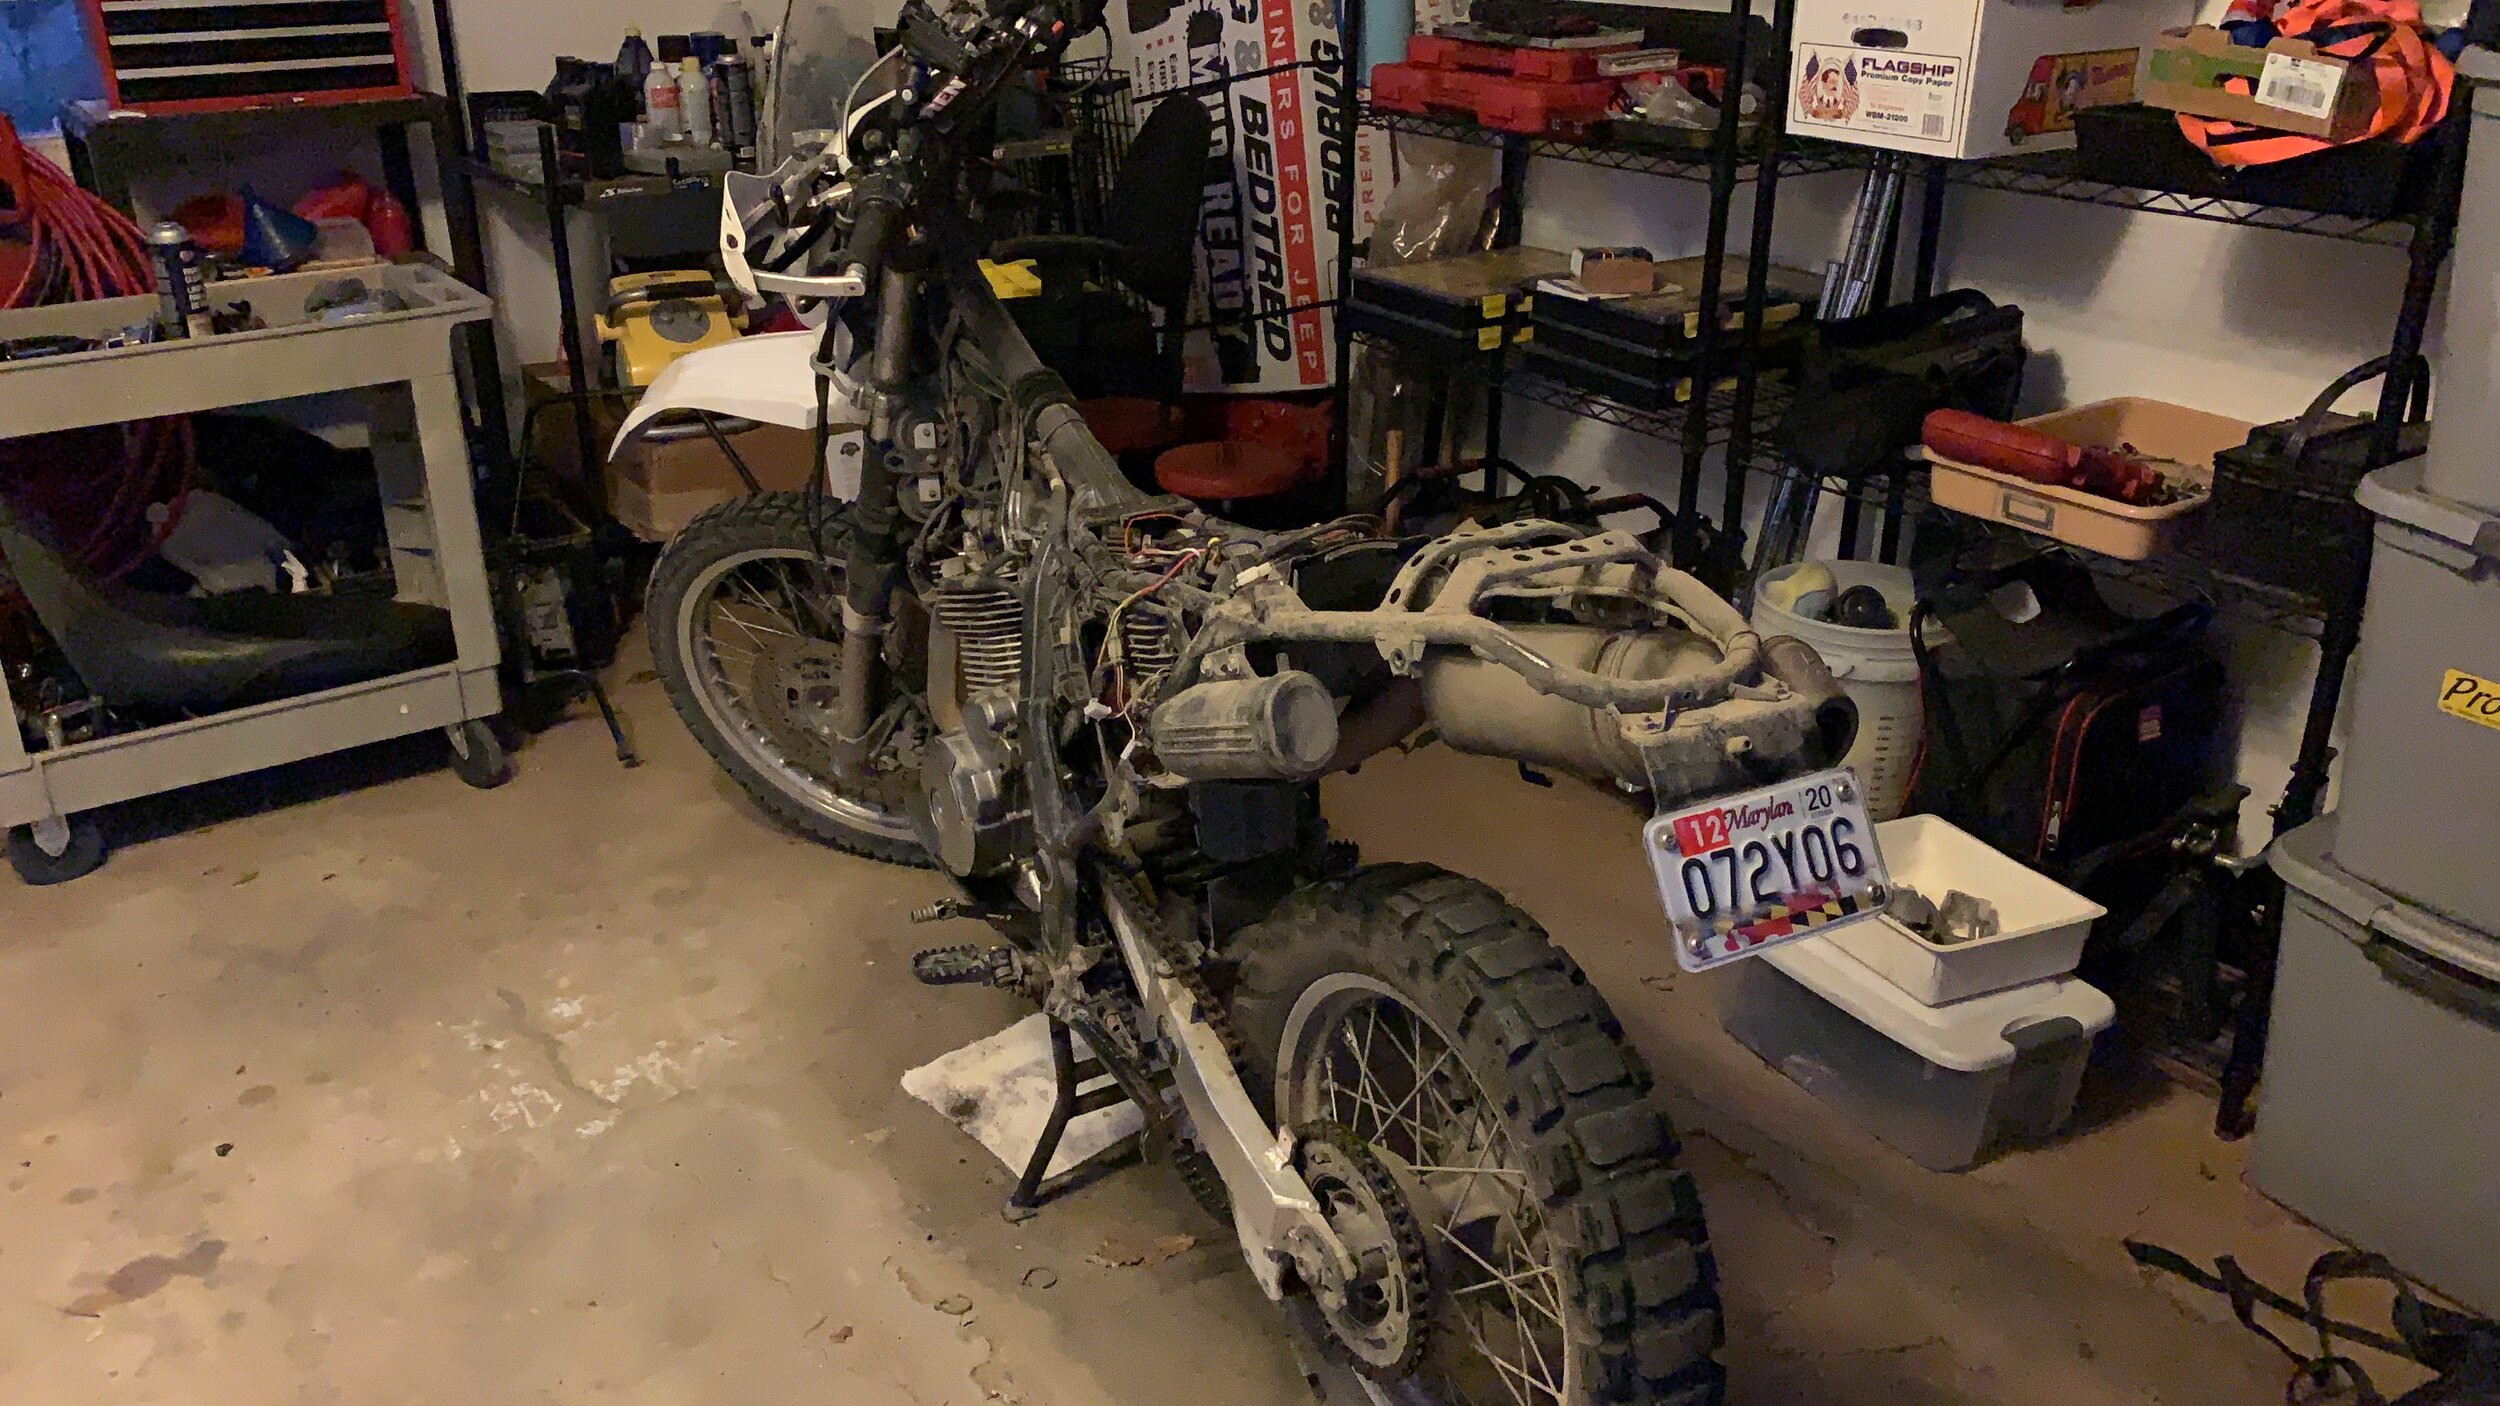
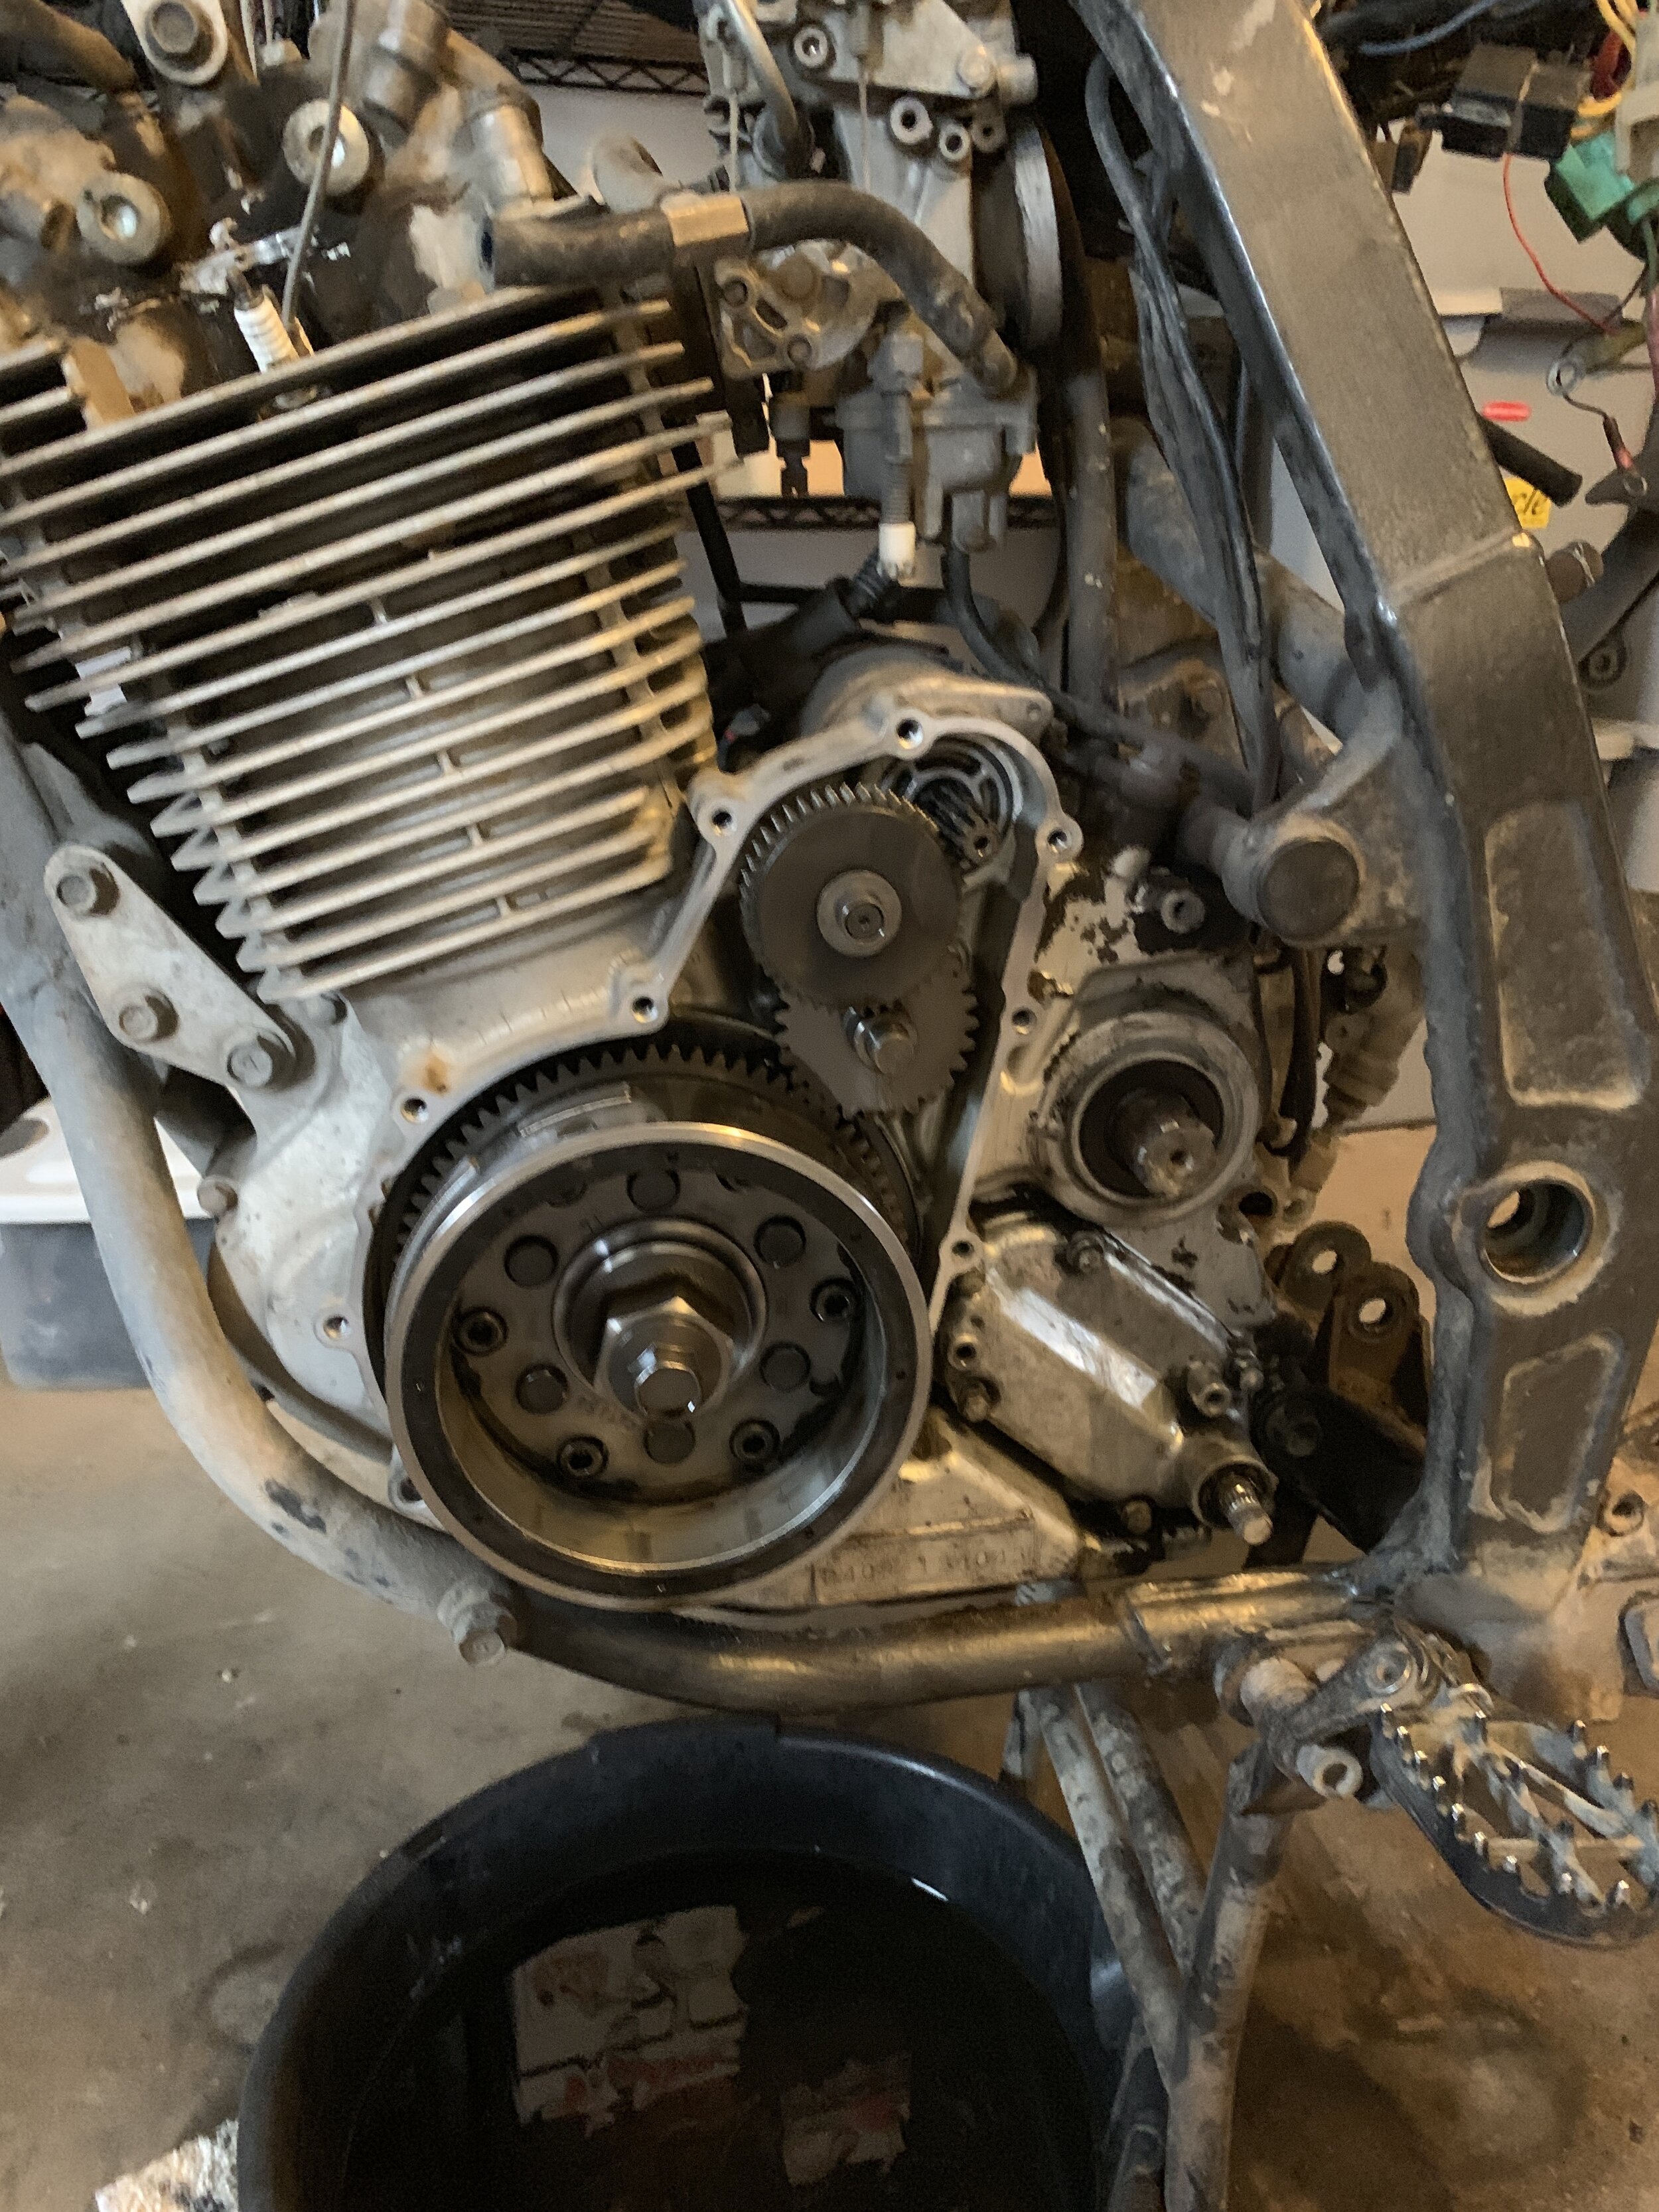
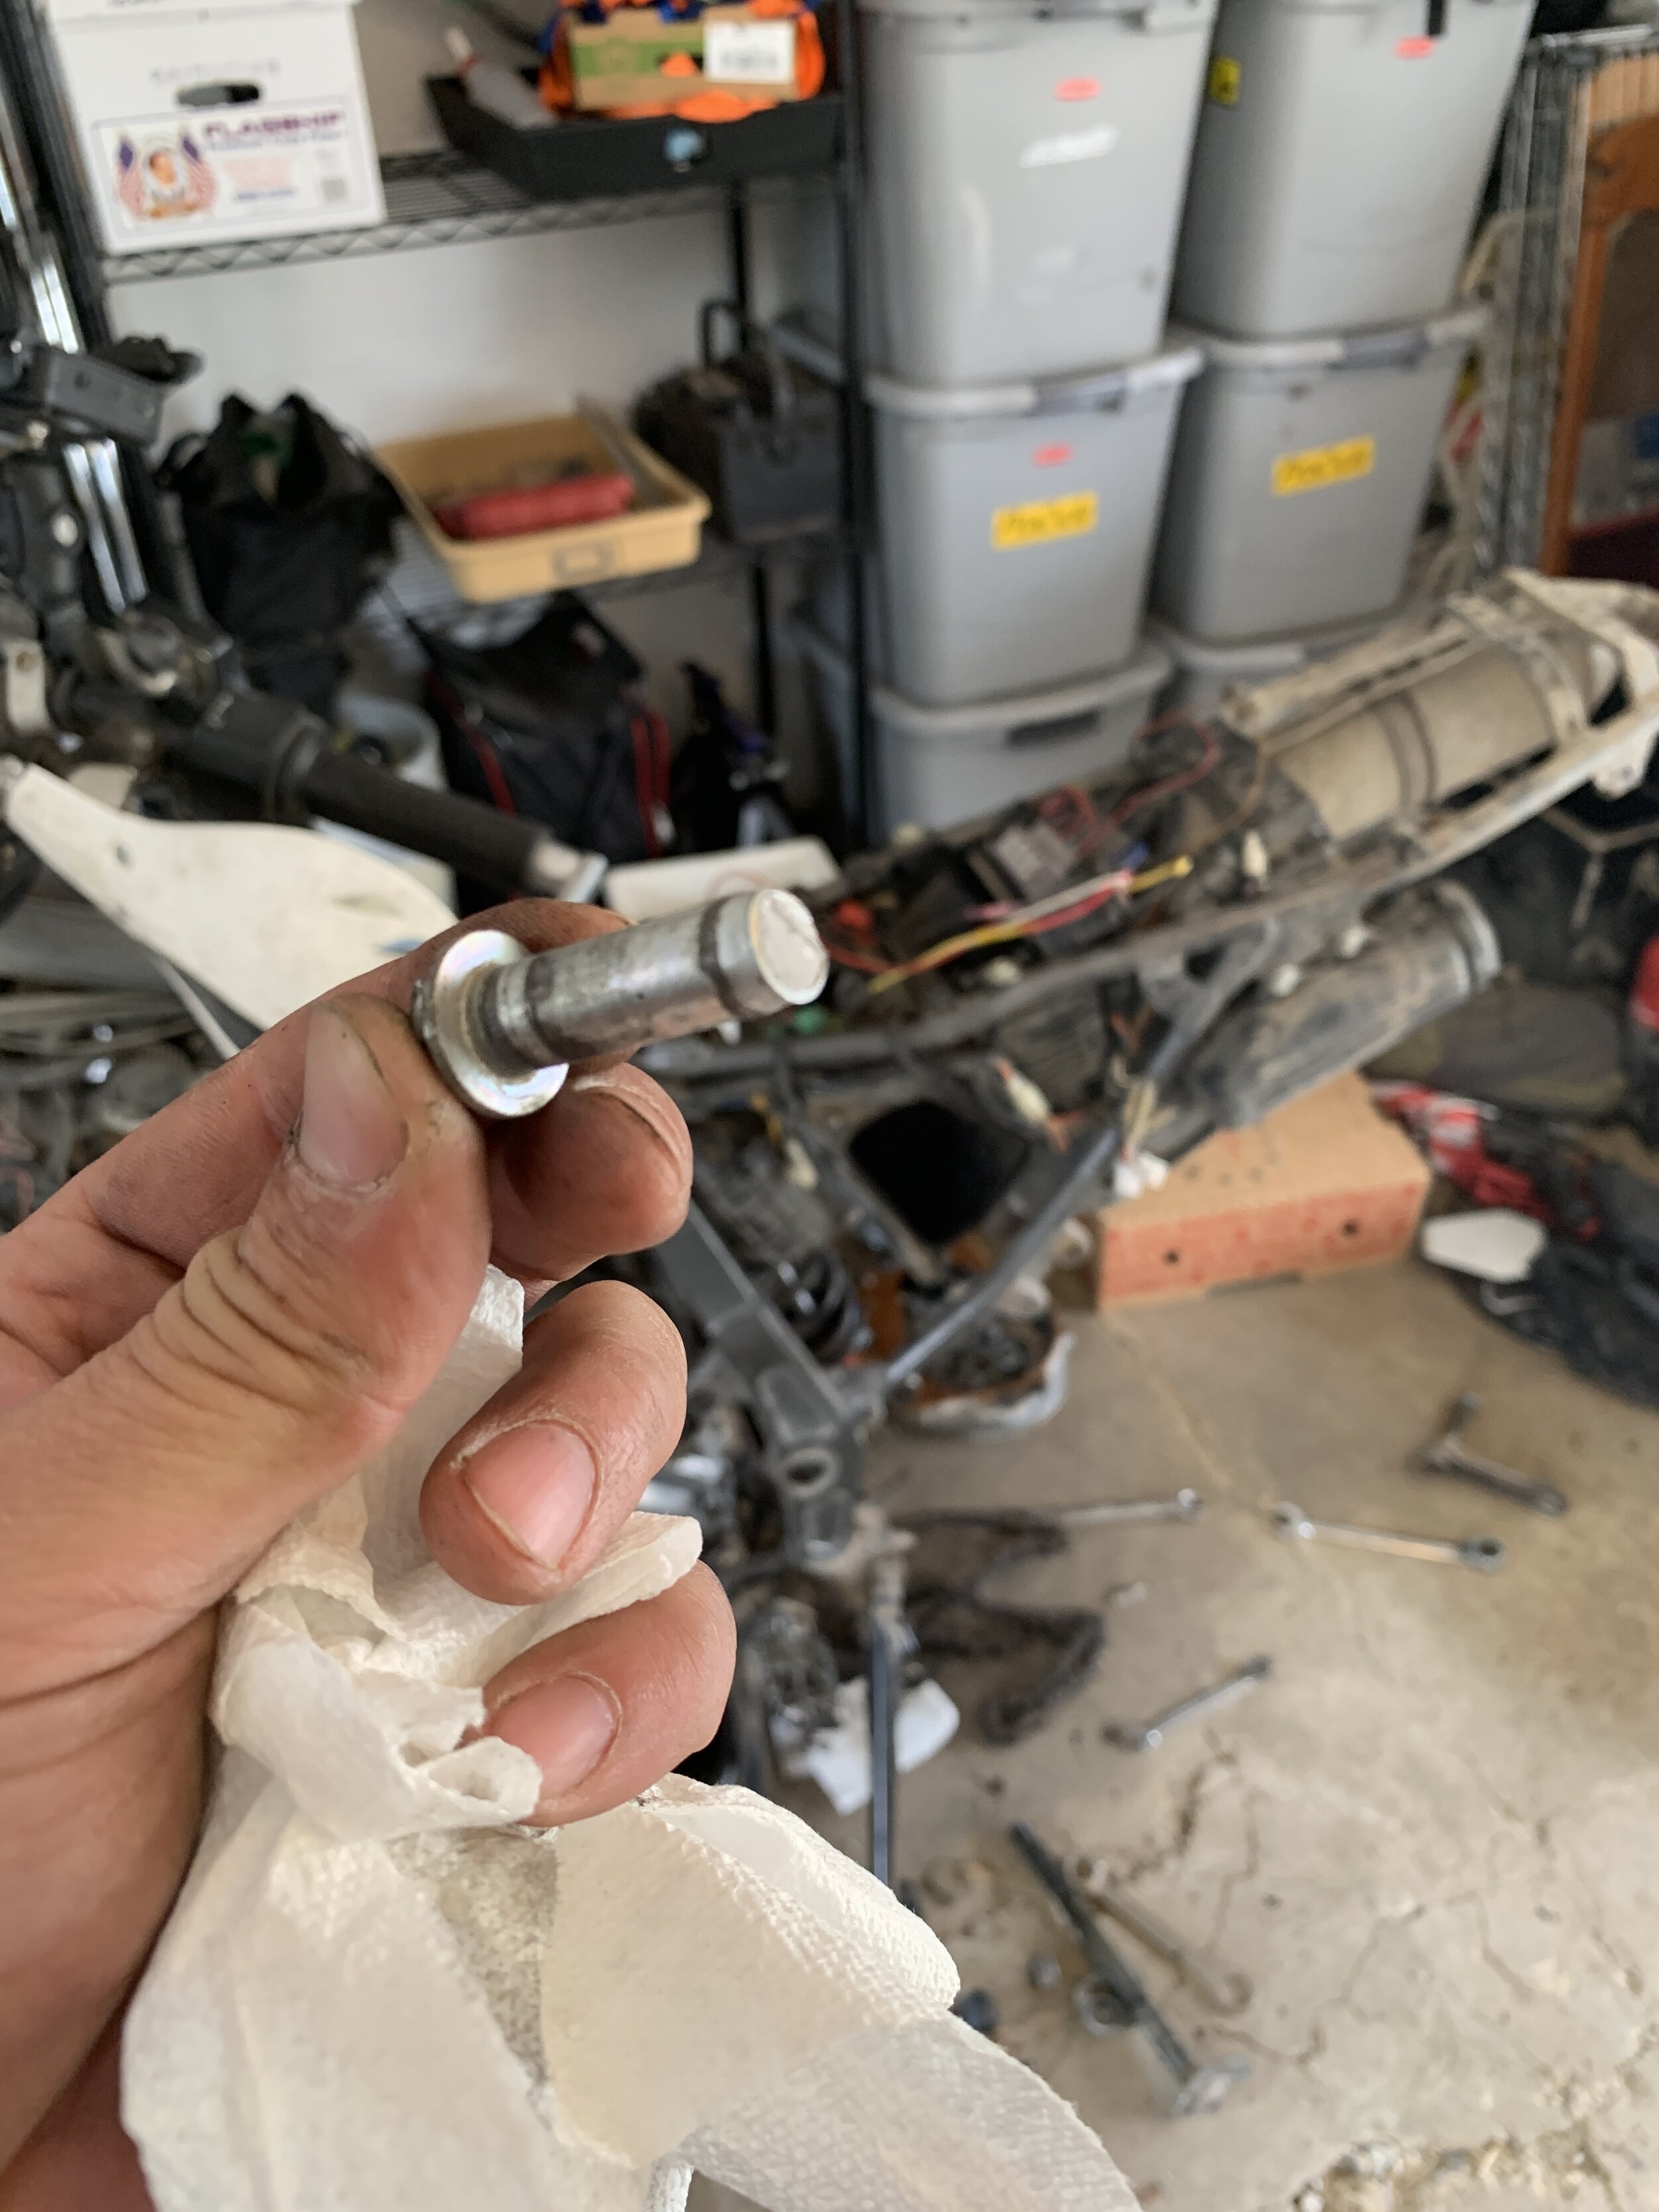
Swing arm came in, and I remove the old swing arm. Before I even looked closely at the damage on the swing arm, there was a shocking revelation… the shock bolt has been sheered off, for who knows how long. Did it break during the crash in Alaska? Or did it break from the extra weight two up riding? I am not certain, but the only reason the shock is still in there is because its wedge inside by the damaged bolt. Very scary discovery.
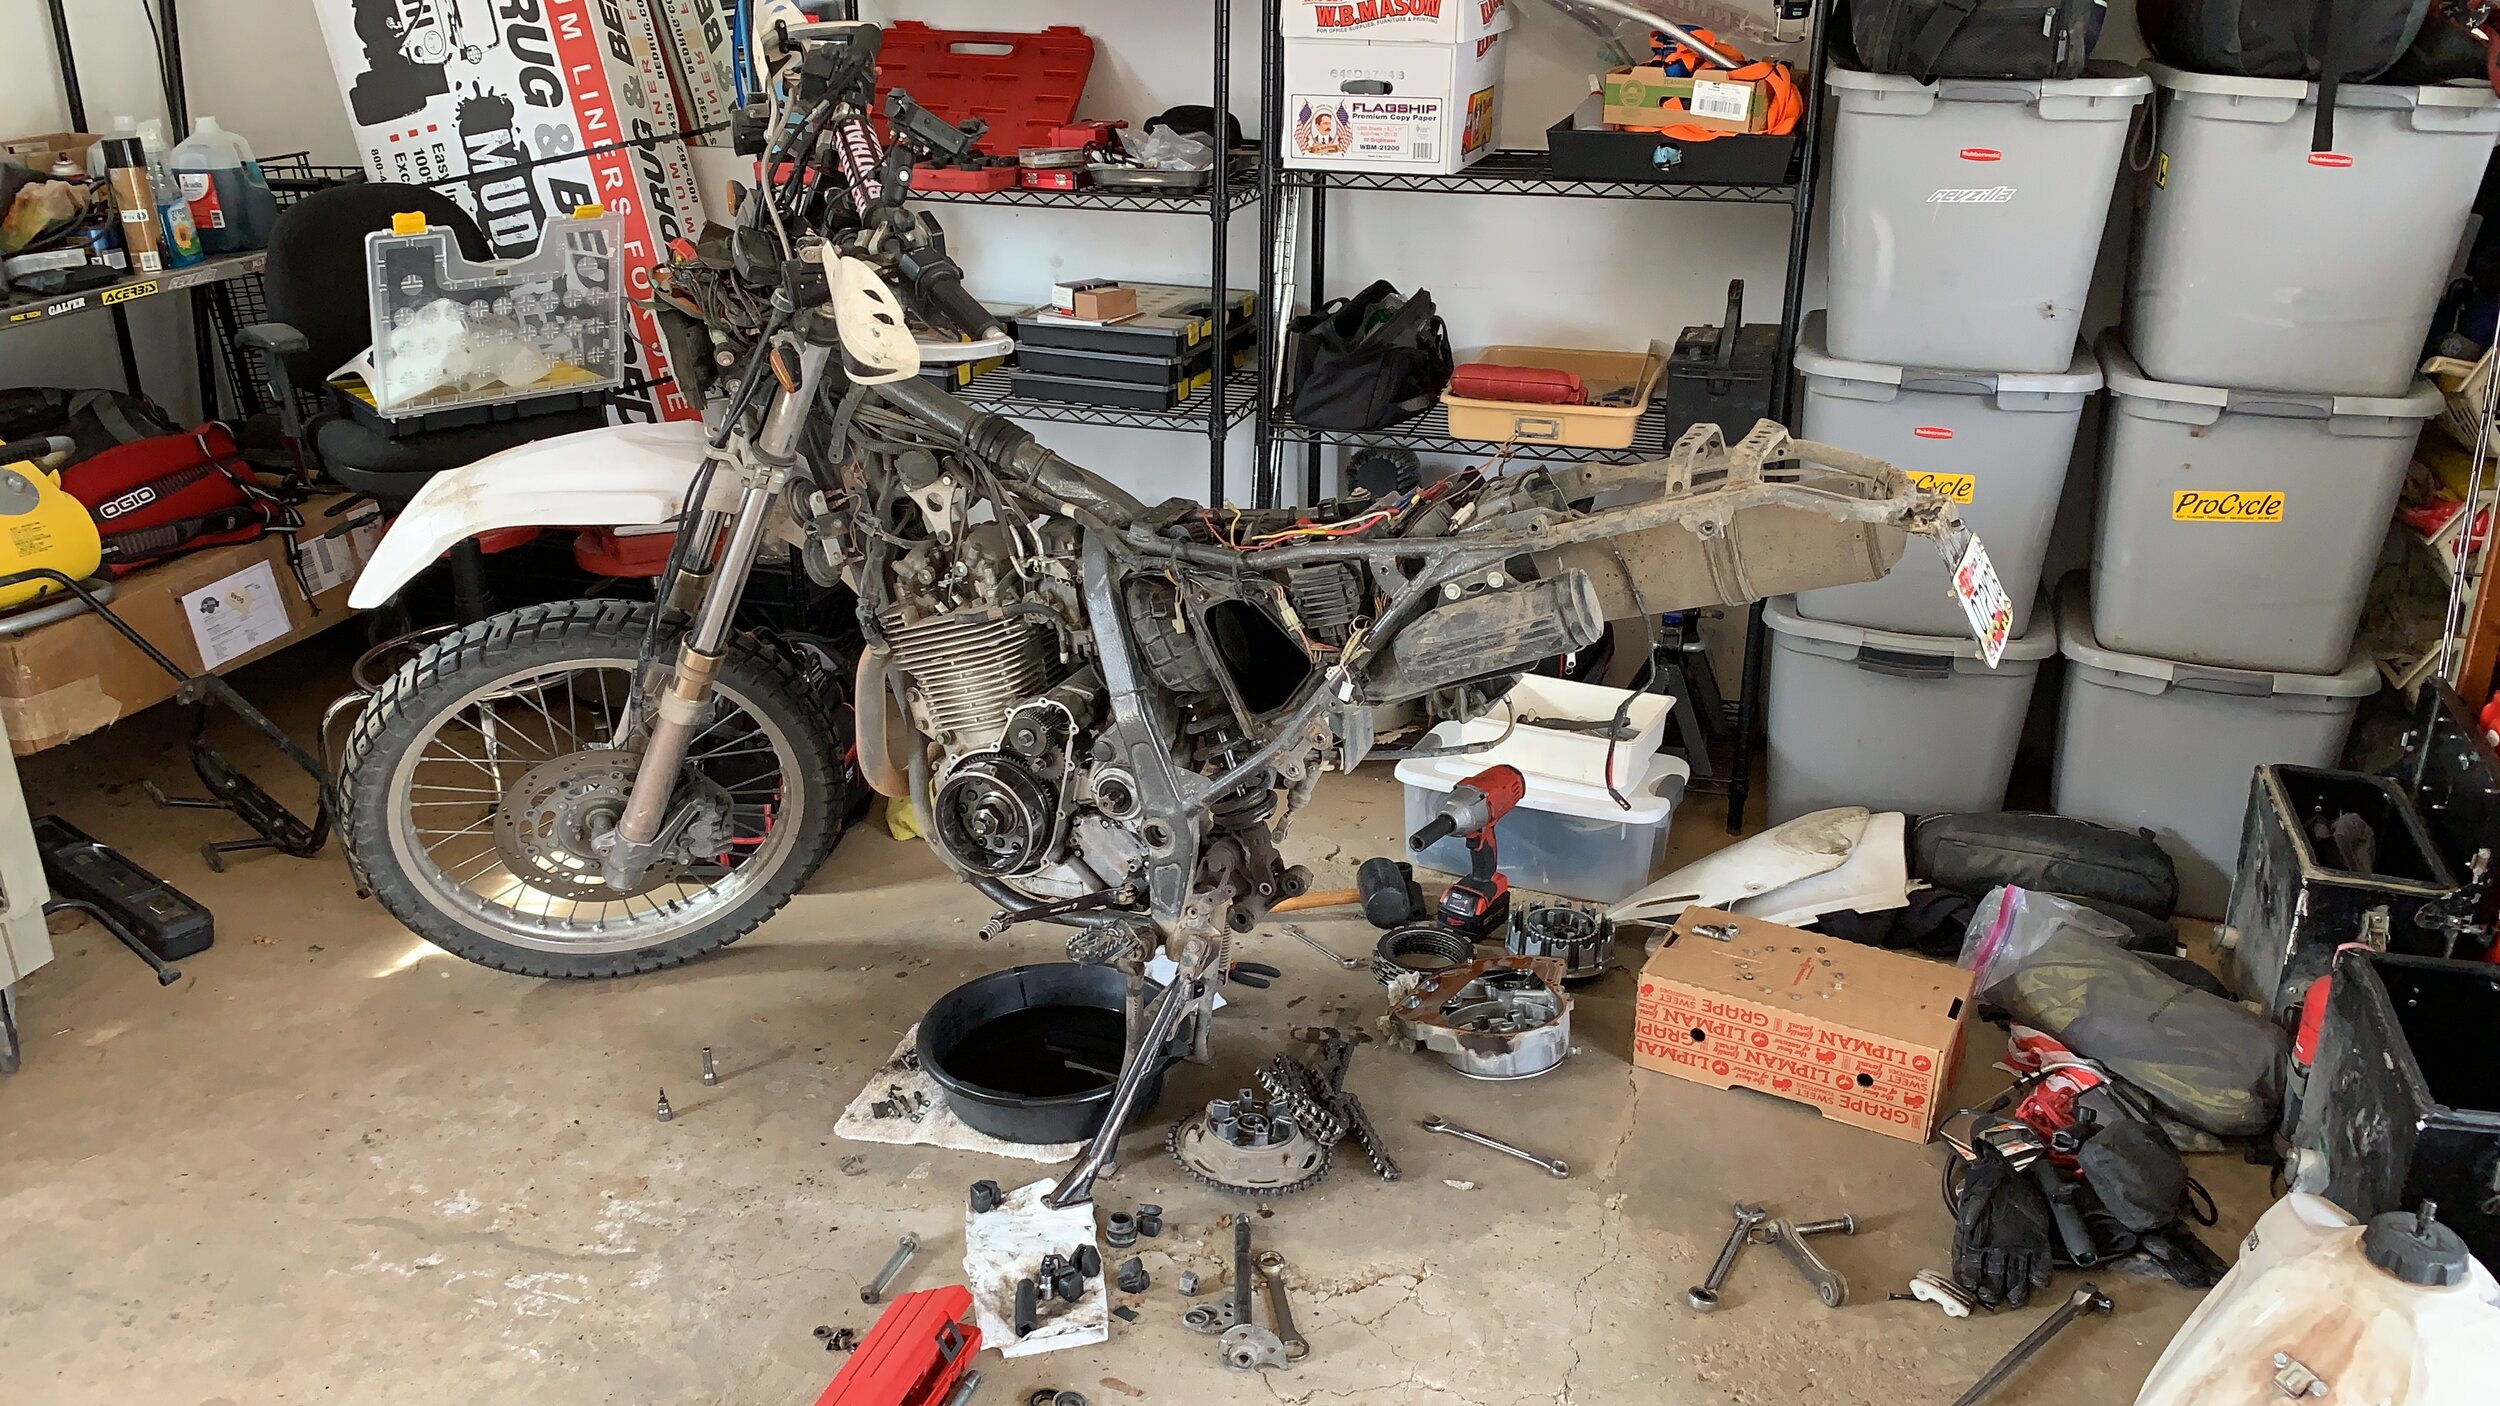
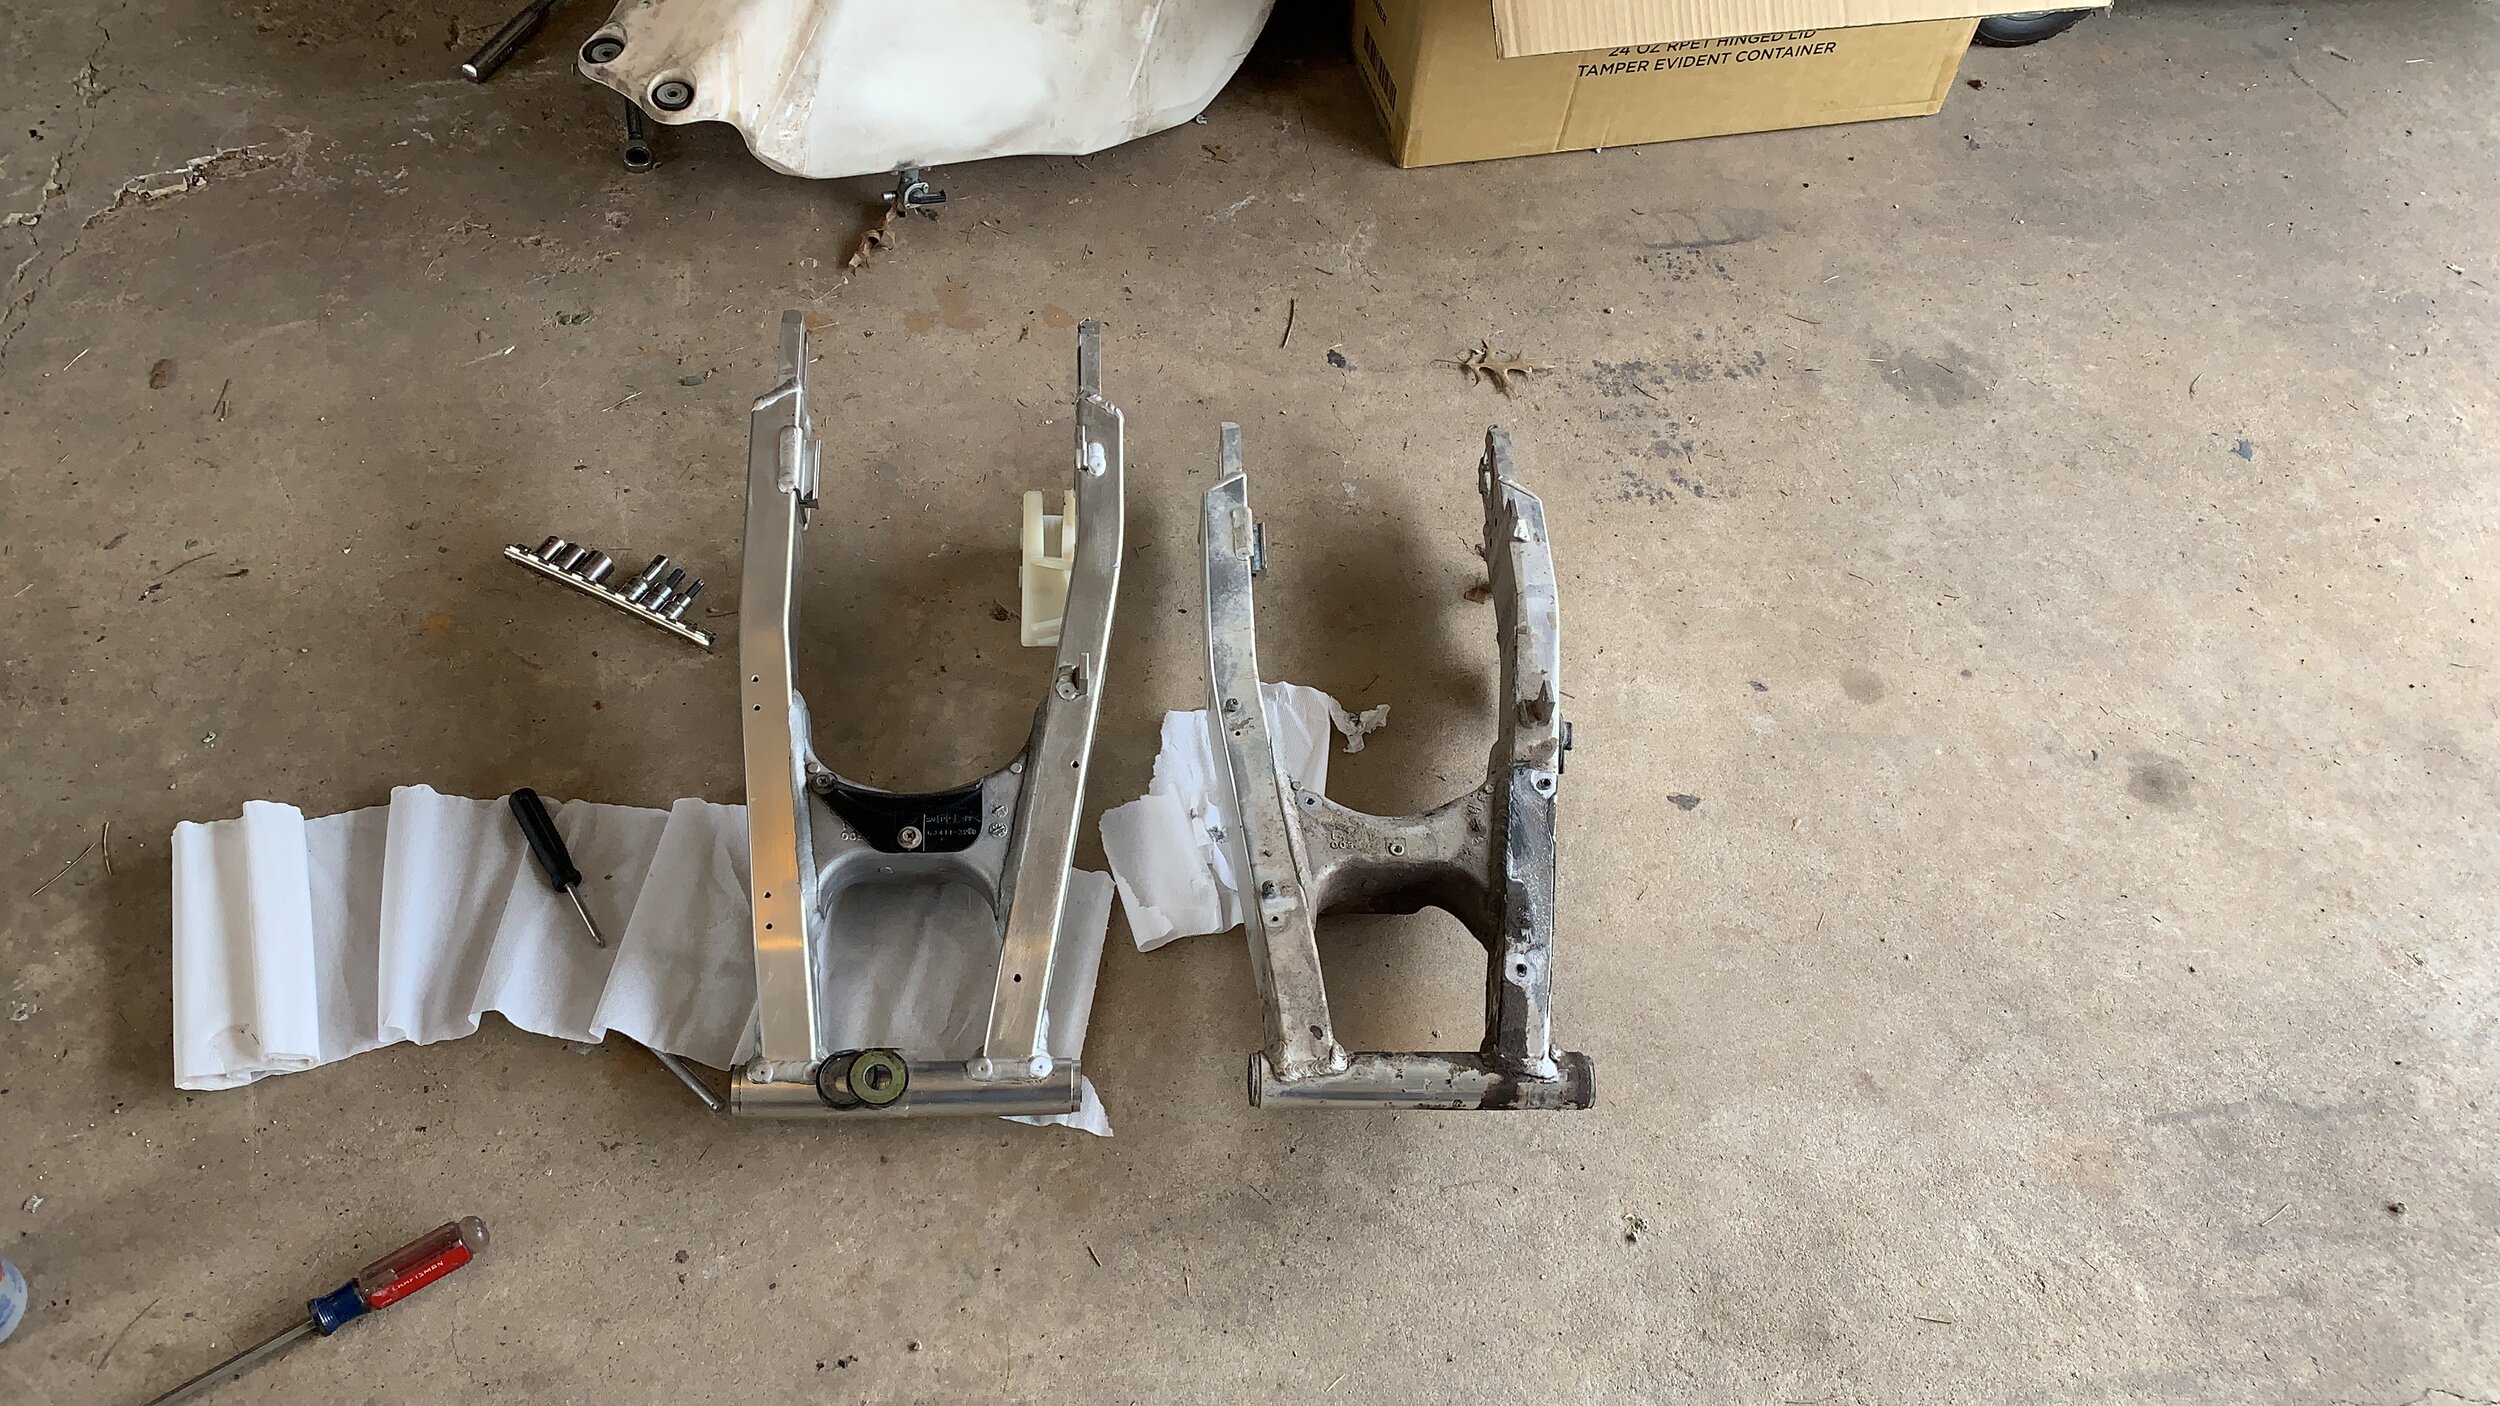
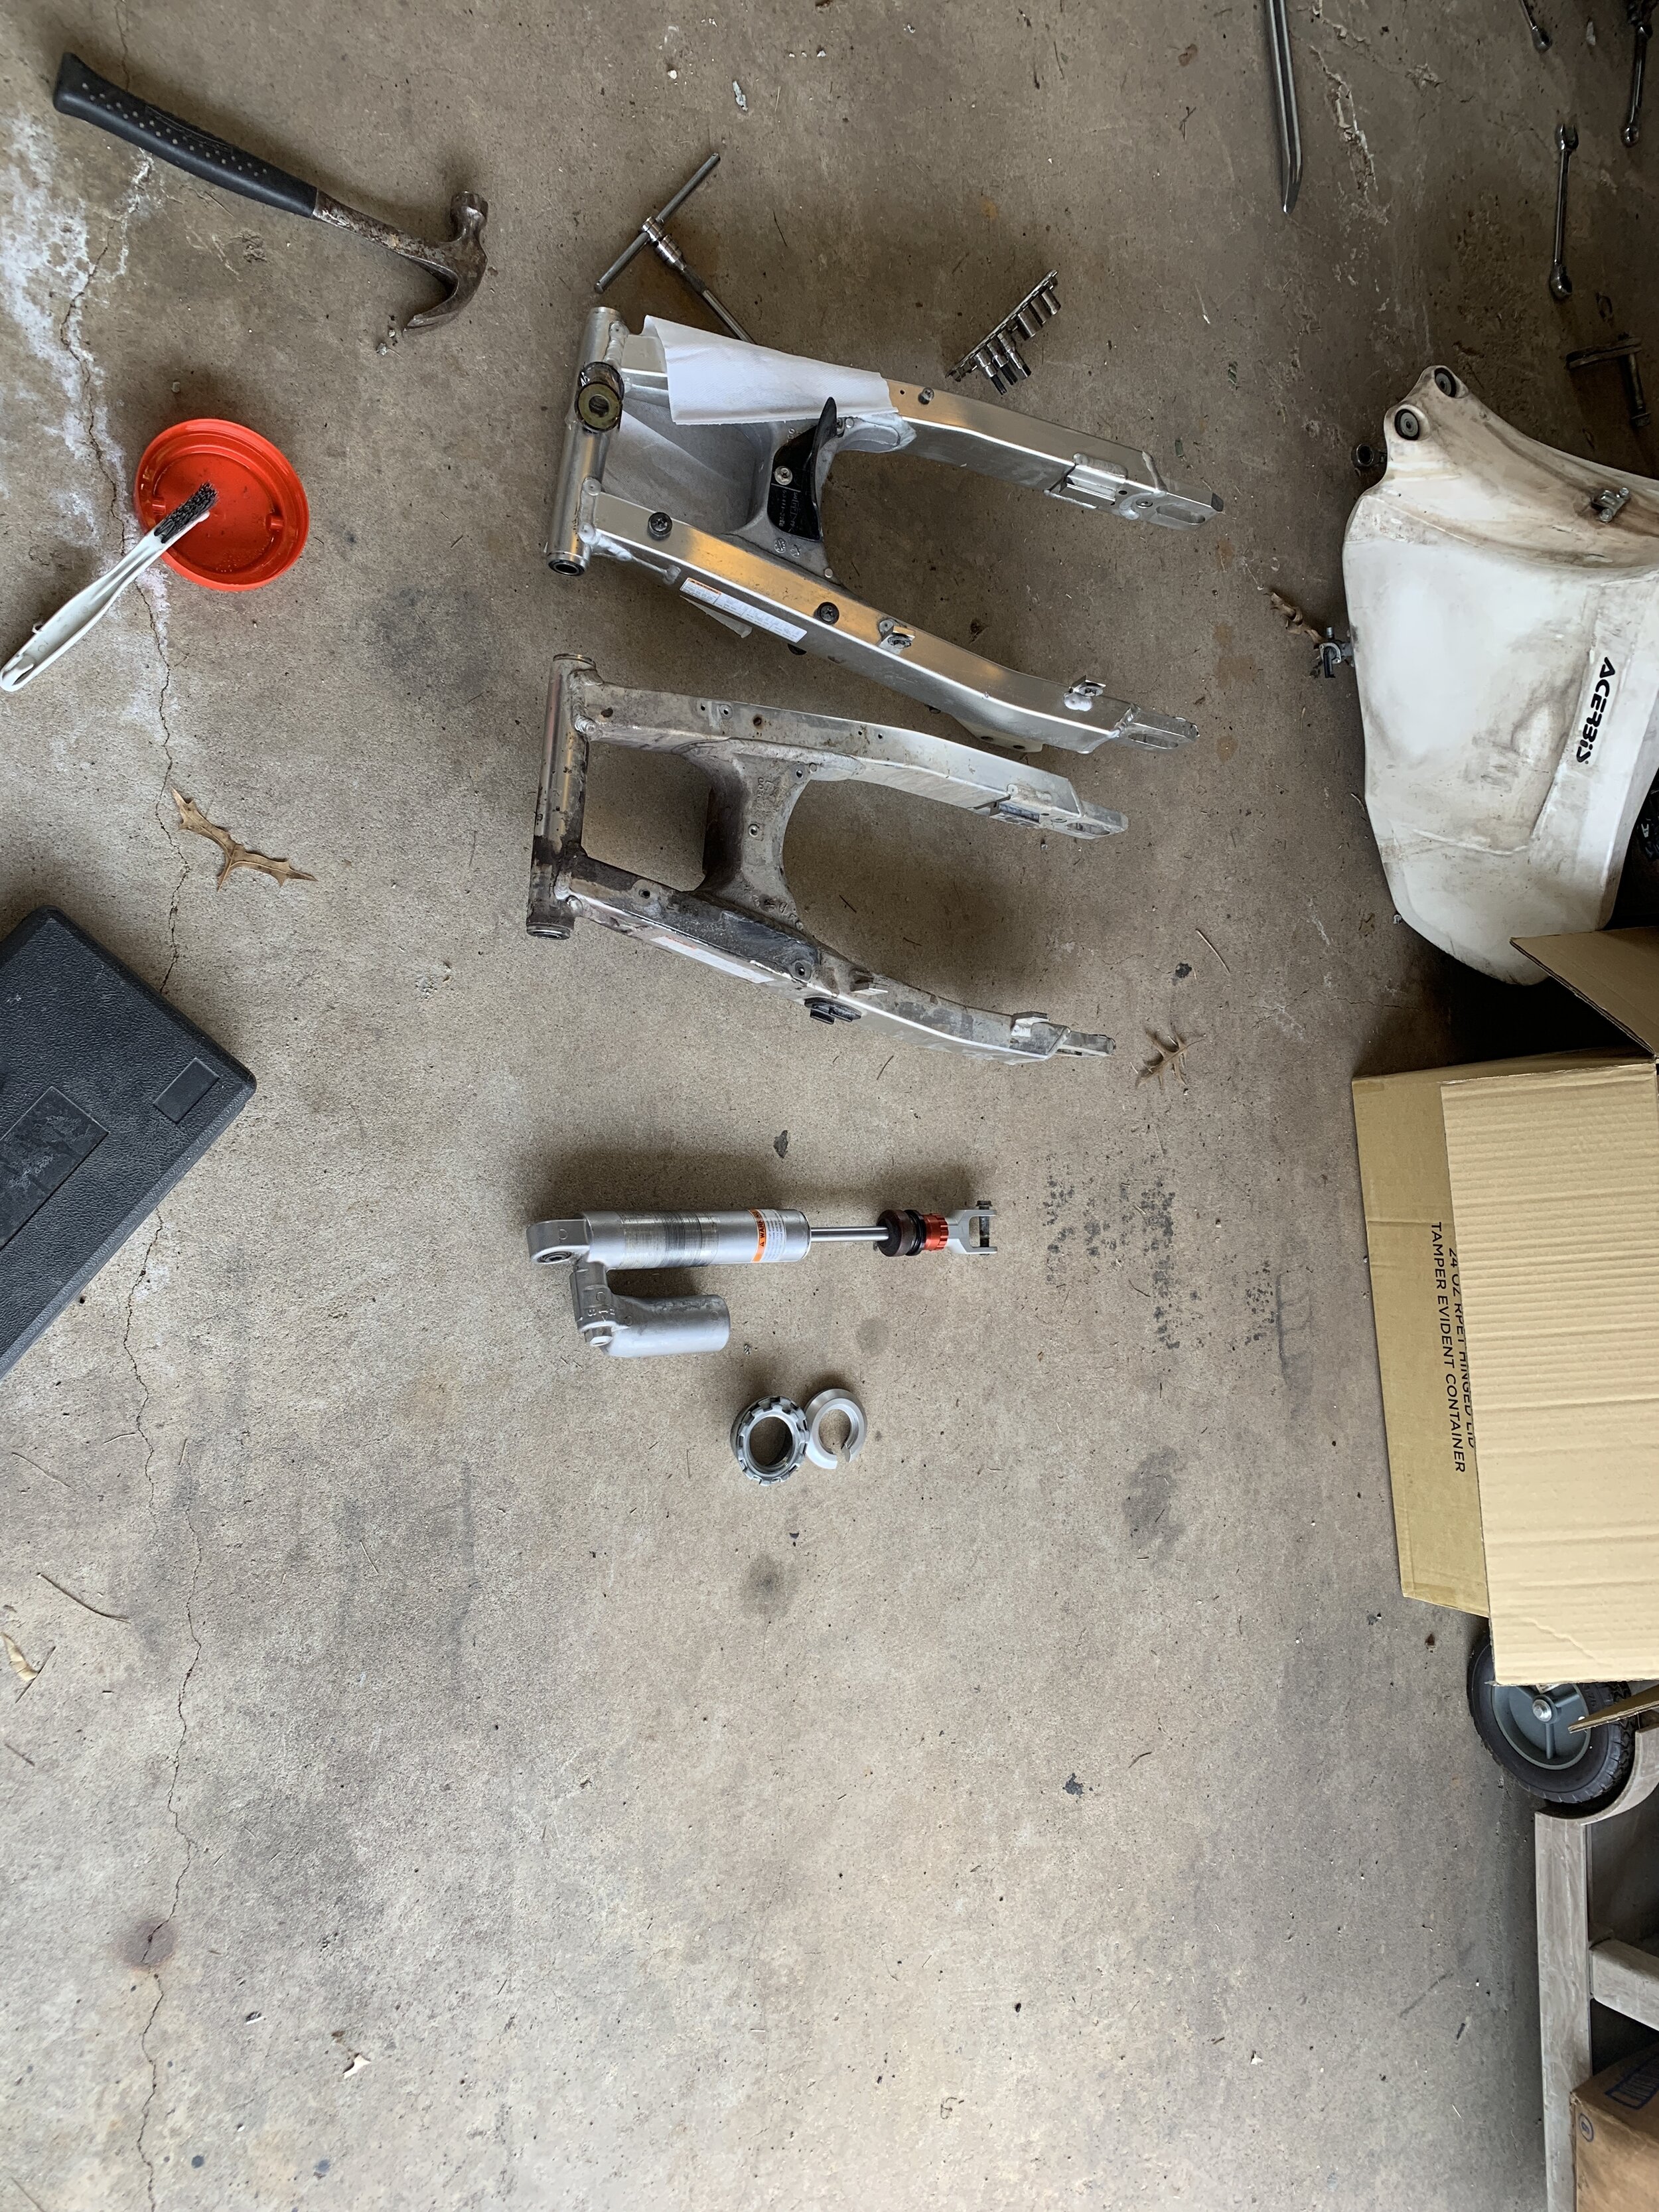
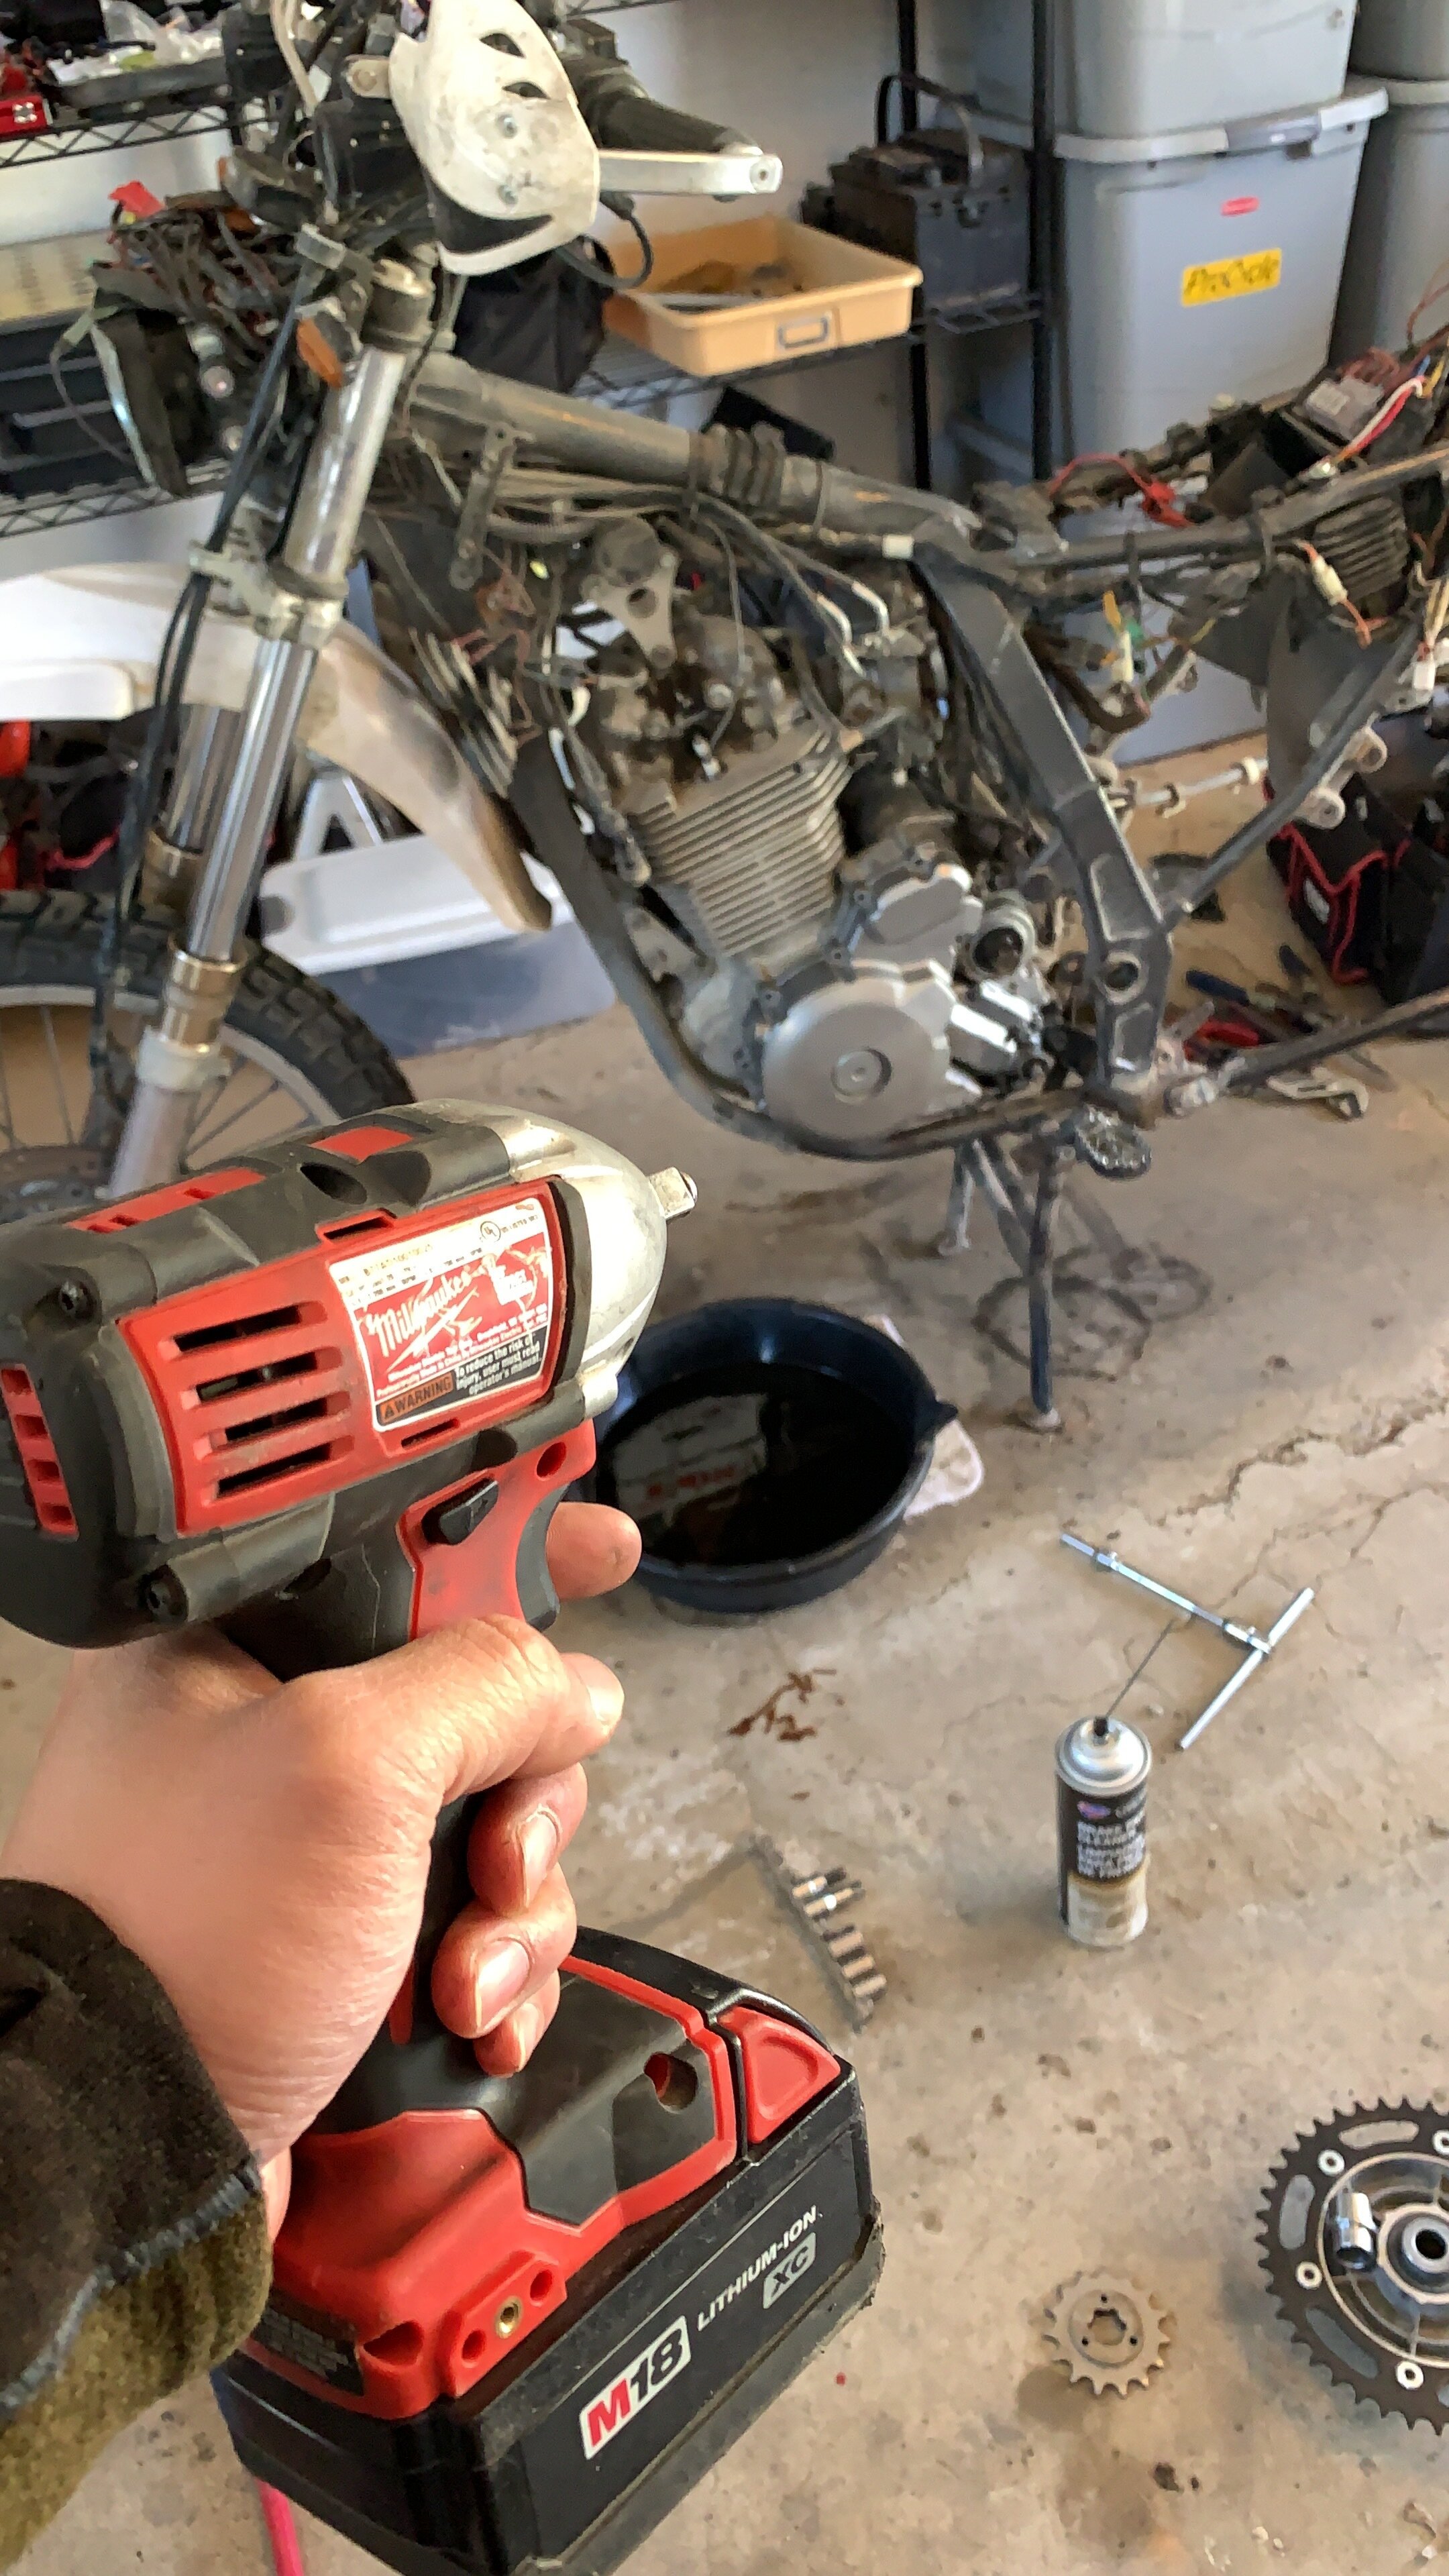
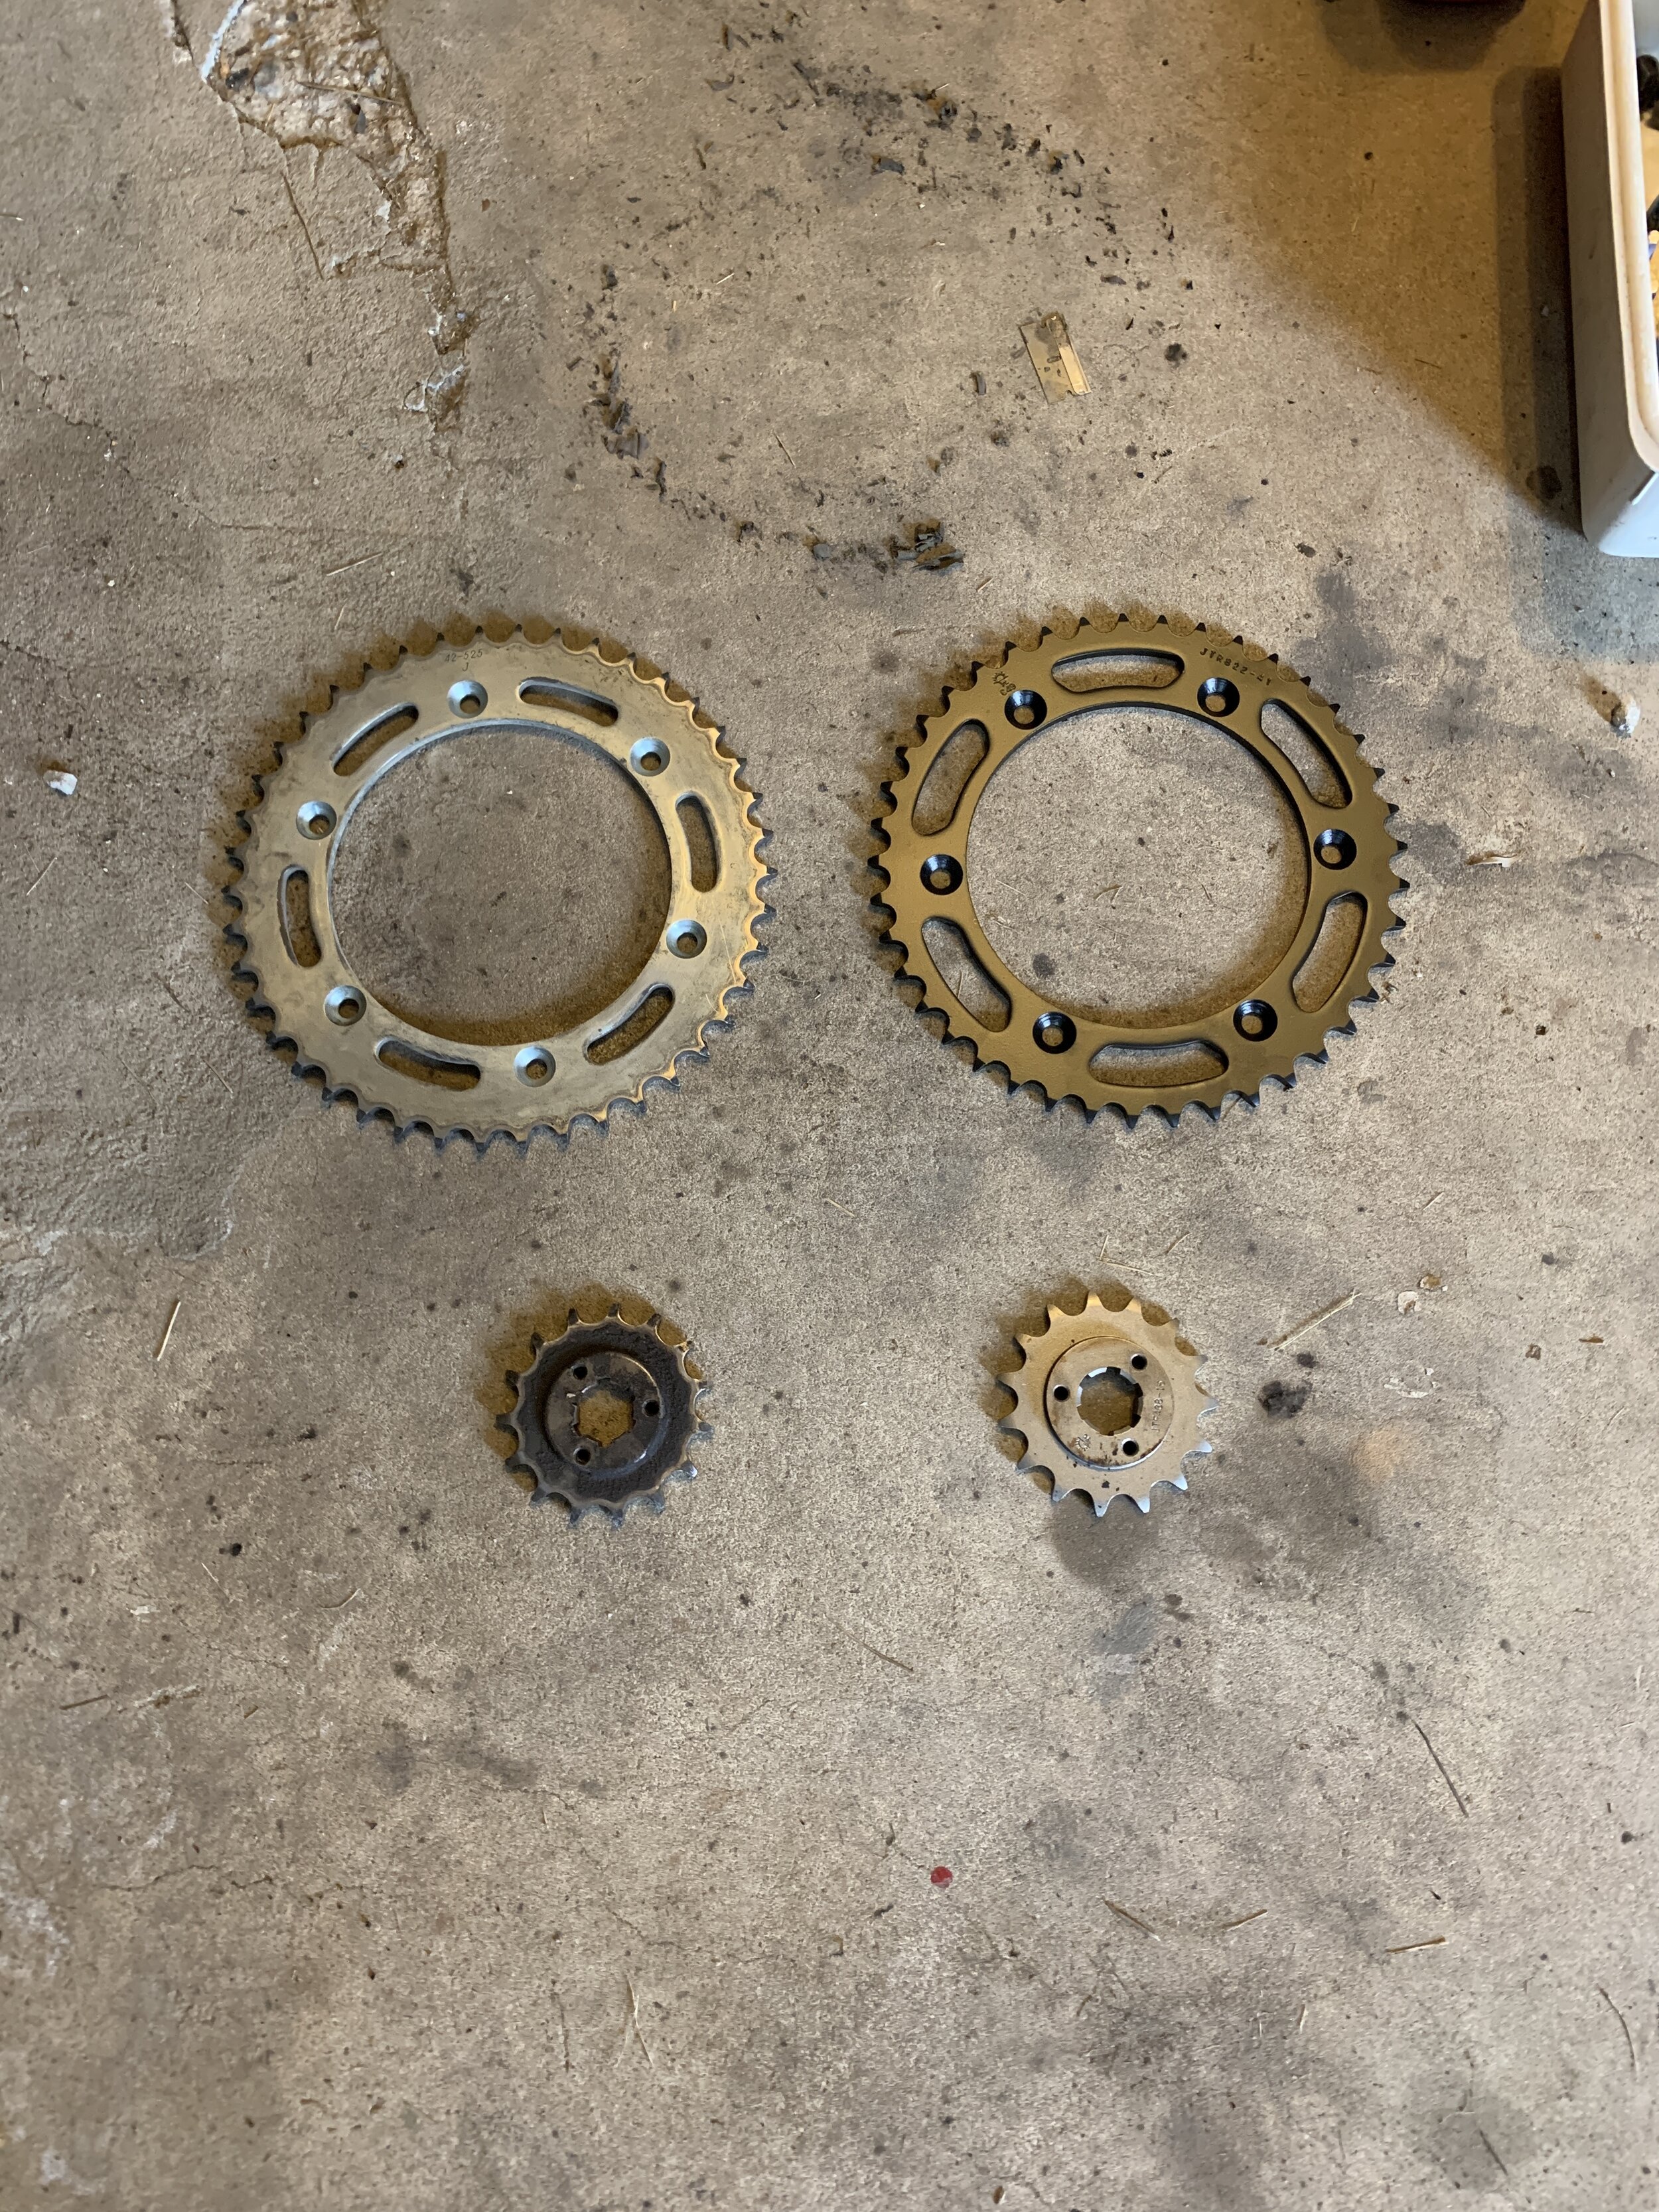
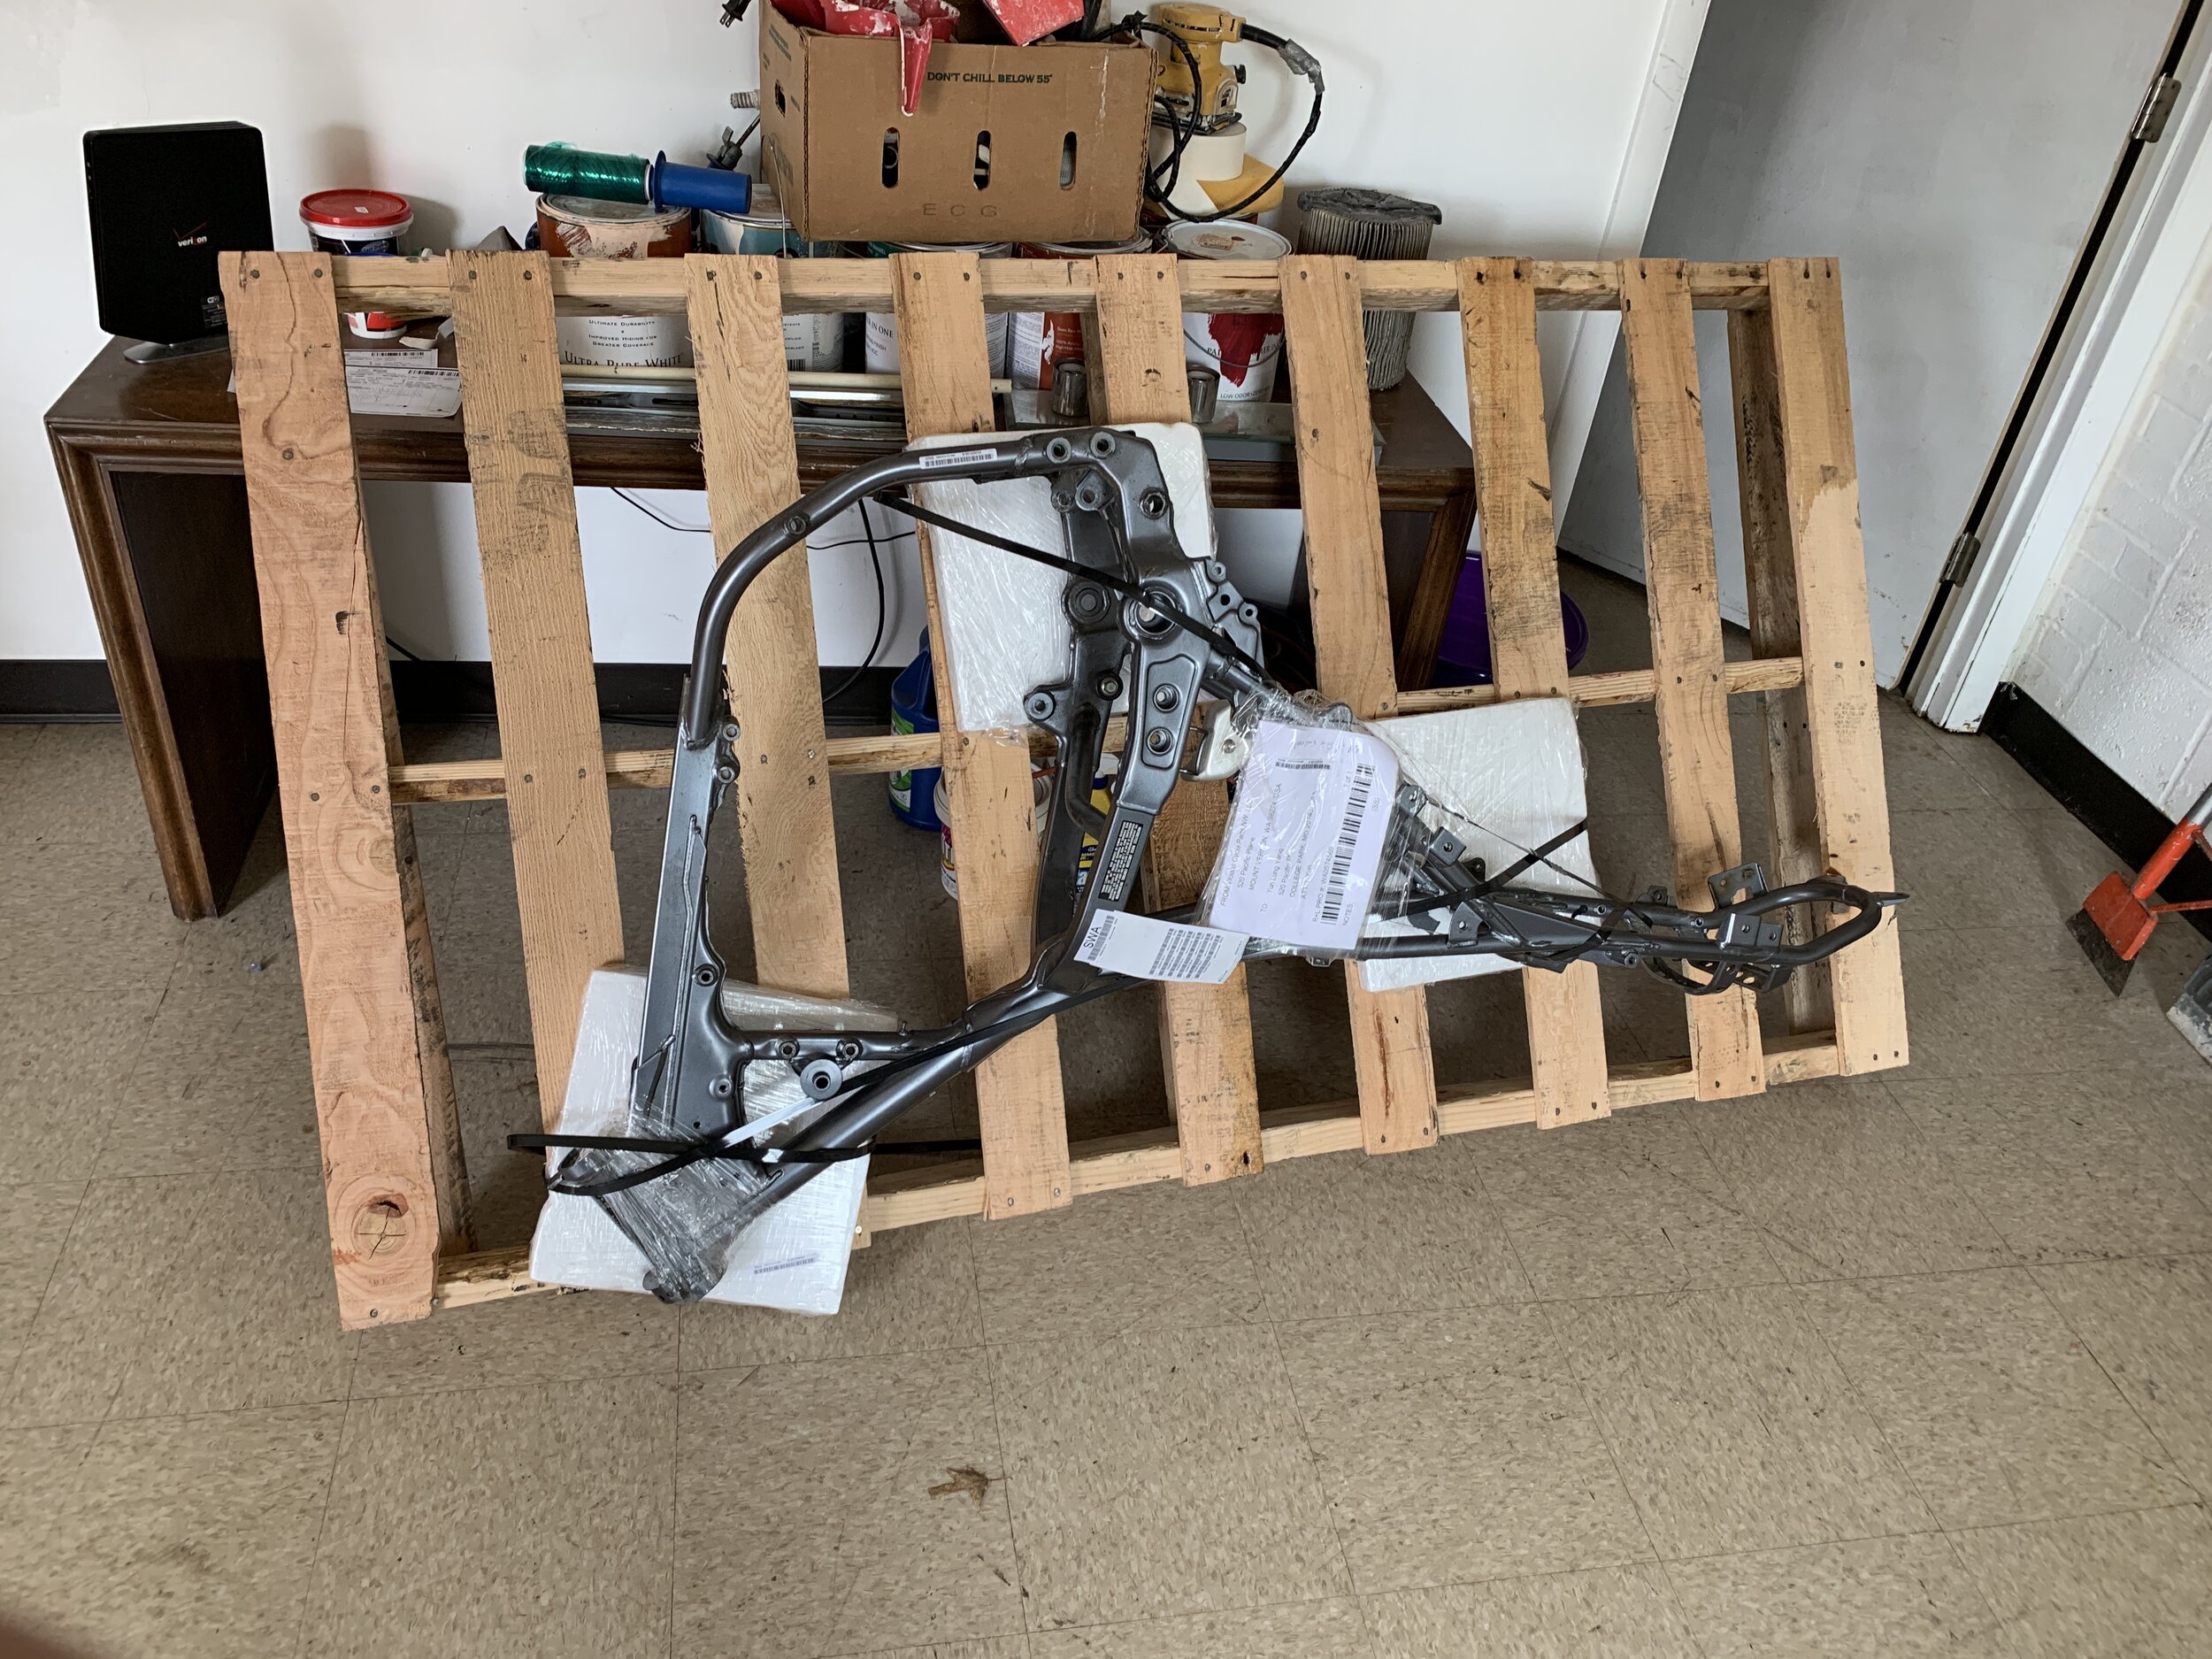
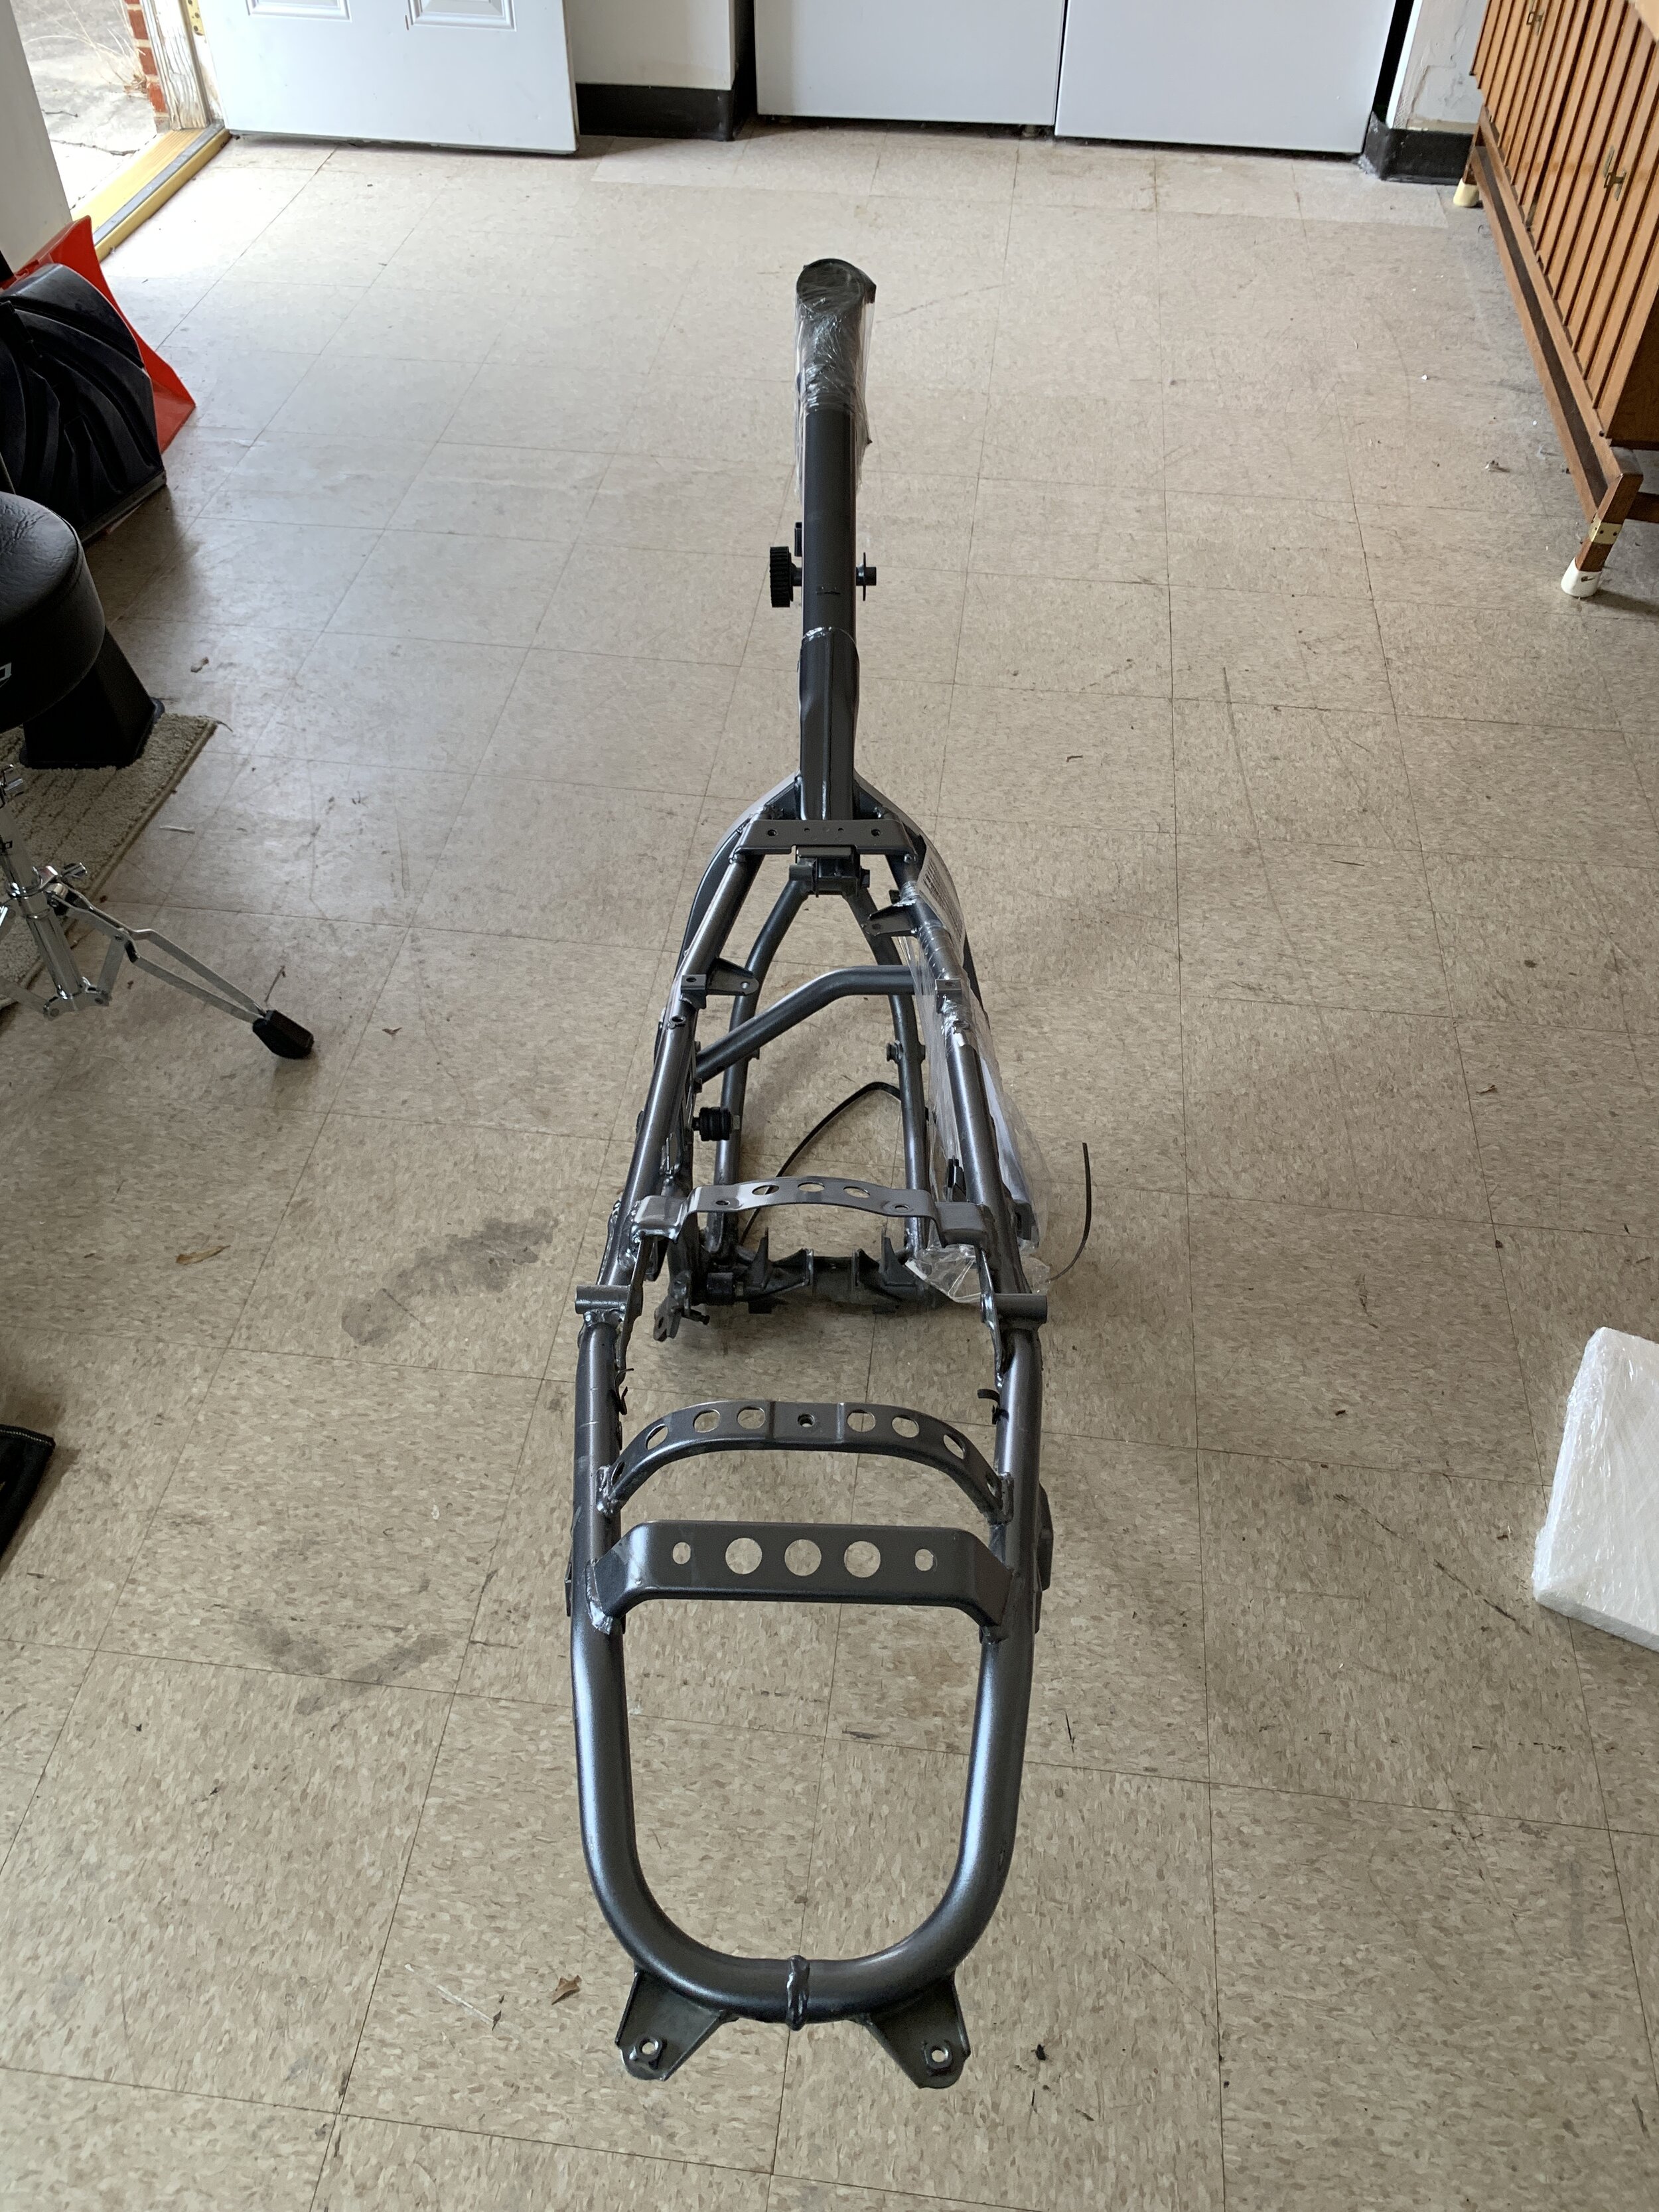
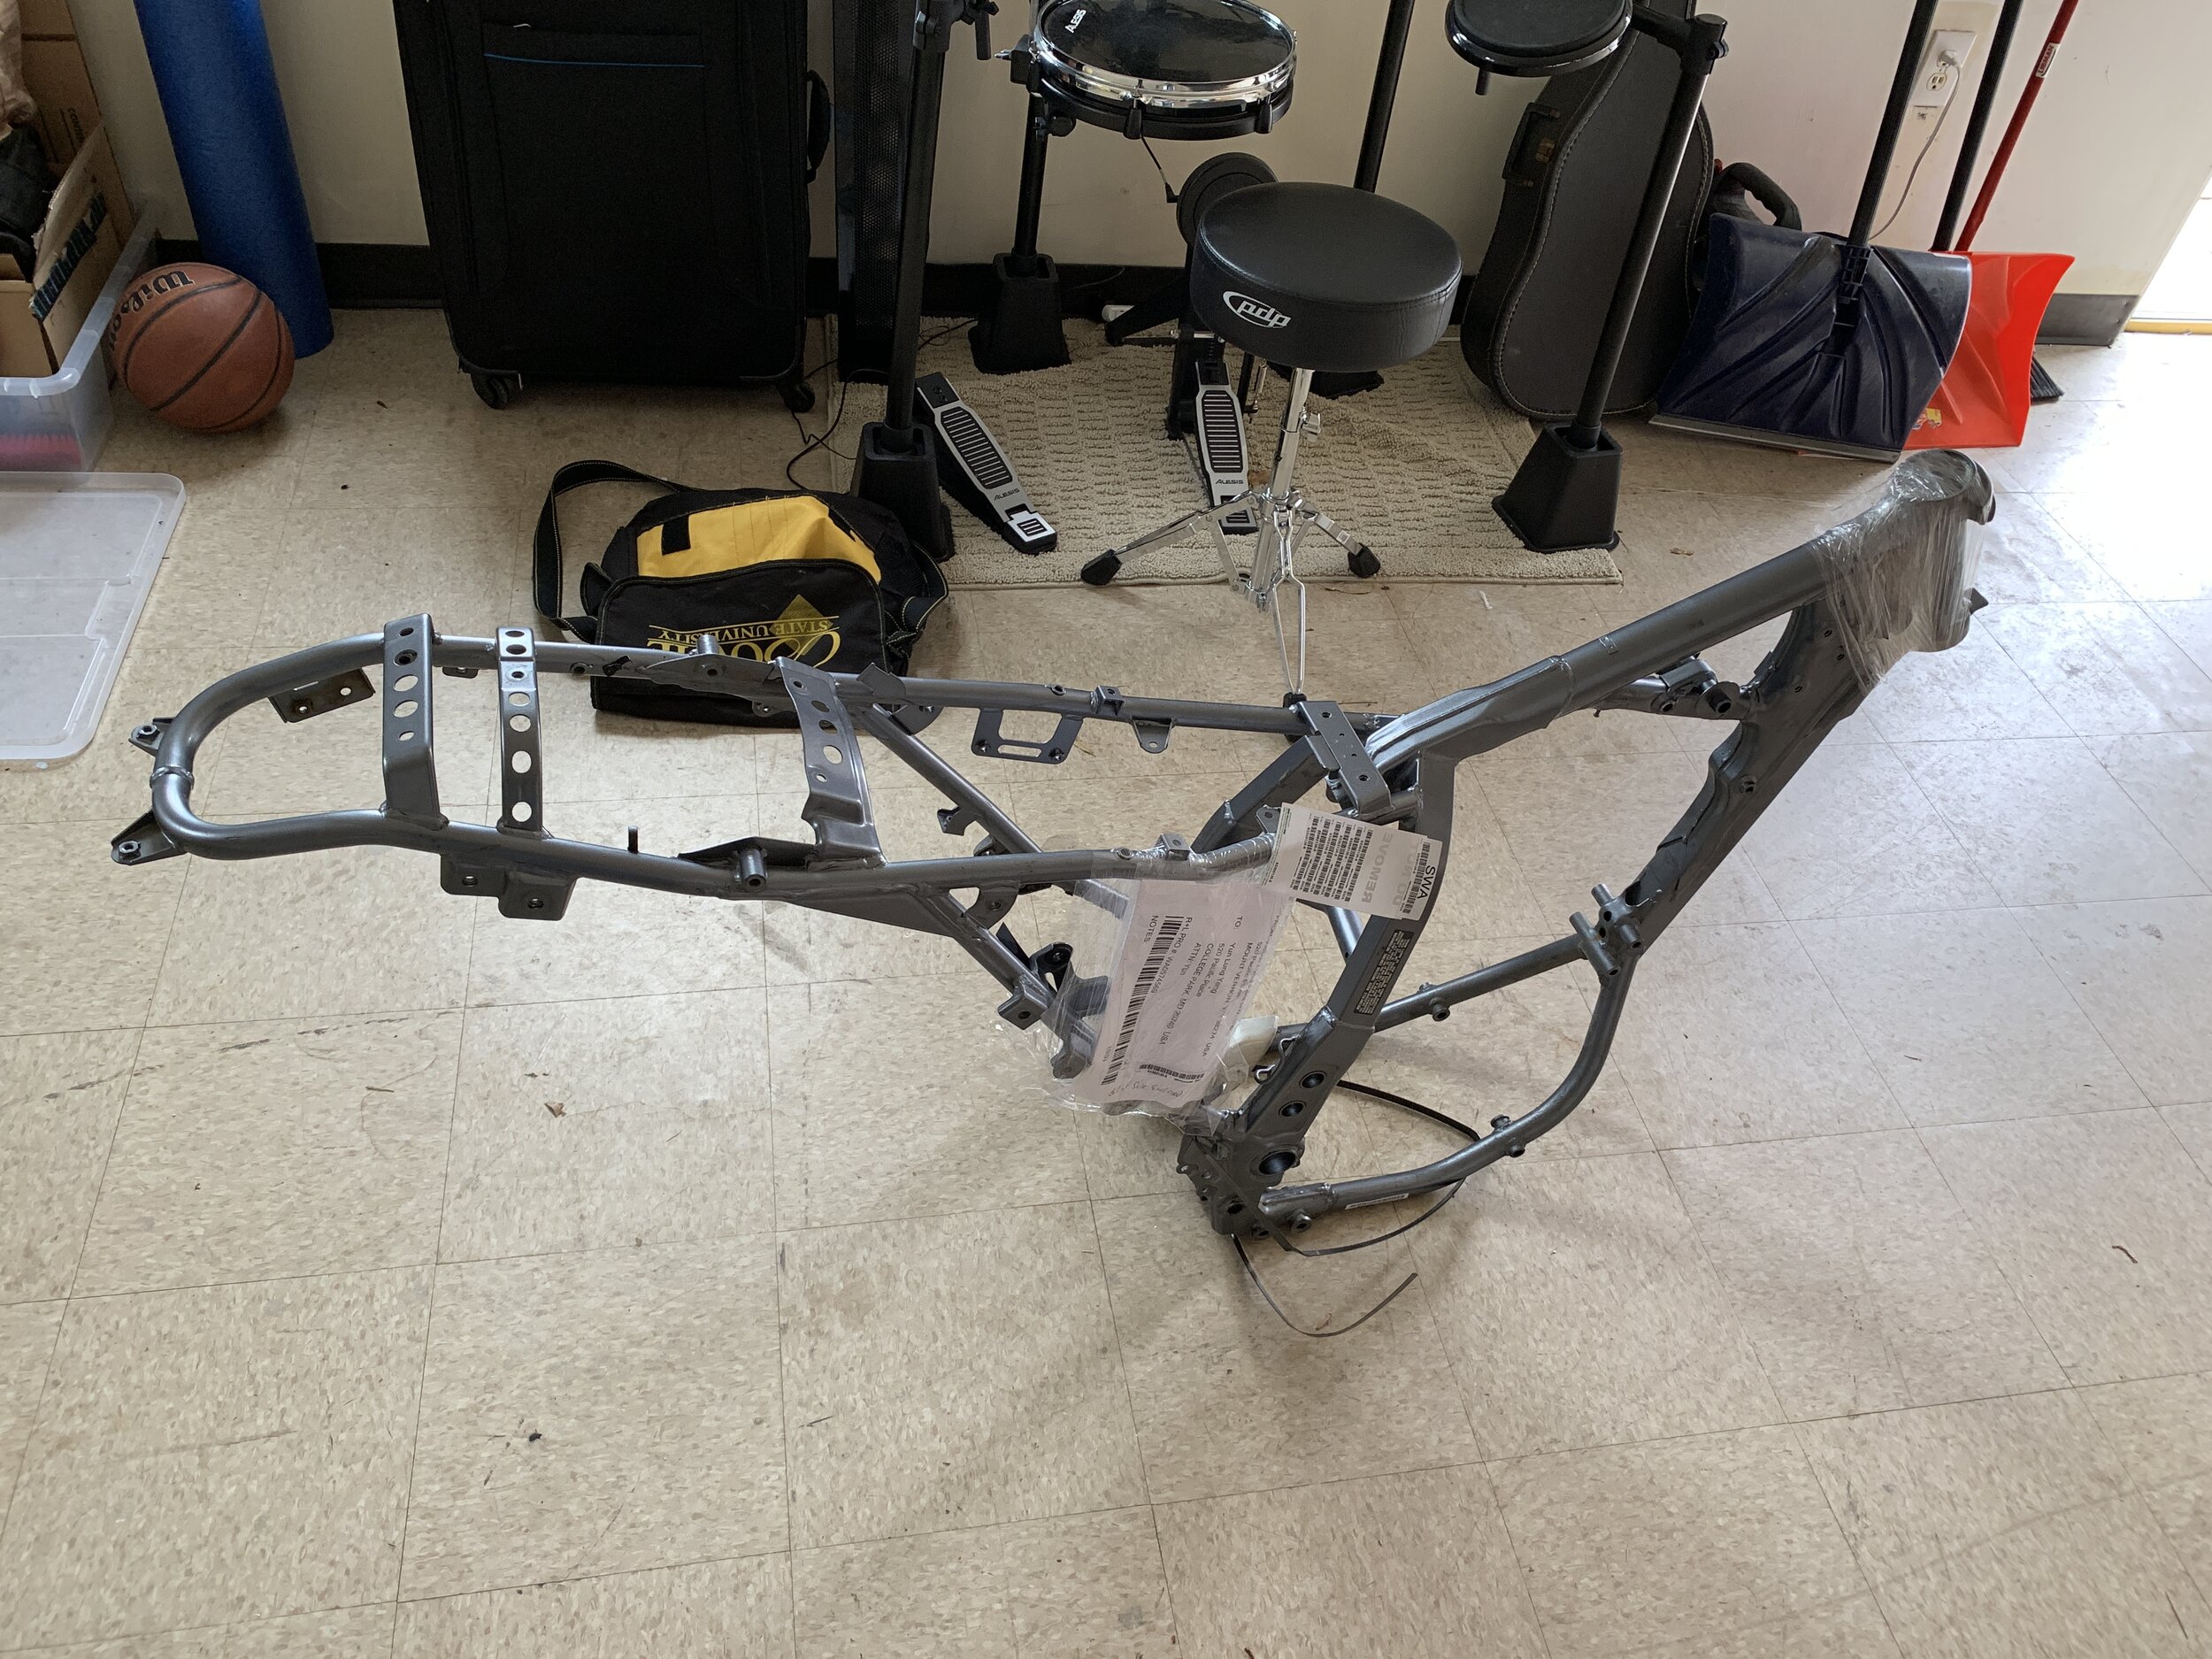
I disassembled the drive train, cause the sprockets need replacing, then the replacement frame came. It looks great, but I would discover month later with the help of my neighbor that the frame I bought was damaged in an accident and the steering head is bend. Which explain the awkward vibration I feel when hitting bumps. More on that later.
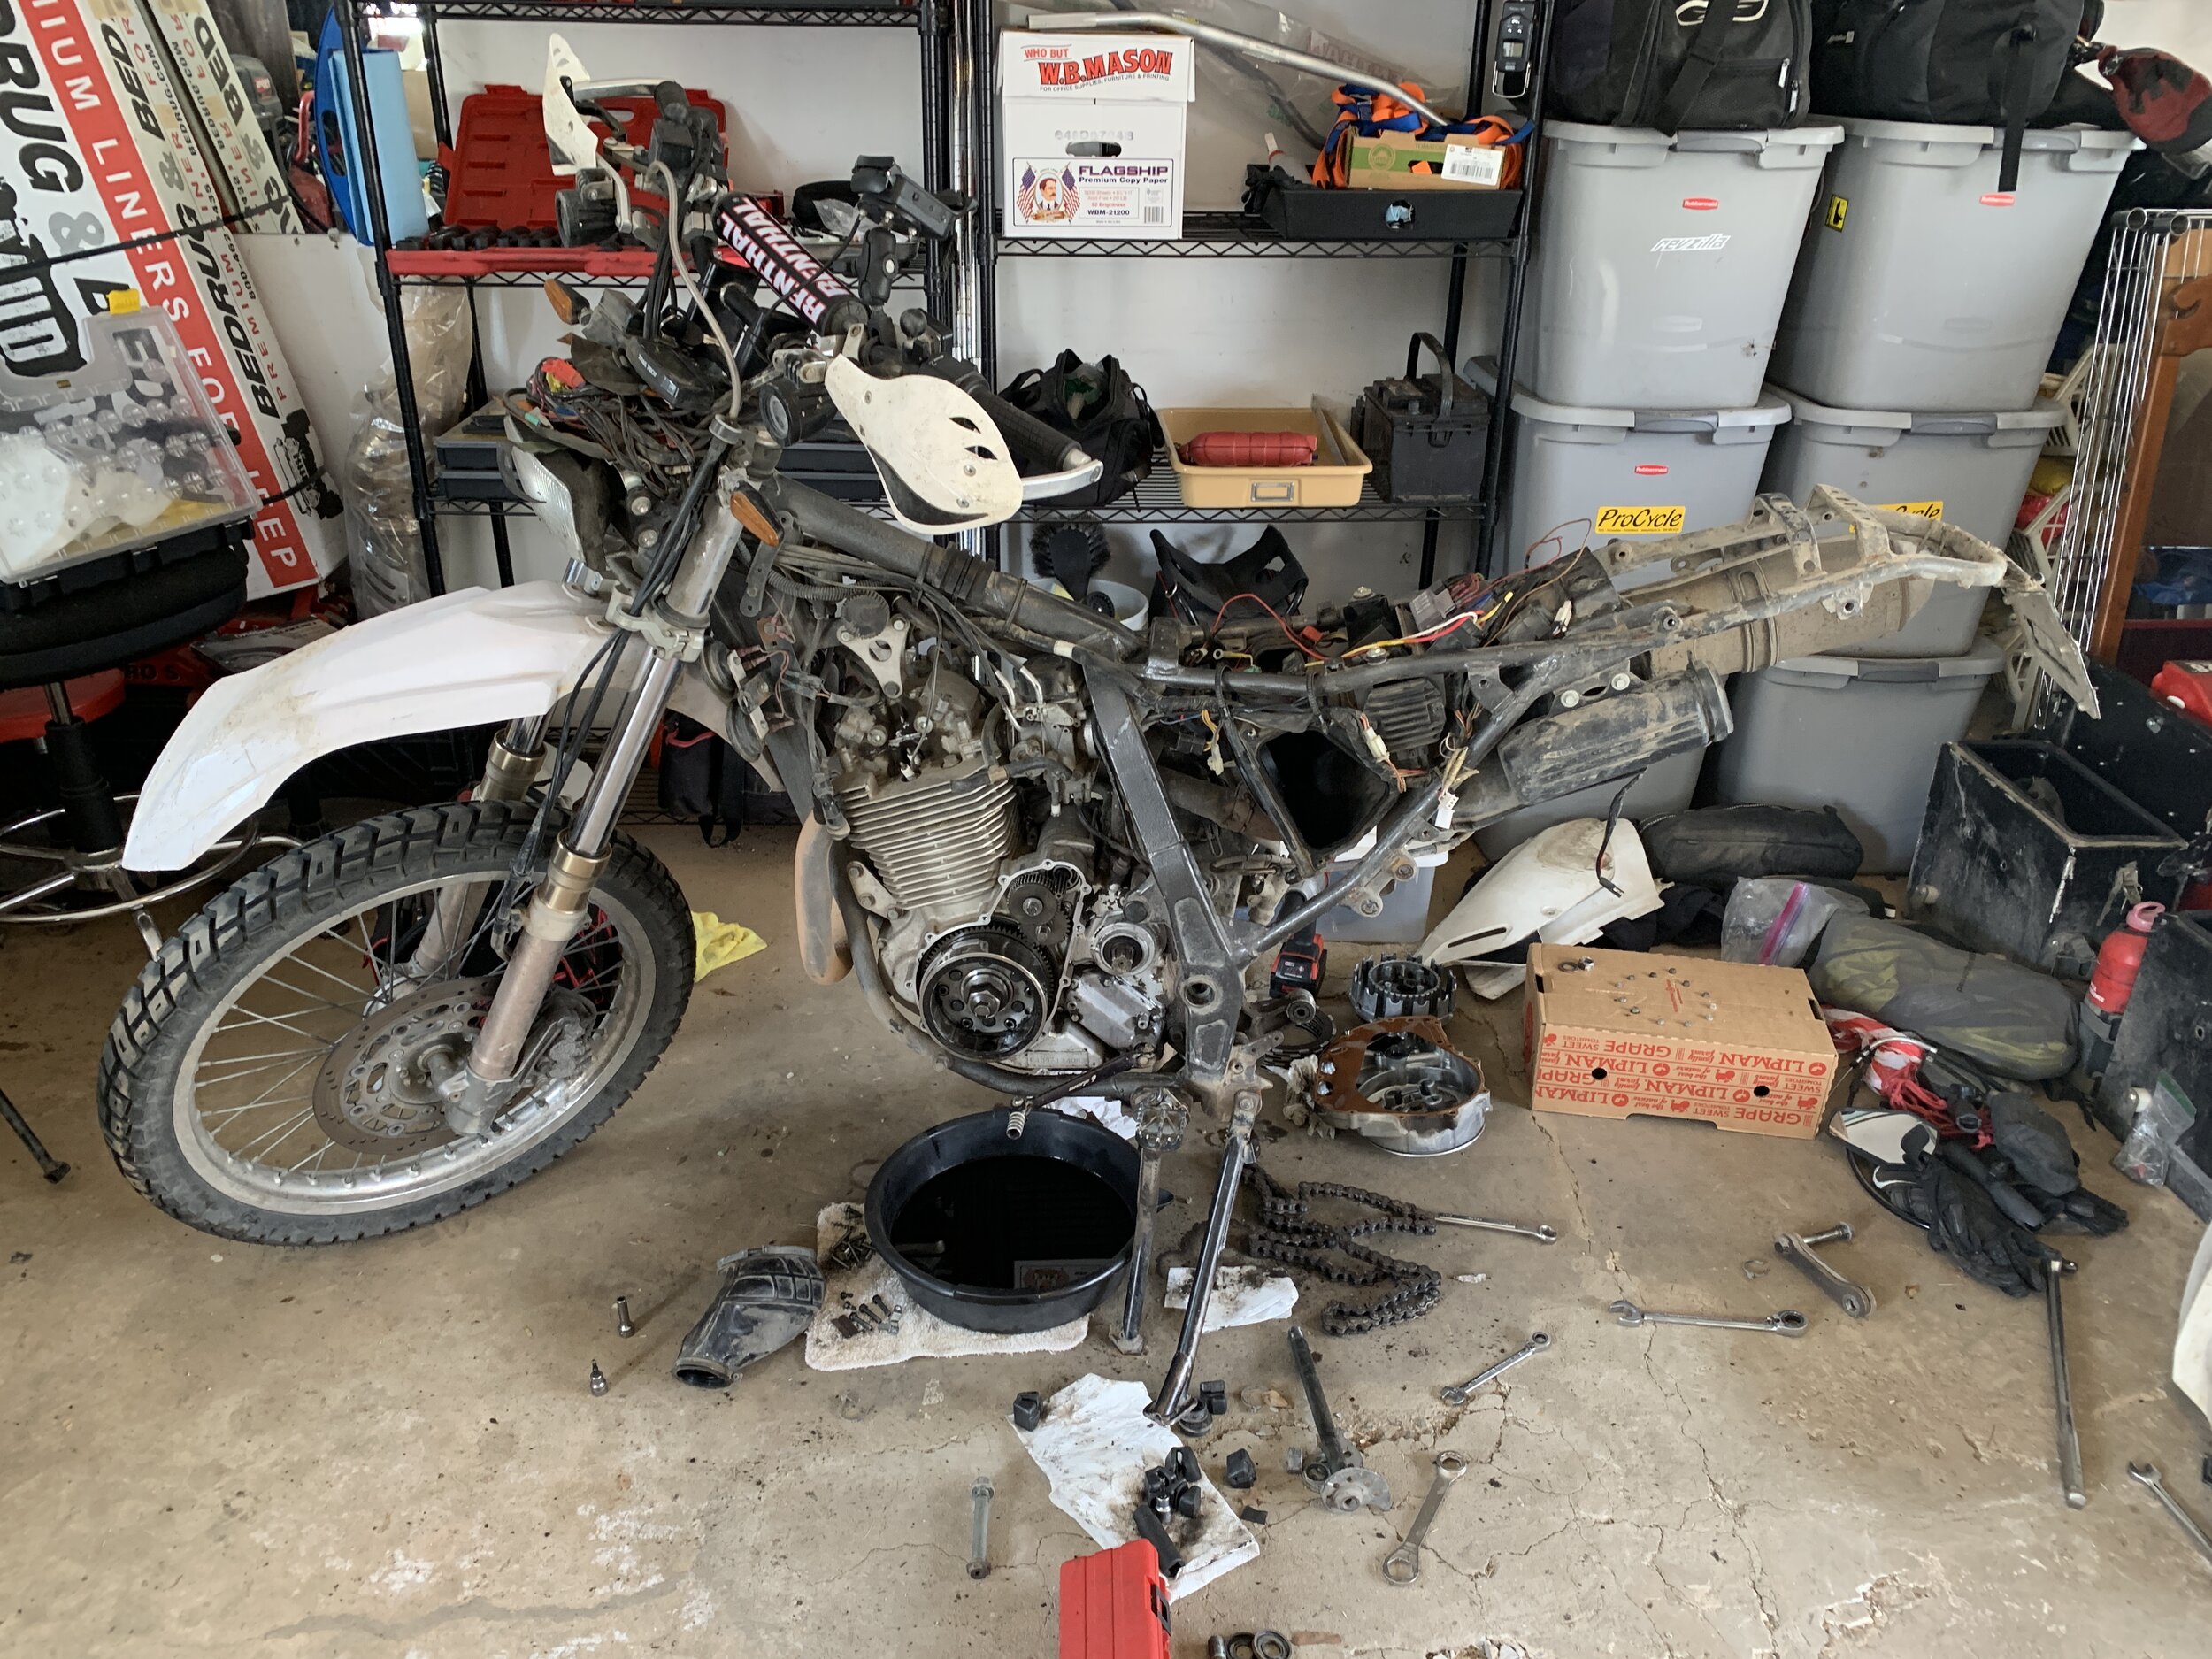
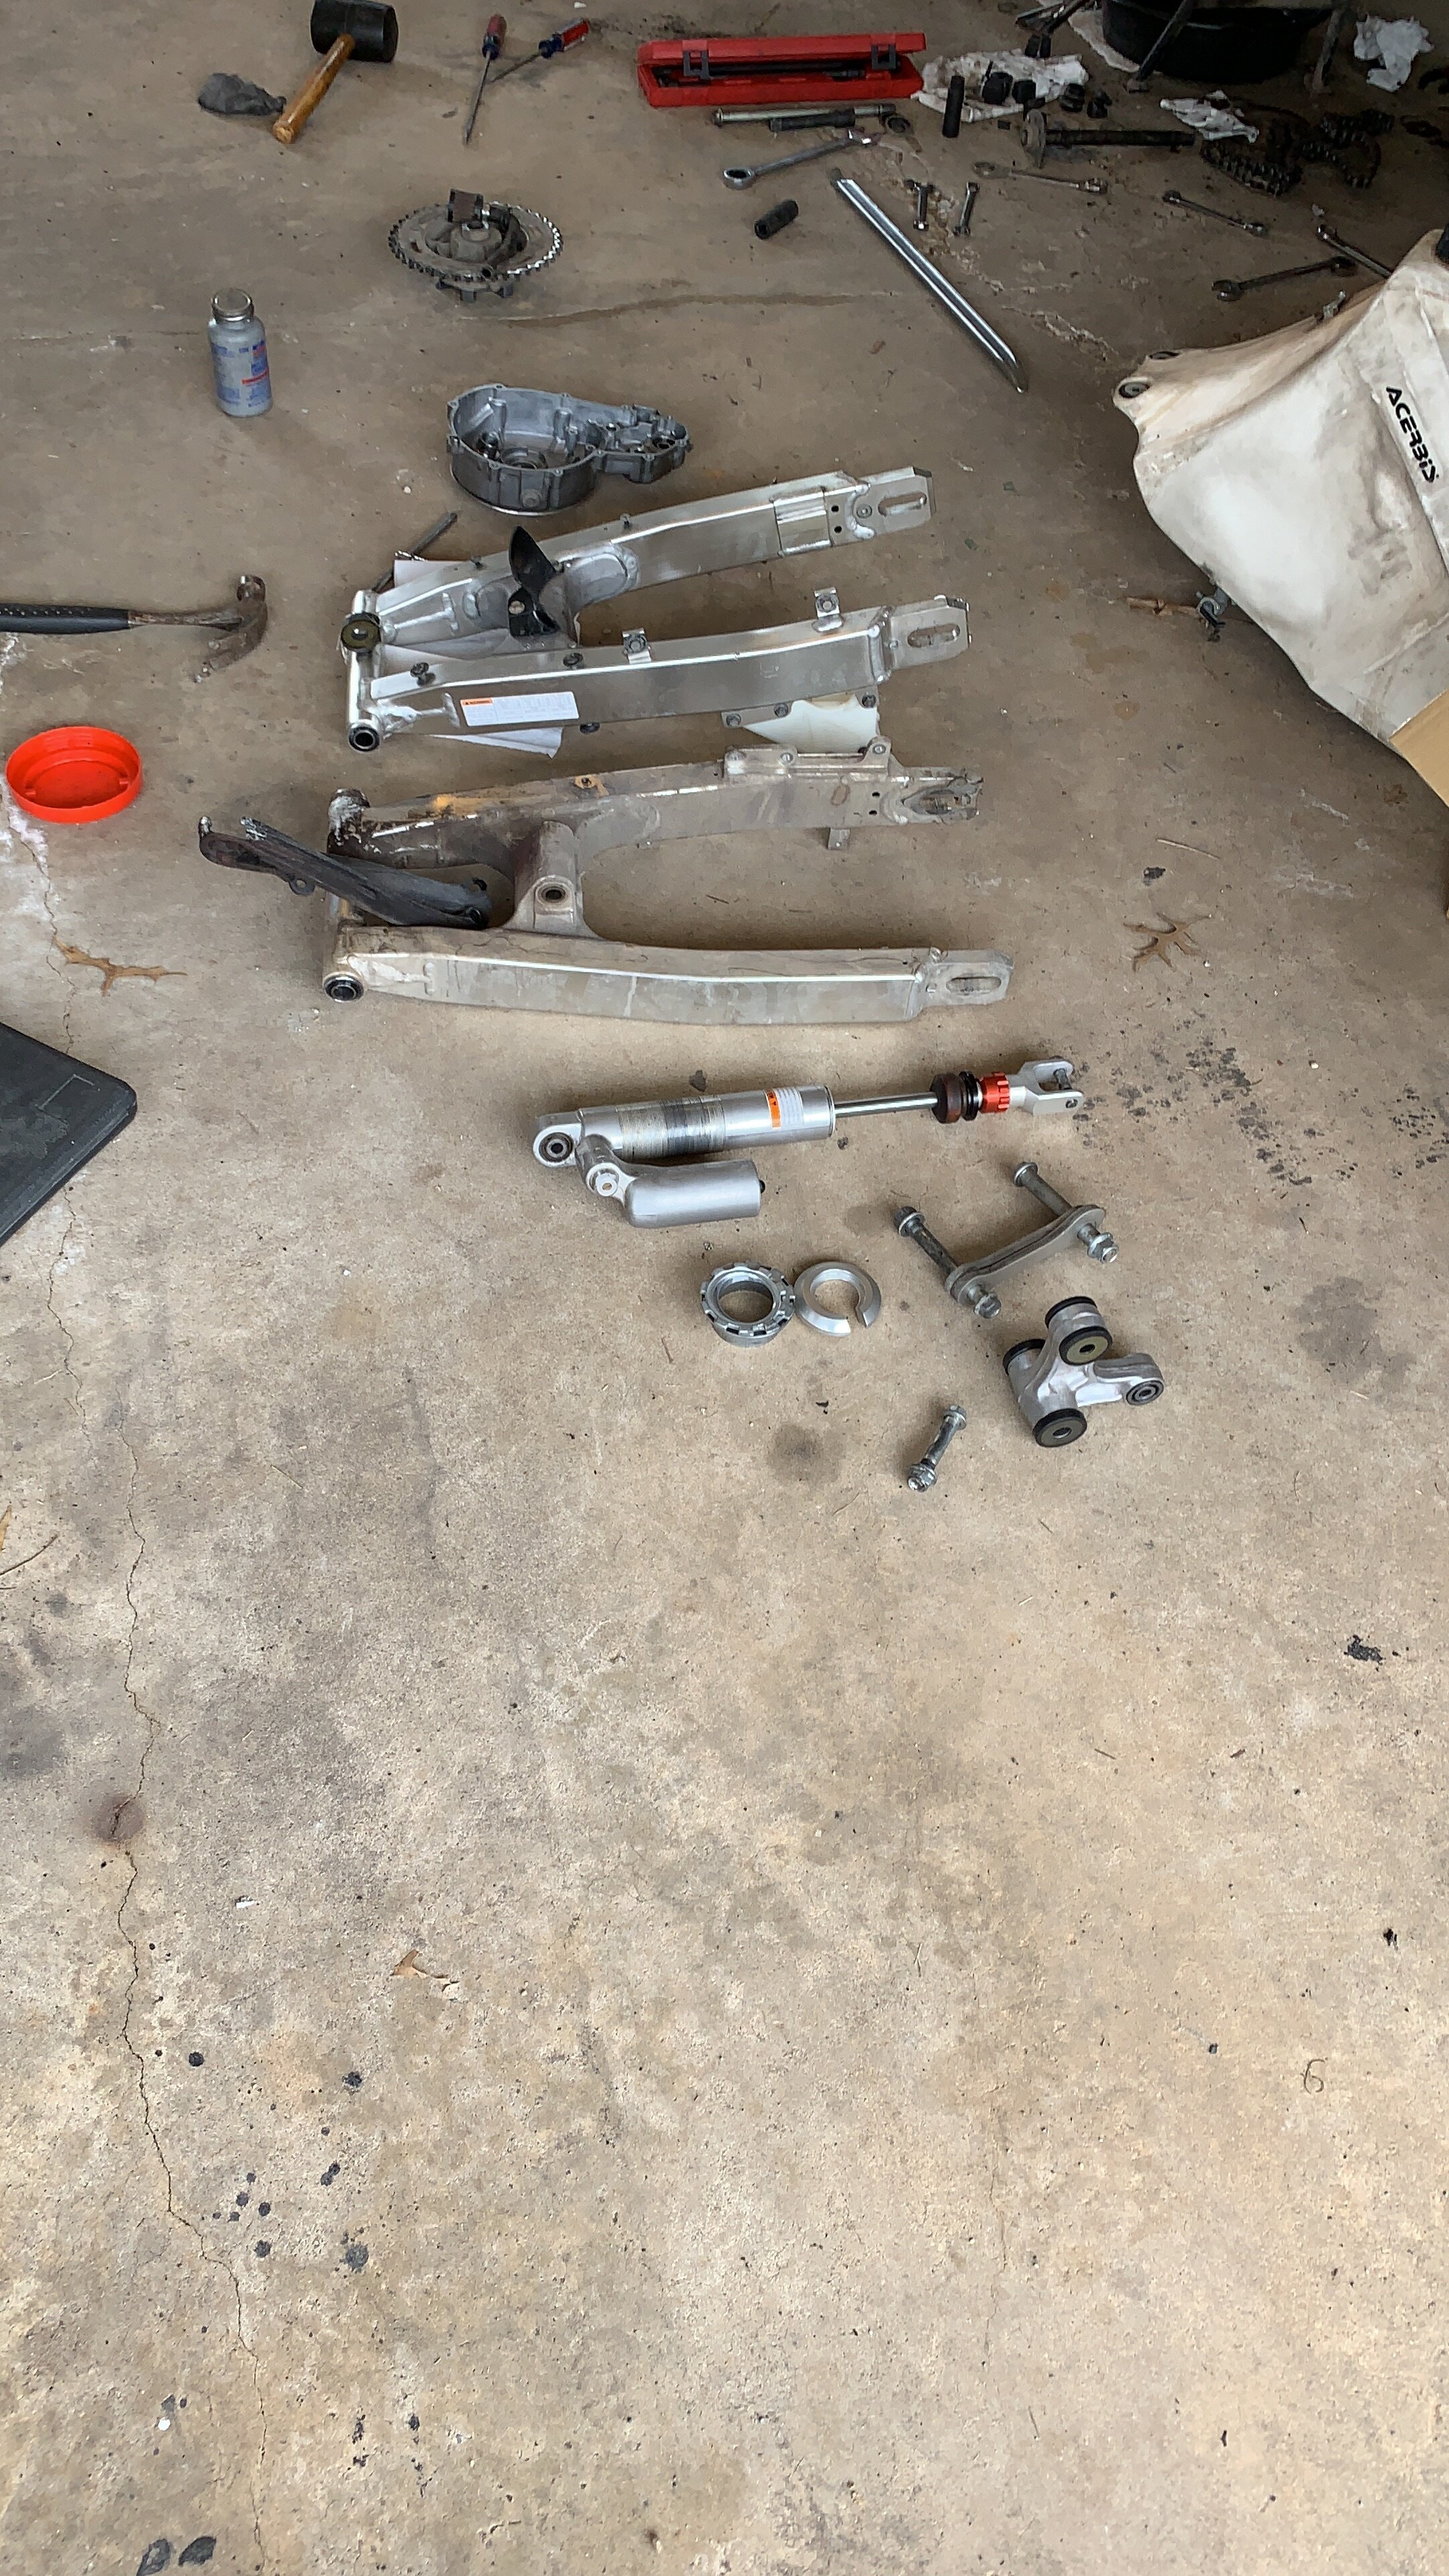
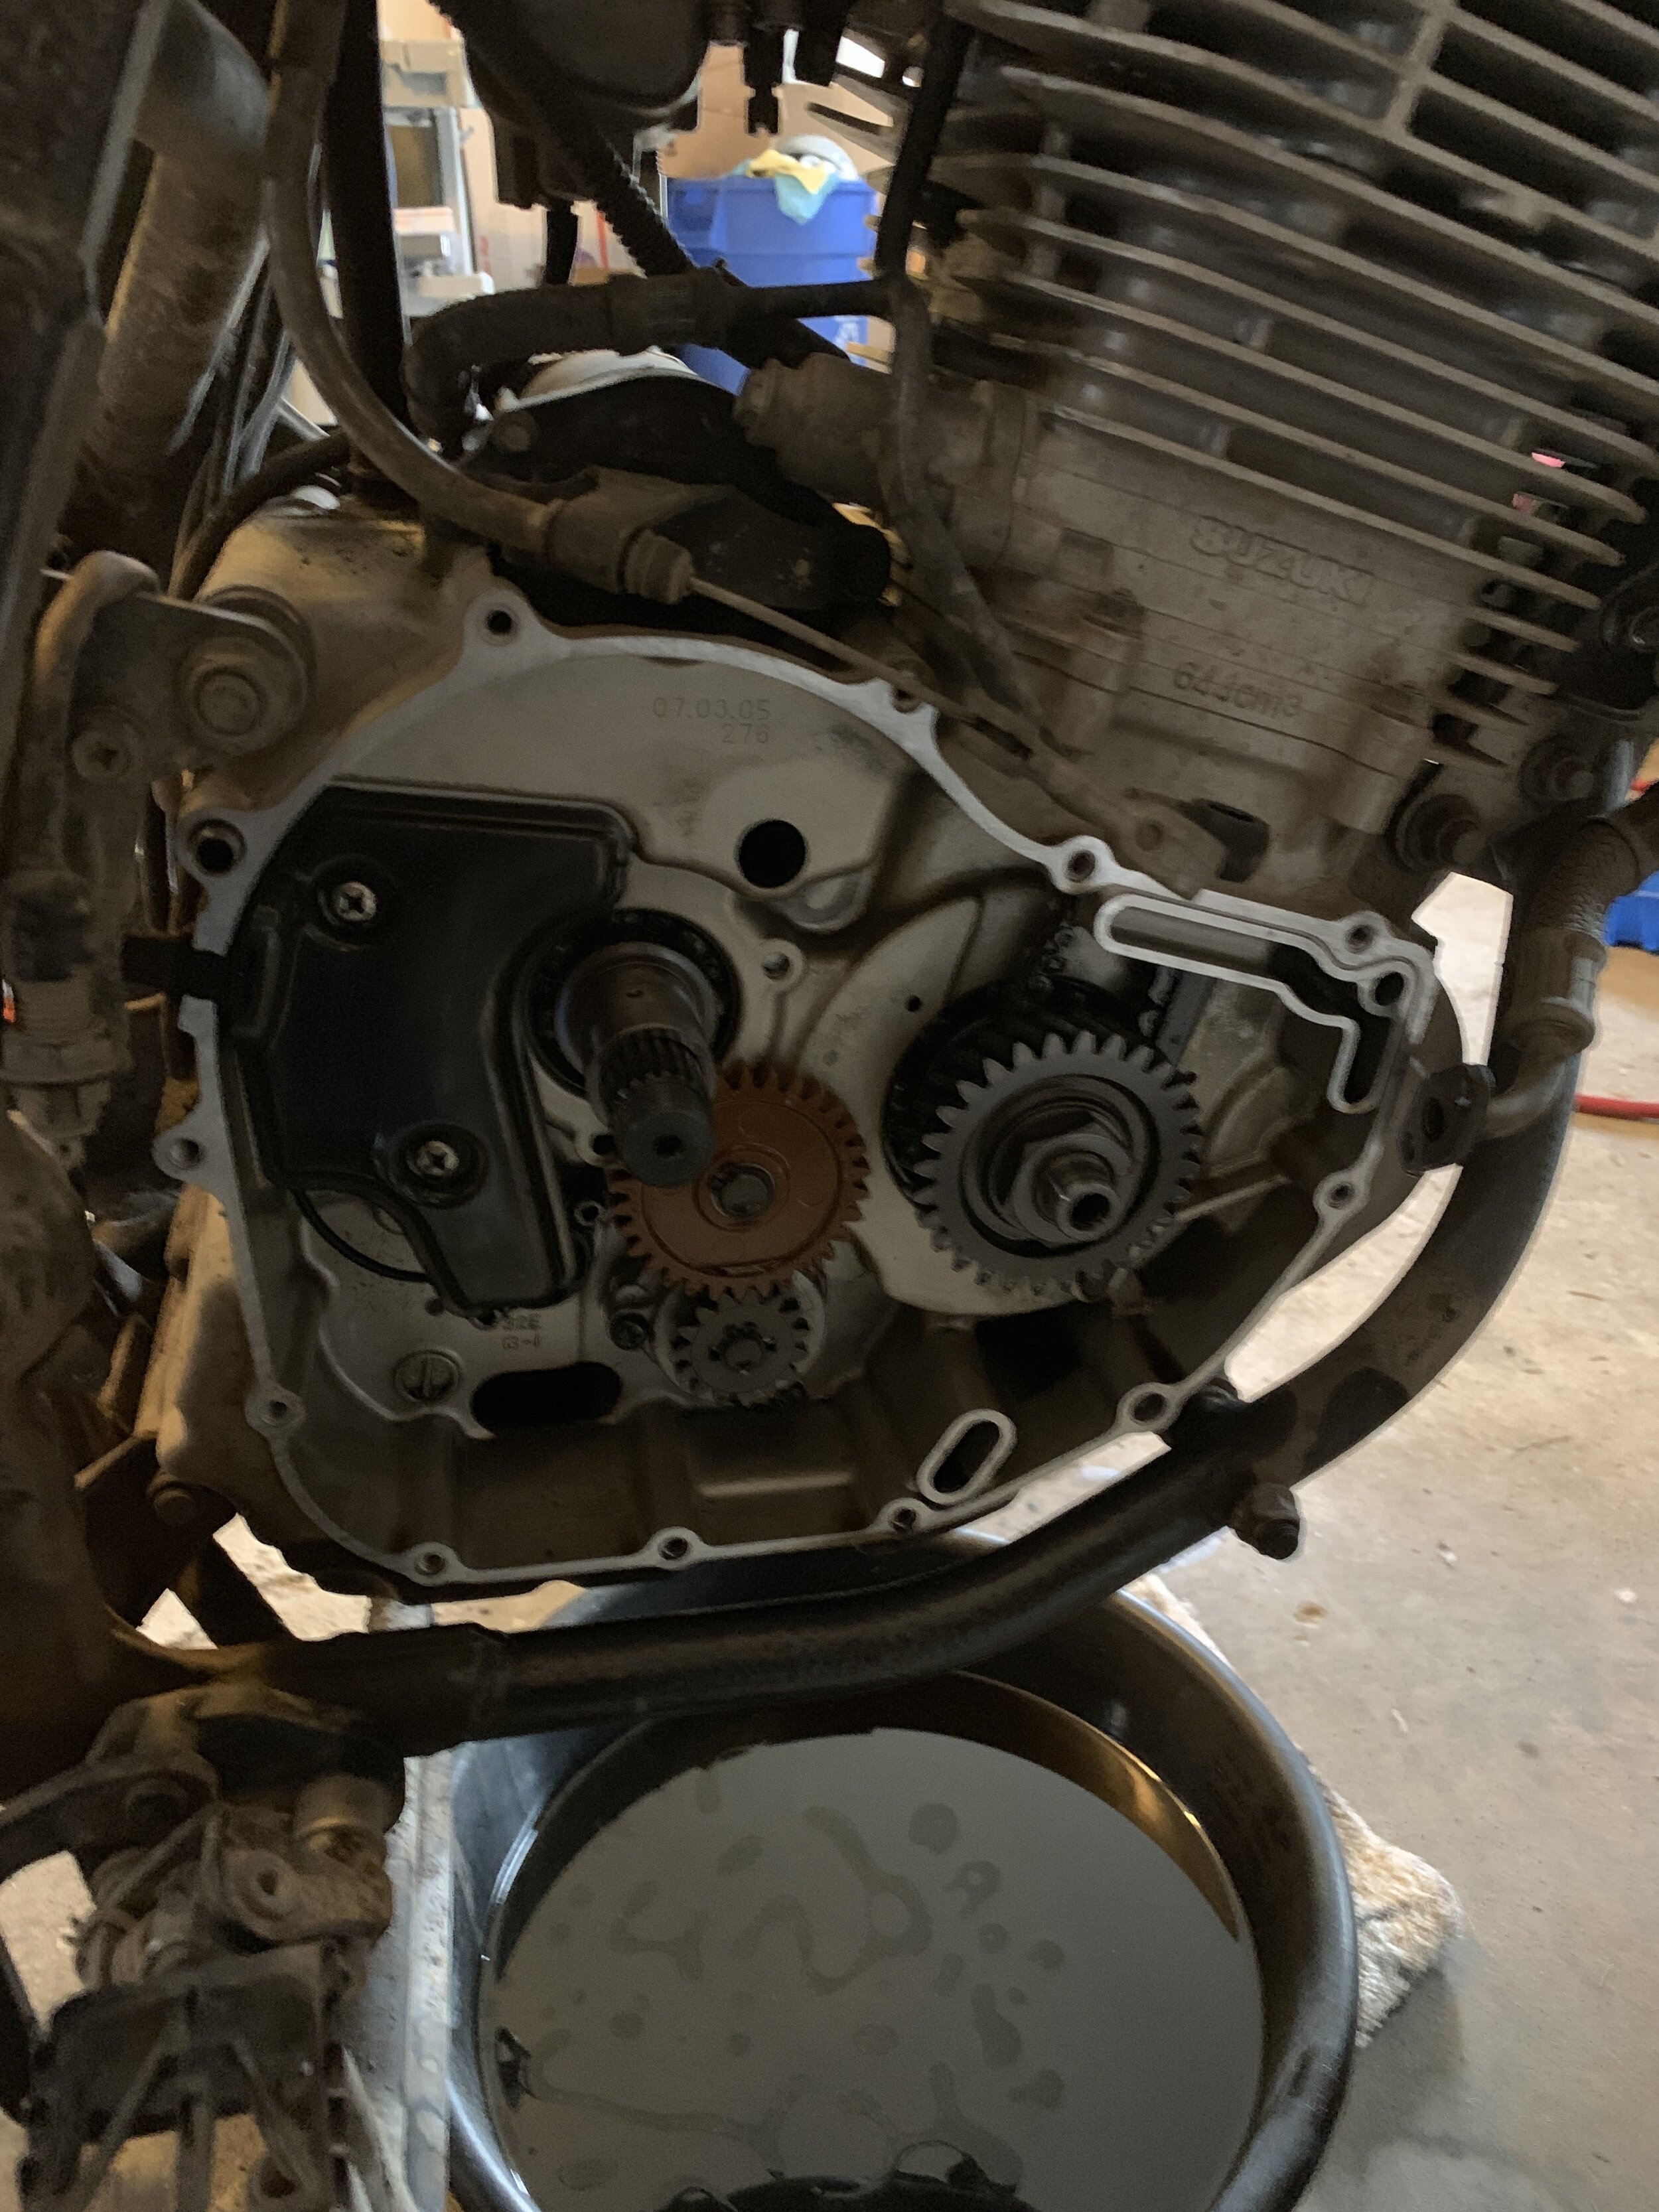
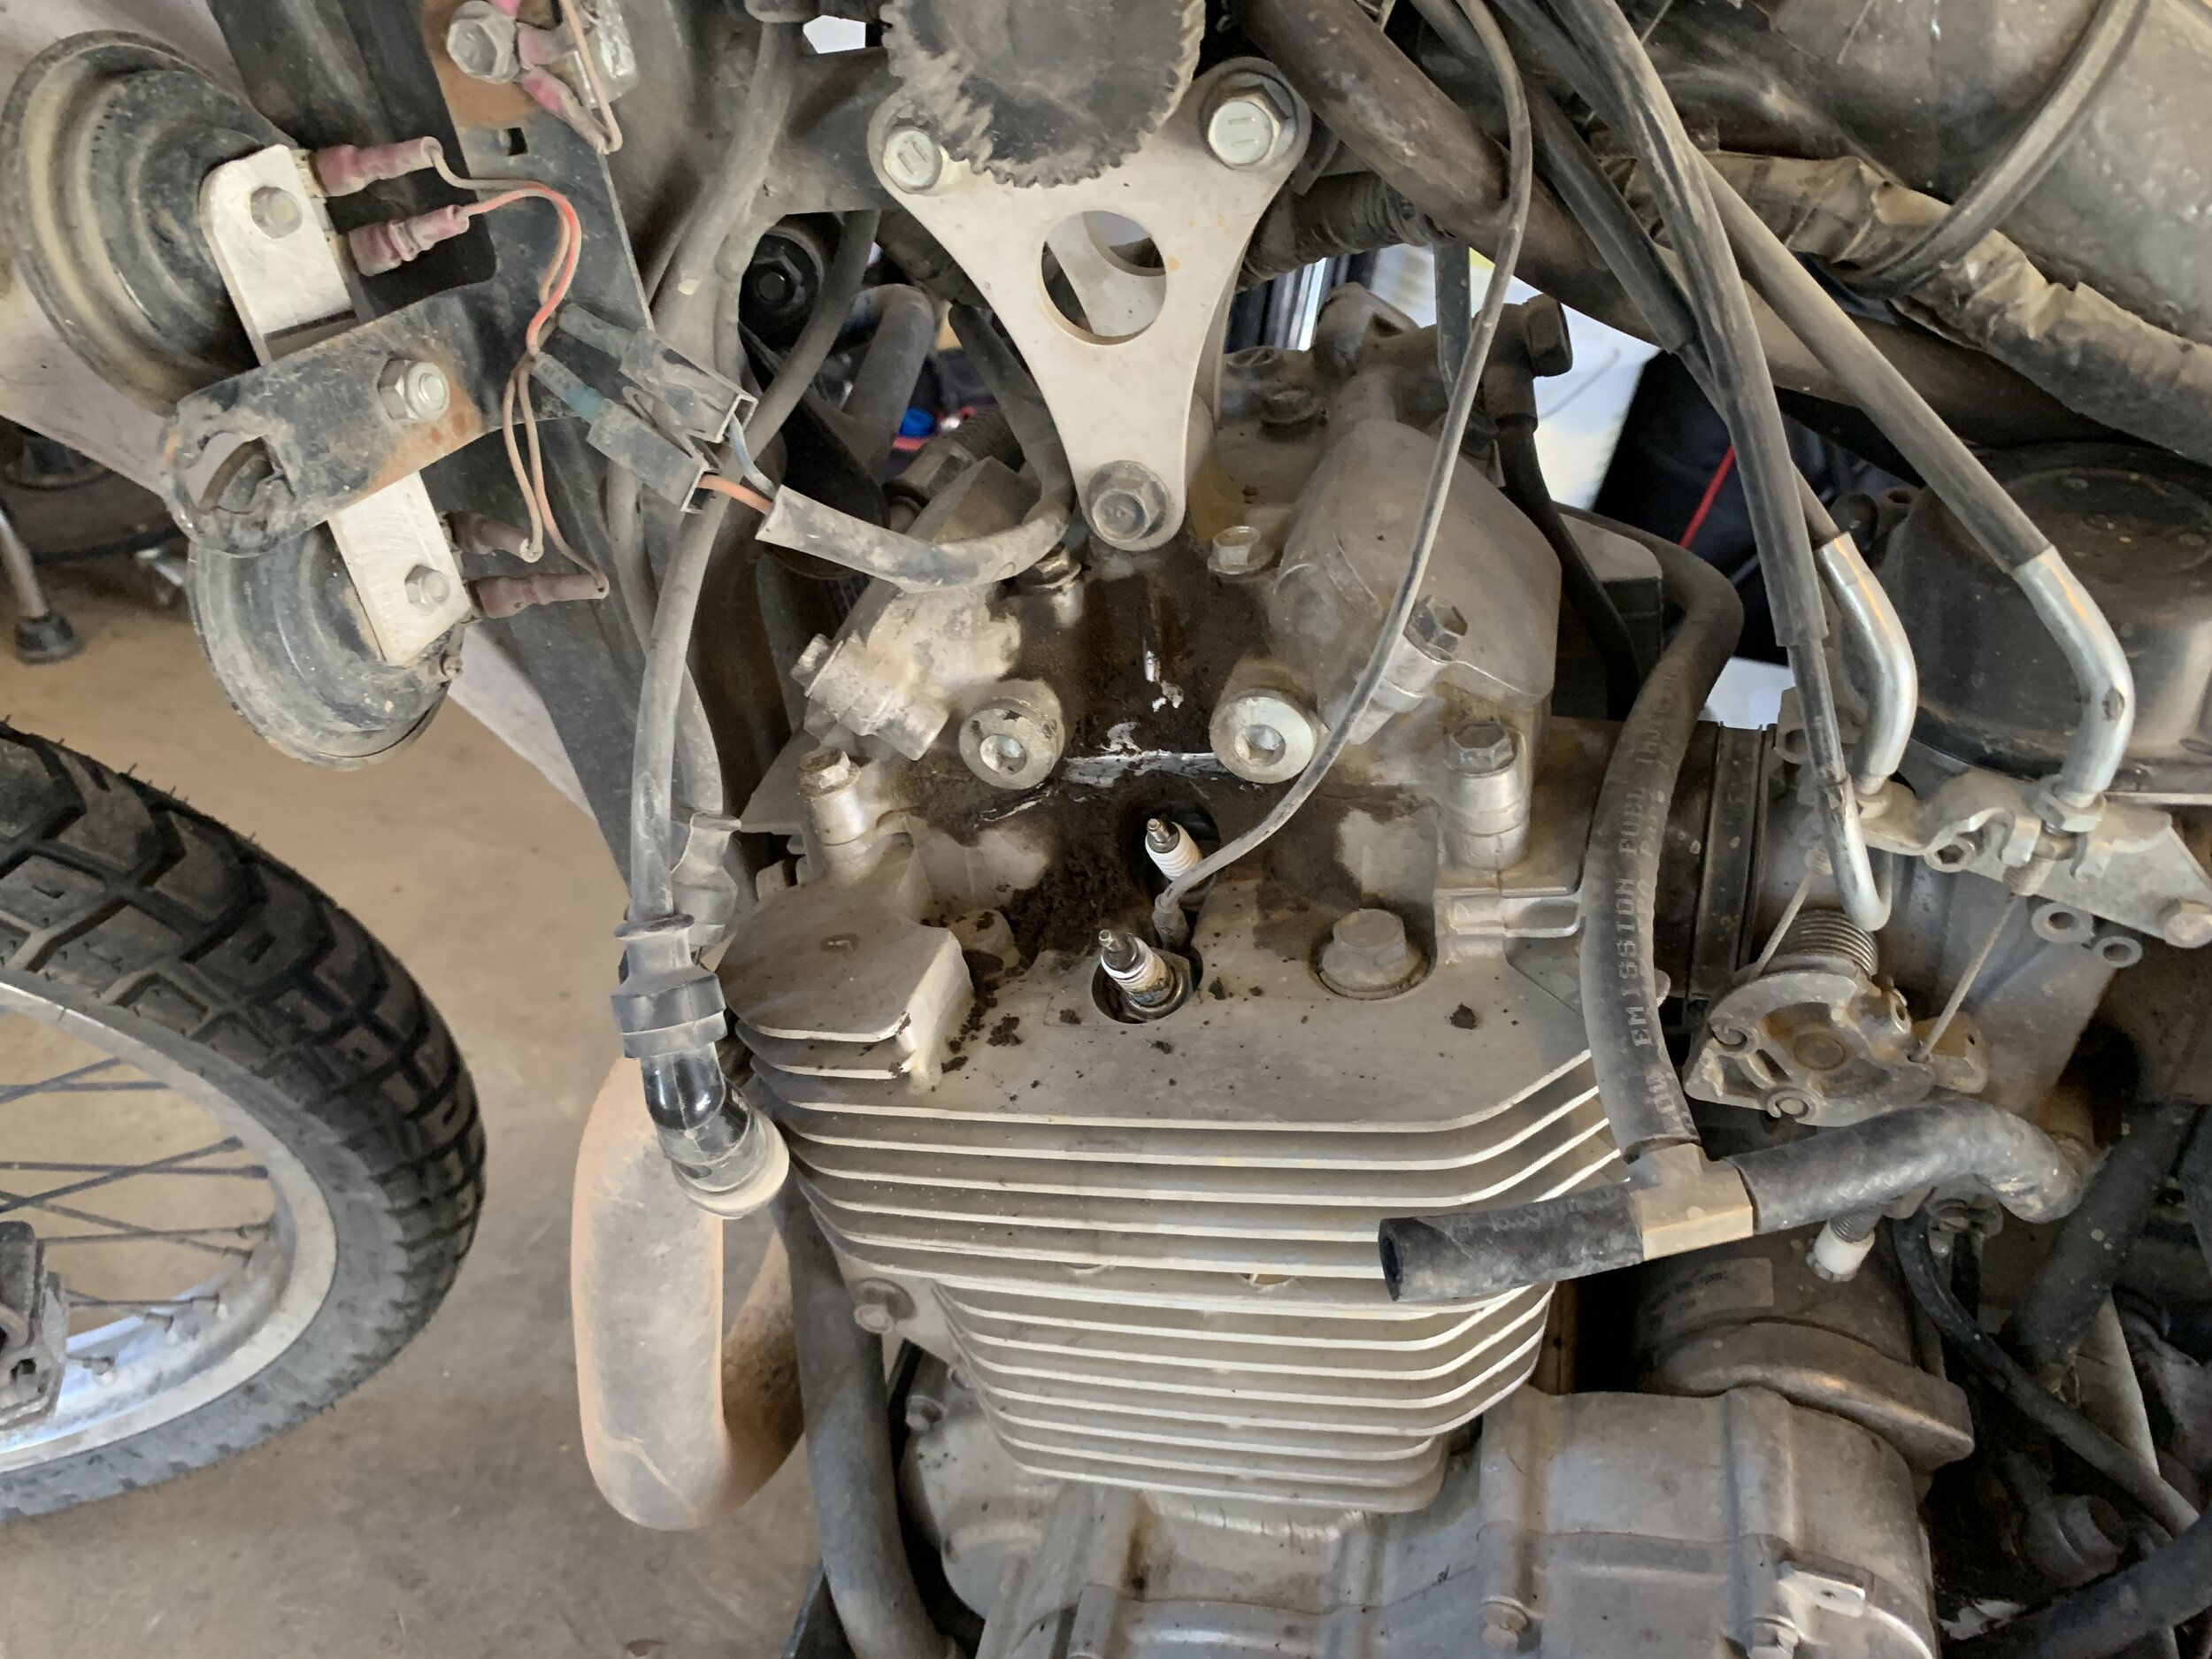
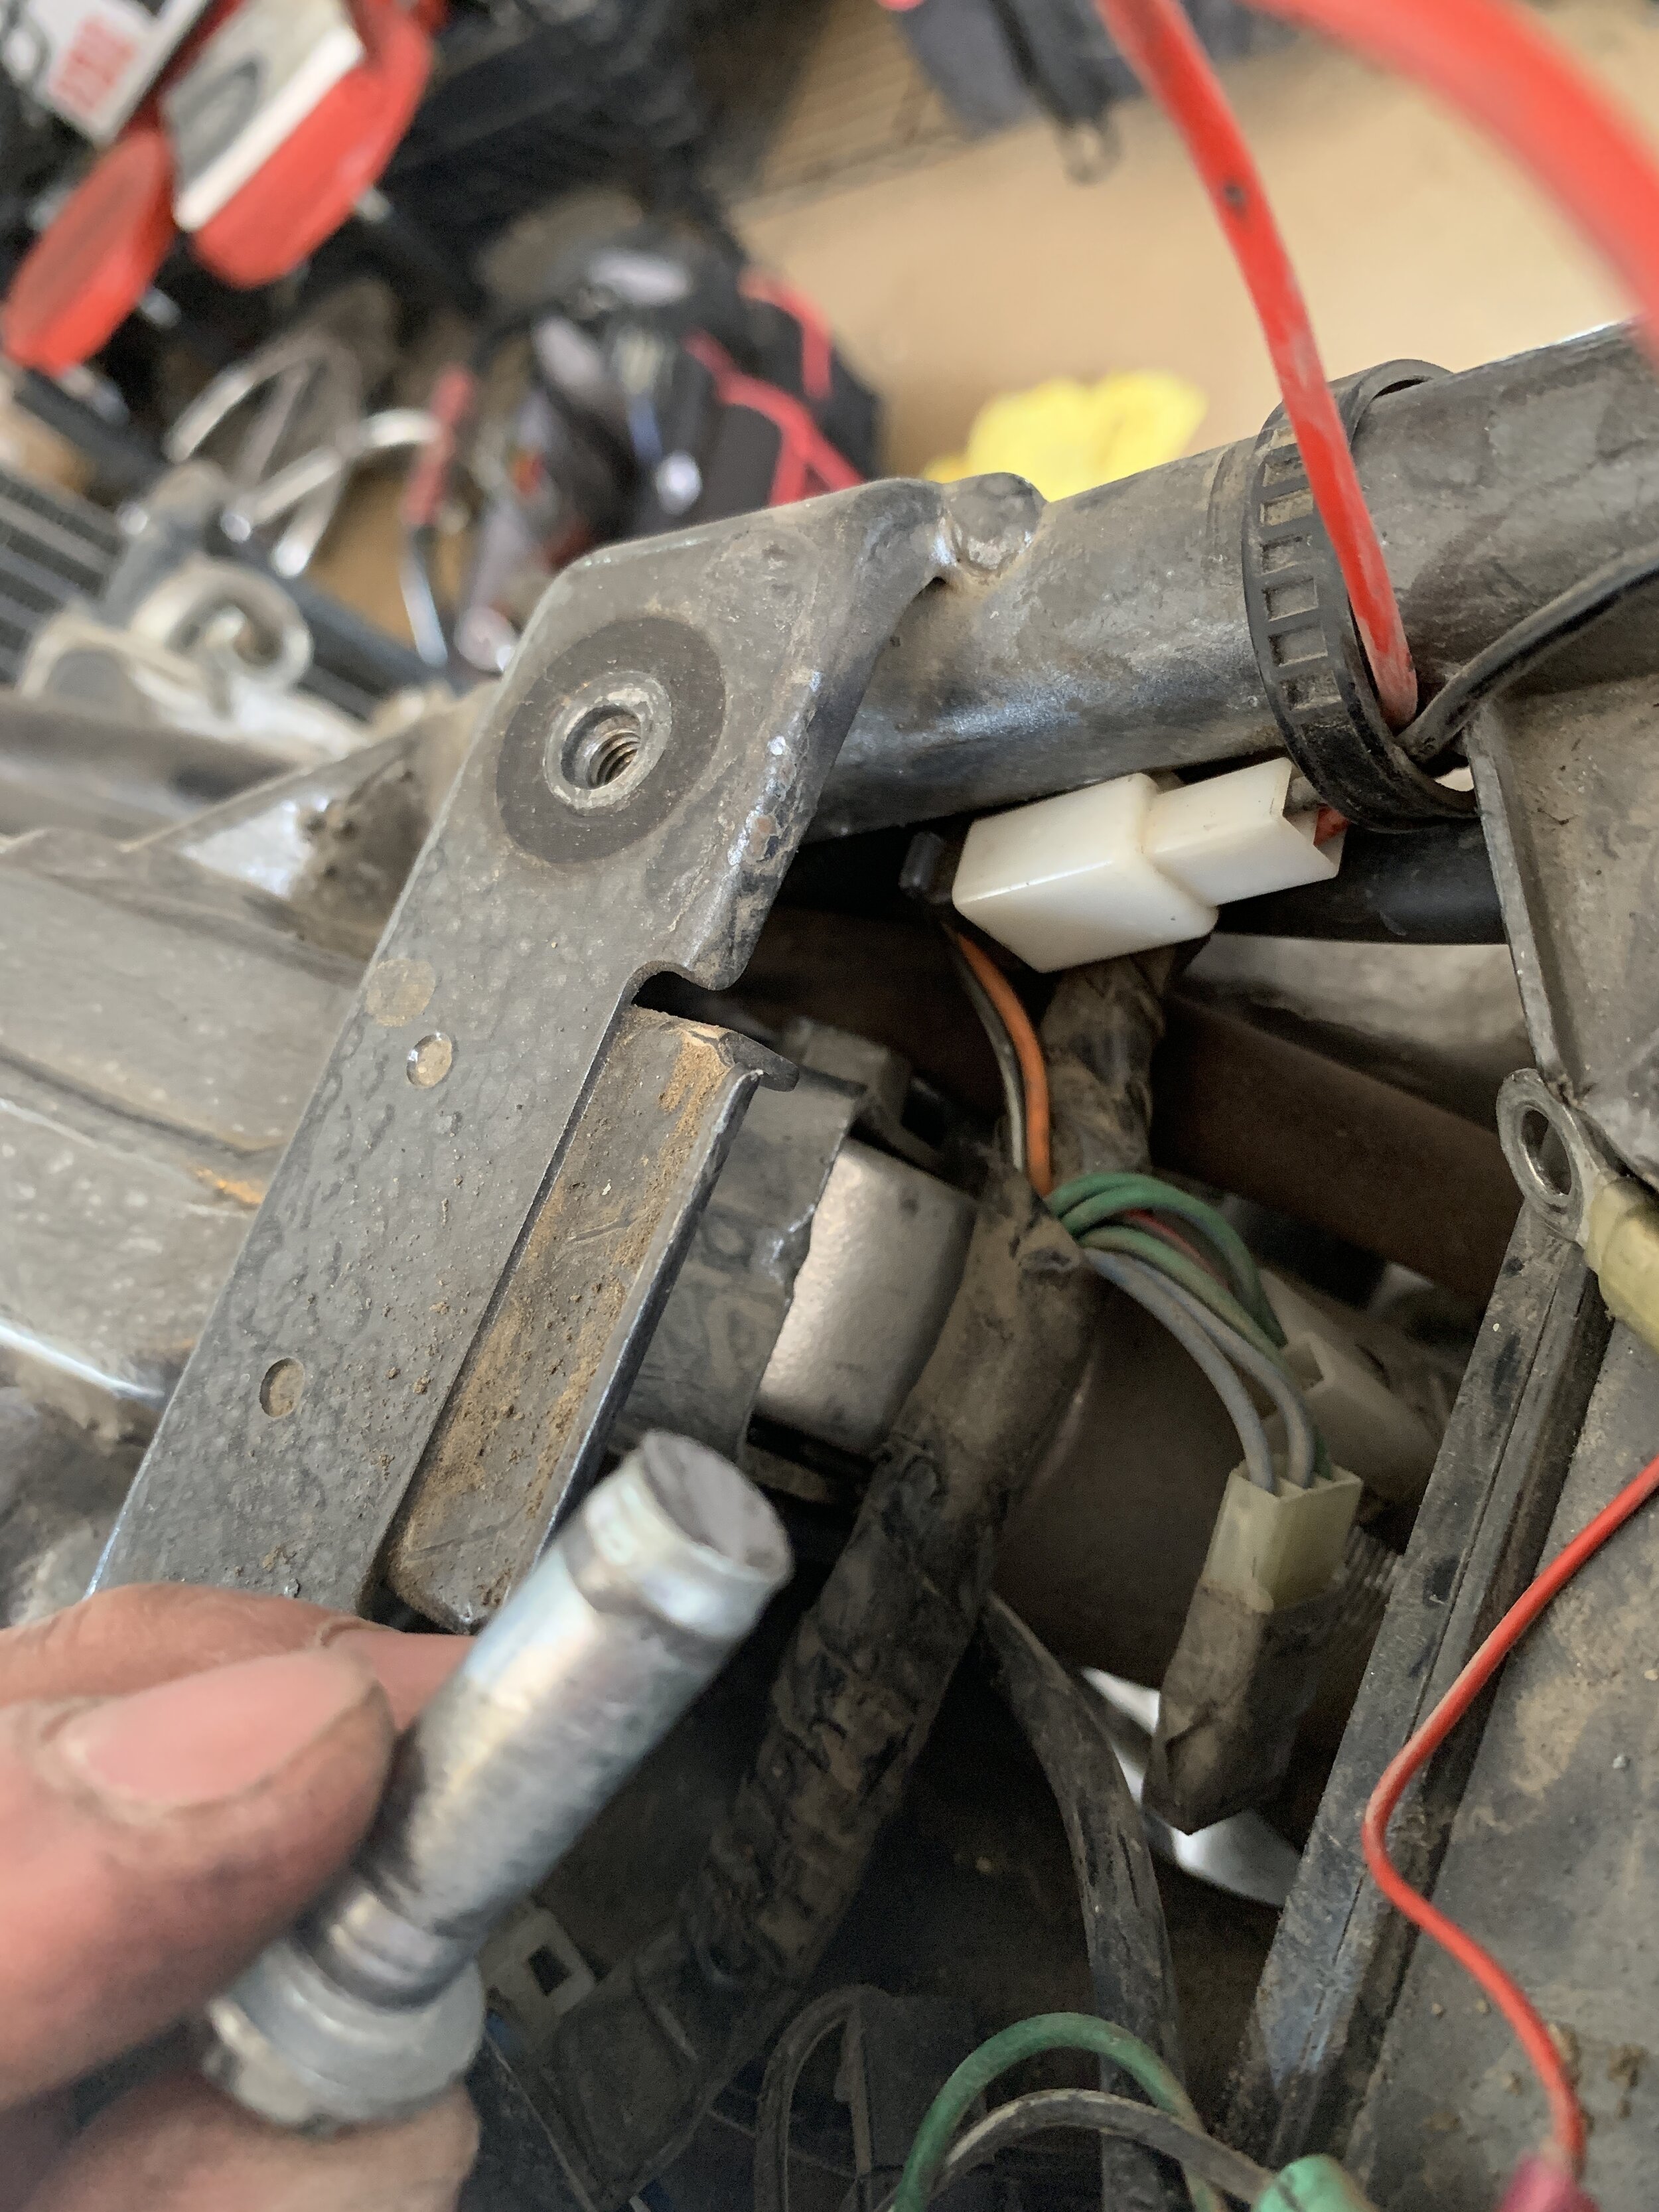
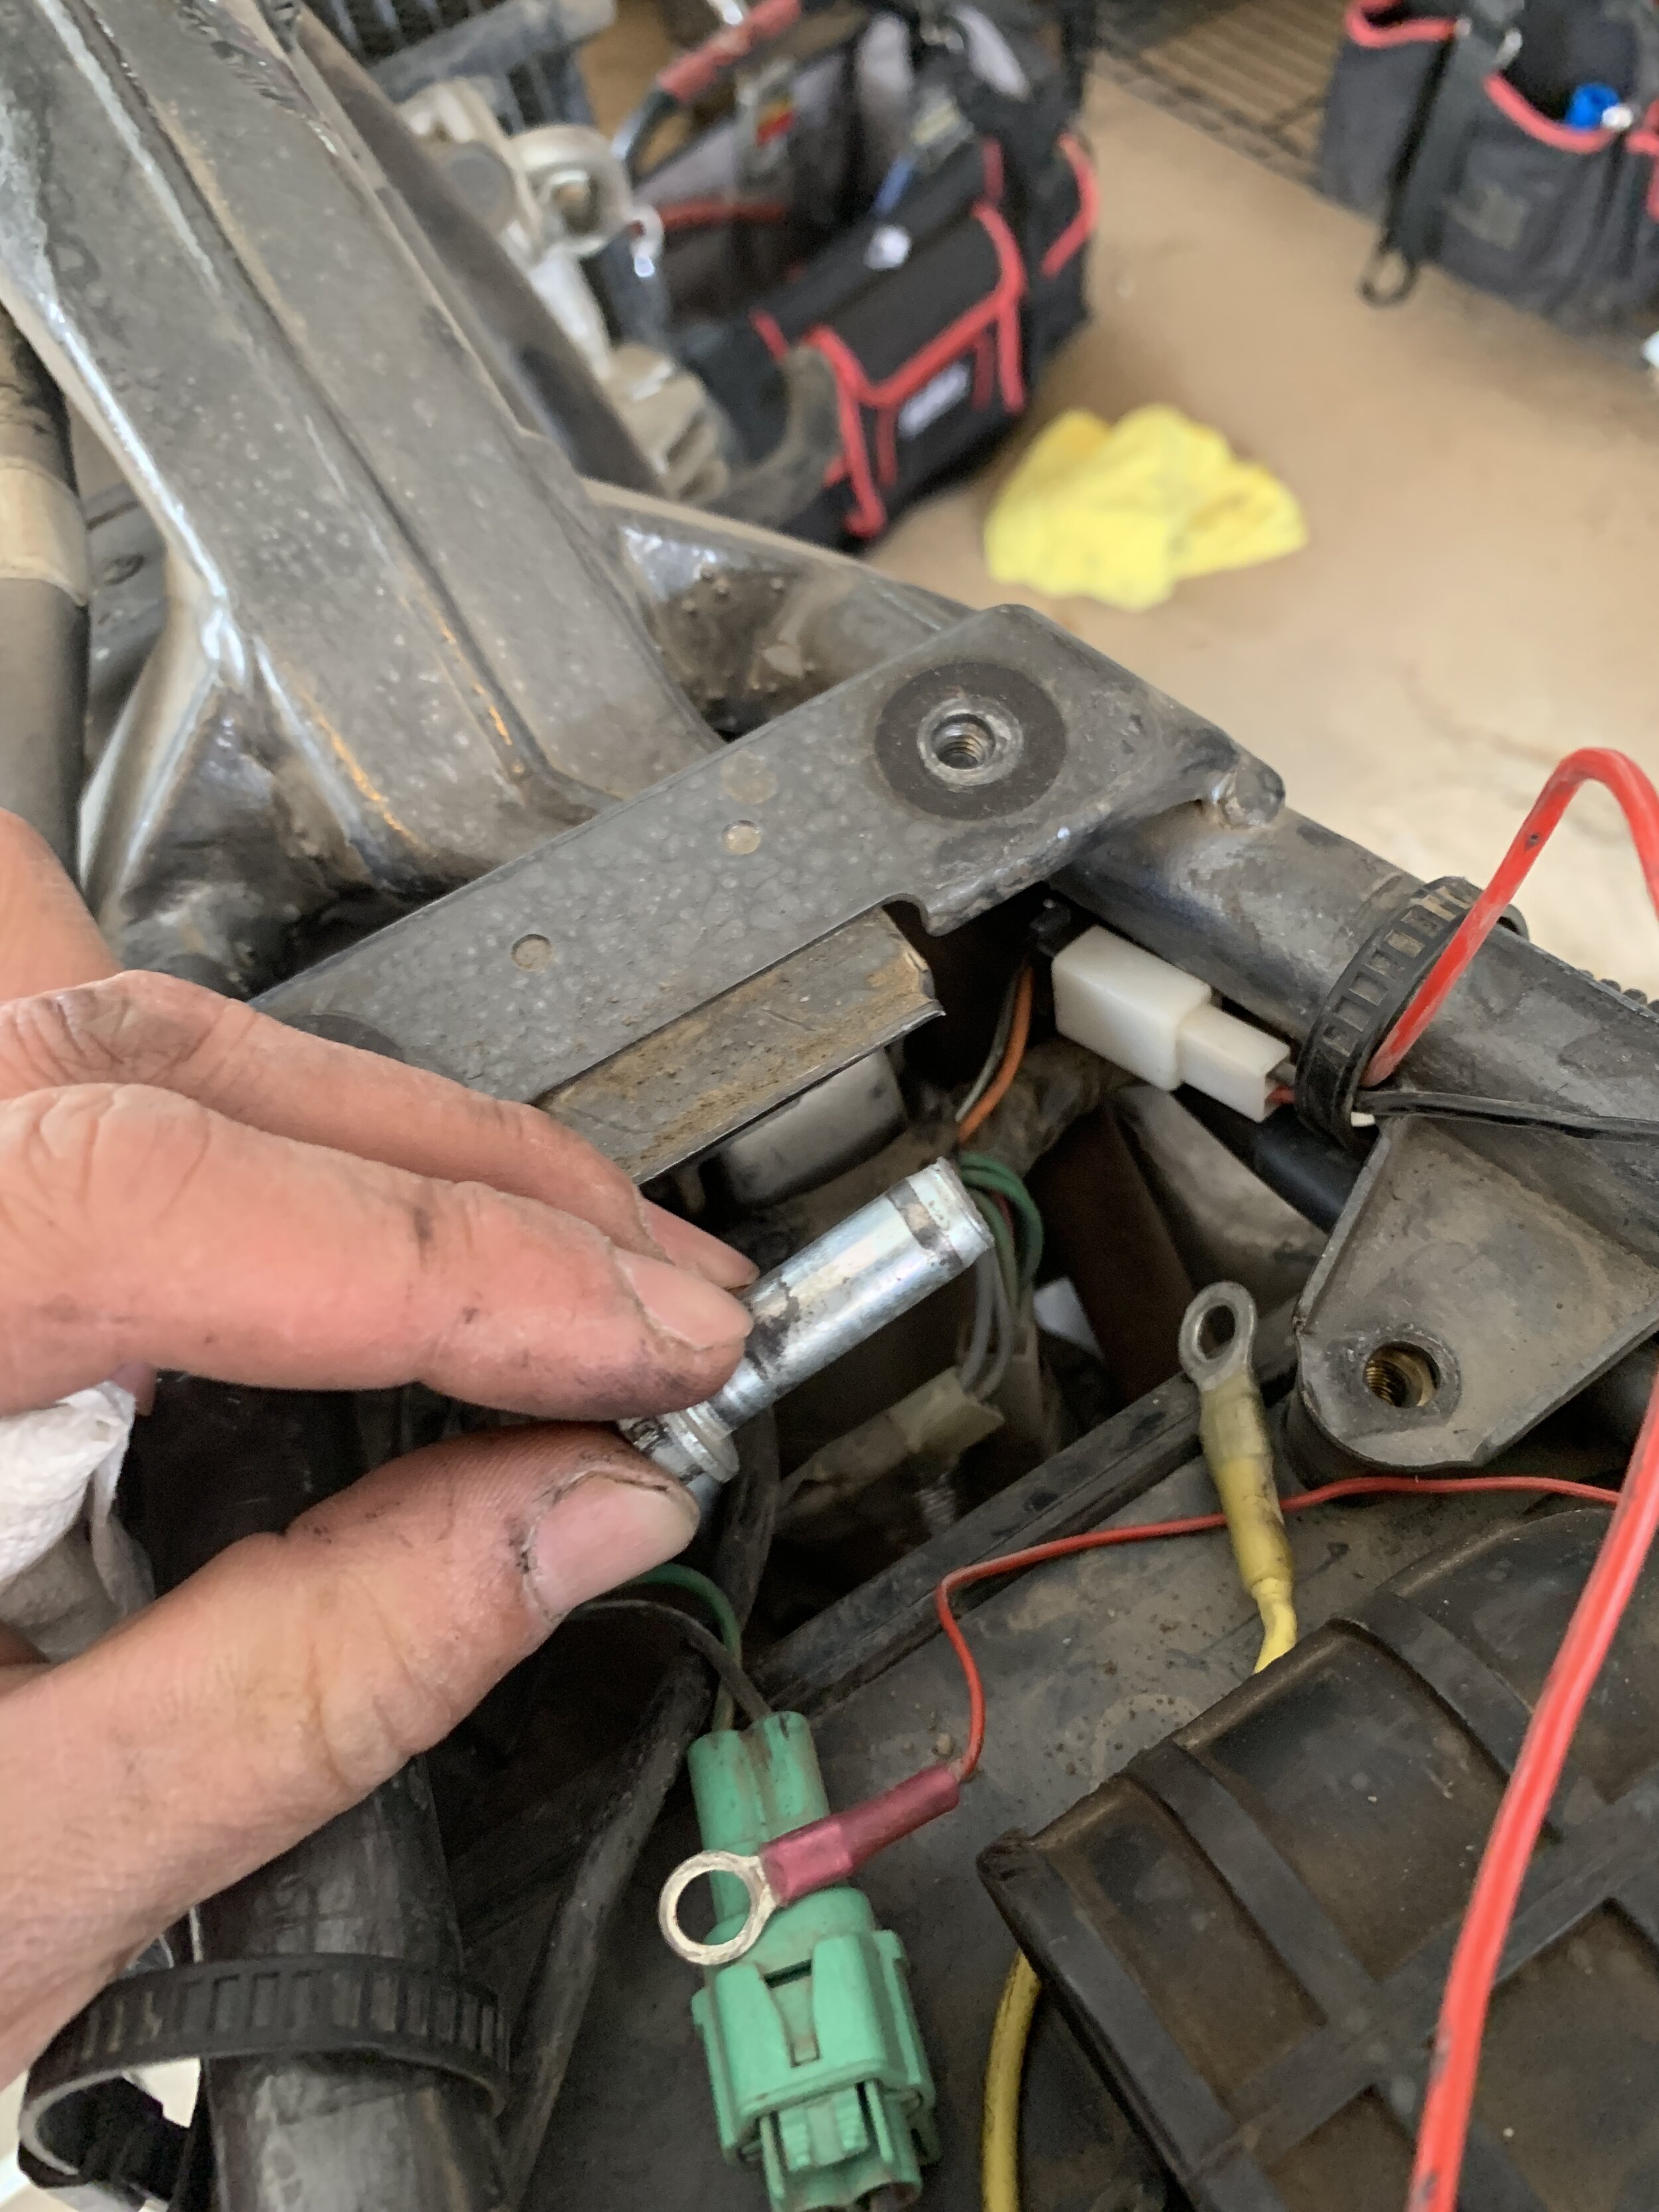
Took both covers off to inspect the clutch basket and the neutral sending screw. I only red loctite the screw for the NSU, and I did not wire it. It was still on there snug, but not super tight. But after 30,000 hard ridden miles, I think it was not too bad. It wouldn’t have mattered as most service would have happen for the clutch at the same interval and you can check and reapply loctite if needed. I then remove the engine because I needed to reseal the top of the engine, and since I’m swapping the frame I took the engine out.